> ## Documentation Index
> Fetch the complete documentation index at: https://help.scribe-mail.com/llms.txt
> Use this file to discover all available pages before exploring further.
# Rippling
> Halten Sie E-Mail-Signaturen aktuell und korrekt, indem Sie Mitarbeiterdaten wie Position und Abteilung aus Rippling, Ihrer HR- und IT-Plattform, synchronisieren.
Folgen Sie diesen Schritten, um [die Signaturen Ihrer Teammitglieder automatisch auszufüllen](/de/smart-fields) und nutzen Sie dabei Rippling als Datenquelle.
**Ihre Teammitglieder müssen nichts tun.**
**Änderungen in Rippling werden automatisch mit Scribe synchronisiert.**
**SOC 2 Type II zertifiziert.** [Ihre Daten sind sicher](/de/security/data-collection/rippling).
## Installationsanleitung
### Voraussetzungen
* Administratorzugriff auf Ihr Rippling-Konto
* Ein Scribe-Konto mit Administratorzugriff
Sie müssen **Admin in Rippling** sein, um diese Integration zu installieren.
Klicken Sie auf **Go to Rippling app store**, um die Integration zu starten.
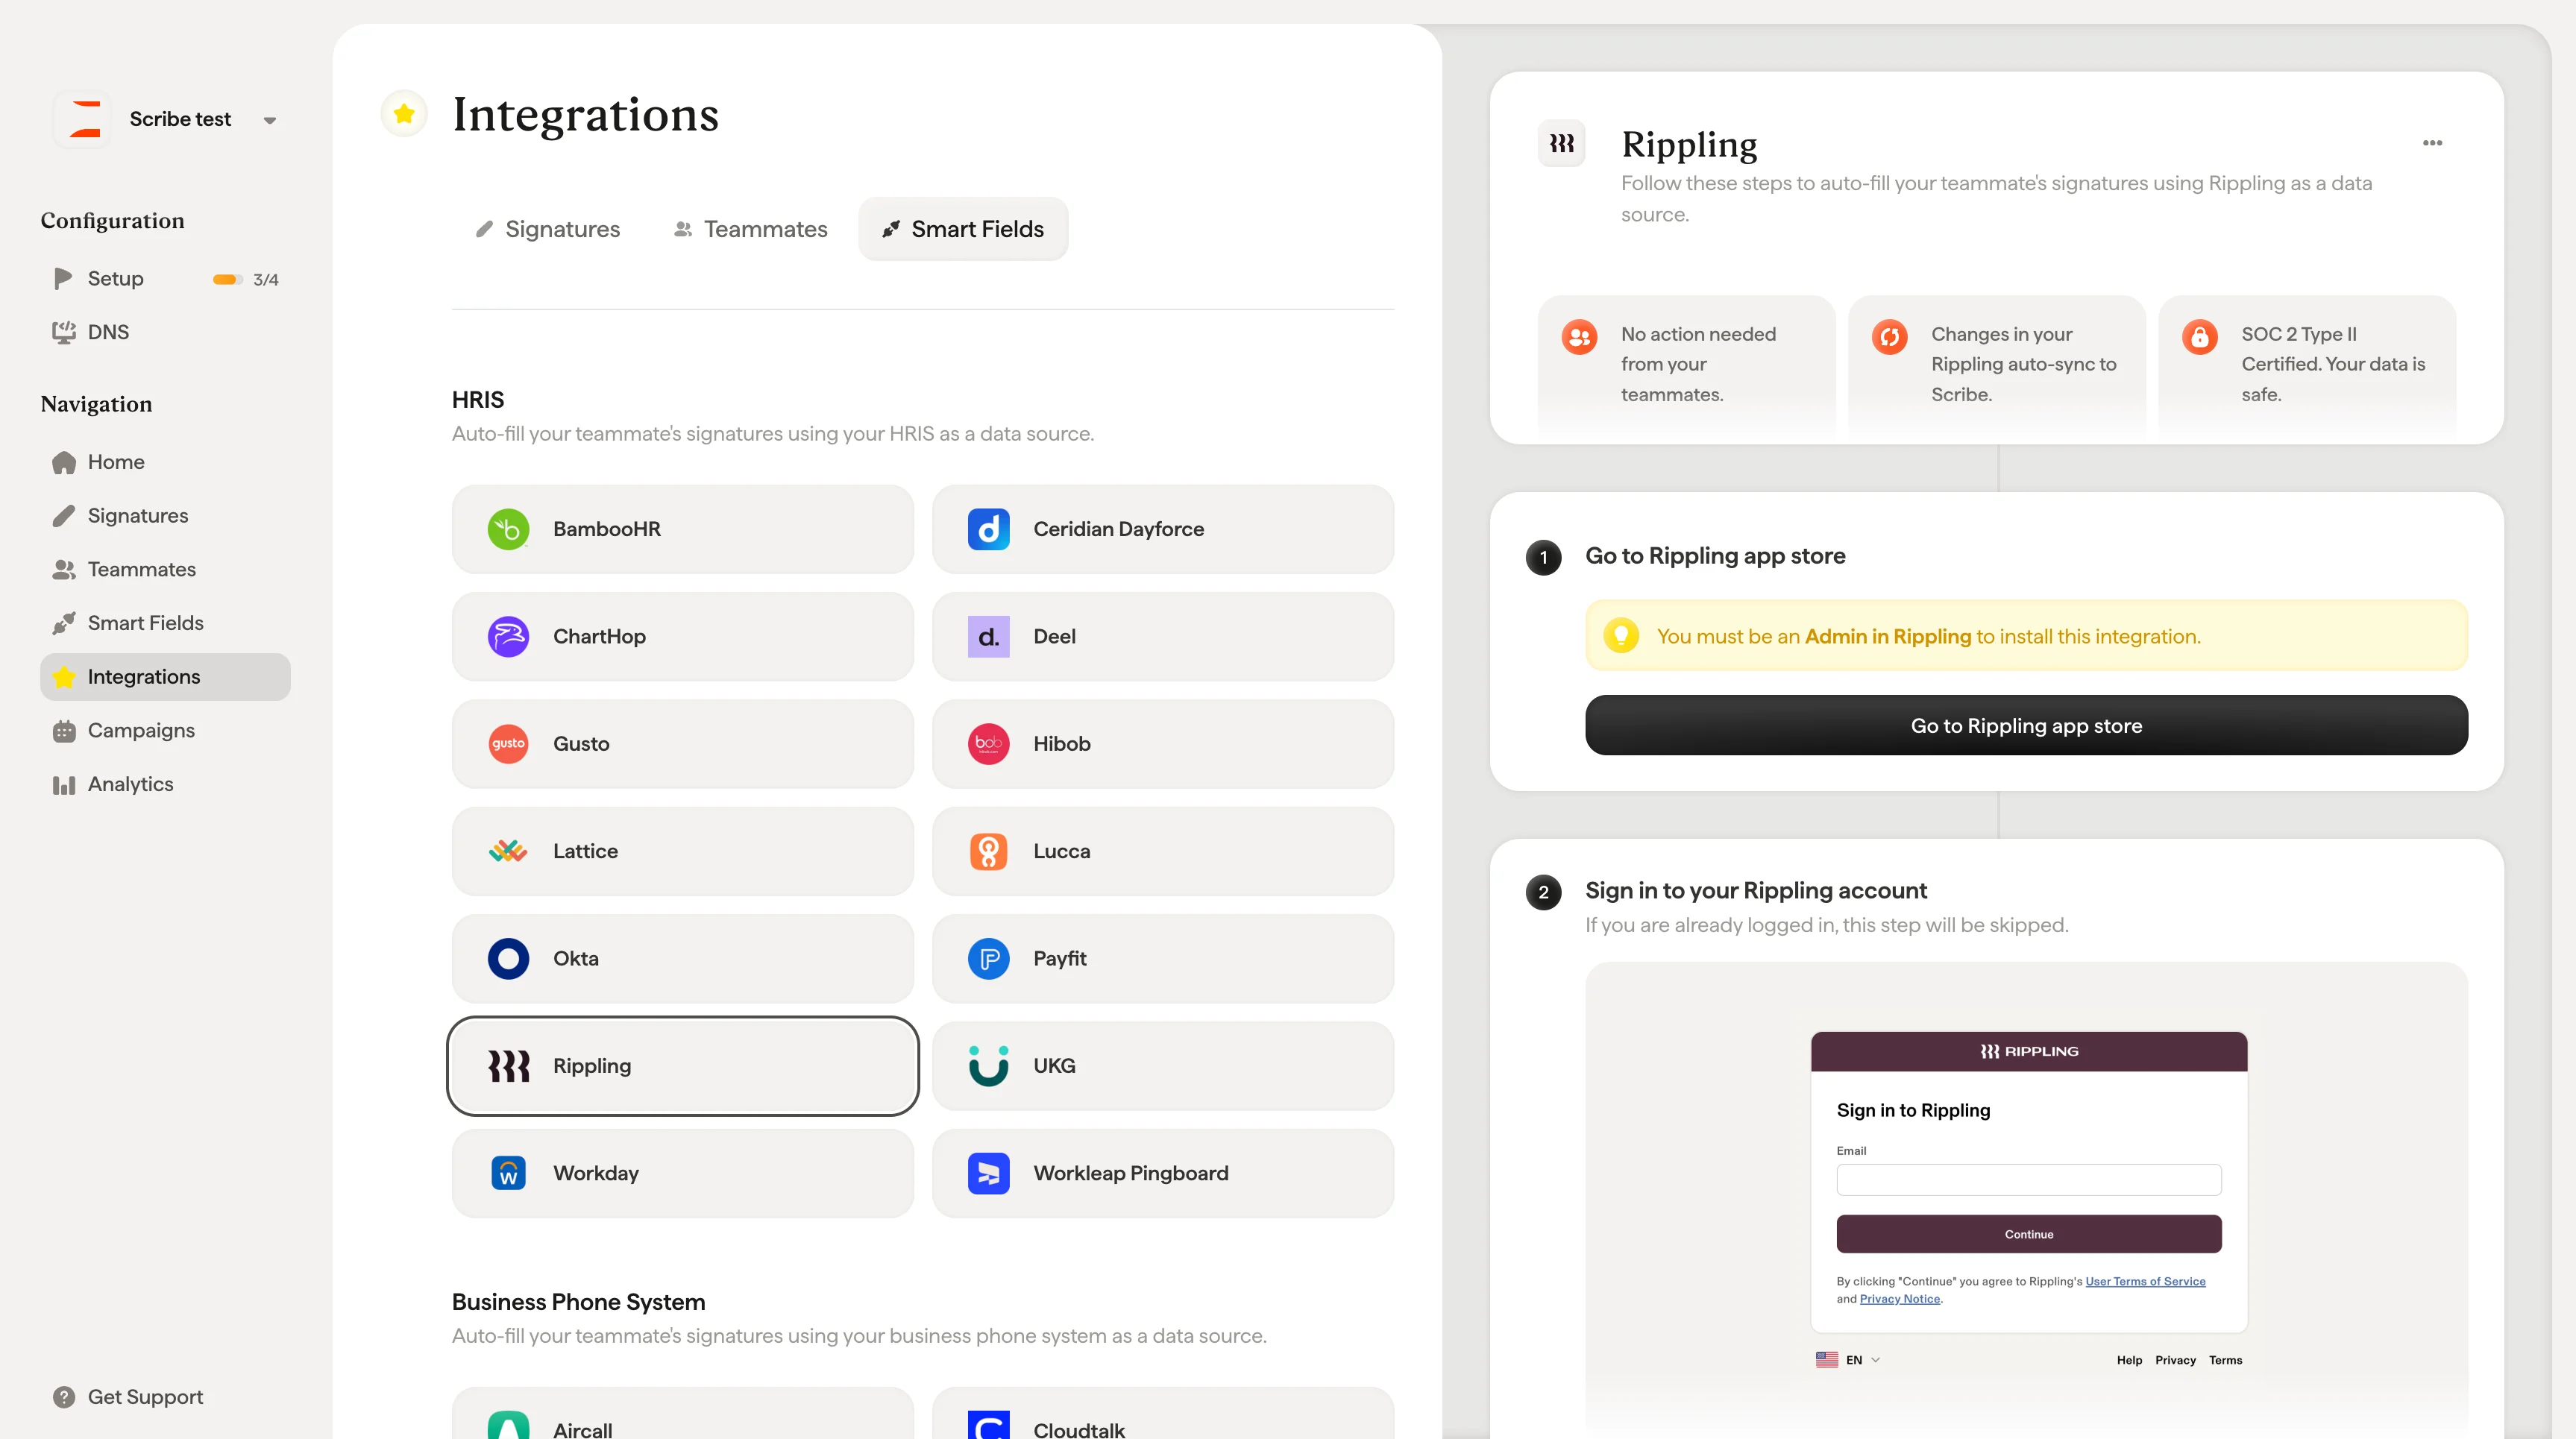 Wenn Sie bereits angemeldet sind, wird dieser Schritt übersprungen.
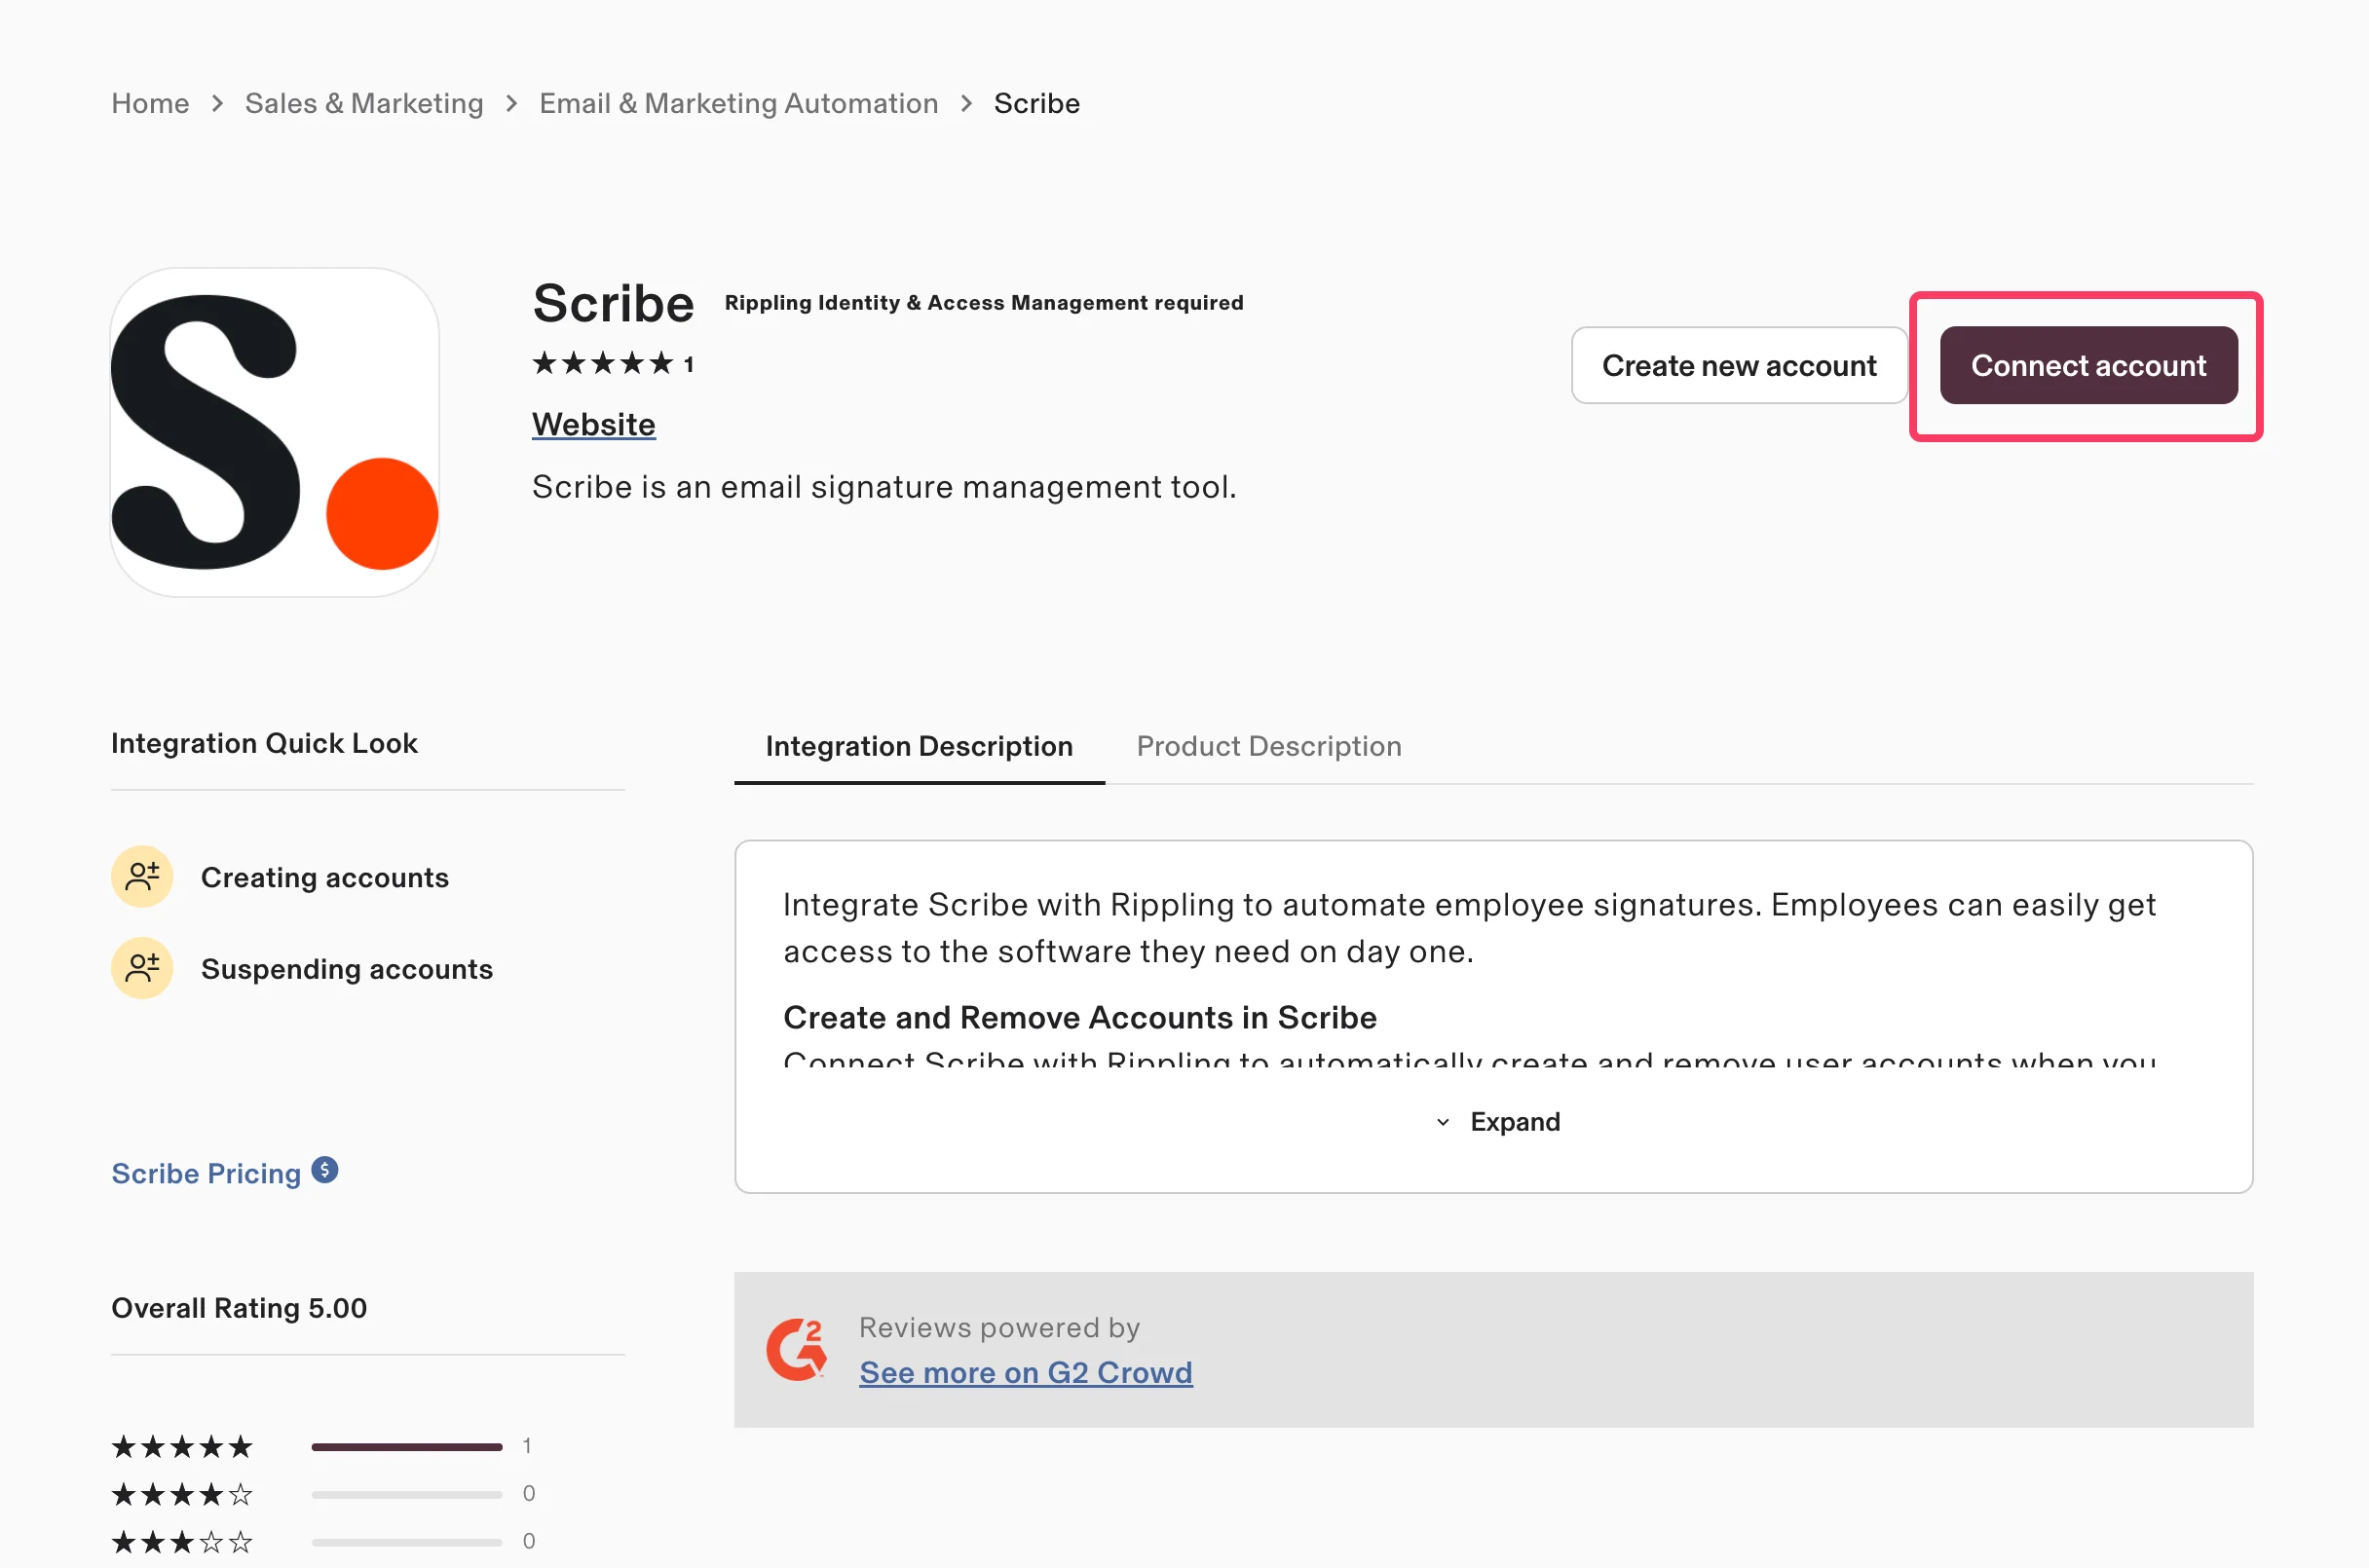
 Klicken Sie auf der Scribe-App-Seite im Rippling App Store auf **Connect account**.
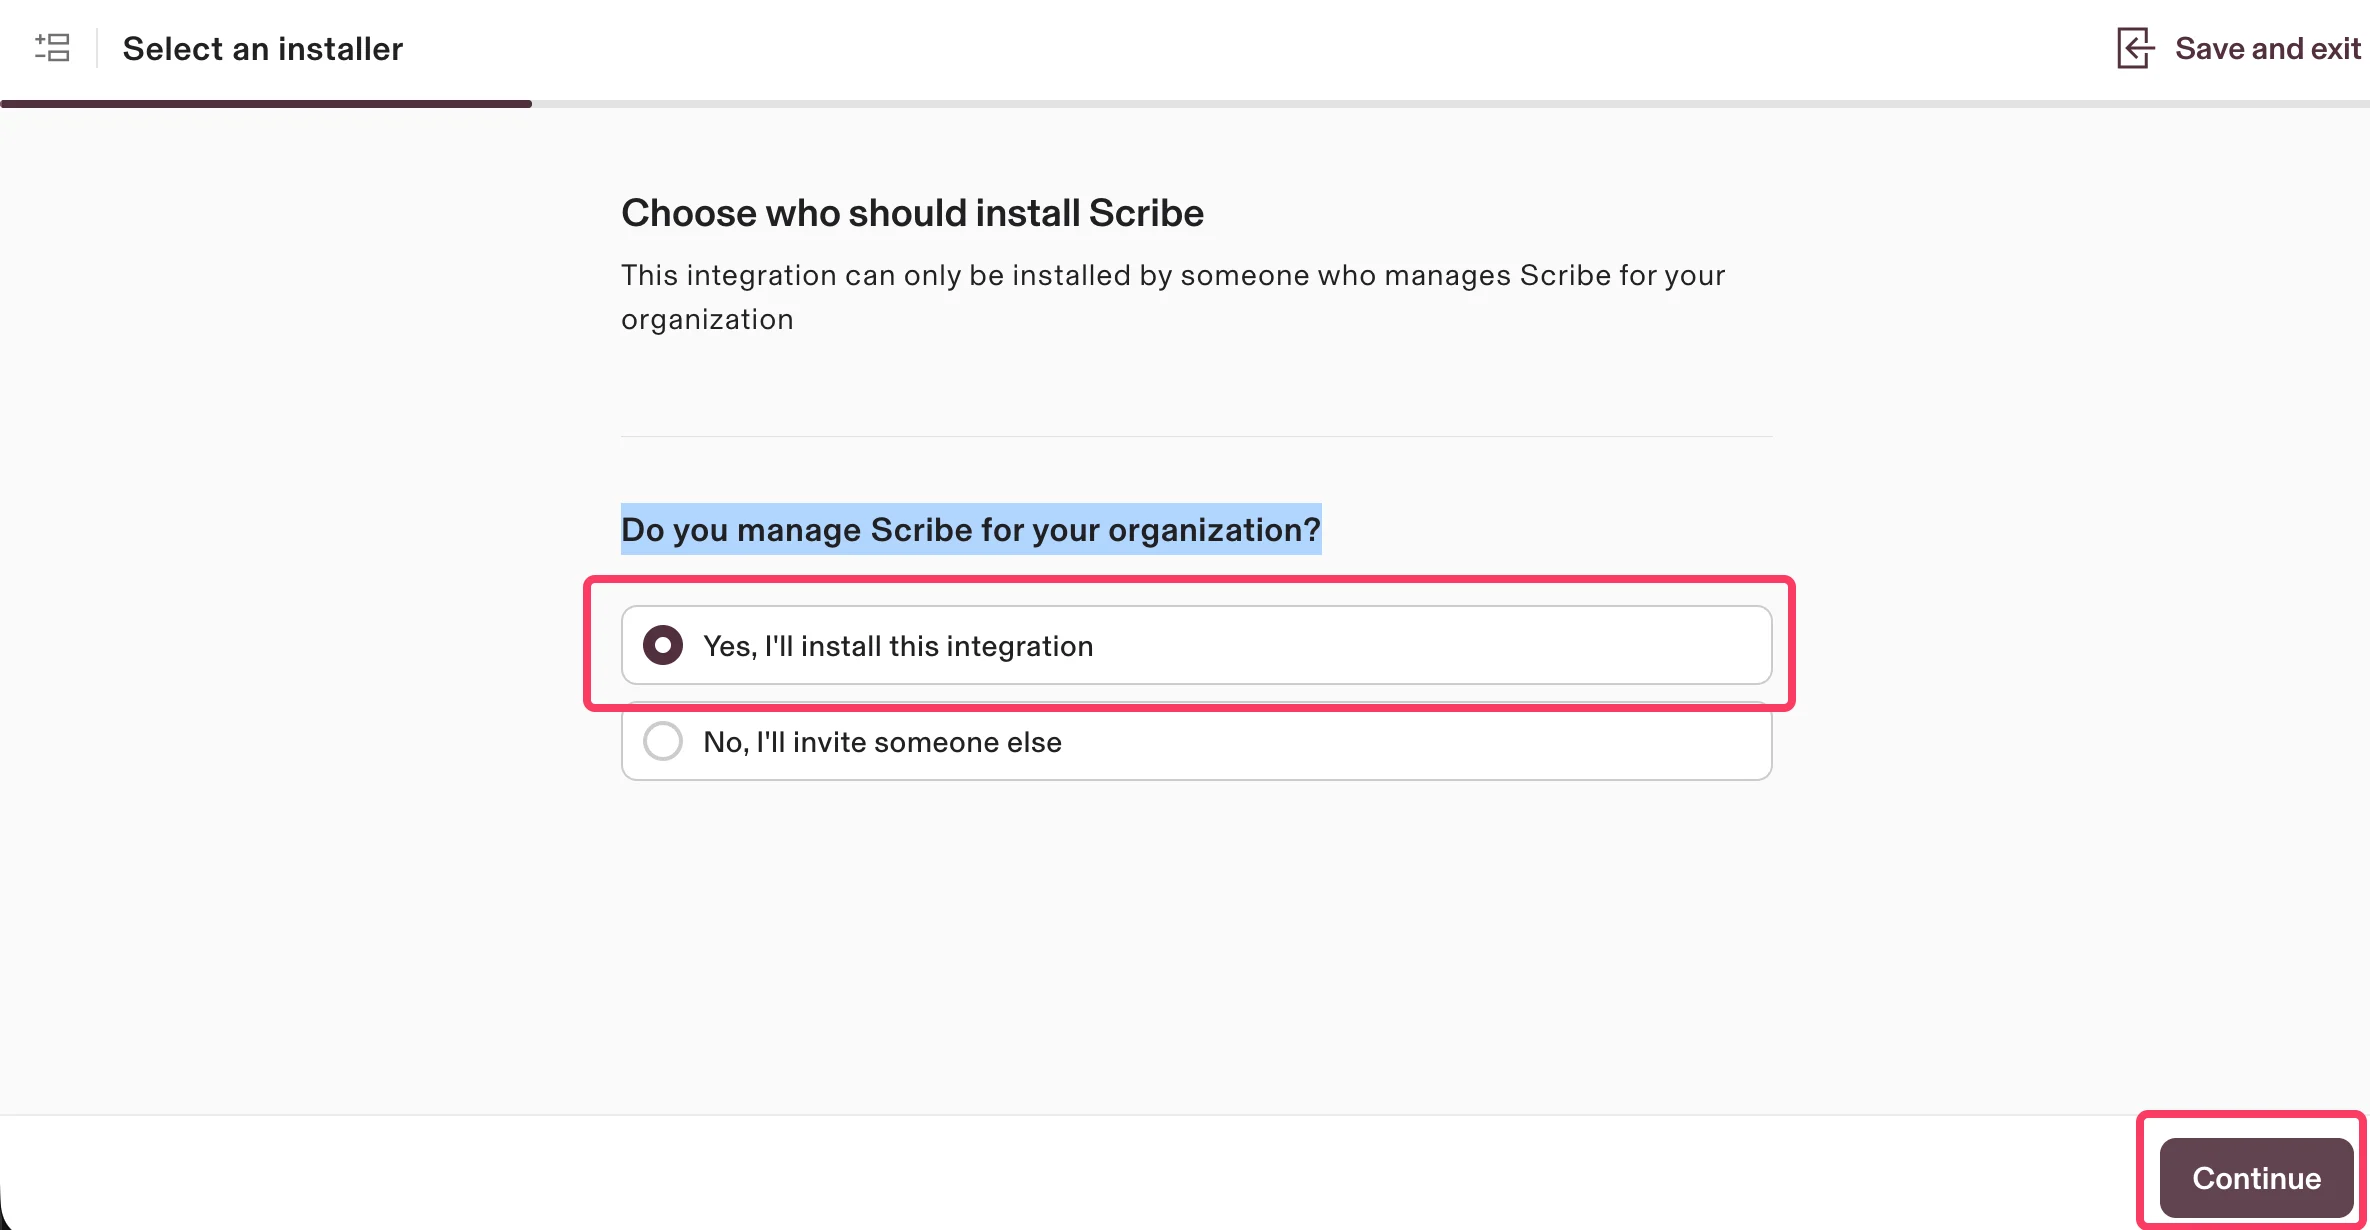
 Wählen Sie **Yes, I'll install this integration**, um zu bestätigen, dass Sie Scribe für Ihre Organisation verwalten, und klicken Sie dann auf **Continue**.
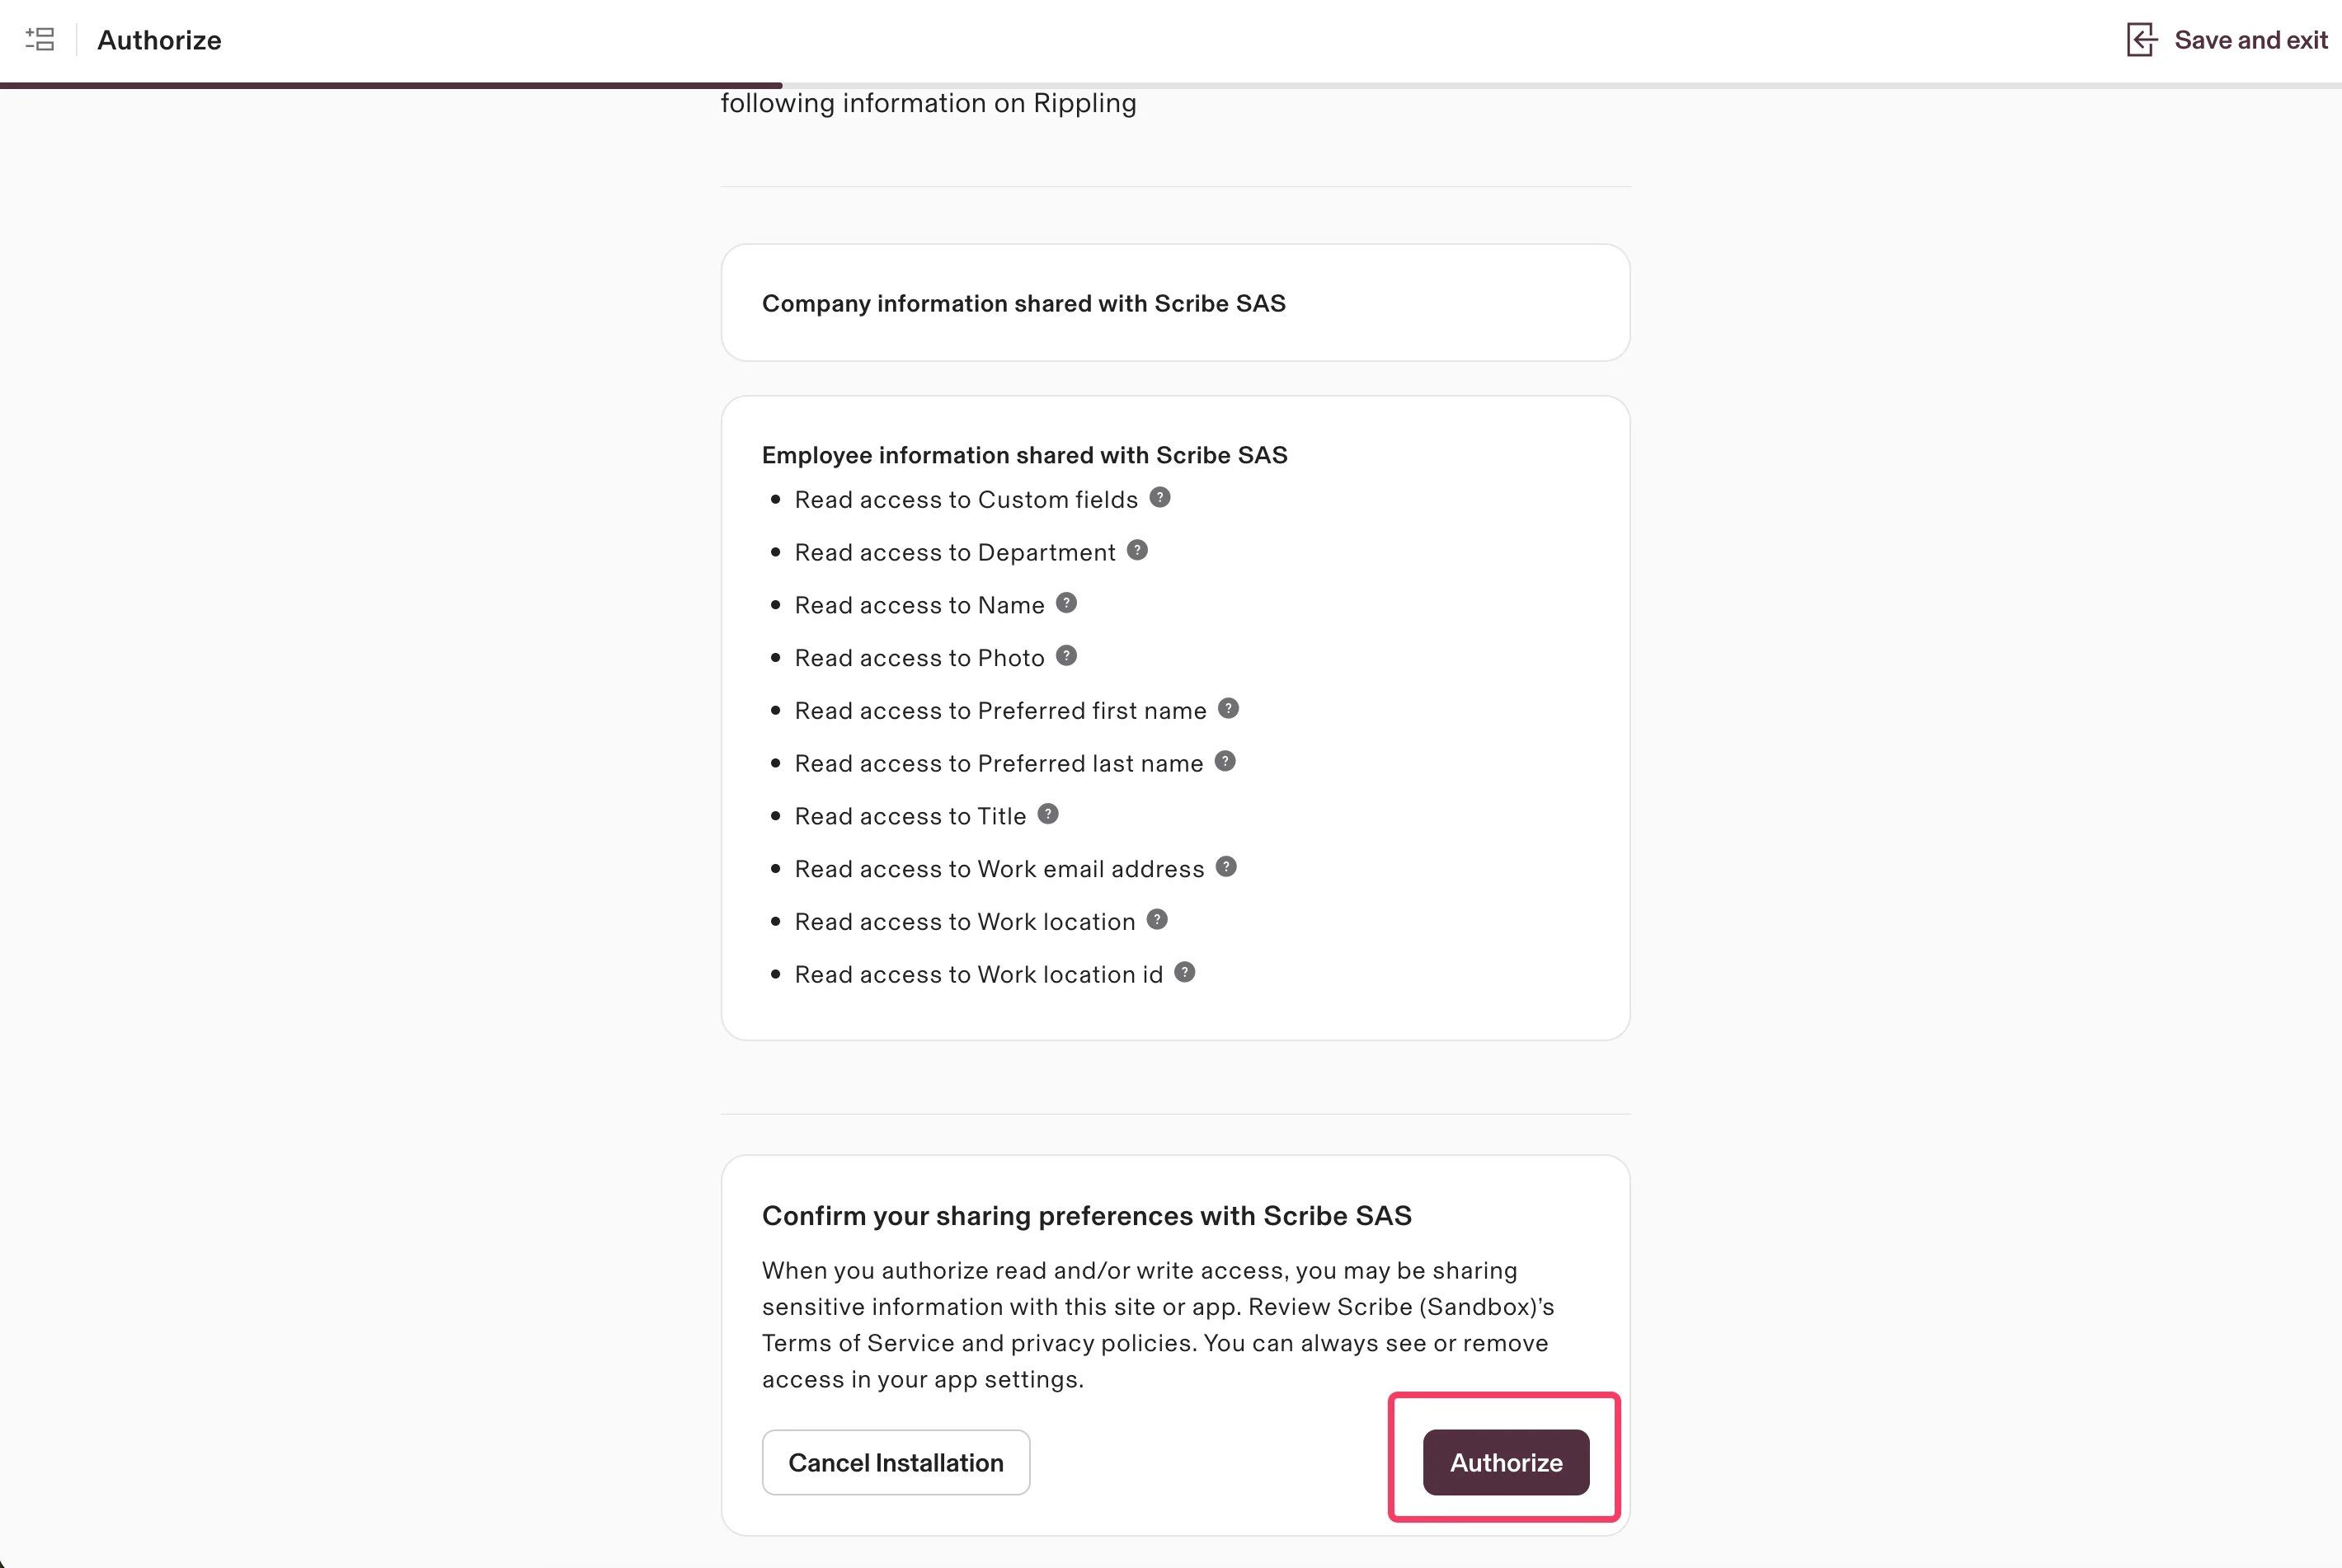
 Scribe hat nur Lesezugriff auf Ihre Daten. Prüfen Sie die angeforderten Berechtigungen und klicken Sie auf **Authorize**.
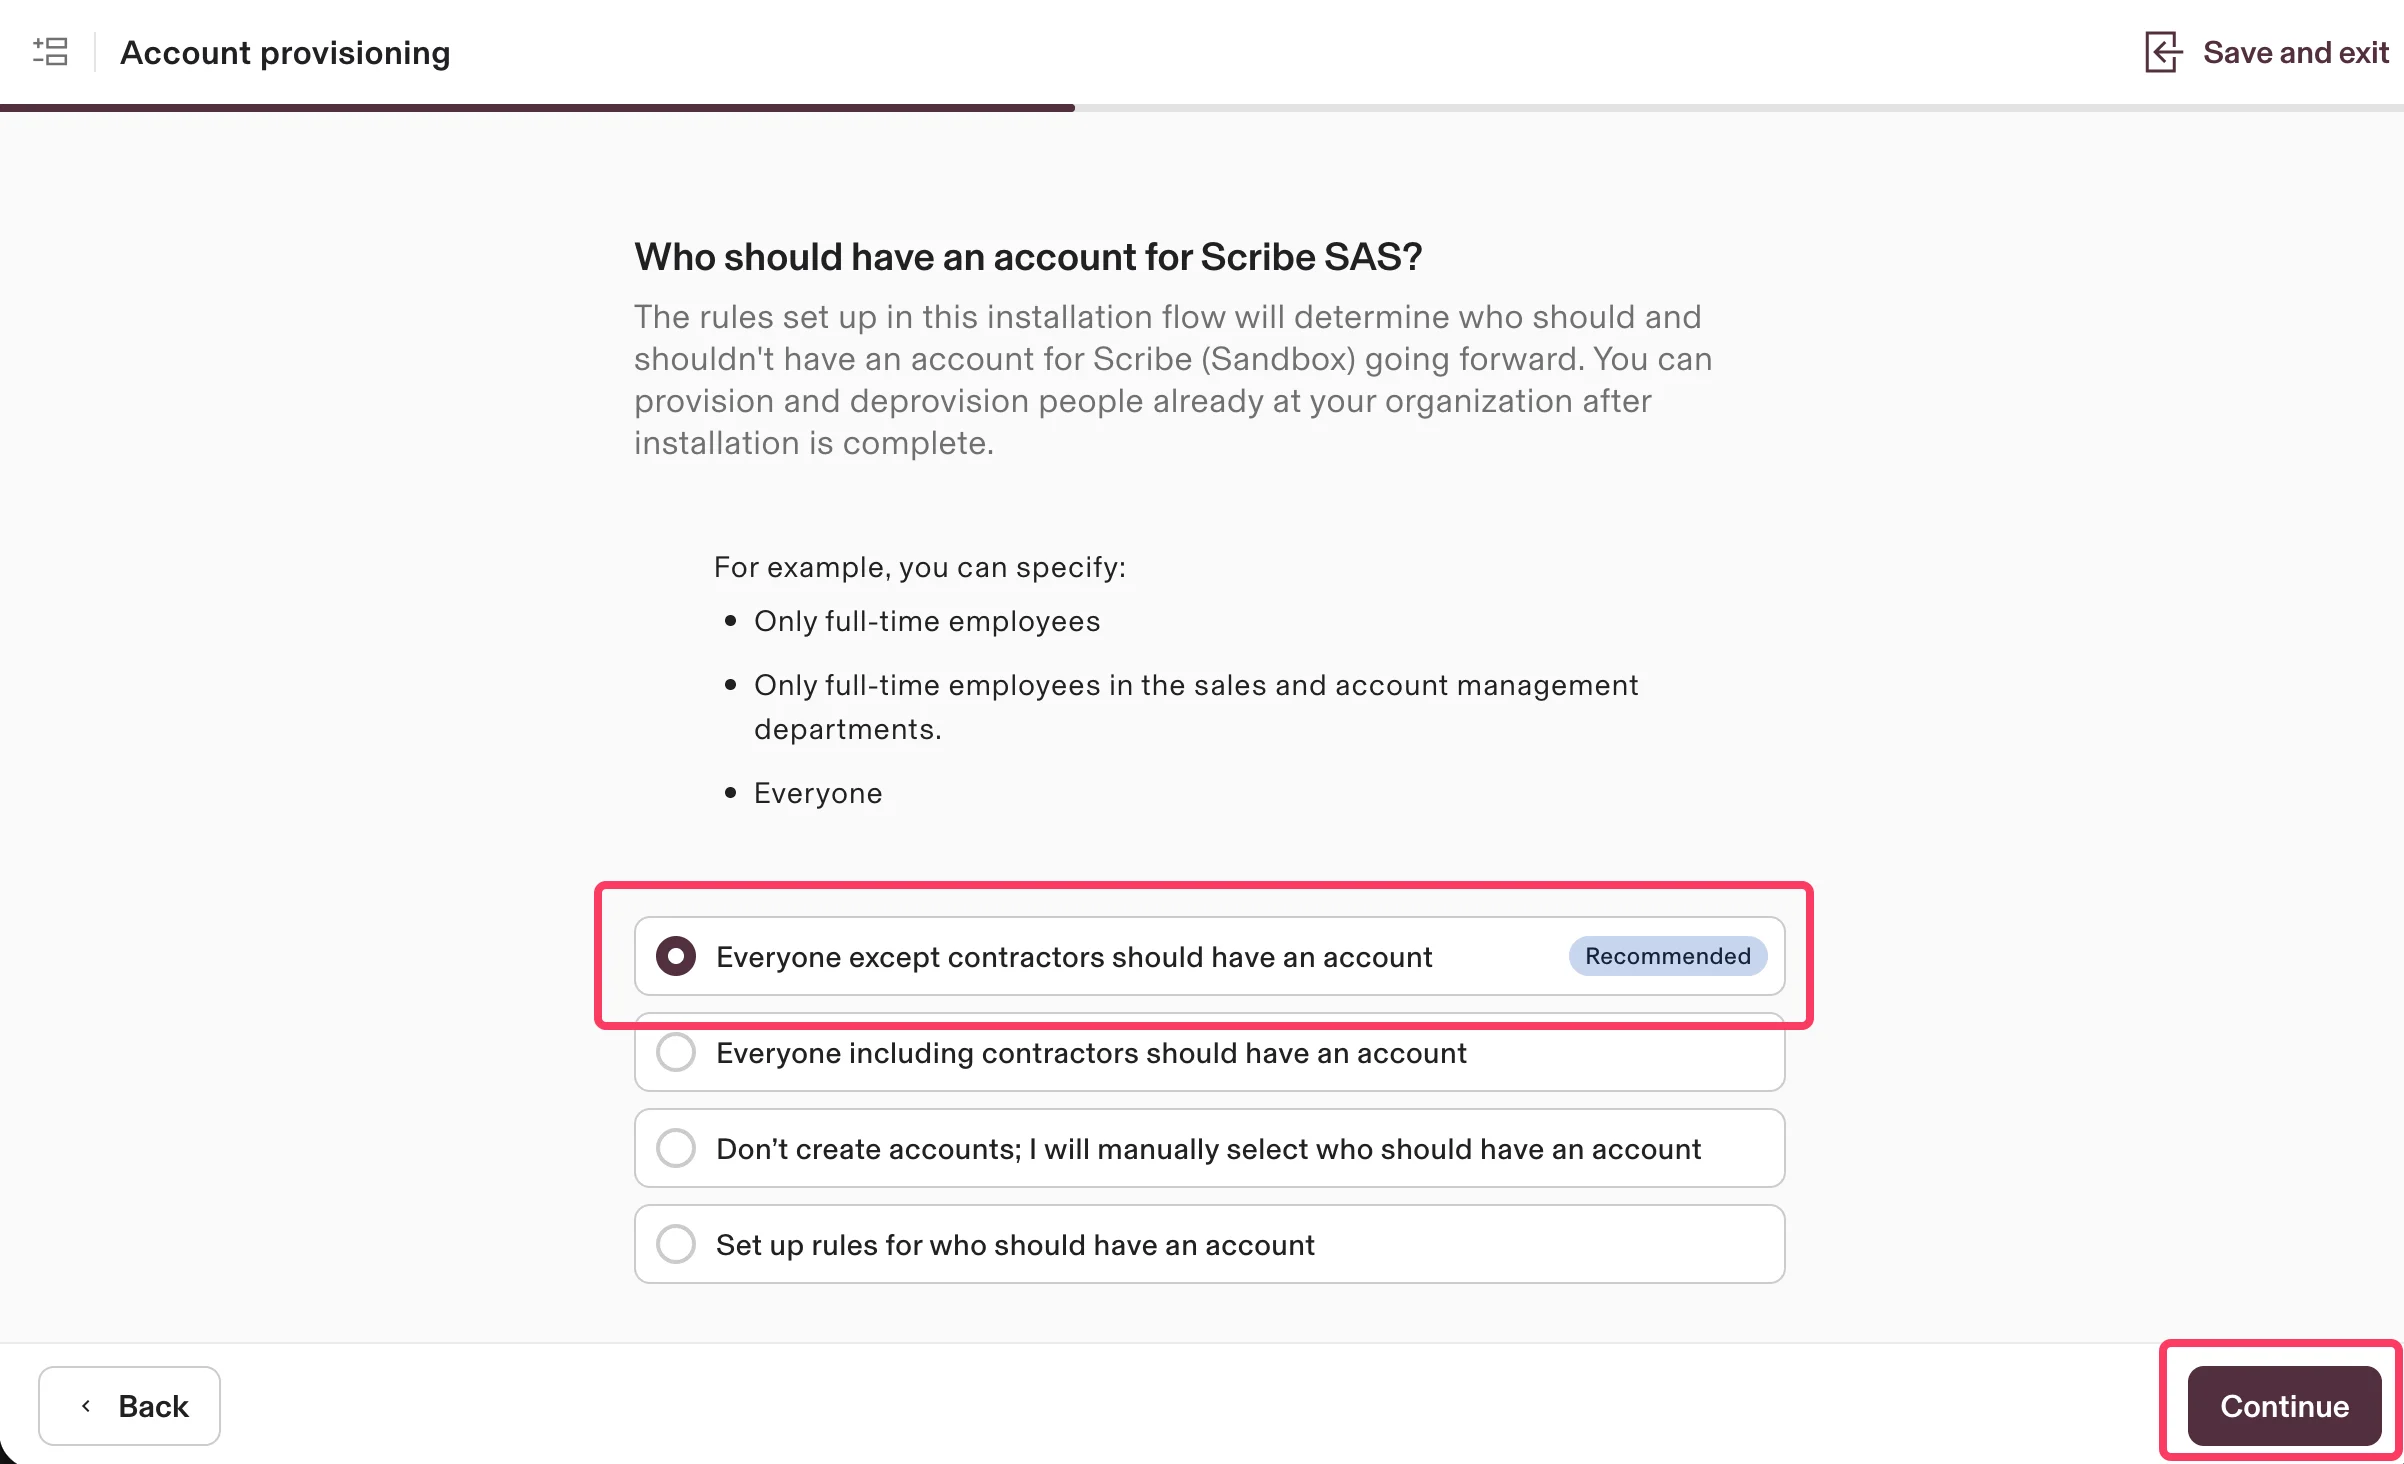
 Wählen Sie aus, wer ein Konto für Scribe haben soll. Die empfohlene Option ist **Everyone except contractors should have an account**. Klicken Sie auf **Continue**.
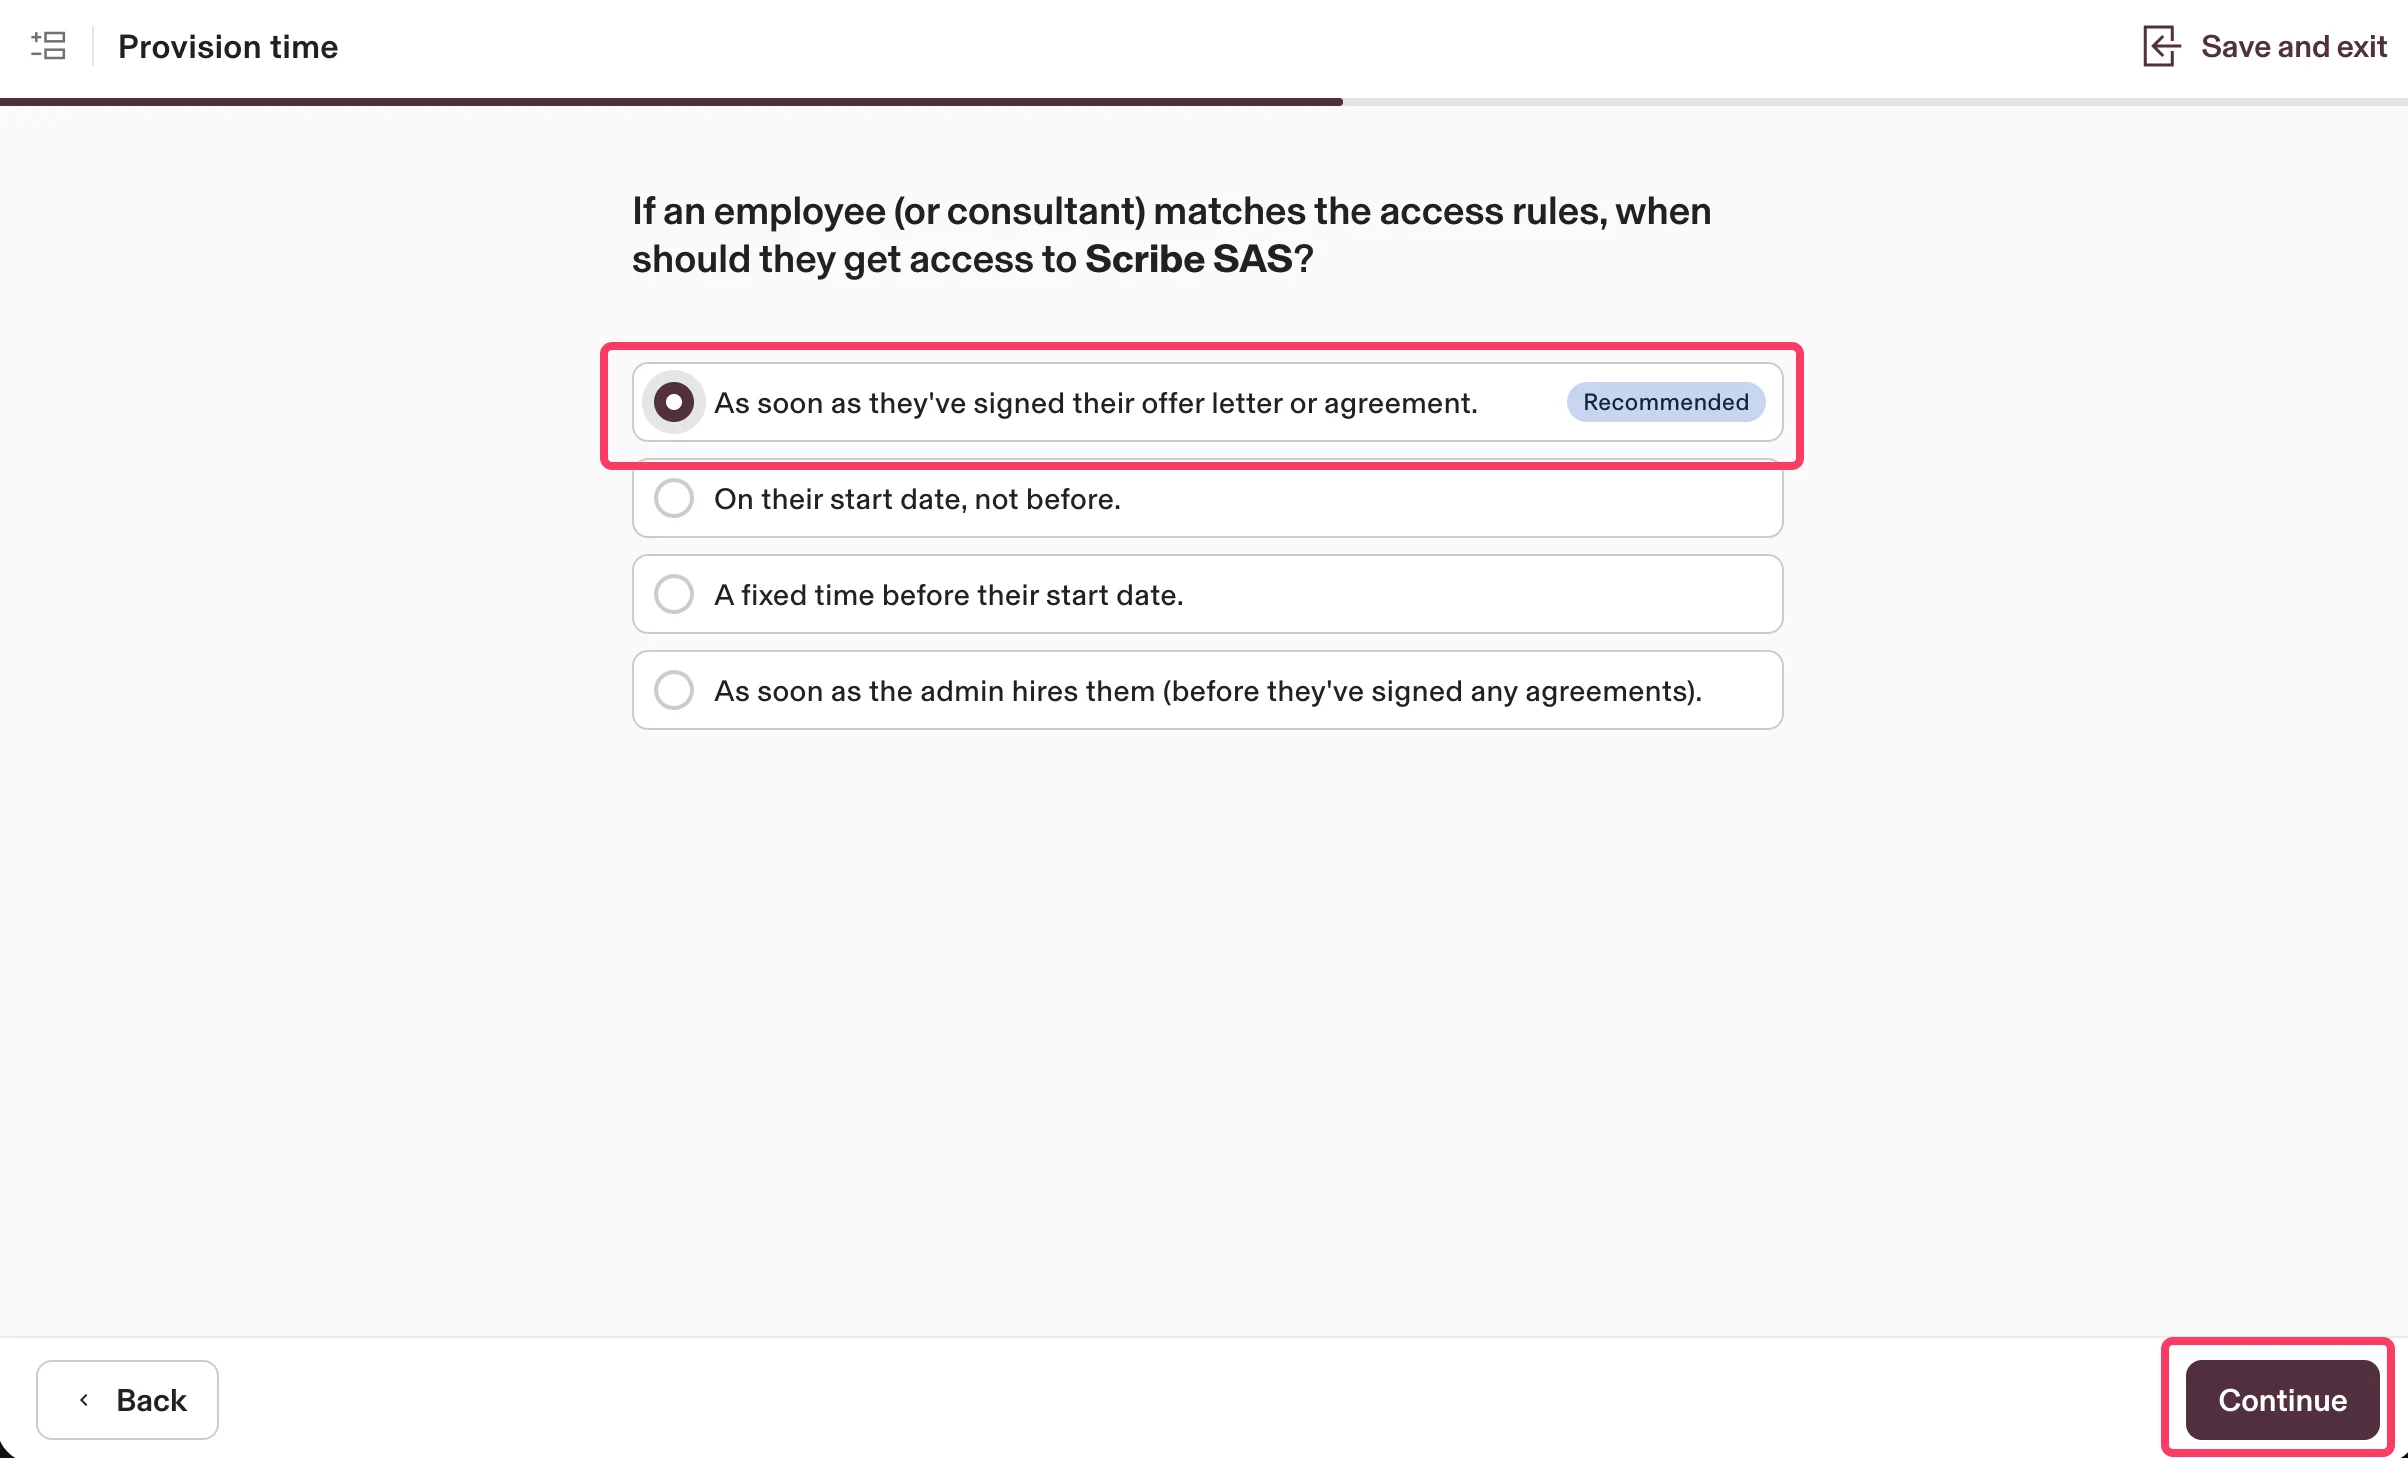
 Wählen Sie aus, wann Mitarbeitende Zugriff auf Scribe erhalten sollen. Die empfohlene Option ist **As soon as they've signed their offer letter or agreement**. Klicken Sie auf **Continue**.
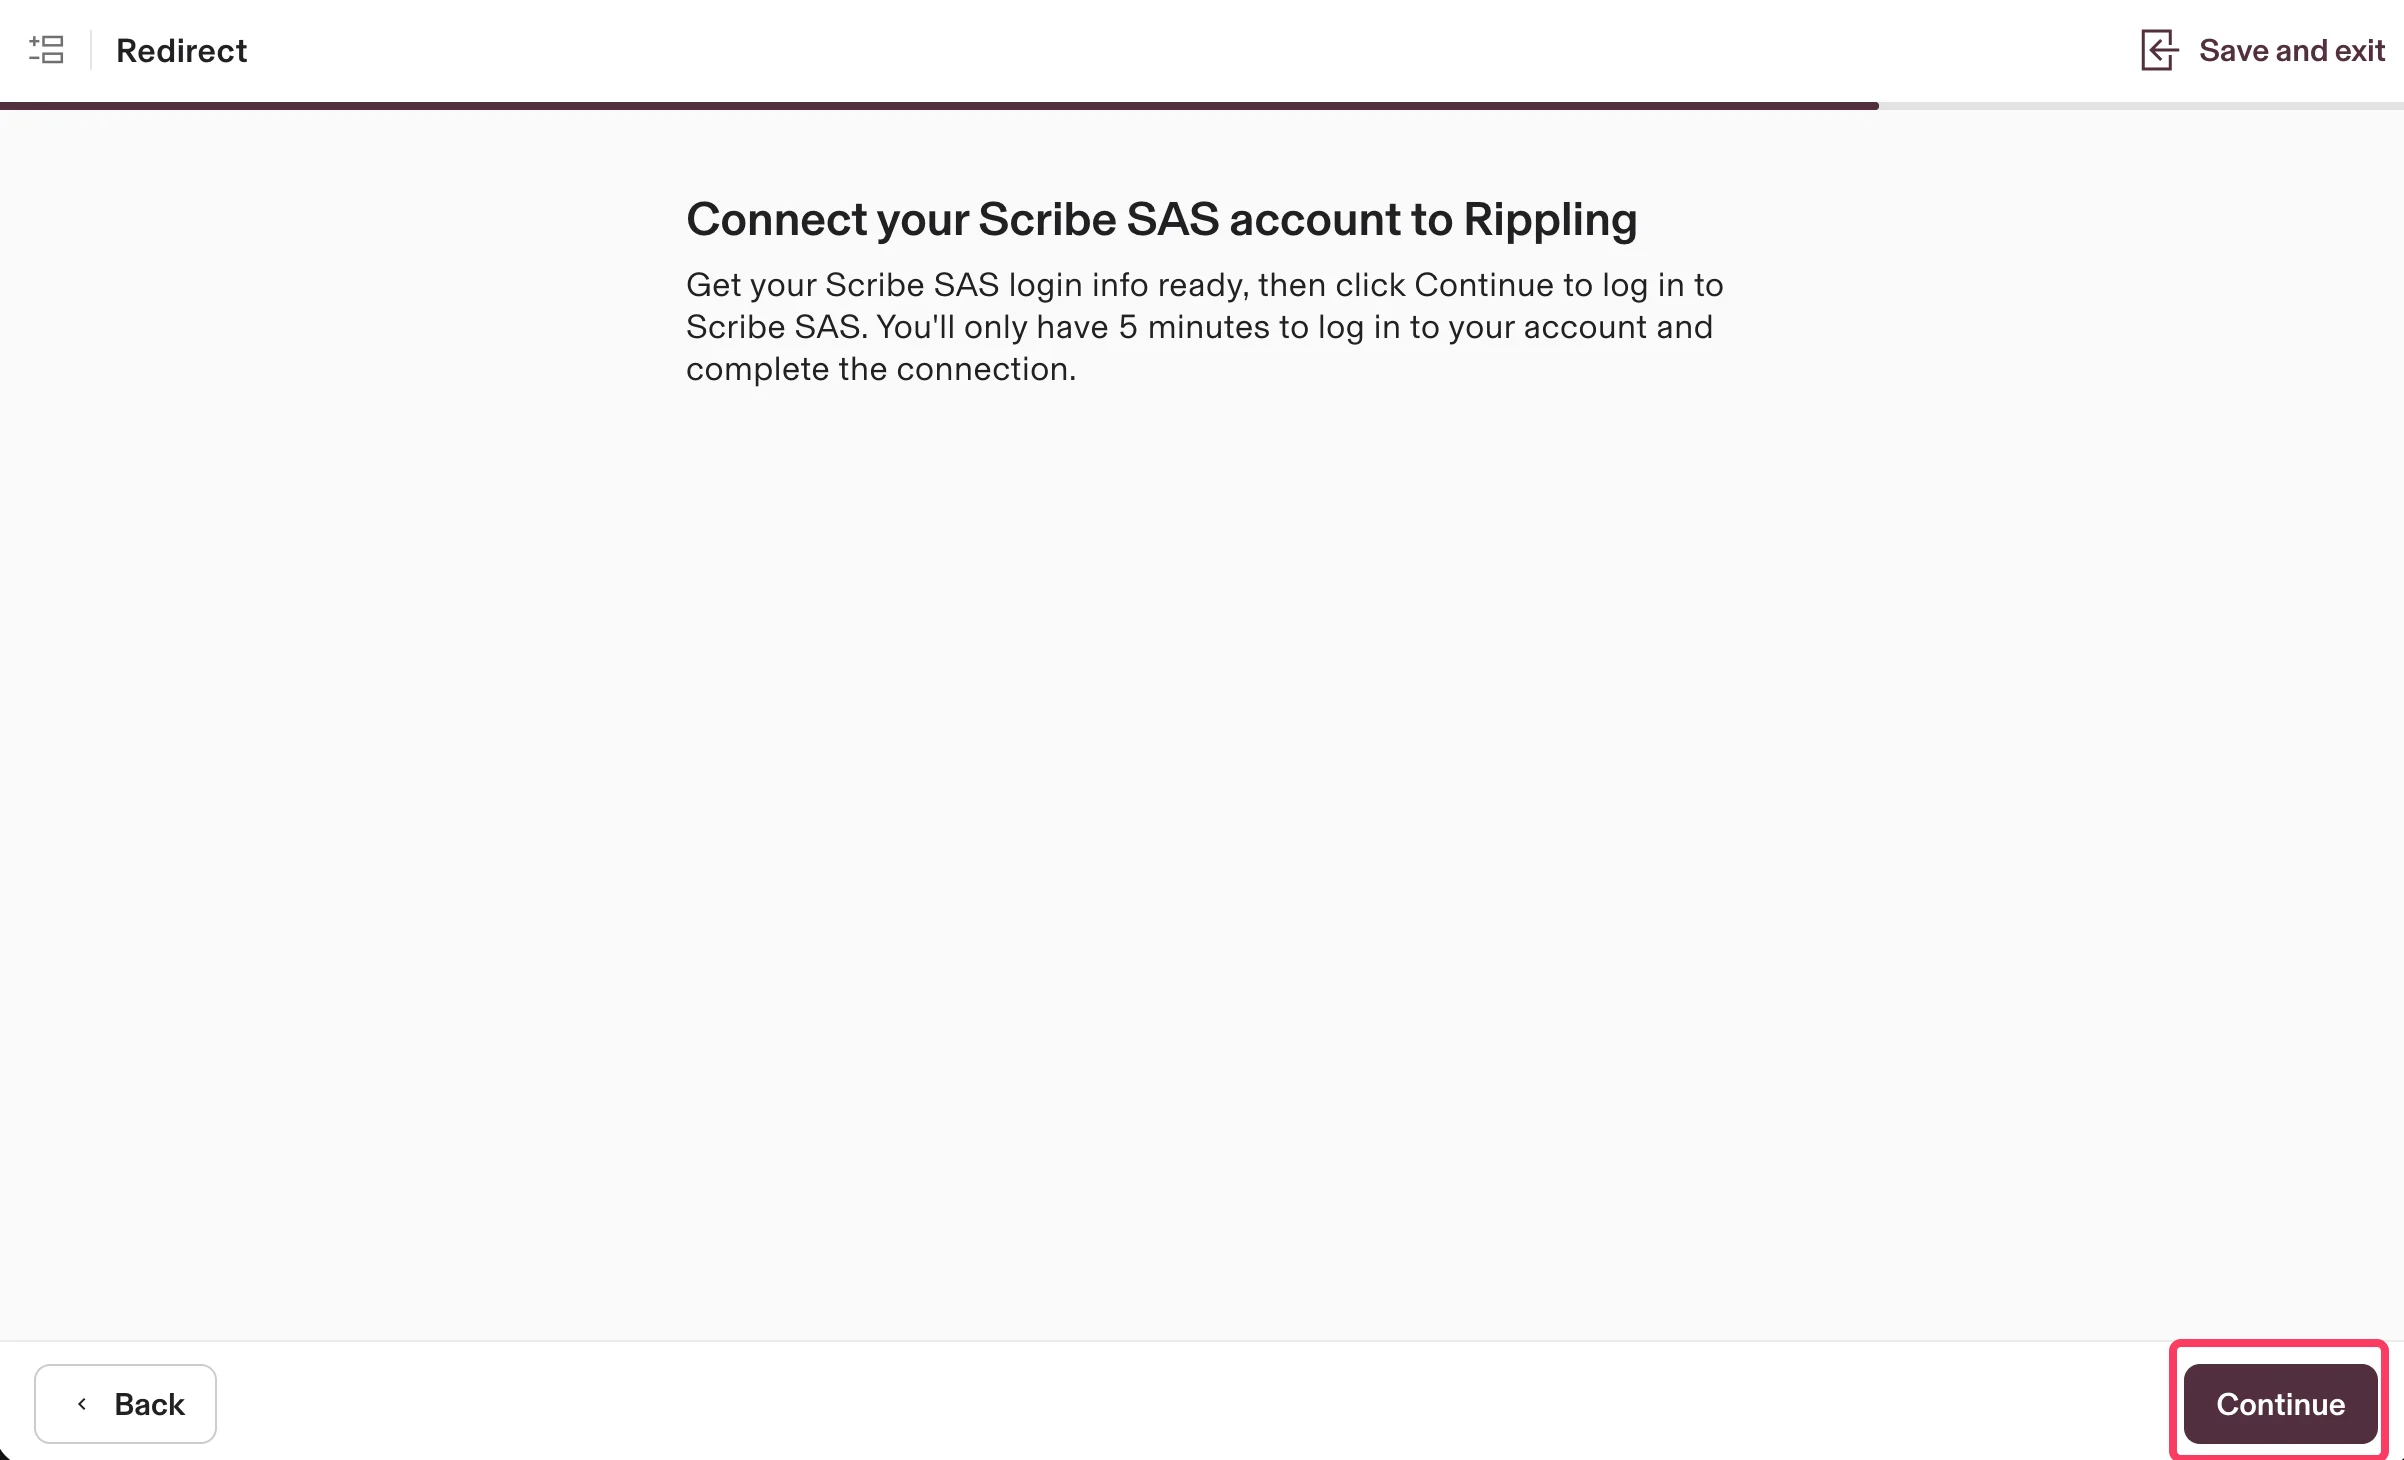
 Klicken Sie auf **Continue**, um Ihr Scribe-Konto mit Rippling zu verbinden und die Integration abzuschließen.
 ## Verwandte Artikel
* [UKG](/de/integrations/smart-fields/ukg-smart-fields): UKG-Daten in Ihre Signaturen synchronisieren.
* [Workday](/de/integrations/smart-fields/workday-smart-fields): Workday-Daten in Ihre Signaturen synchronisieren.
* [Teammitglieder einer Signatur zuweisen](/de/assign-teammates-to-a-signature): Smartfield-Bedingungen nutzen, um Signaturen automatisch zuzuweisen.
## Verwandte Artikel
* [UKG](/de/integrations/smart-fields/ukg-smart-fields): UKG-Daten in Ihre Signaturen synchronisieren.
* [Workday](/de/integrations/smart-fields/workday-smart-fields): Workday-Daten in Ihre Signaturen synchronisieren.
* [Teammitglieder einer Signatur zuweisen](/de/assign-teammates-to-a-signature): Smartfield-Bedingungen nutzen, um Signaturen automatisch zuzuweisen.