> ## Documentation Index
> Fetch the complete documentation index at: https://help.scribe-mail.com/llms.txt
> Use this file to discover all available pages before exploring further.
# Workleap Pingboard
> Halten Sie E-Mail-Signaturen aktuell und korrekt, indem Sie Angaben wie Jobtitel und Abteilung aus Workleap Pingboard, Ihrem Organigramm- und Verzeichnis-Tool, synchronisieren.
Folgen Sie diesen Schritten, um [die Signaturen Ihrer Teammitglieder automatisch auszufüllen](/de/smart-fields) und Workleap Pingboard als Datenquelle zu nutzen.
**Ihre Teammitglieder müssen nichts tun.**
**Änderungen in Ihrem Workleap Pingboard werden automatisch mit Scribe synchronisiert.**
**SOC 2 Type II zertifiziert.** [Ihre Daten sind sicher](/de/security/data-collection/pingboard).
## Installationsanleitung
### Voraussetzungen
* Admin-Zugang zu Ihrem Pingboard-Konto
* Ein Scribe-Konto mit Admin-Zugang
Öffnen Sie in Ihrem Pingboard-Konto das Menü **Settings** und klicken Sie auf **Add-Ons**.
 Wählen Sie das Add-On **Pingboard API** aus der Liste aus.
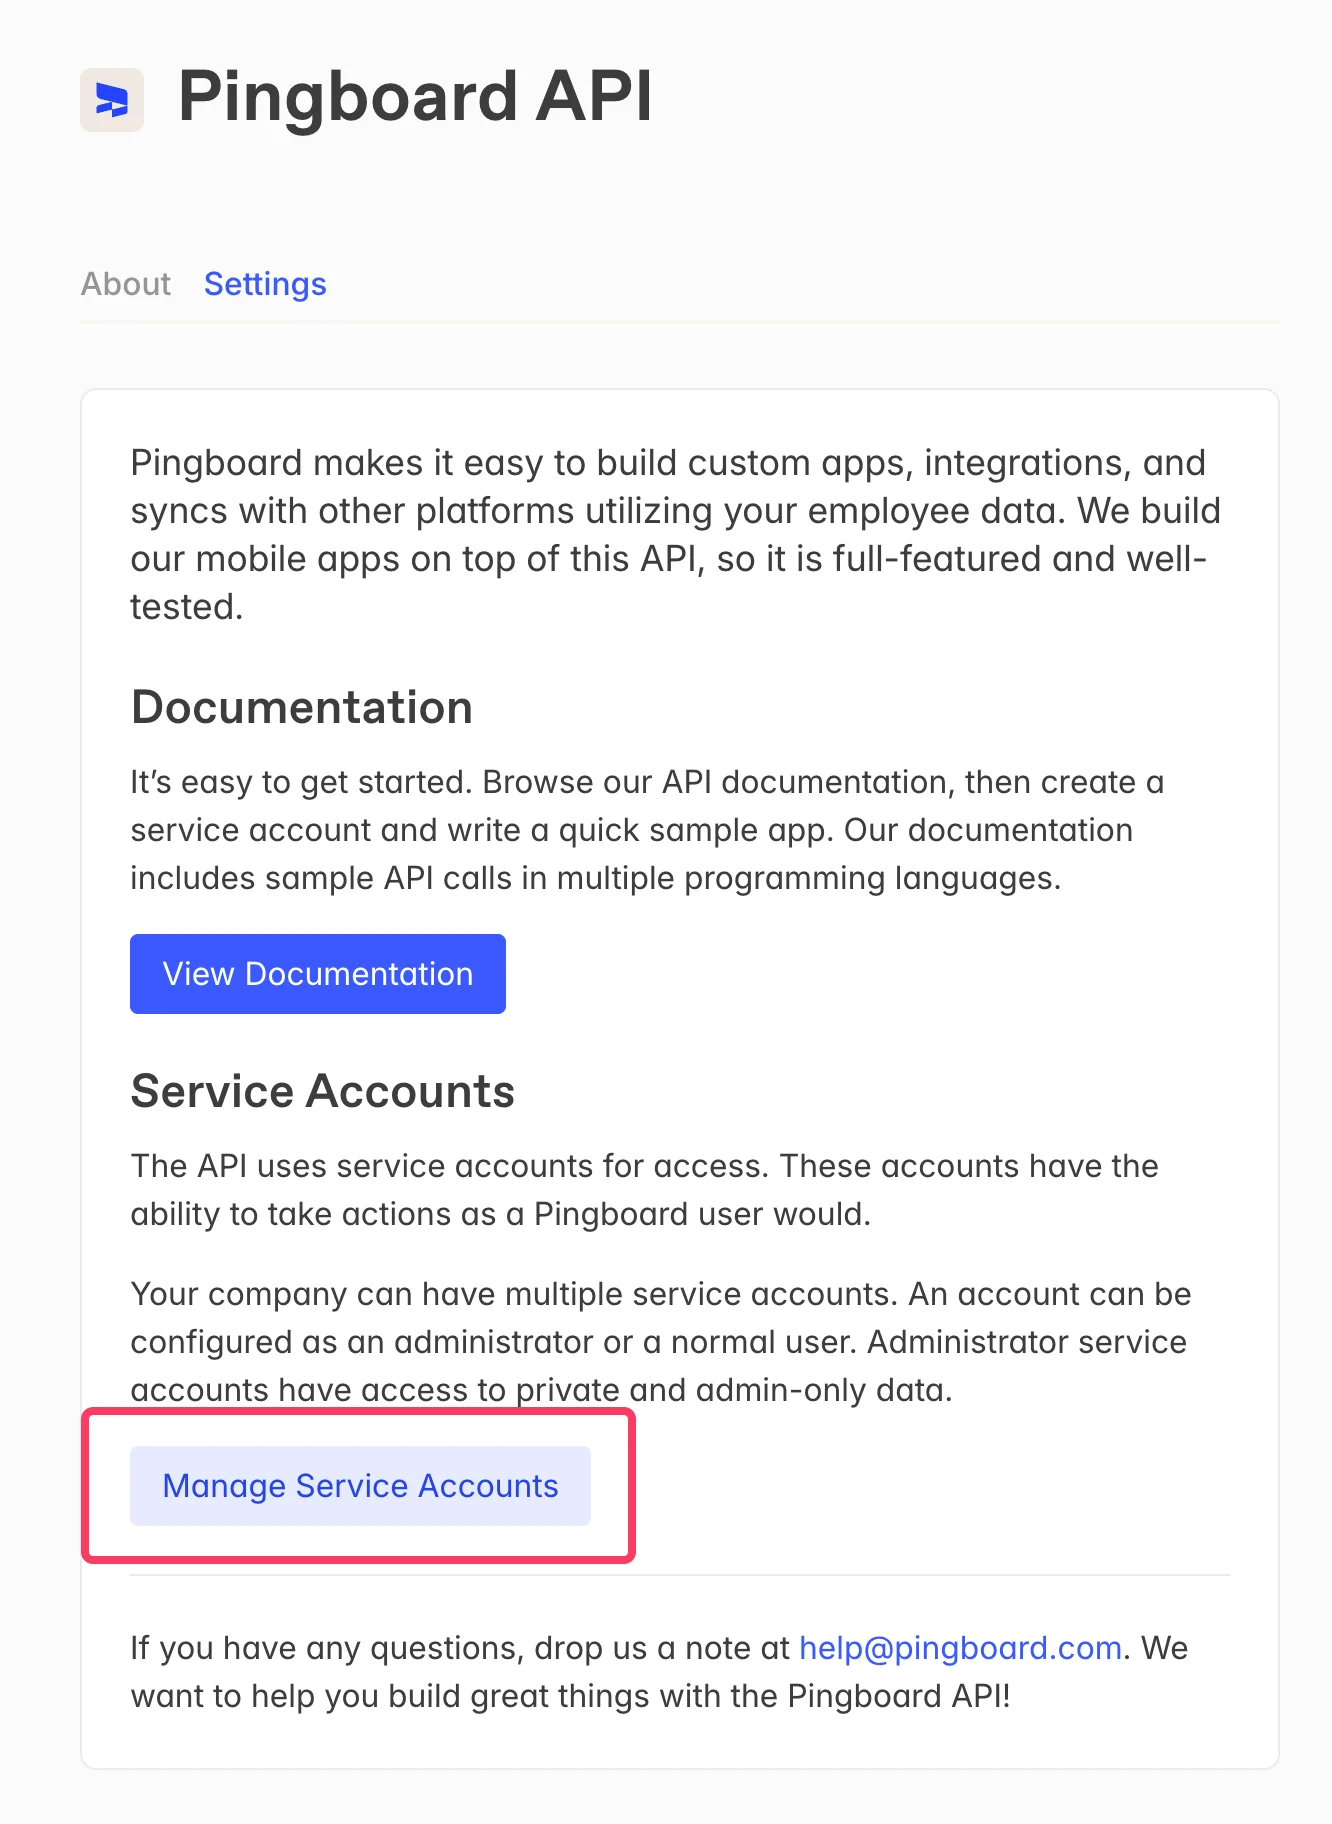
 Klicken Sie auf der Seite Pingboard API auf **Manage Service Accounts**.
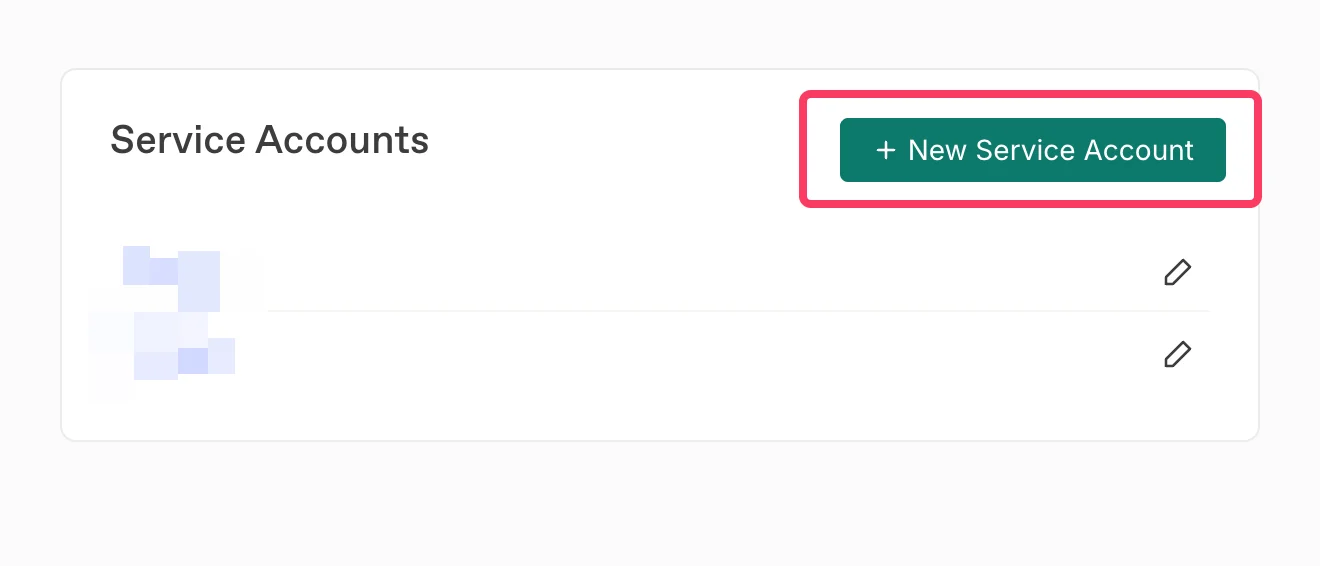
 Klicken Sie auf **+ New Service Account**, um ein neues Service-Konto für Scribe anzulegen.
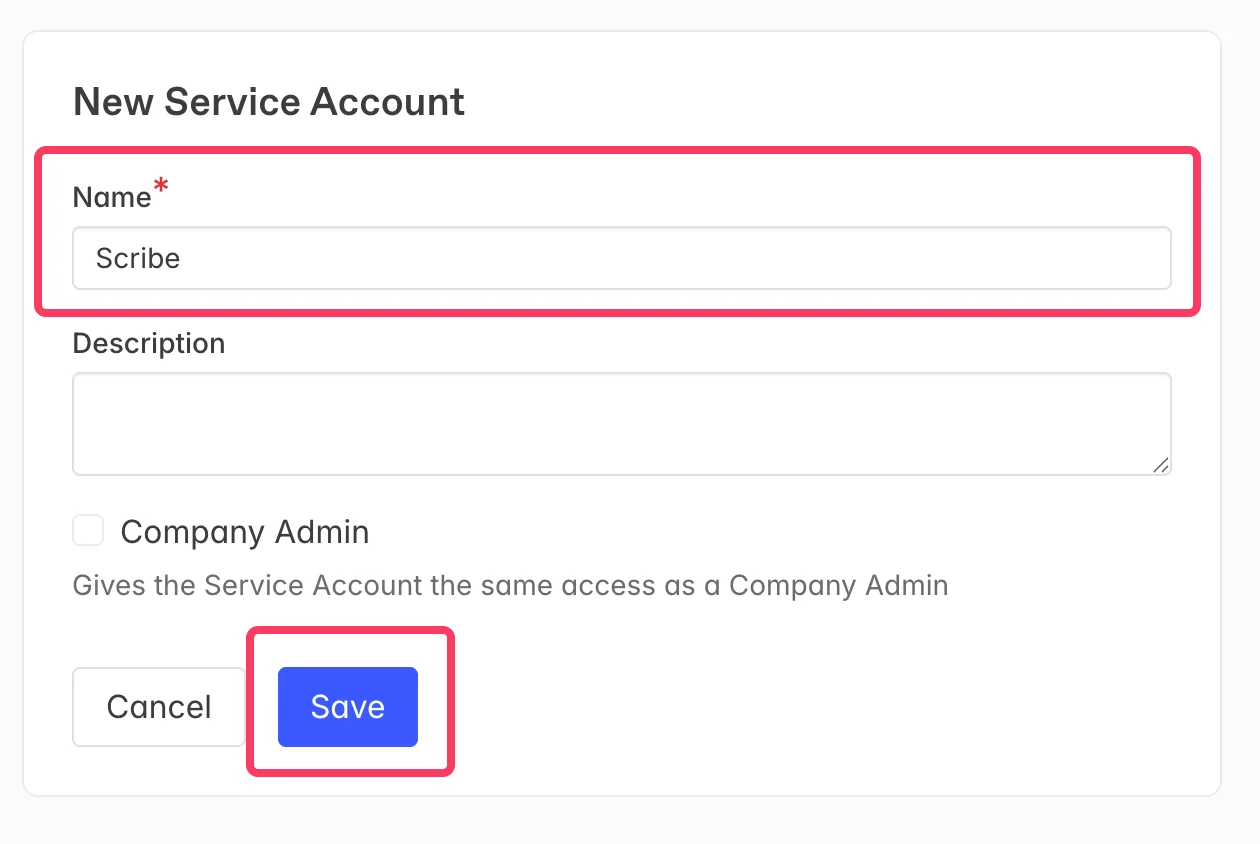
 Geben Sie **Scribe** als Namen für das Service-Konto ein und klicken Sie dann auf **Save**.
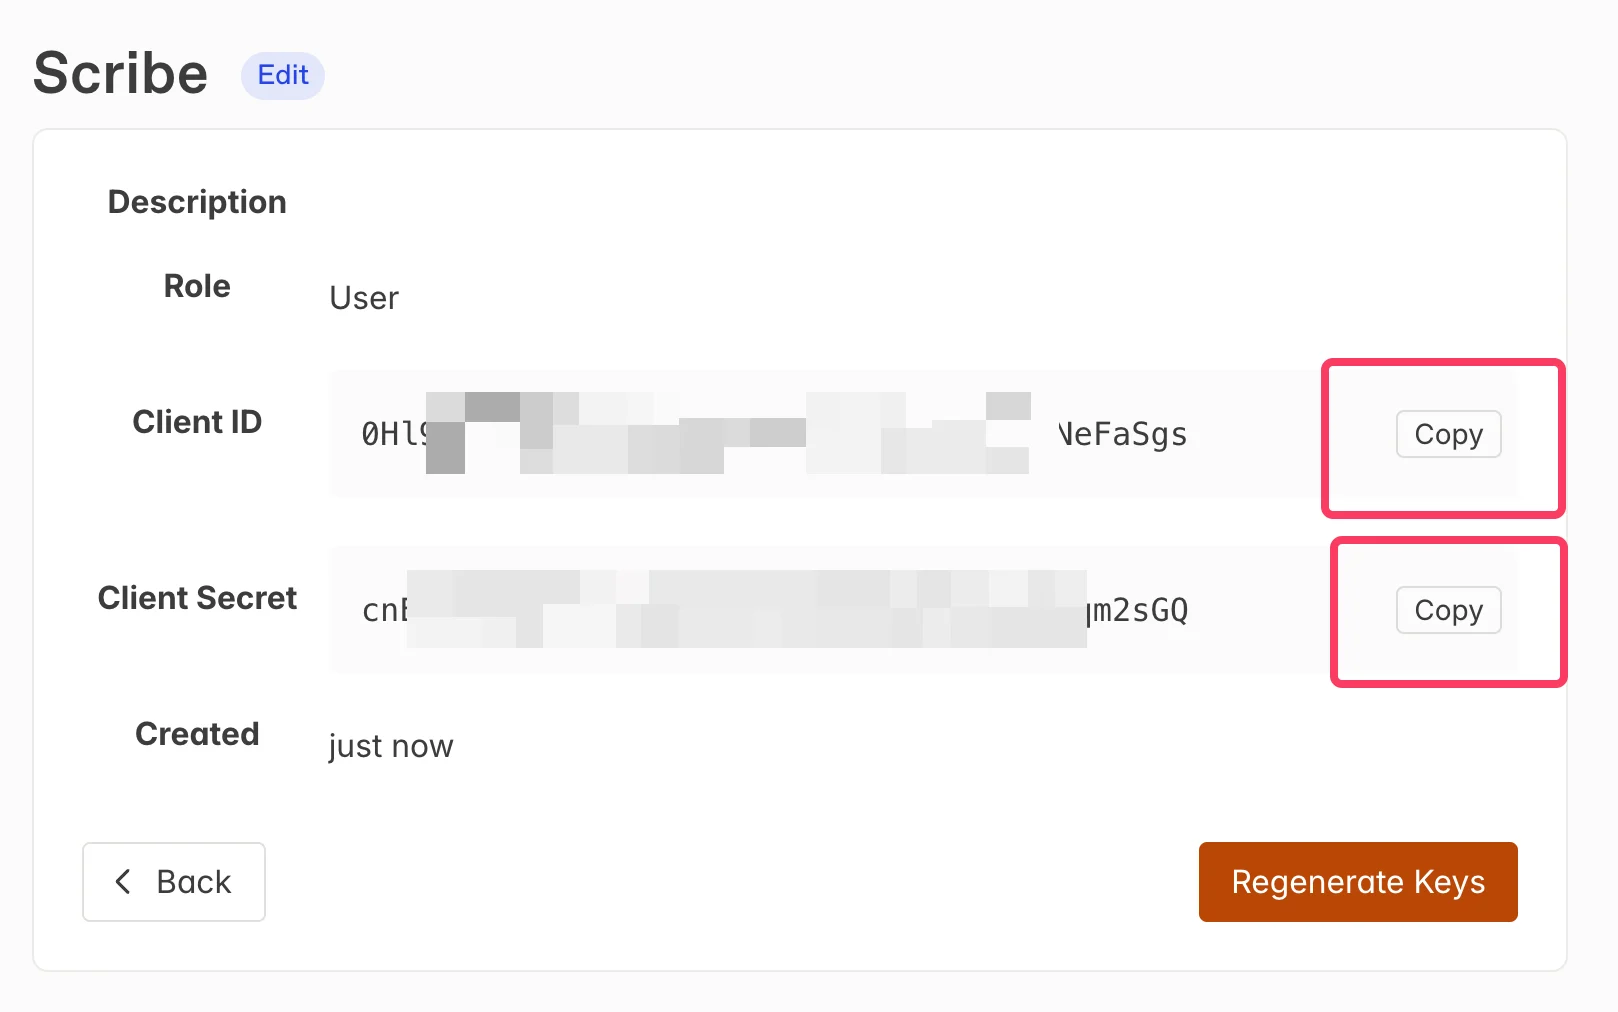
 Kopieren Sie die **Client ID** und das **Client Secret** in Pingboard über die Schaltflächen **Copy** und fügen Sie diese in die entsprechenden Felder in Scribe ein. Klicken Sie auf **Connect Pingboard**, um die Integration abzuschließen.
 ## Verwandte Artikel
* [BambooHR](/de/integrations/smart-fields/bamboohr-smart-fields): BambooHR-Daten mit Ihren Signaturen synchronisieren.
* [Ceridian Dayforce](/de/integrations/smart-fields/ceridian-dayforce-smart-fields): Ceridian-Dayforce-Daten mit Ihren Signaturen synchronisieren.
* [Teammitglieder einer Signatur zuweisen](/de/assign-teammates-to-a-signature): Mit Smartfield-Bedingungen Signaturen automatisch zuweisen.
## Verwandte Artikel
* [BambooHR](/de/integrations/smart-fields/bamboohr-smart-fields): BambooHR-Daten mit Ihren Signaturen synchronisieren.
* [Ceridian Dayforce](/de/integrations/smart-fields/ceridian-dayforce-smart-fields): Ceridian-Dayforce-Daten mit Ihren Signaturen synchronisieren.
* [Teammitglieder einer Signatur zuweisen](/de/assign-teammates-to-a-signature): Mit Smartfield-Bedingungen Signaturen automatisch zuweisen.