> ## Documentation Index
> Fetch the complete documentation index at: https://help.scribe-mail.com/llms.txt
> Use this file to discover all available pages before exploring further.
# Configure your DNS
> Set up a custom sending domain in Scribe to improve email deliverability and avoid spam filters. Takes 5 minutes, no developer needed.
Configuring your DNS is an important step to ensure your email signatures don't trigger spam filters. It takes about 5 minutes and doesn't require a developer. Scribe's setup wizard handles most of it automatically.
## Why configure DNS?
Your Scribe email signatures contain multiple URLs: logos, profile pictures, social icons, website links, campaign banners, and tracking links. By default, these URLs use Scribe's domain (`sendassets.io`).
The problem: spam filters flag emails that contain many URLs pointing to a domain different from the sender's email domain. If your team sends from `@yourcompany.com` but all signature links point to `sendassets.io`, deliverability can suffer.
The fix: replace Scribe's default domain with a subdomain of your own, like `signature.yourcompany.com`. This is called a **sending domain**. It tells spam filters that the links in your emails belong to your organization, keeping your emails out of spam folders.
For example, if your team sends from `joe@my-company.com`, you would configure a sending domain like `signature.my-company.com`.
## How to set it up
In your Scribe dashboard, navigate to **Settings → DNS**. If you've already synced your email provider, your domain will appear automatically. Click **Configure**. Otherwise, click **Add a domain**.
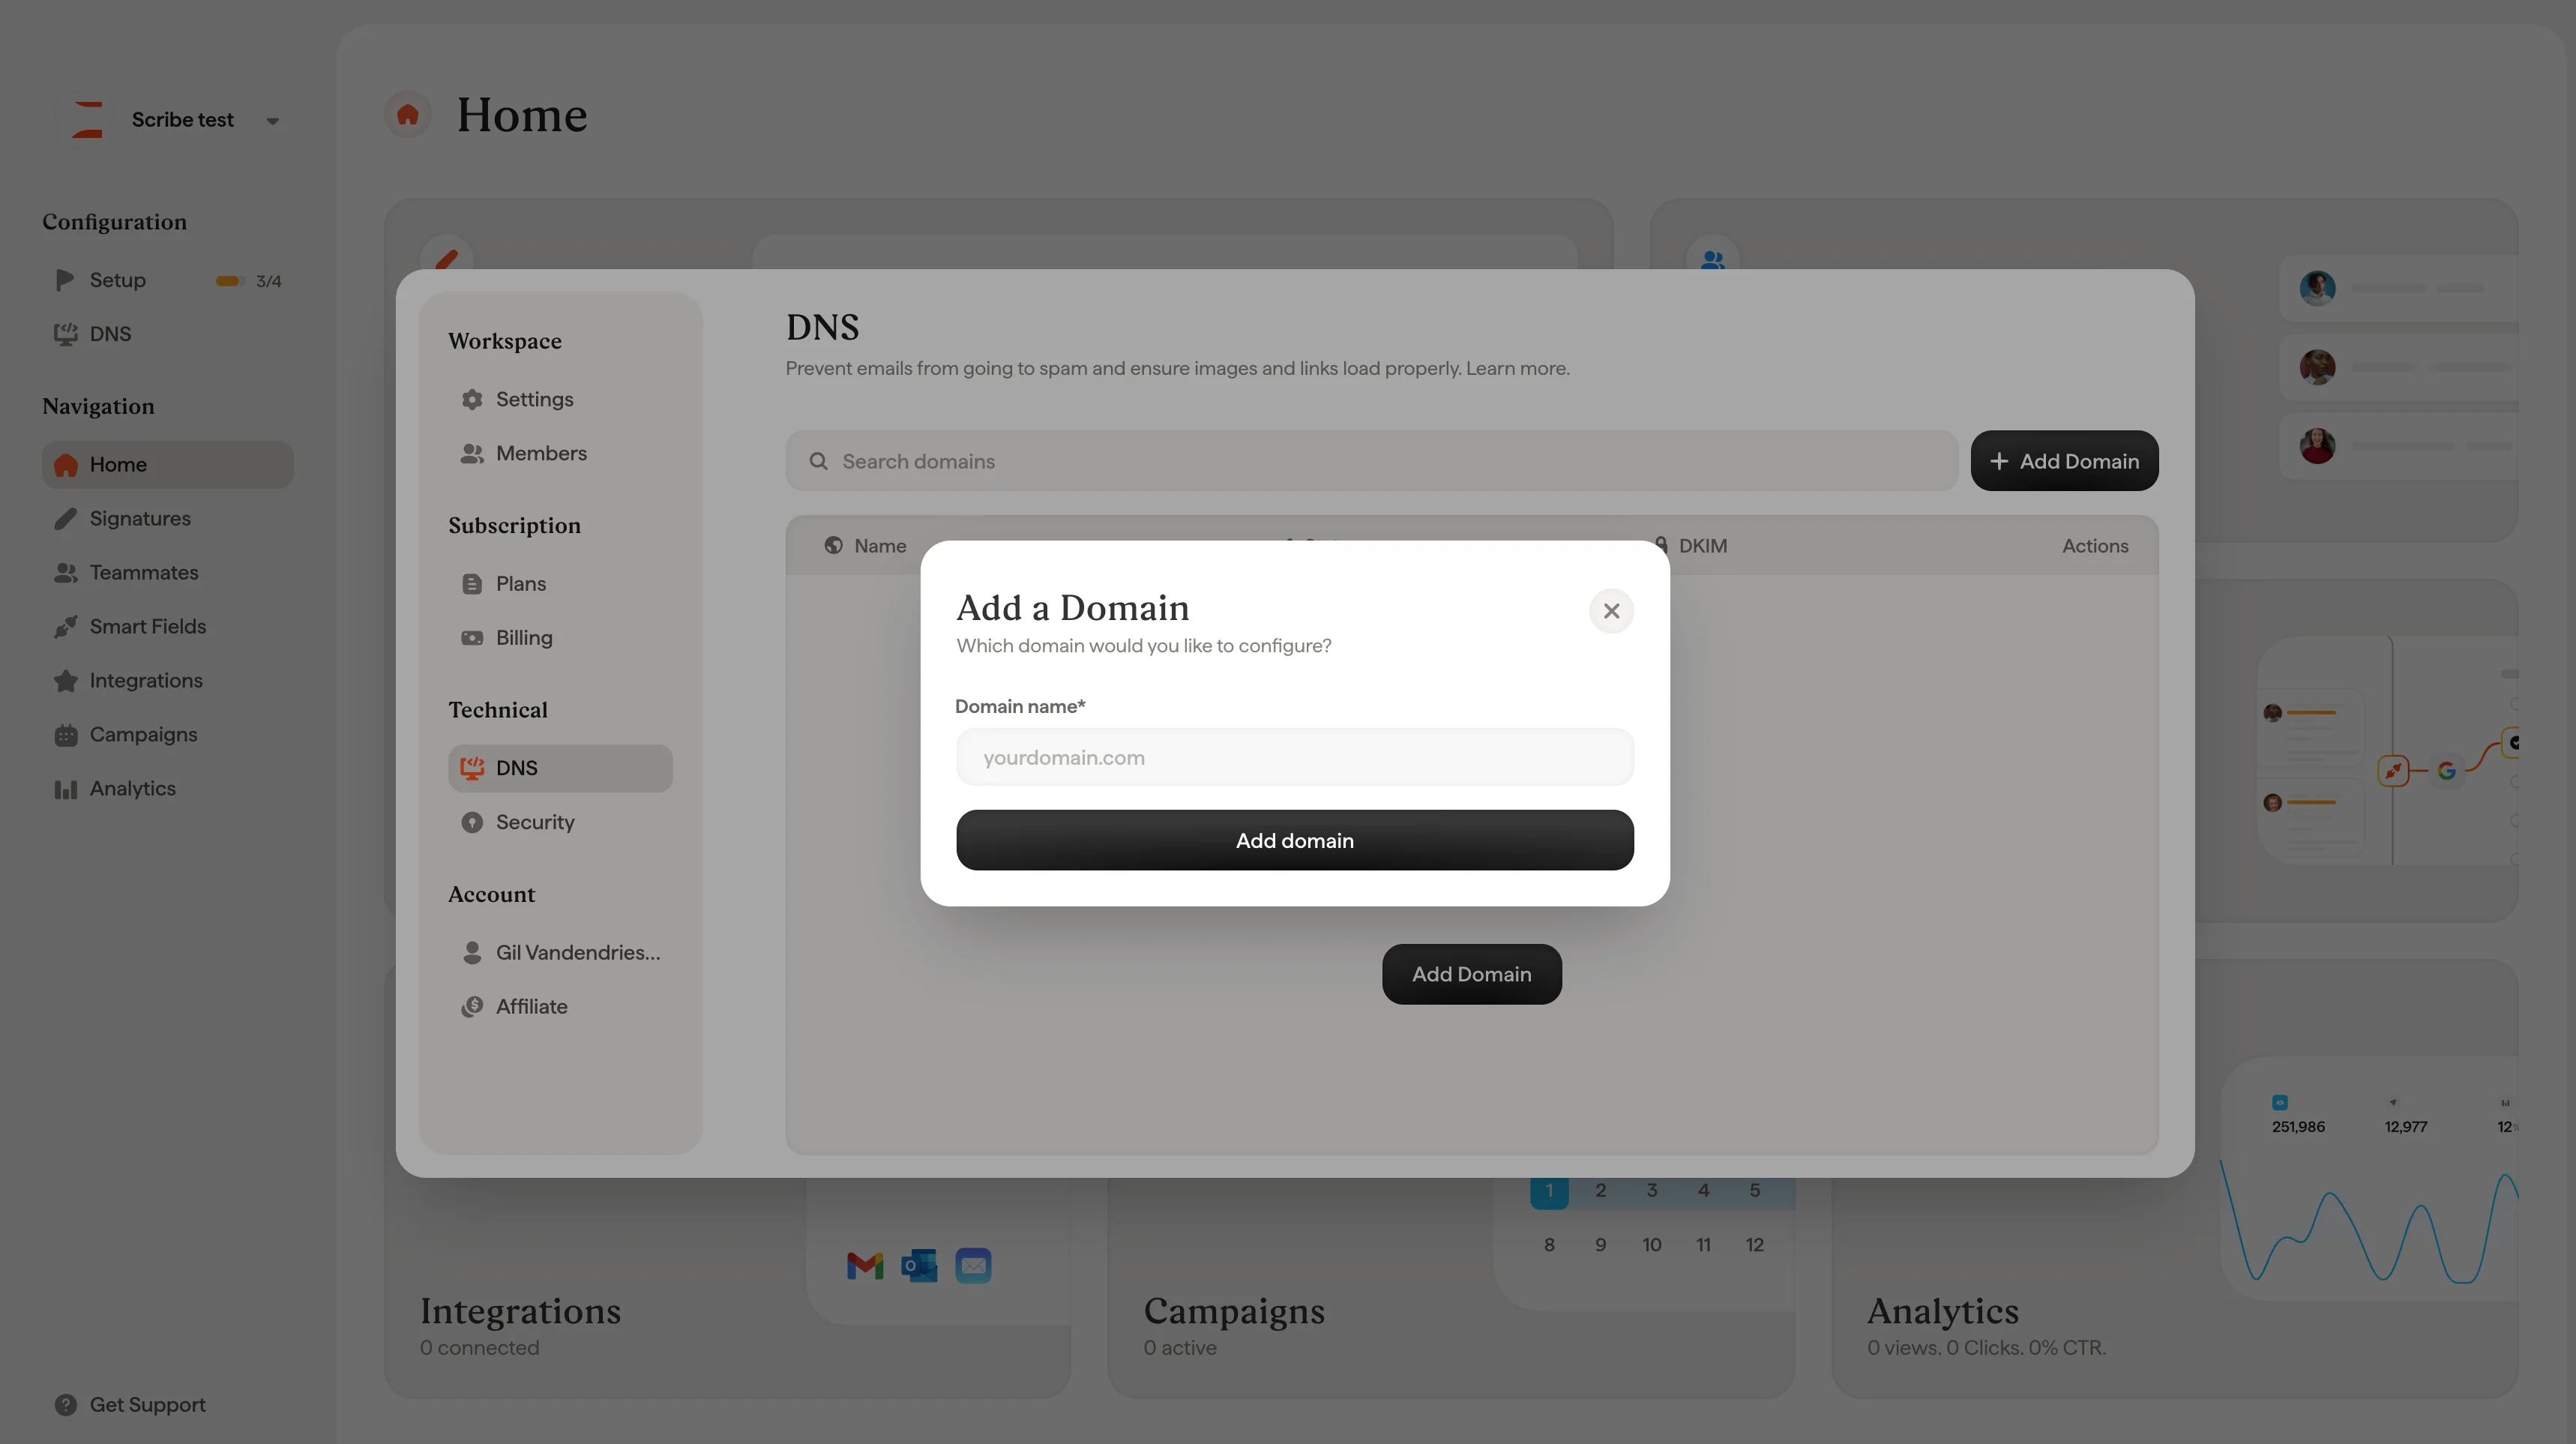 Type your company's primary domain. For example, `mycompany.com`.
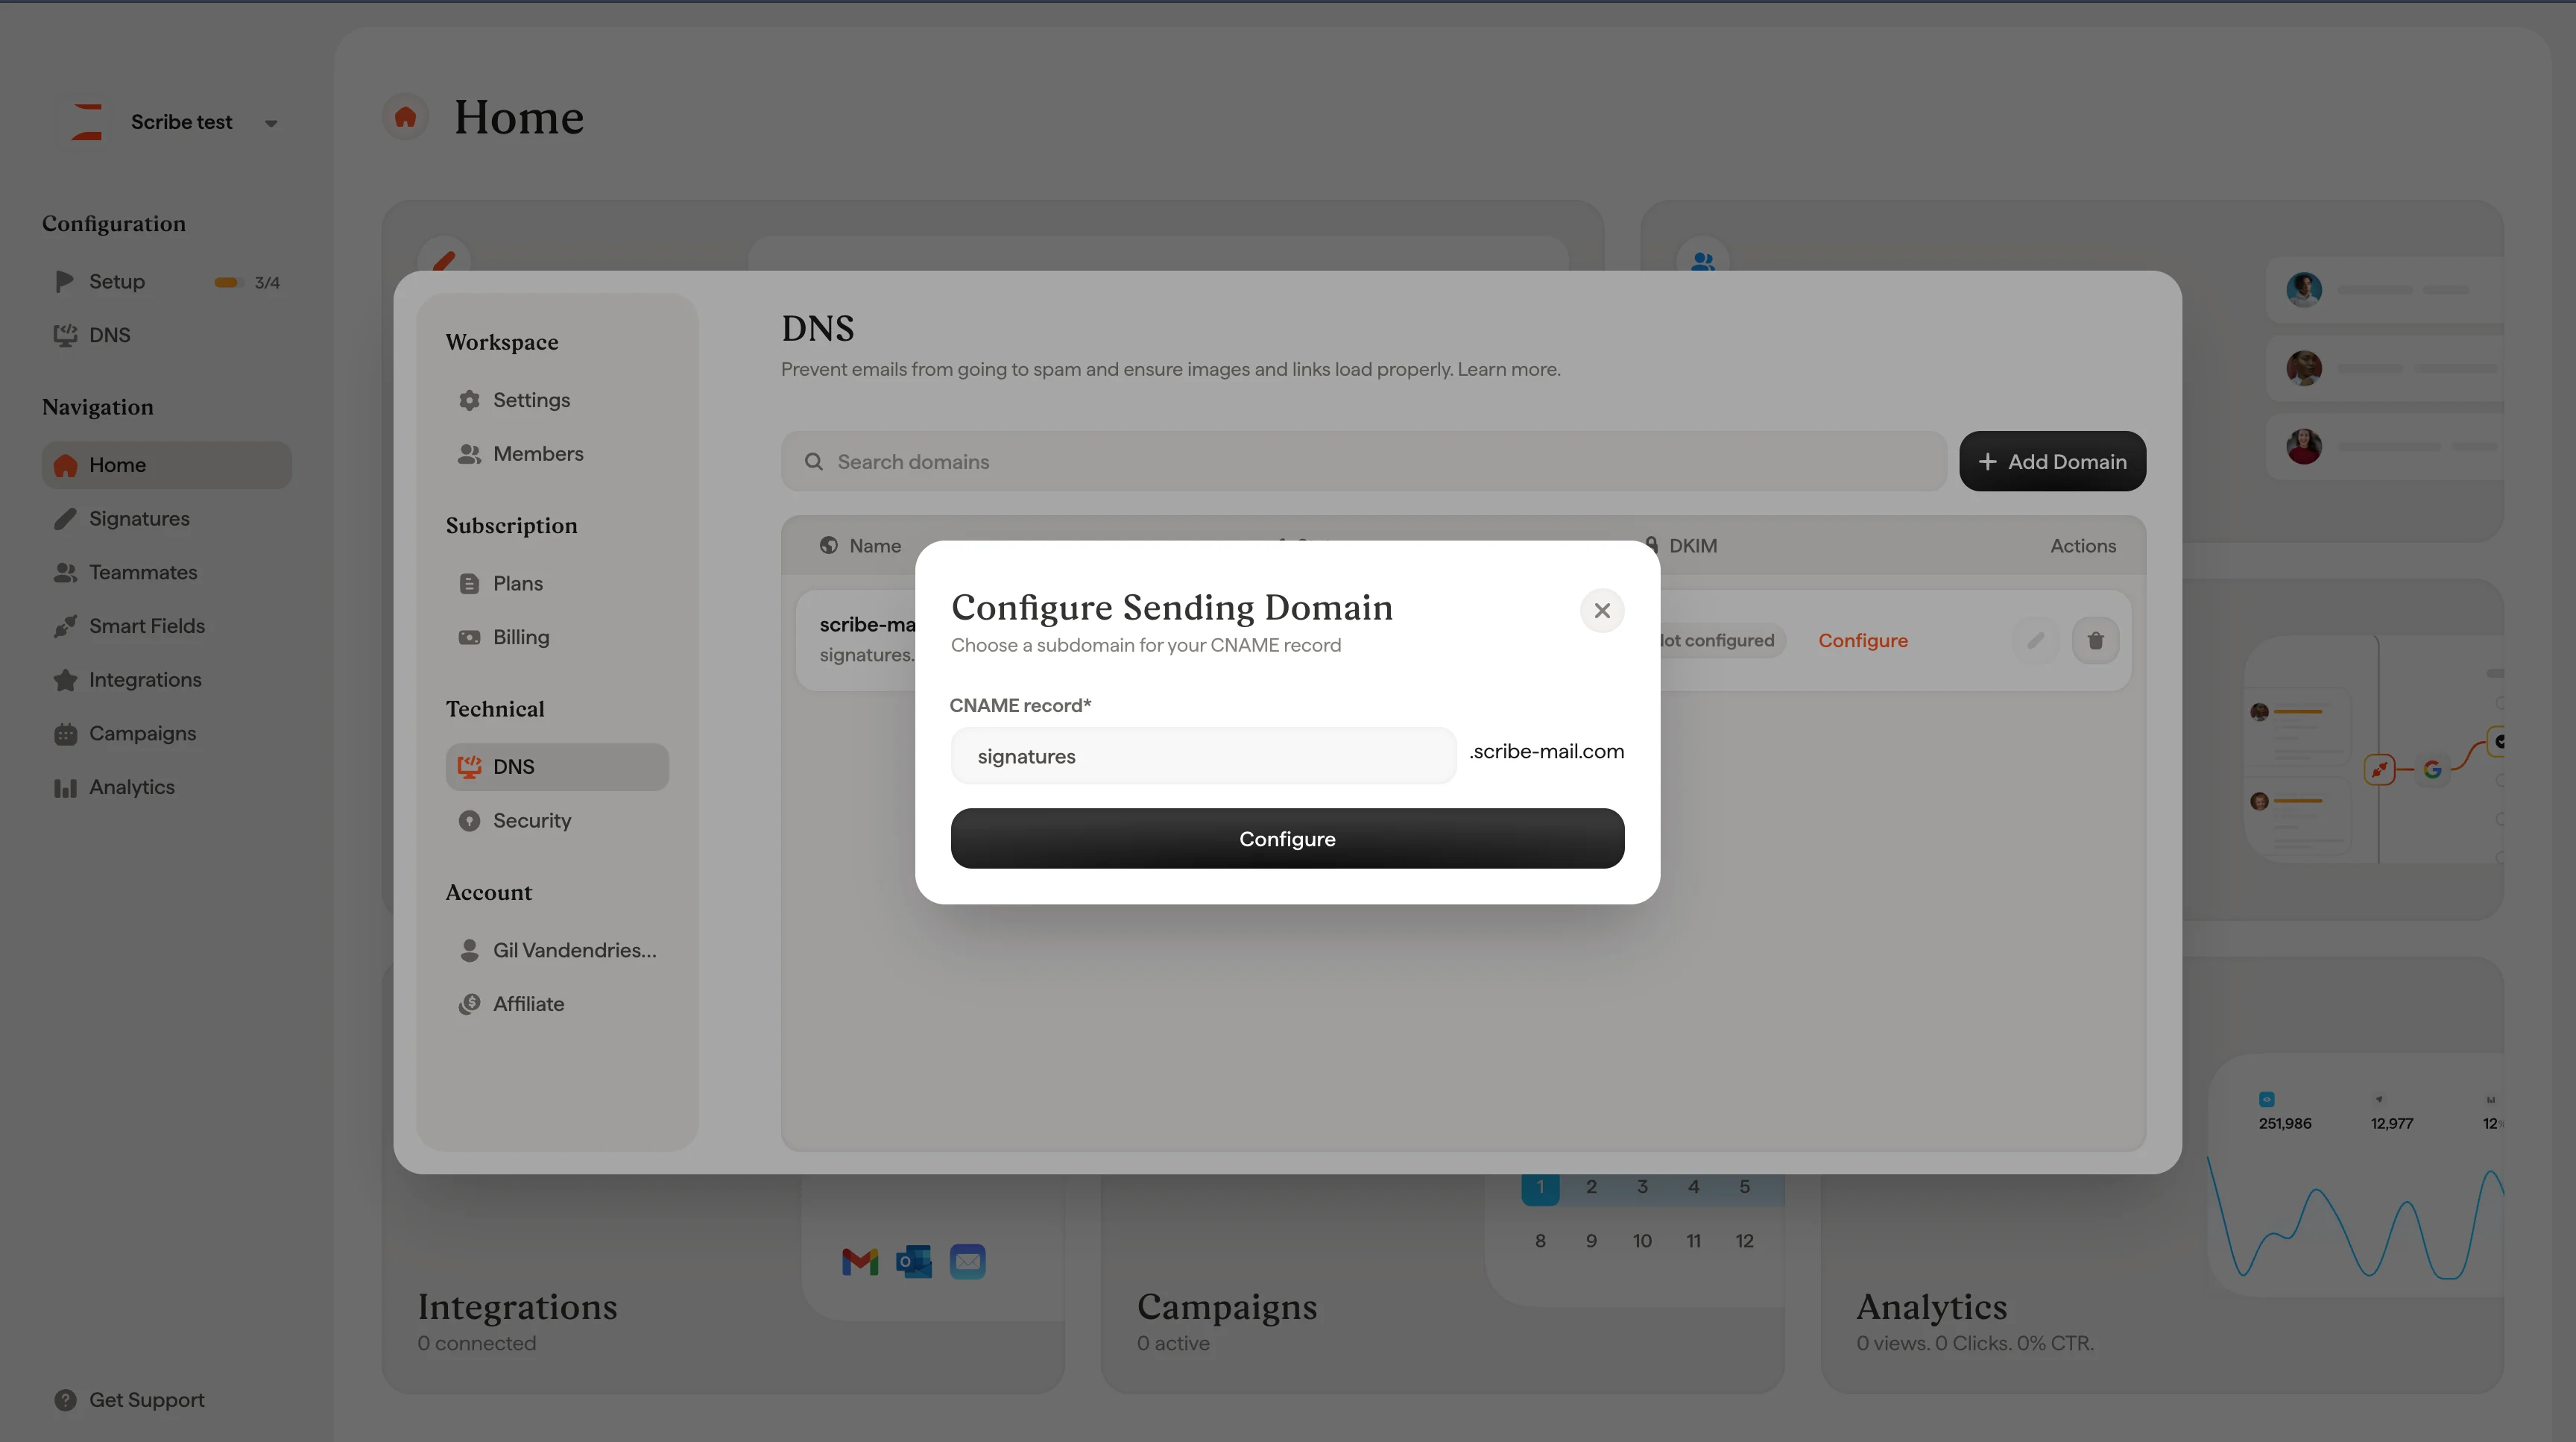
Pick a subdomain prefix for your sending domain. For example, `signature` would create `signature.mycompany.com`. Other common choices include `email` or `mail-assets`.
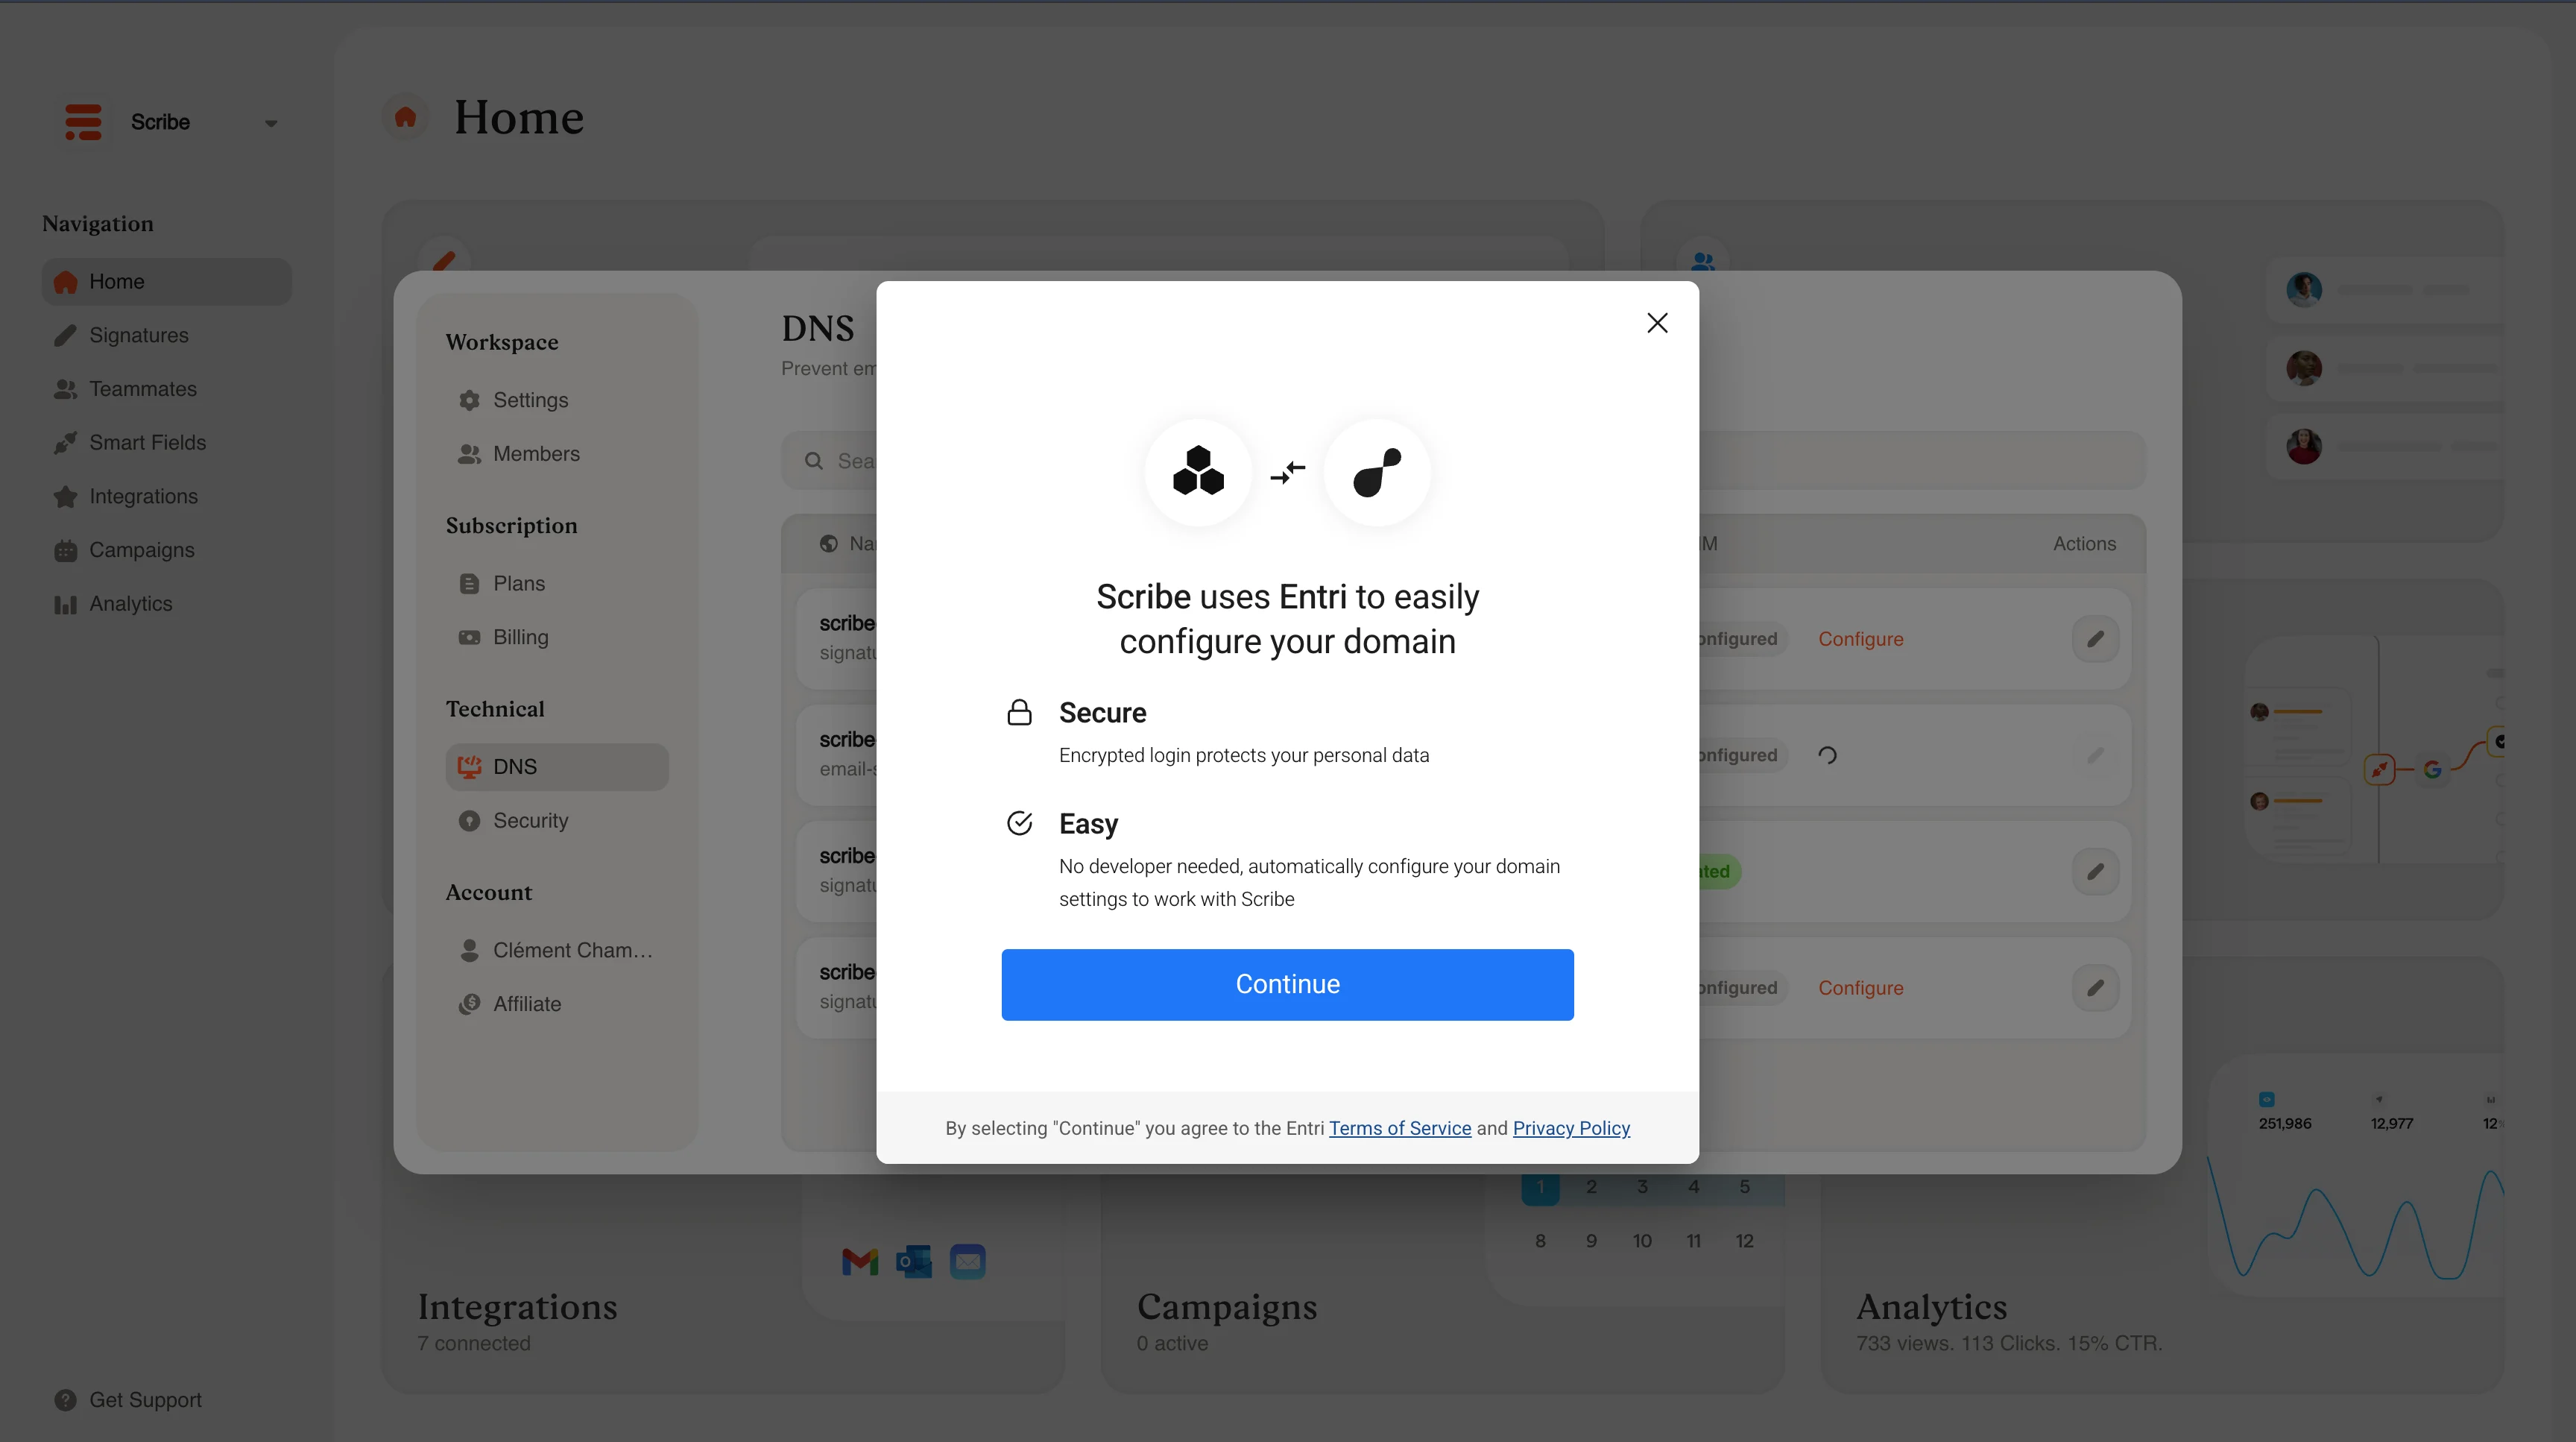
Scribe's wizard will automatically configure the DNS settings with your domain provider. No developer or manual DNS editing required. Just follow the prompts.
Type your company's primary domain. For example, `mycompany.com`.
Pick a subdomain prefix for your sending domain. For example, `signature` would create `signature.mycompany.com`. Other common choices include `email` or `mail-assets`.
Scribe's wizard will automatically configure the DNS settings with your domain provider. No developer or manual DNS editing required. Just follow the prompts.
 ## After setup
Once configured, DNS propagation can take up to 24 hours. You can check the status in two ways:
* In your Scribe dashboard under **Settings → DNS**, where the status will change to **Validated** once propagation is complete
* Using an external tool like [dnschecker.org](https://dnschecker.org/#CNAME/signature-assets.scribe-mail.com)
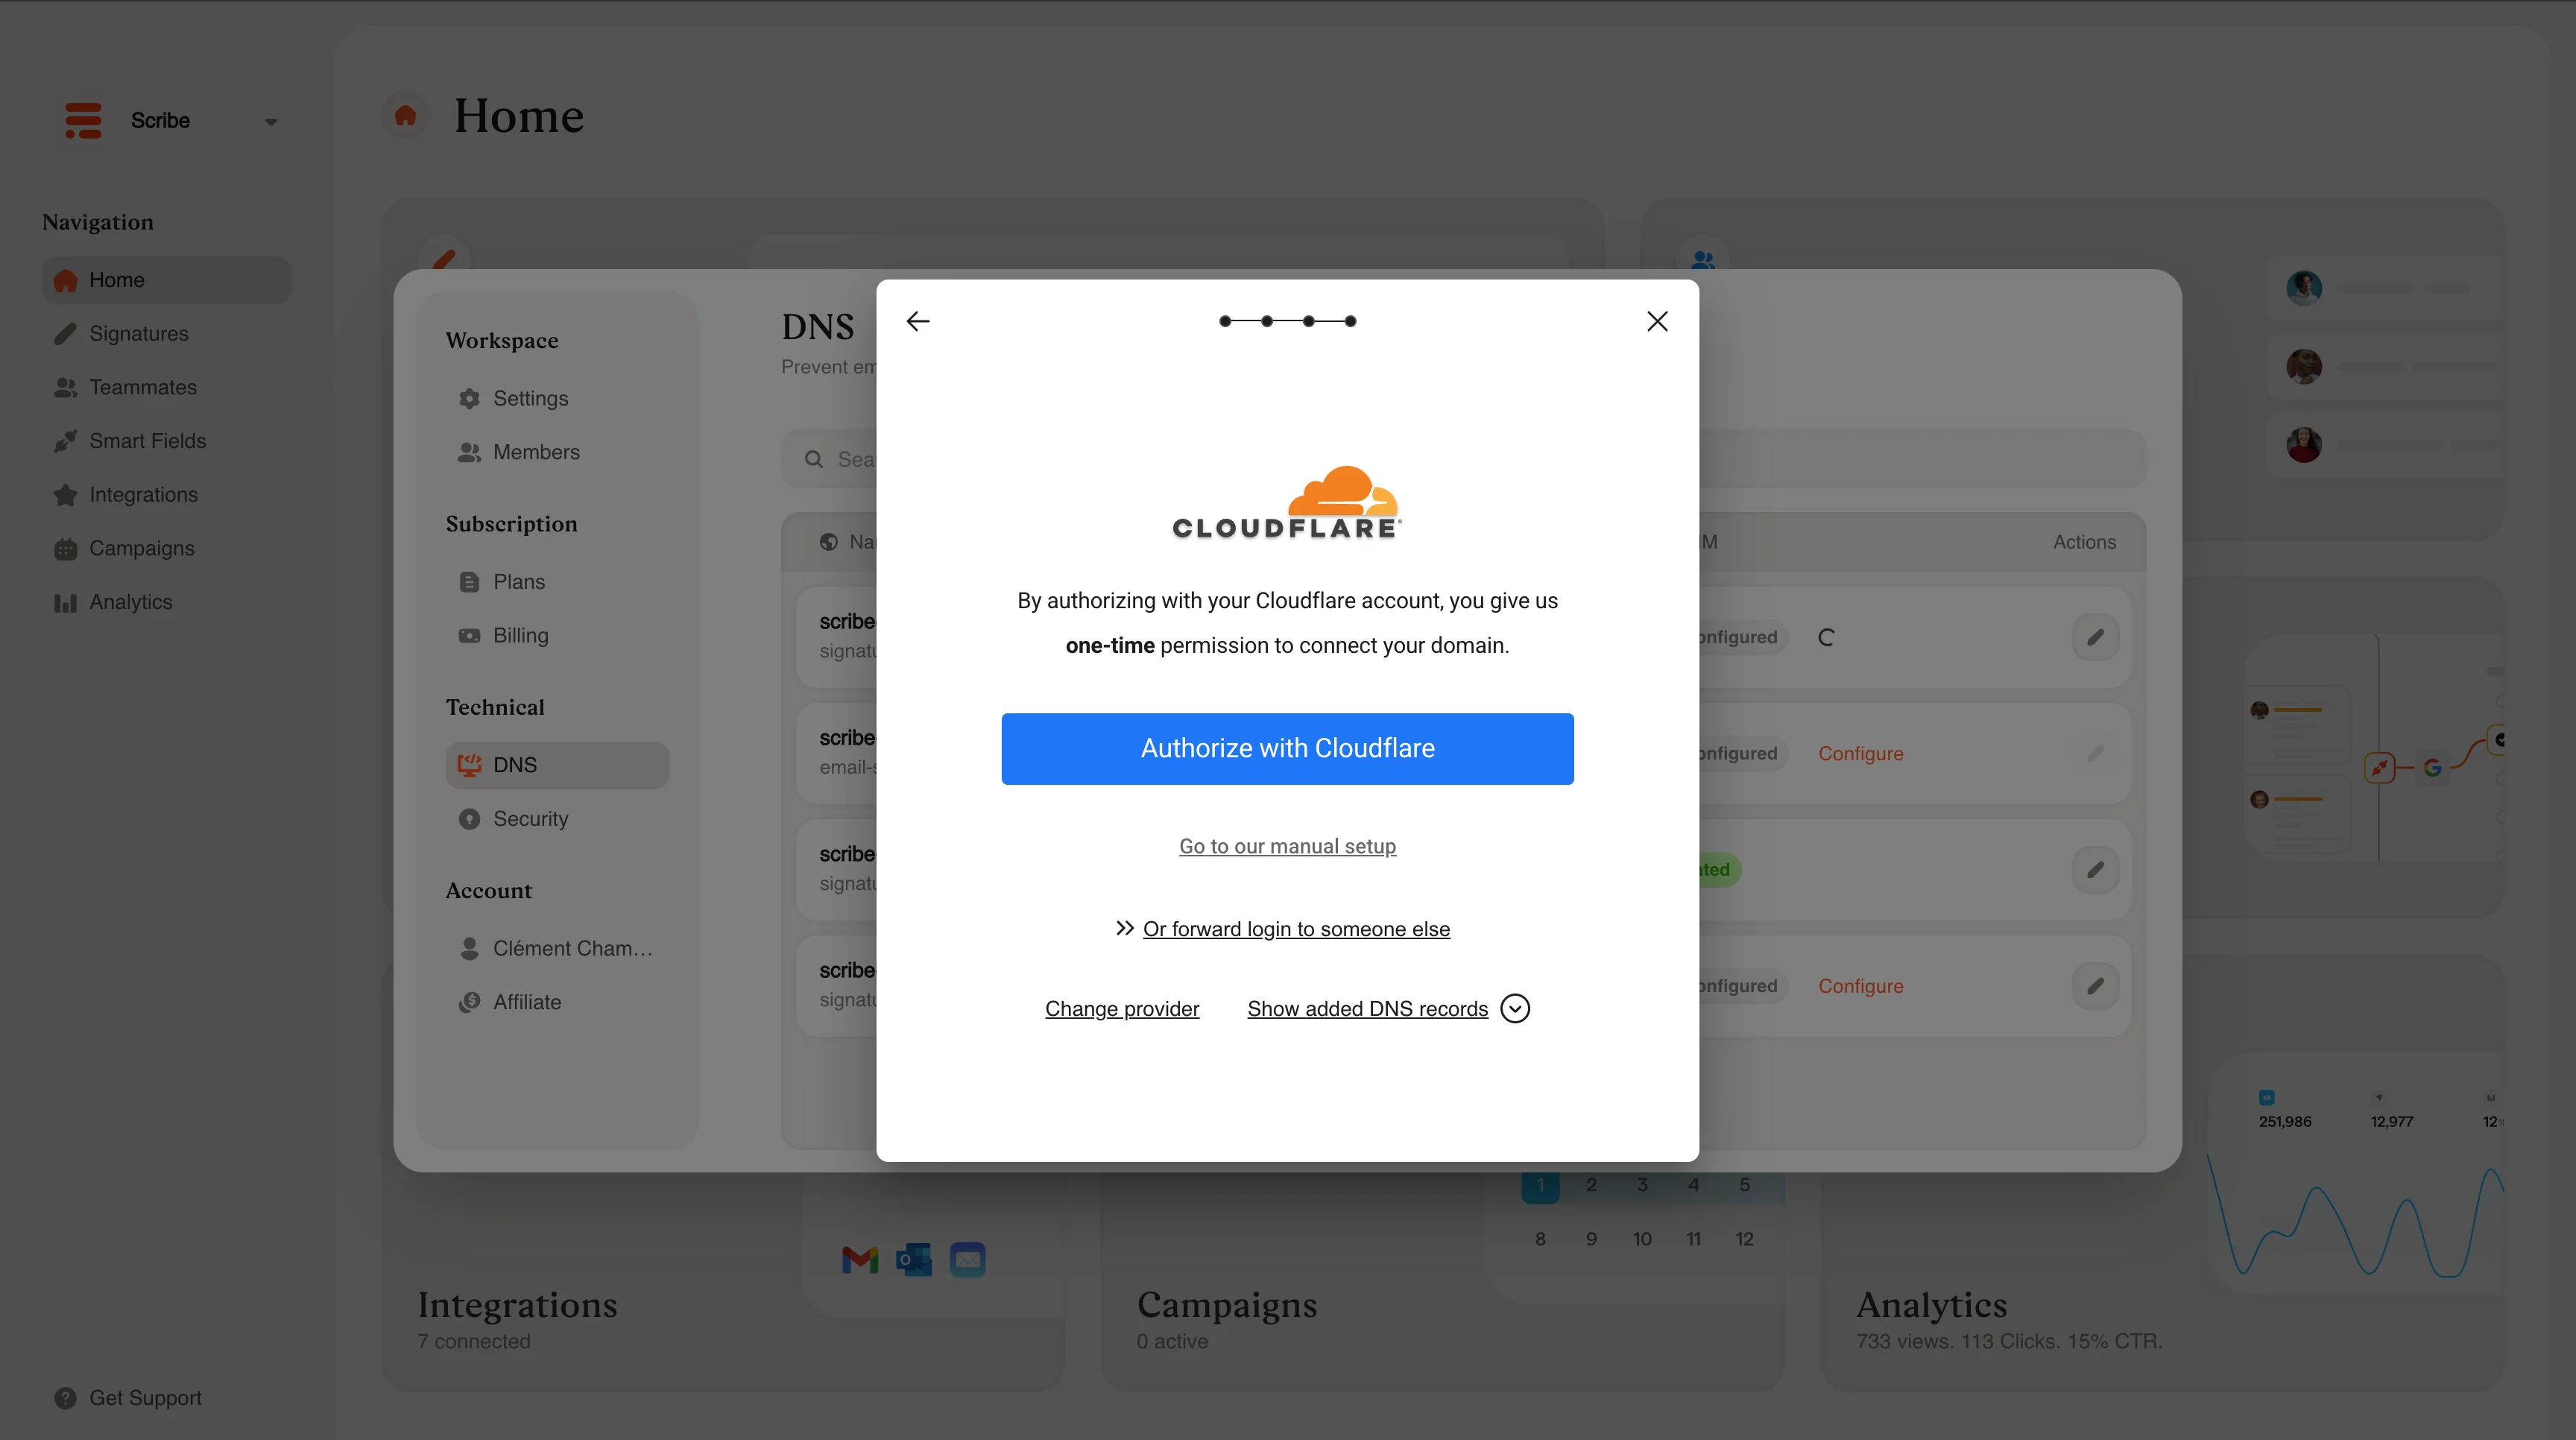
**If you use Cloudflare**, two settings must be adjusted:
* Set the Proxy Status to **DNS only** (not proxied)
* **Disable CNAME flattening**
Without these changes, the DNS validation will fail.
You can configure your DNS at any point, before or after installing signatures. But we recommend doing it early, ideally right after your initial setup, to ensure good deliverability from day one.
Full DNS configuration details and troubleshooting
## After setup
Once configured, DNS propagation can take up to 24 hours. You can check the status in two ways:
* In your Scribe dashboard under **Settings → DNS**, where the status will change to **Validated** once propagation is complete
* Using an external tool like [dnschecker.org](https://dnschecker.org/#CNAME/signature-assets.scribe-mail.com)
**If you use Cloudflare**, two settings must be adjusted:
* Set the Proxy Status to **DNS only** (not proxied)
* **Disable CNAME flattening**
Without these changes, the DNS validation will fail.
You can configure your DNS at any point, before or after installing signatures. But we recommend doing it early, ideally right after your initial setup, to ensure good deliverability from day one.
Full DNS configuration details and troubleshooting