> ## Documentation Index
> Fetch the complete documentation index at: https://help.scribe-mail.com/llms.txt
> Use this file to discover all available pages before exploring further.
# Editor top bar
> Preview your signature in Gmail, Outlook, and Apple Mail, run a quality check, apply templates, and publish changes from the editor top bar.
The top bar gives you quick access to the key actions you need while designing your signature. It stays visible at all times so you can switch between tasks without leaving the editor.
 ## Signature info
On the left side of the top bar, you'll see:
* **Back arrow**: Return to your signatures list
* **Signature name**: The name of the signature you're editing (e.g., "Marketing")
* **Teammates count**: How many teammates are assigned to this signature
* **Status badge**: Shows **Draft** if the signature has unpublished changes
## Actions
The right side of the top bar contains four actions, from left to right.
### Templates
Open the [template library](/en/editor/template-library) to browse pre-designed signature layouts. Pick a template and it applies to your current signature, and your existing Smart Field data fills in automatically.
## Signature info
On the left side of the top bar, you'll see:
* **Back arrow**: Return to your signatures list
* **Signature name**: The name of the signature you're editing (e.g., "Marketing")
* **Teammates count**: How many teammates are assigned to this signature
* **Status badge**: Shows **Draft** if the signature has unpublished changes
## Actions
The right side of the top bar contains four actions, from left to right.
### Templates
Open the [template library](/en/editor/template-library) to browse pre-designed signature layouts. Pick a template and it applies to your current signature, and your existing Smart Field data fills in automatically.
 ### Quality check
Run an automatic check on your signature before publishing. This verifies that everything is properly configured: links are valid, images are loading, and Smart Fields are connected correctly.
### Quality check
Run an automatic check on your signature before publishing. This verifies that everything is properly configured: links are valid, images are loading, and Smart Fields are connected correctly.
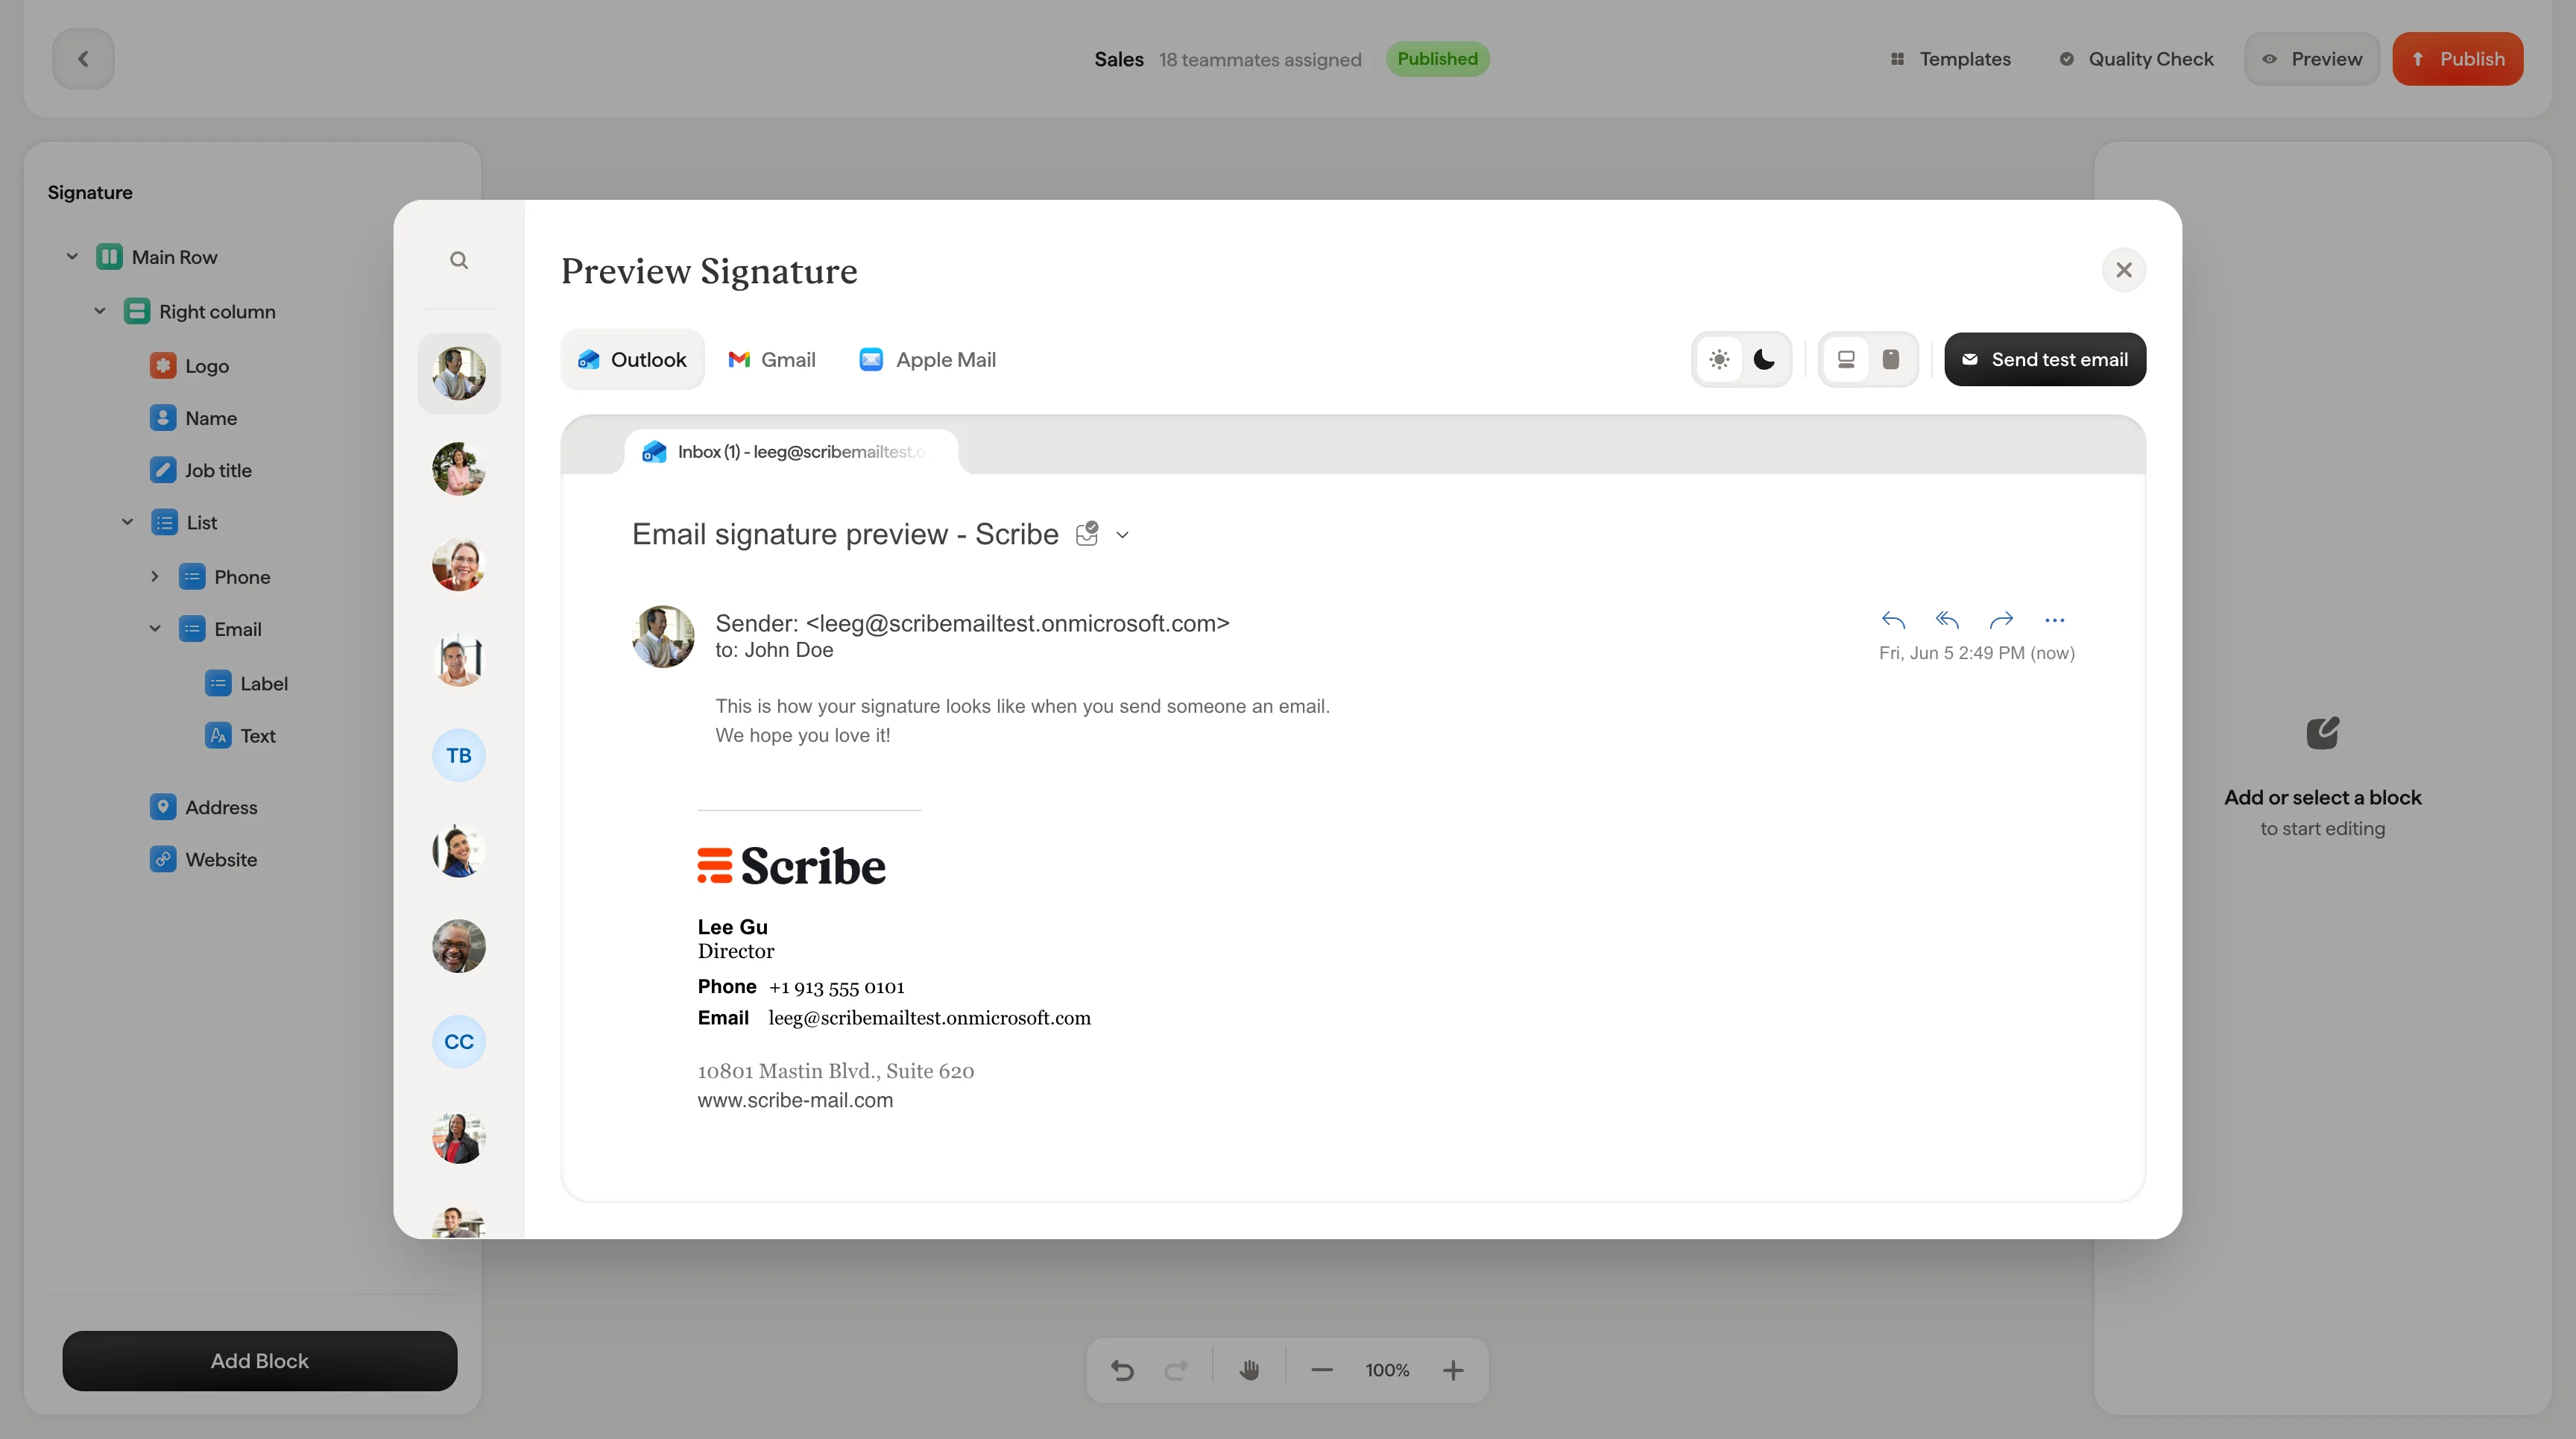
 ### Preview
[Preview](/en/preview-signatures) shows you exactly how your signature will look in real email clients. The preview modal includes:
* **Teammate selector**: Browse and search your assigned teammates on the left to preview the signature with their specific data (name, photo, job title, etc.)
* **Email client tabs**: Switch between **Outlook**, **Gmail**, and **Apple Mail** to see how each client renders your signature
* **Light / Dark mode**: Toggle between light and dark mode to check both versions
* **Device views**: Preview on desktop, tablet, and mobile to verify your signature looks good across screen sizes
* **Send test email**: Send yourself a real email with the signature attached so you can see it in actual conditions, not just a preview
### Preview
[Preview](/en/preview-signatures) shows you exactly how your signature will look in real email clients. The preview modal includes:
* **Teammate selector**: Browse and search your assigned teammates on the left to preview the signature with their specific data (name, photo, job title, etc.)
* **Email client tabs**: Switch between **Outlook**, **Gmail**, and **Apple Mail** to see how each client renders your signature
* **Light / Dark mode**: Toggle between light and dark mode to check both versions
* **Device views**: Preview on desktop, tablet, and mobile to verify your signature looks good across screen sizes
* **Send test email**: Send yourself a real email with the signature attached so you can see it in actual conditions, not just a preview
 Always send a test email before publishing. Previews are close, but a real email in your inbox is the best way to catch spacing or image issues that only show up in specific email clients.
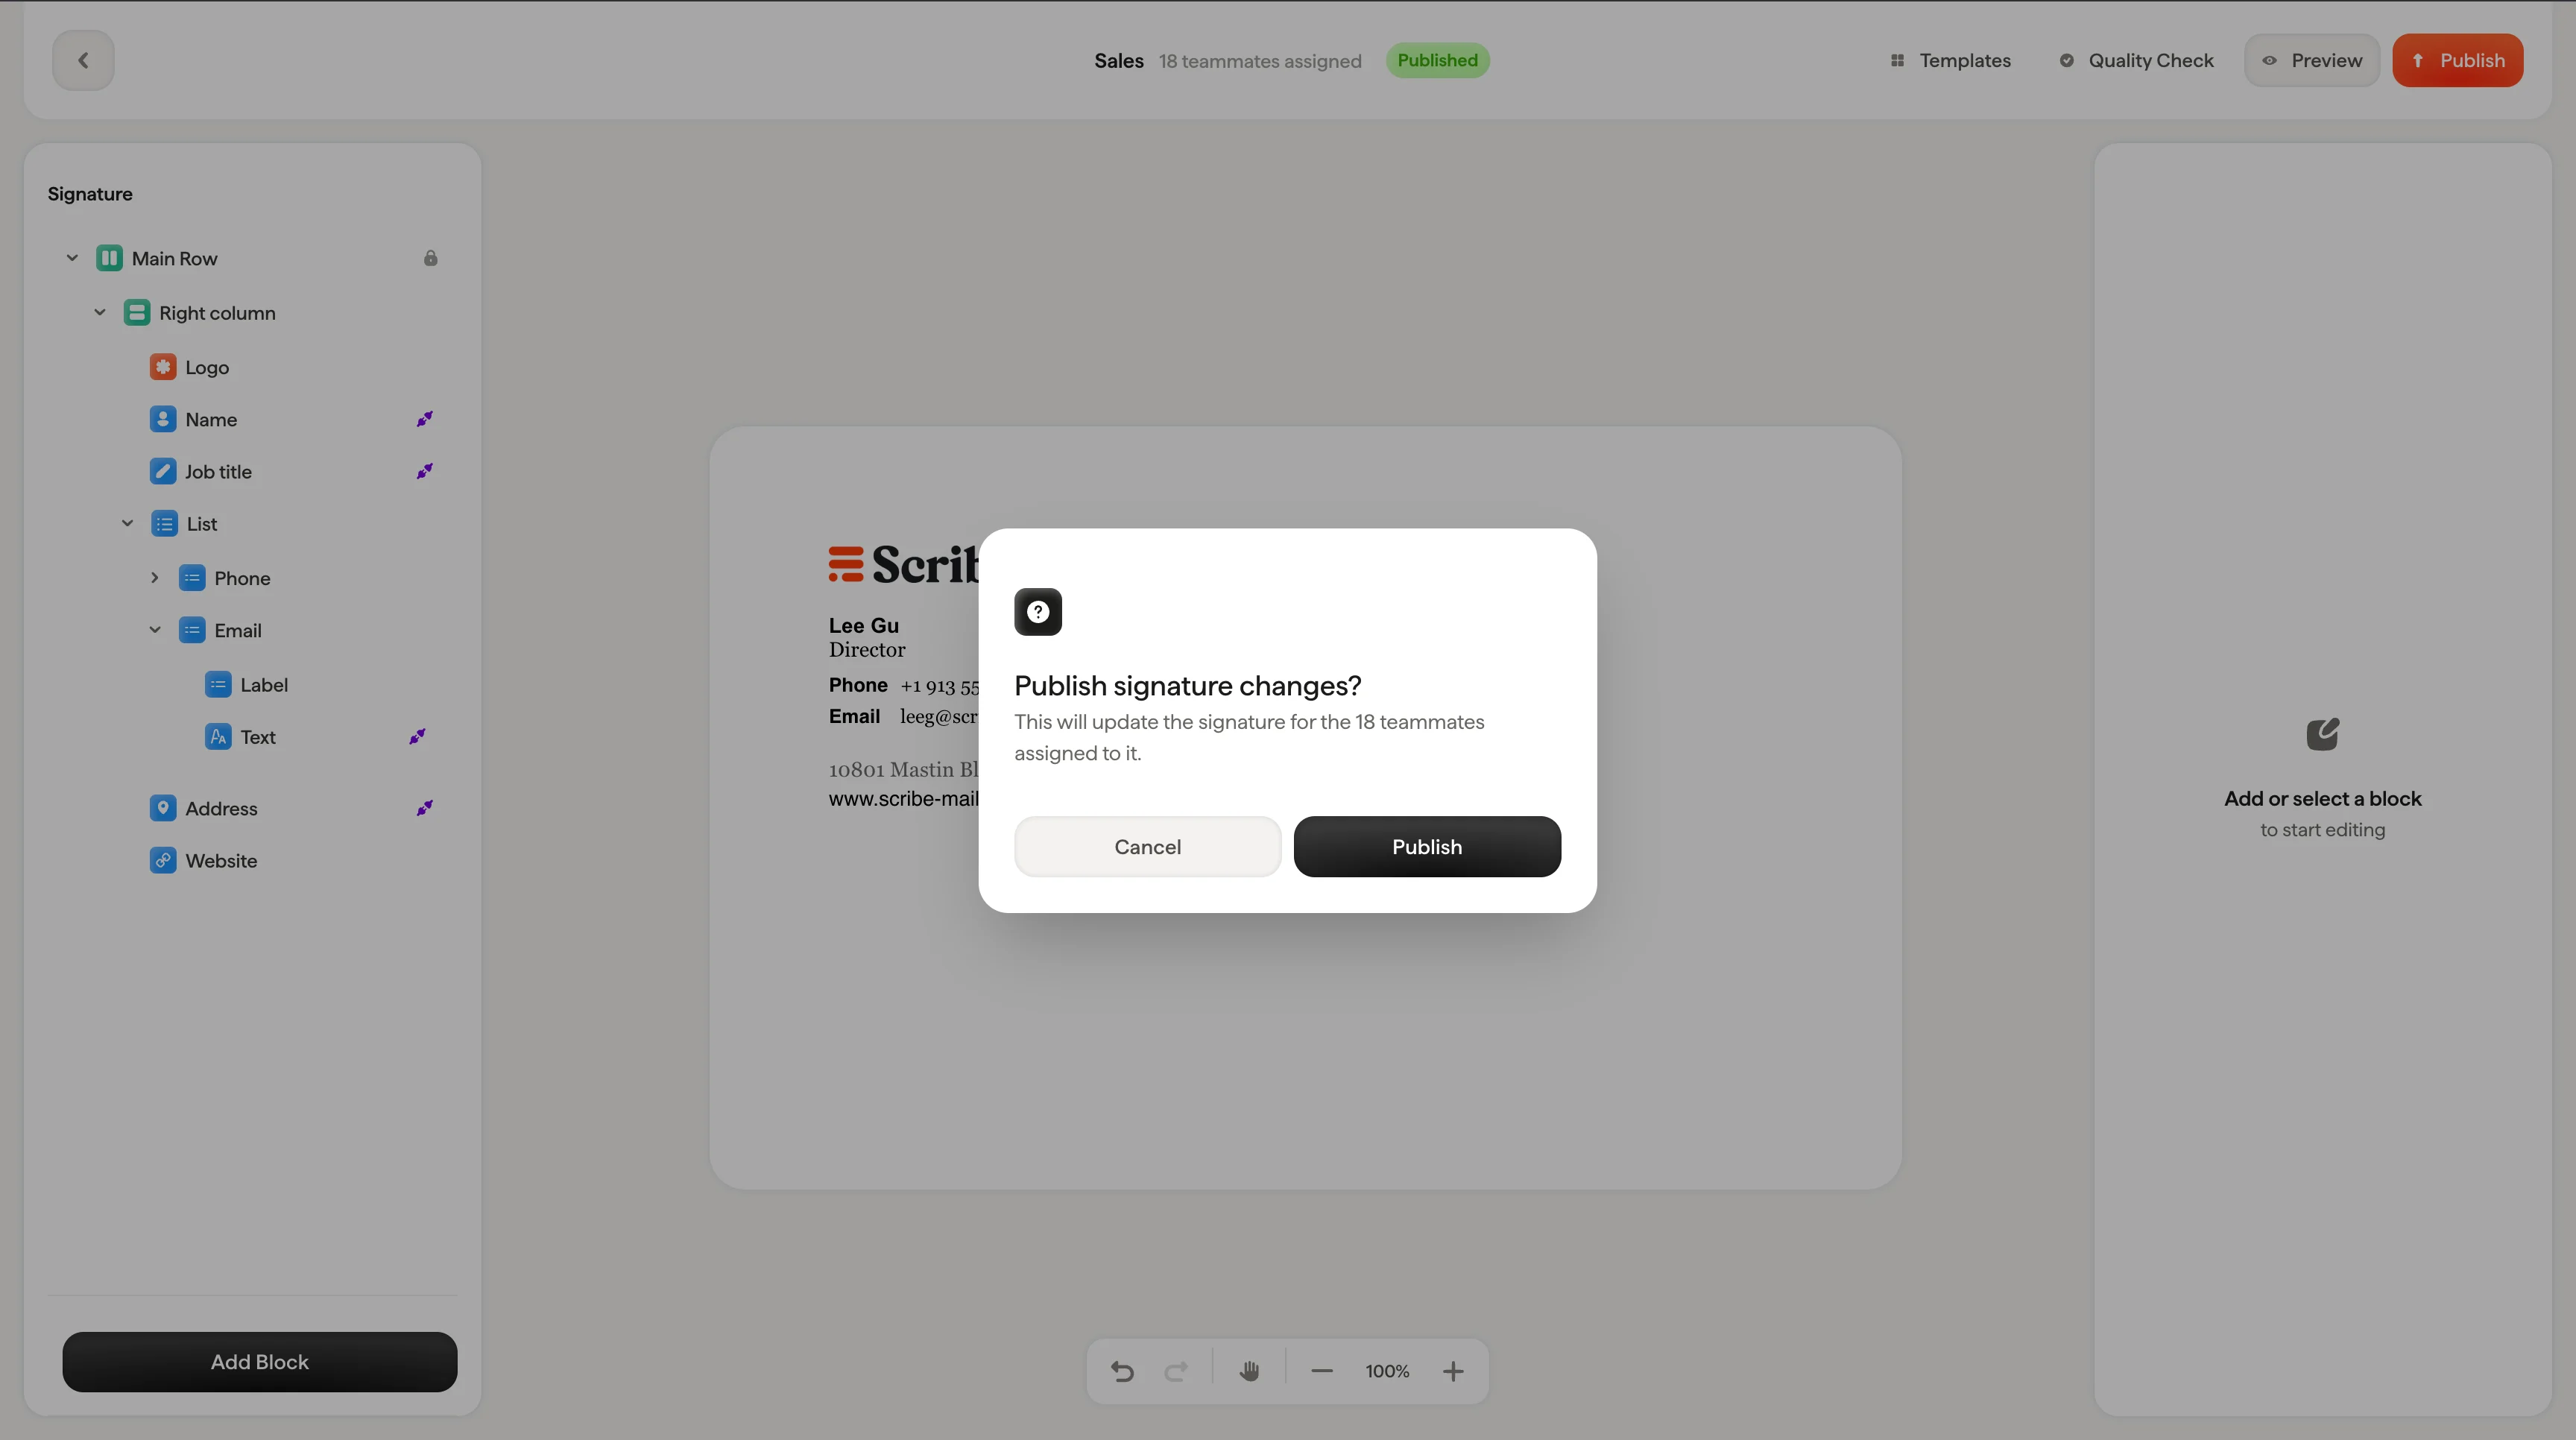
### Publish
When you're happy with your signature, click **Publish** to push the changes live. What happens when you click depends on your setup:
* **No integration connected**: You'll be prompted to connect an integration first. This redirects you to the [integration page](/en/integrations-overview) so you can set up Google Workspace, Microsoft 365, or another provider.
* **Integration connected but no teammates assigned**: You'll be prompted to assign teammates to this signature. This redirects you to the teammate tab of the signature.
* **Integration connected + teammates assigned**: A confirmation dialog appears: "Publish signature changes? This will update the signature for the teammates assigned to it." Click **Publish** to confirm or **Cancel** to go back.
Always send a test email before publishing. Previews are close, but a real email in your inbox is the best way to catch spacing or image issues that only show up in specific email clients.
### Publish
When you're happy with your signature, click **Publish** to push the changes live. What happens when you click depends on your setup:
* **No integration connected**: You'll be prompted to connect an integration first. This redirects you to the [integration page](/en/integrations-overview) so you can set up Google Workspace, Microsoft 365, or another provider.
* **Integration connected but no teammates assigned**: You'll be prompted to assign teammates to this signature. This redirects you to the teammate tab of the signature.
* **Integration connected + teammates assigned**: A confirmation dialog appears: "Publish signature changes? This will update the signature for the teammates assigned to it." Click **Publish** to confirm or **Cancel** to go back.
 Publishing updates the signature for all teammates assigned to it. Make sure you've previewed the signature with a few different teammates before publishing to catch any Smart Field issues.
## Related articles
* [Editor overview](/en/editor/editor-overview)
* [Assign teammates to a signature](/en/assign-teammates-to-a-signature)
* [Action bar](/en/editor/action-bar)
Publishing updates the signature for all teammates assigned to it. Make sure you've previewed the signature with a few different teammates before publishing to catch any Smart Field issues.
## Related articles
* [Editor overview](/en/editor/editor-overview)
* [Assign teammates to a signature](/en/assign-teammates-to-a-signature)
* [Action bar](/en/editor/action-bar)