> ## Documentation Index
> Fetch the complete documentation index at: https://help.scribe-mail.com/llms.txt
> Use this file to discover all available pages before exploring further.
# Microsoft 365: Server Side
> Set up server-side email signature deployment for Microsoft 365. Emails route through Scribe's secure servers to add signatures from any device or client.
Server-side installation automatically adds signatures to emails from any device or client.
**Centralized one-click installation.** No teammate action needed. Users don't see signatures when composing emails. Your emails are processed through Scribe's secure servers for signature injection.
**Supported platforms:** Web, Desktop, Apple Mail, iOS, Android
## Installation guide
This is an advanced user feature. IT support is required to set up this integration.
* Users don't see signatures when composing an email.
* Your emails are processed through Scribe's secure servers to install signatures. Scribe cannot read or edit your emails.
* You can combine [cloud-based integration](/en/integrations/signatures/microsoft-365-client-side) with server-side integration. If both are connected, Scribe defaults to cloud-based integration so users can see their signatures when composing emails.
### Prerequisites
* **Microsoft 365 admin access** (Exchange admin center)
* At least one signature created in Scribe
The setup involves four parts: creating an outbound connector, creating an inbound connector, creating a mail flow rule, and configuring DKIM.
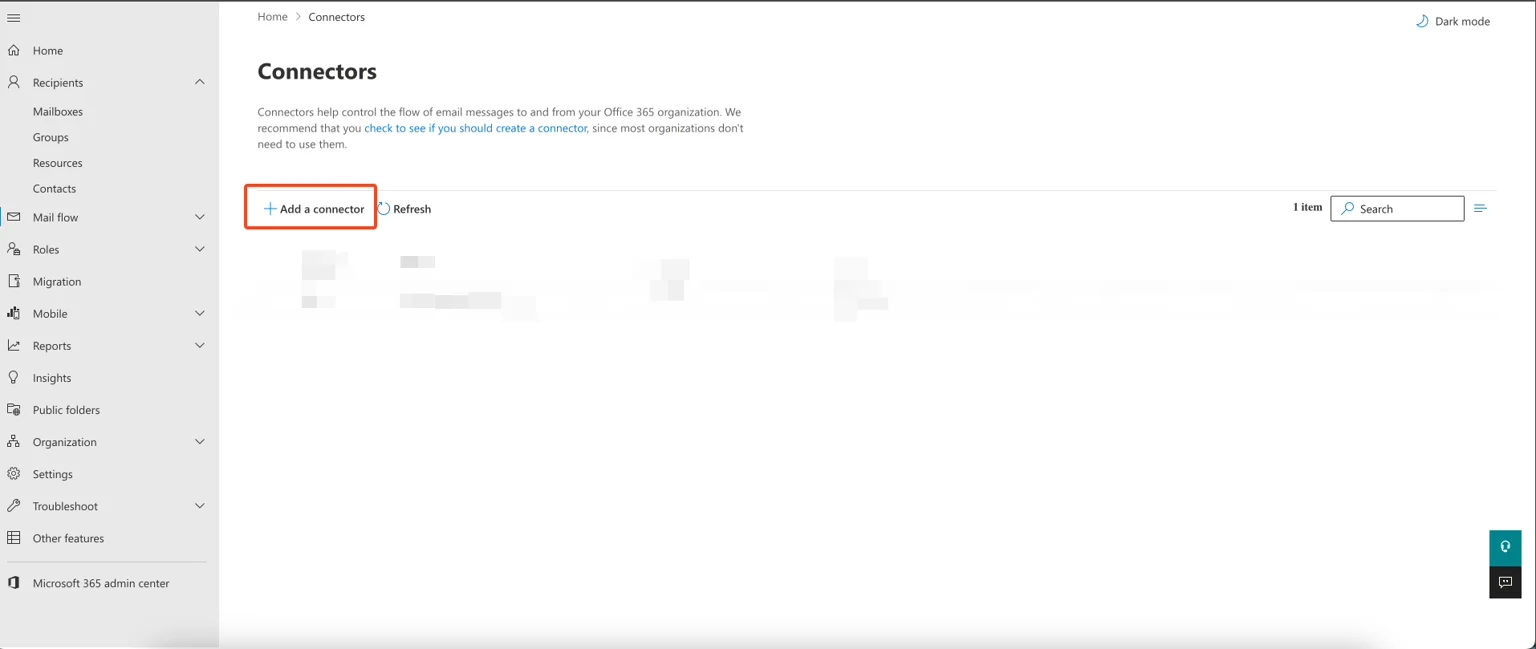
To route emails through Scribe's secure servers, create an outbound connector in your Exchange admin. In the Exchange admin interface, go to **Mail flow → Connectors** and click **"Add a connector."**
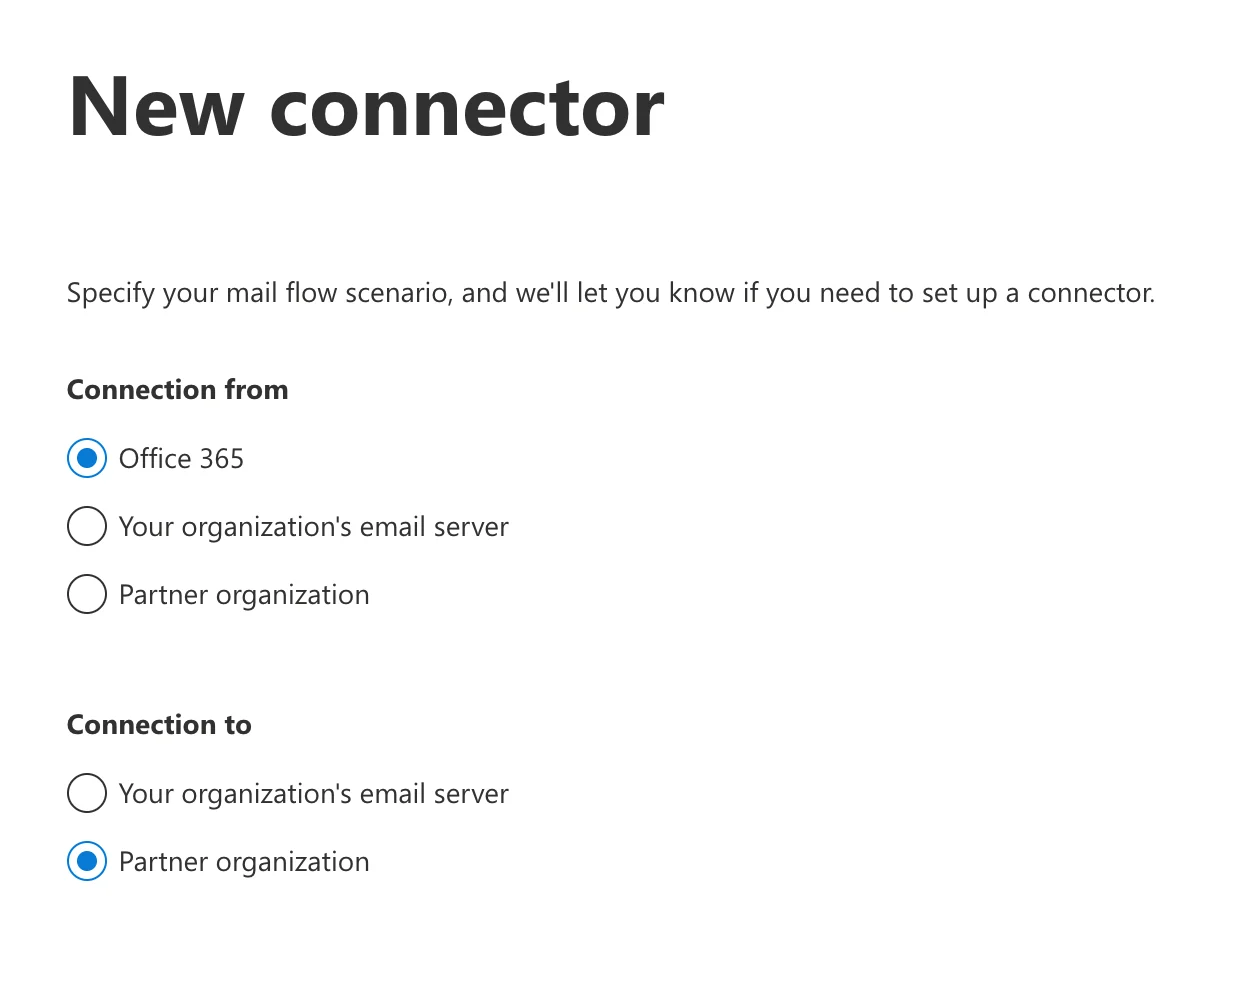
 Select **"Office 365"** for connection from and **"Partner organization"** for connection to.
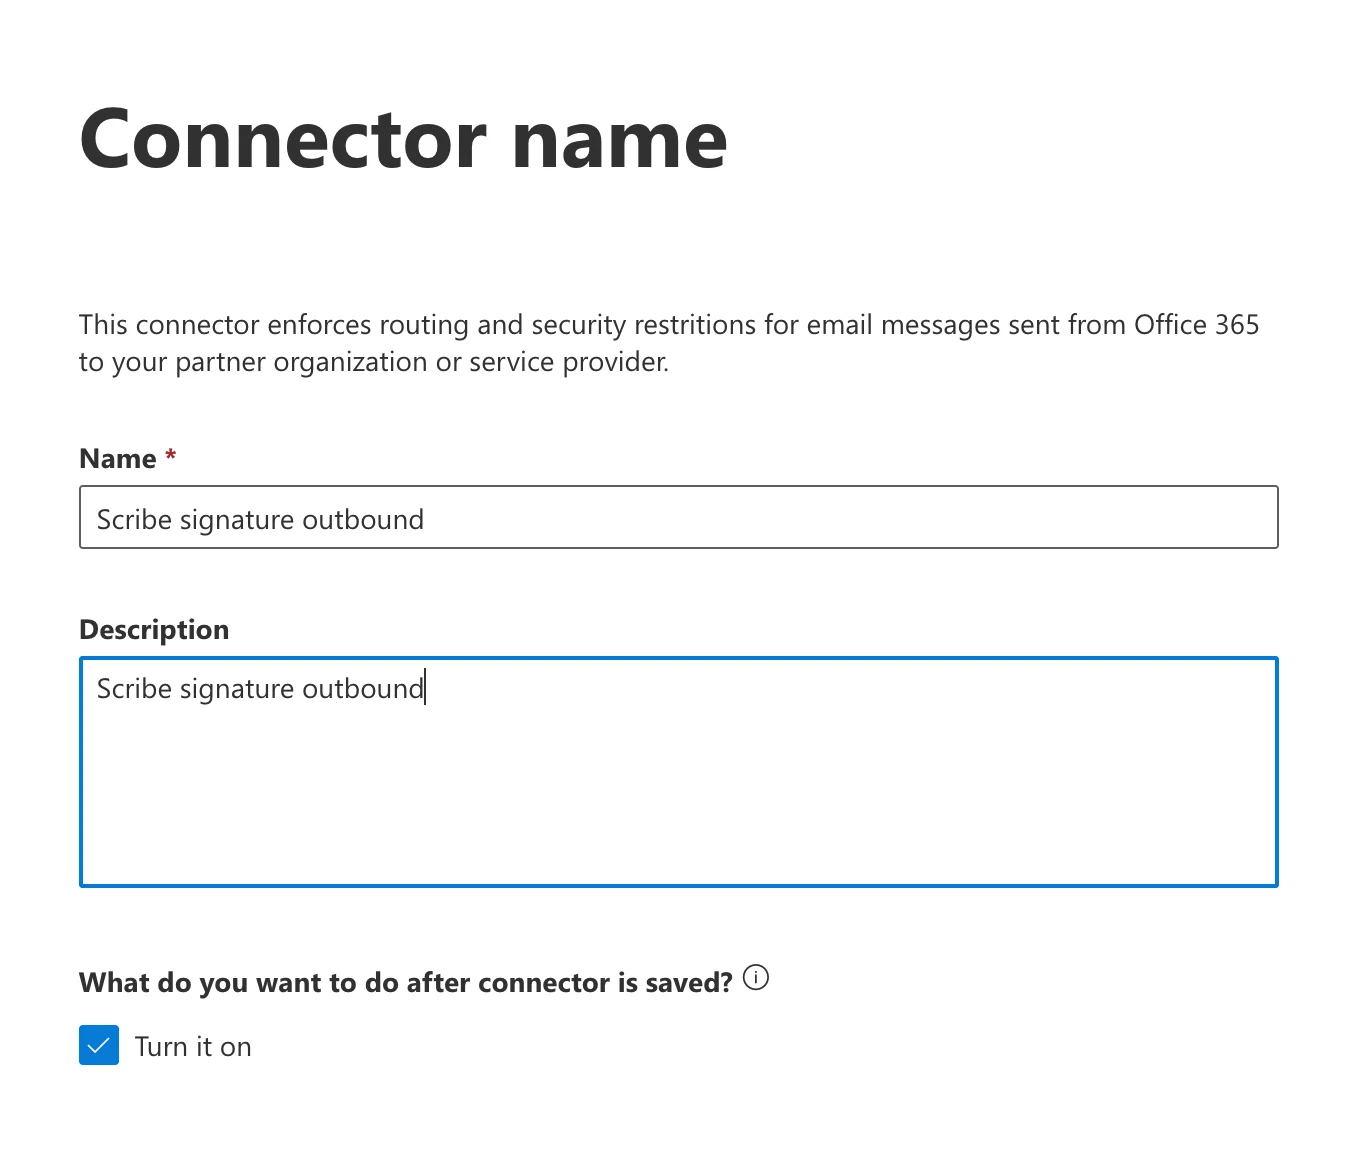
 Enter a connector name and description. Optionally, check **"Turn it on"** to enable immediately.
* **Name:** `Scribe signature outbound`
* **Description:** `Scribe signature outbound`
Enter a connector name and description. Optionally, check **"Turn it on"** to enable immediately.
* **Name:** `Scribe signature outbound`
* **Description:** `Scribe signature outbound`
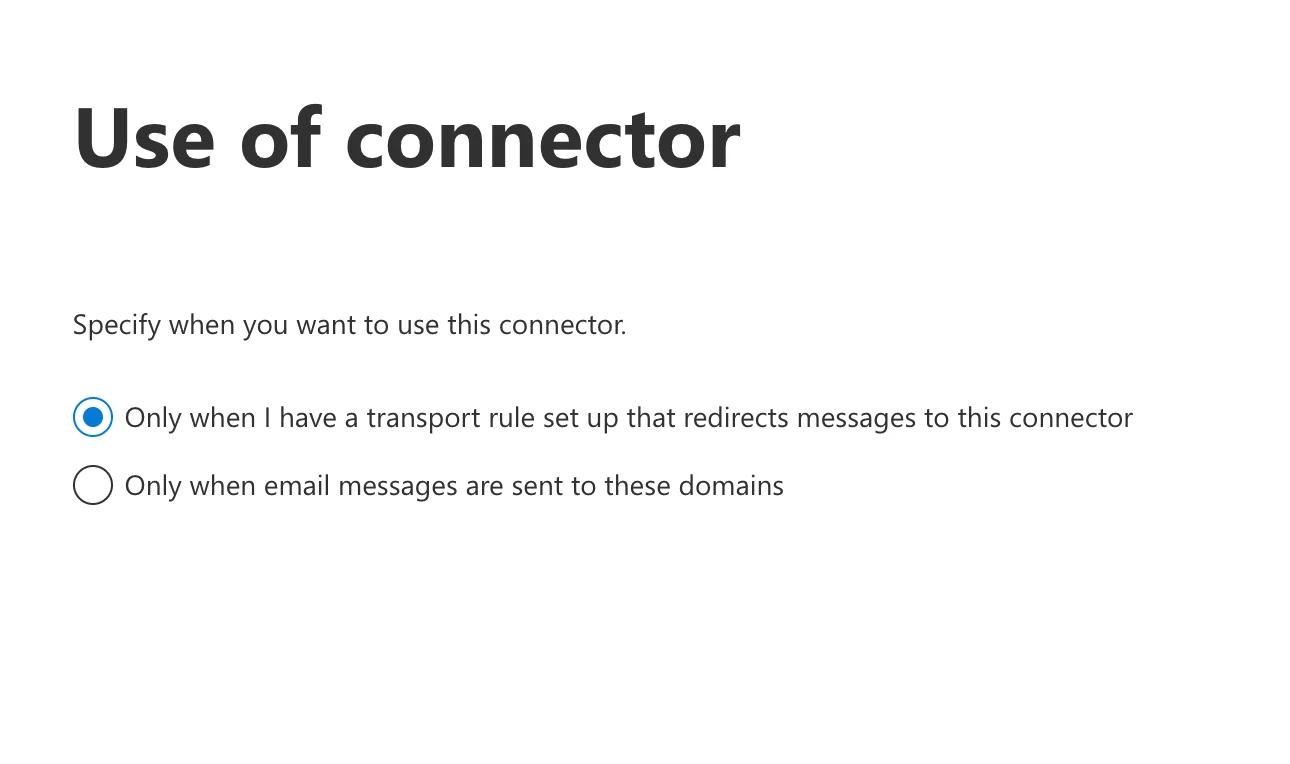
 Select **"Only when I have a transport rule set up that redirects messages to this connector."**
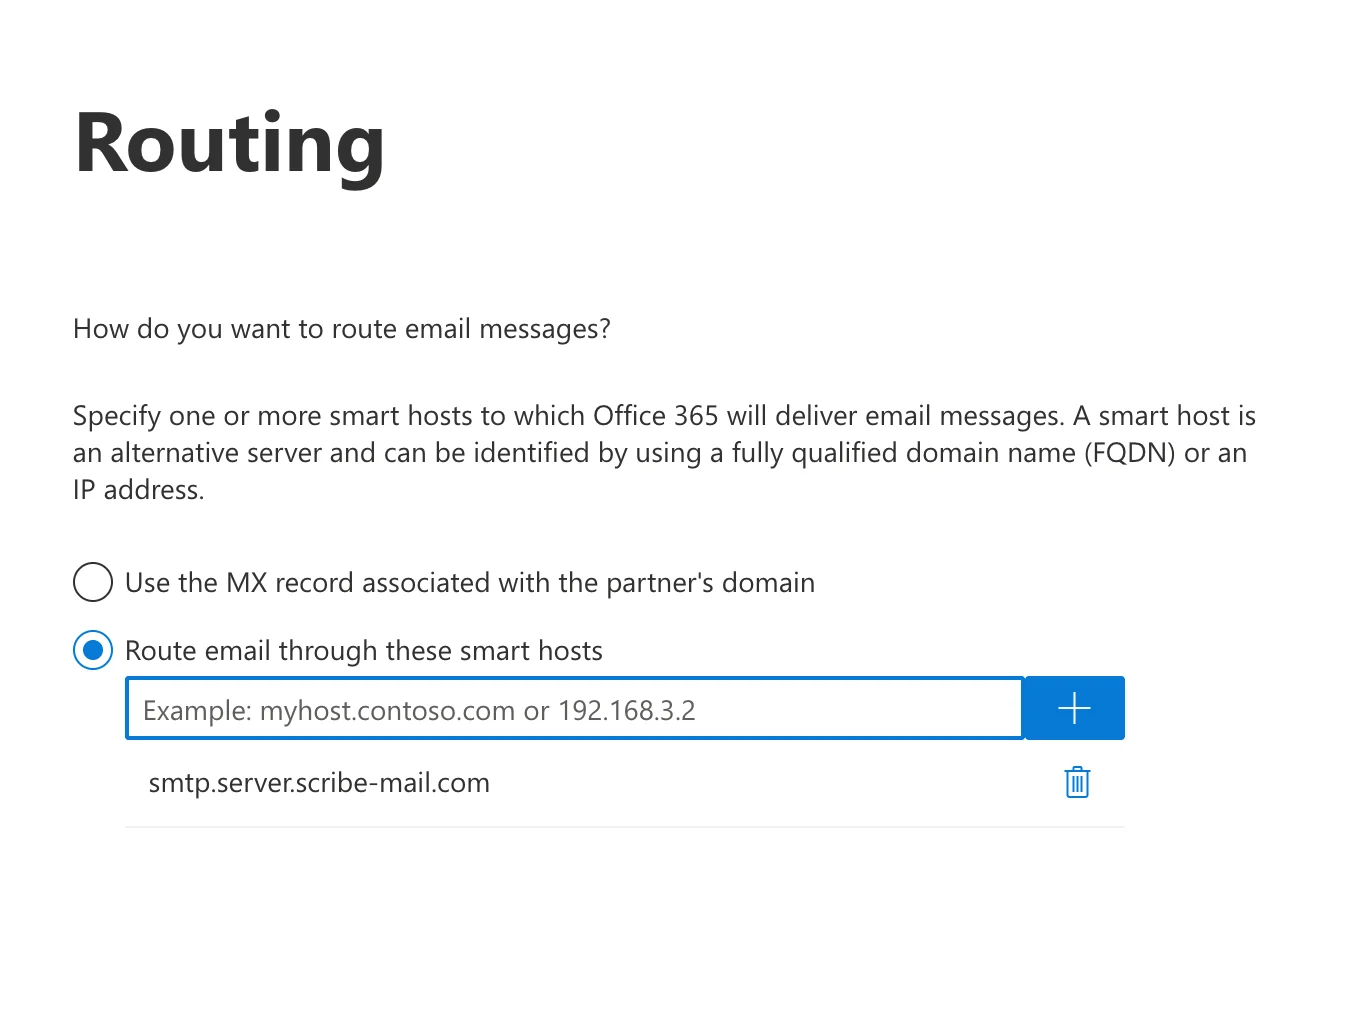
 Select **"Route email through these smart hosts"** and add the following host to the list:
```text theme={null}
smtp.server.scribe-mail.com
```
Select **"Route email through these smart hosts"** and add the following host to the list:
```text theme={null}
smtp.server.scribe-mail.com
```
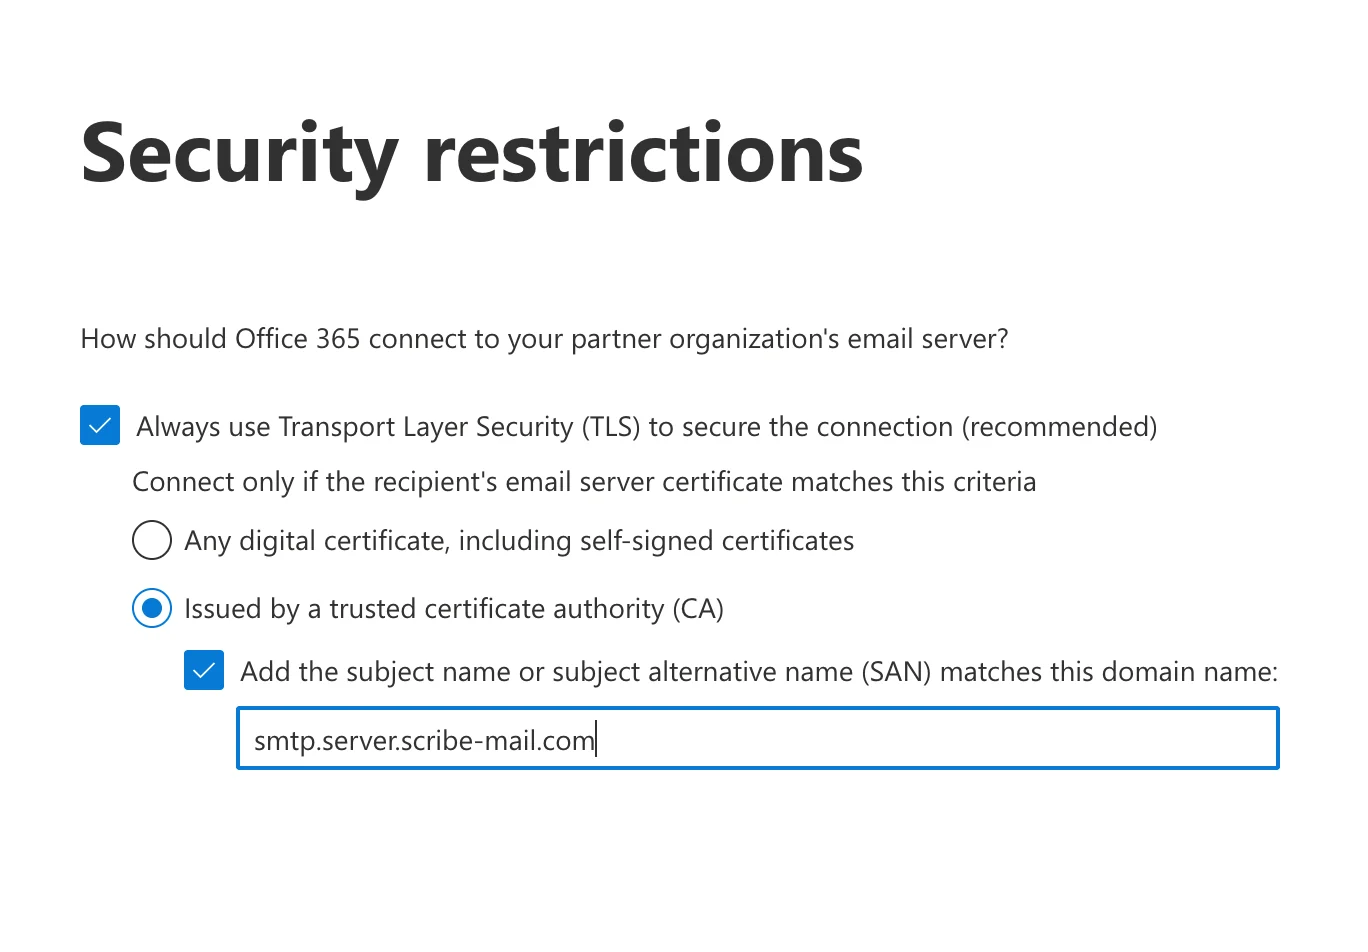
 Select **"Always use Transport Layer Security (TLS) to secure the connection (recommended)"**, then:
**a.** Select: **"Issued by a trusted certificate authority (CA)."**
**b.** Check: **"Add the subject name or subject alternative name (SAN) matches this domain name."**
**c.** Enter the following in the field:
```text theme={null}
smtp.server.scribe-mail.com
```
Select **"Always use Transport Layer Security (TLS) to secure the connection (recommended)"**, then:
**a.** Select: **"Issued by a trusted certificate authority (CA)."**
**b.** Check: **"Add the subject name or subject alternative name (SAN) matches this domain name."**
**c.** Enter the following in the field:
```text theme={null}
smtp.server.scribe-mail.com
```
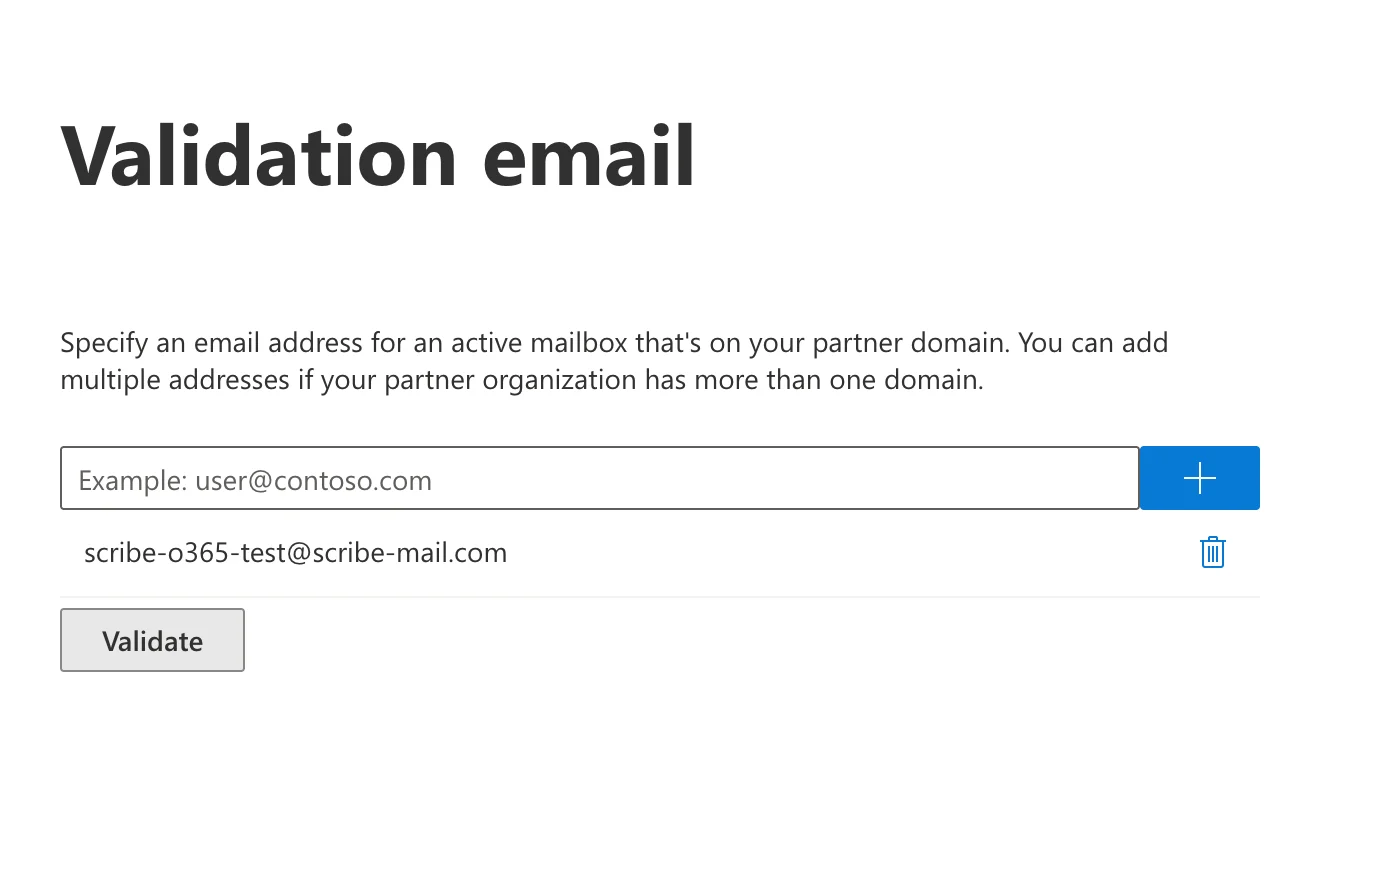
 Enter the following as the test email and start the validation:
```text theme={null}
scribe-o365-test@scribe-mail.com
```
Sometimes the validation fails, but you can safely continue without validating.
Enter the following as the test email and start the validation:
```text theme={null}
scribe-o365-test@scribe-mail.com
```
Sometimes the validation fails, but you can safely continue without validating.
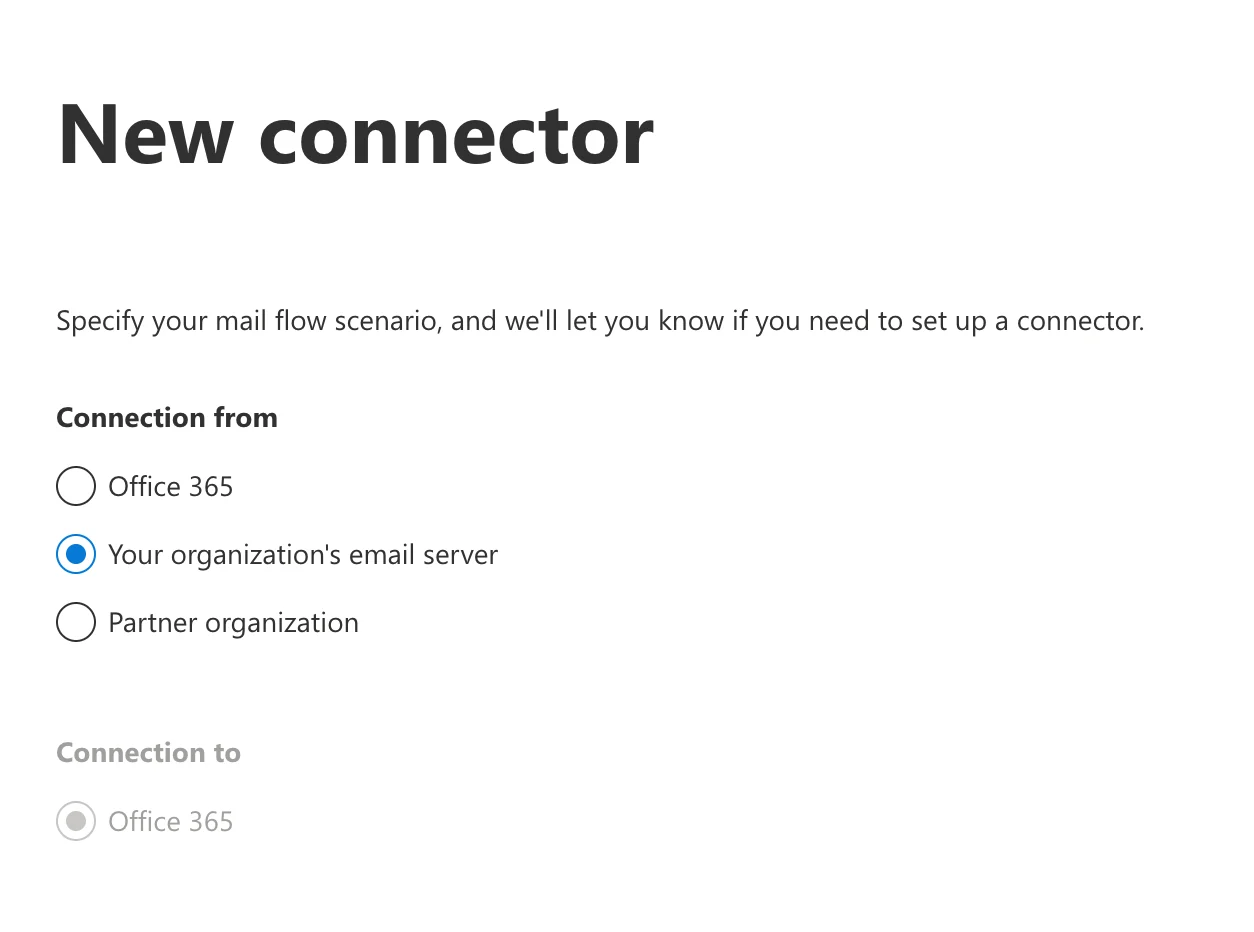
 In your Exchange admin interface, go to **Mail flow → Connectors** and click **"Add connector."** Select connection from **"Your organization's email server"** (connection to will be set to Office 365 automatically).
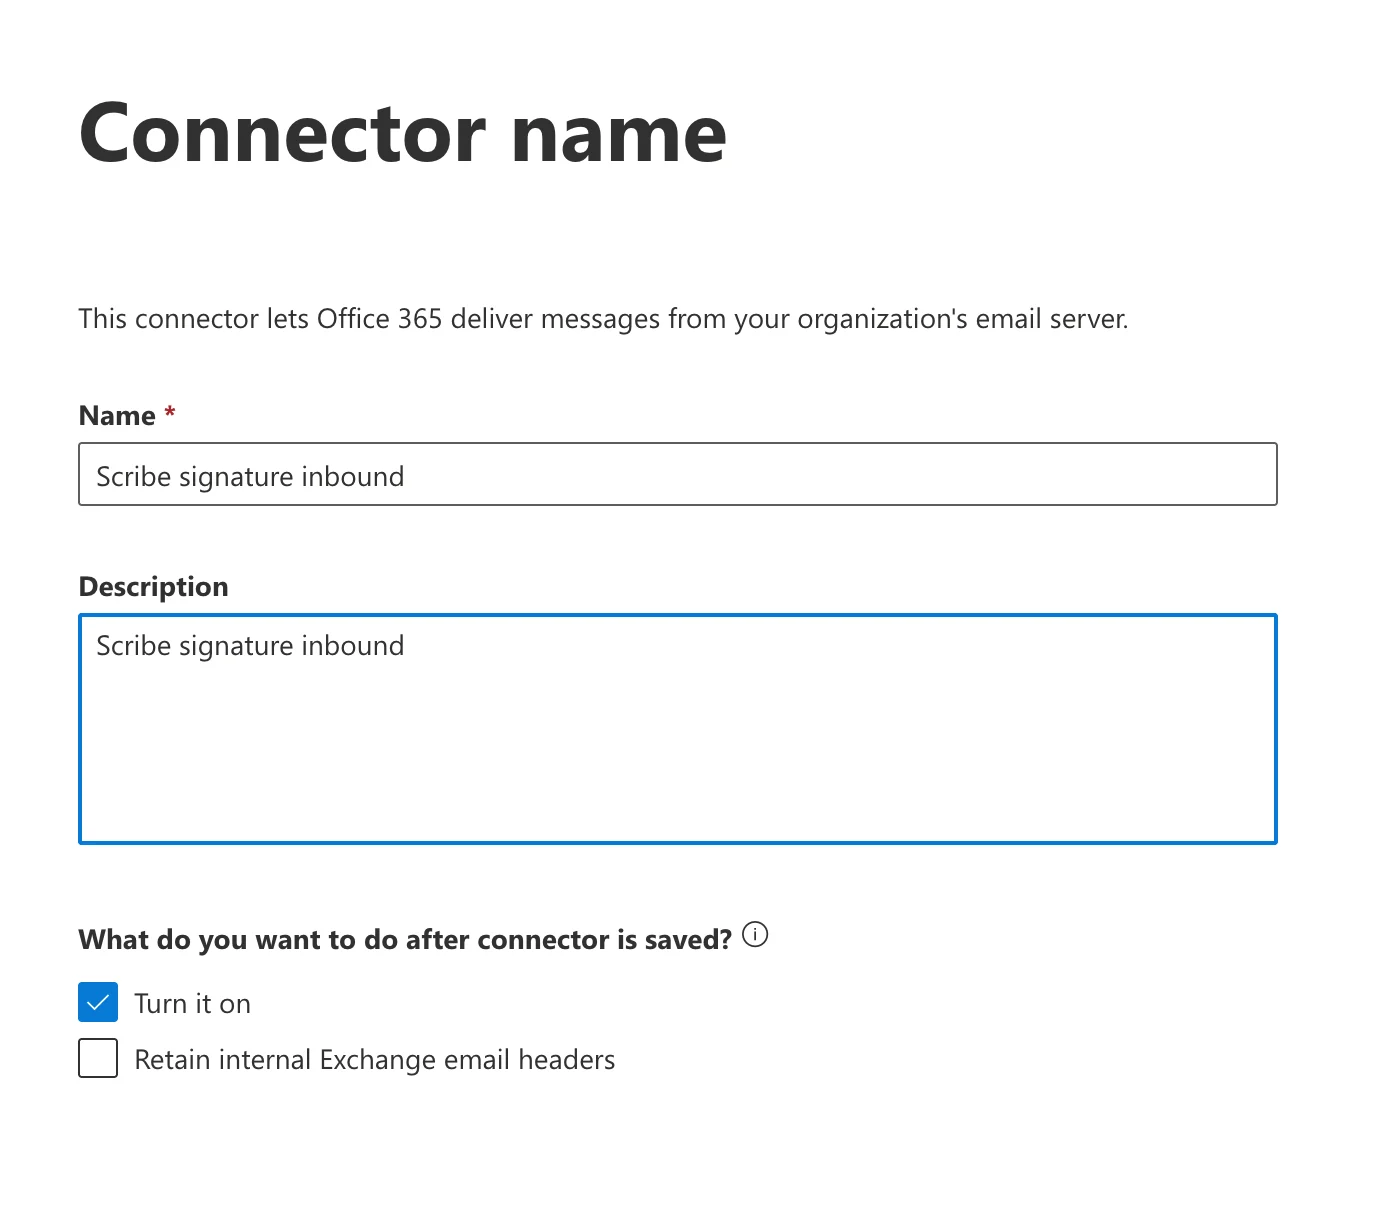
 Enter a name and description. You can also check **"Turn it on"** to enable the connector immediately.
* **Name:** `Scribe signature inbound`
* **Description:** `Scribe signature inbound`
Enter a name and description. You can also check **"Turn it on"** to enable the connector immediately.
* **Name:** `Scribe signature inbound`
* **Description:** `Scribe signature inbound`
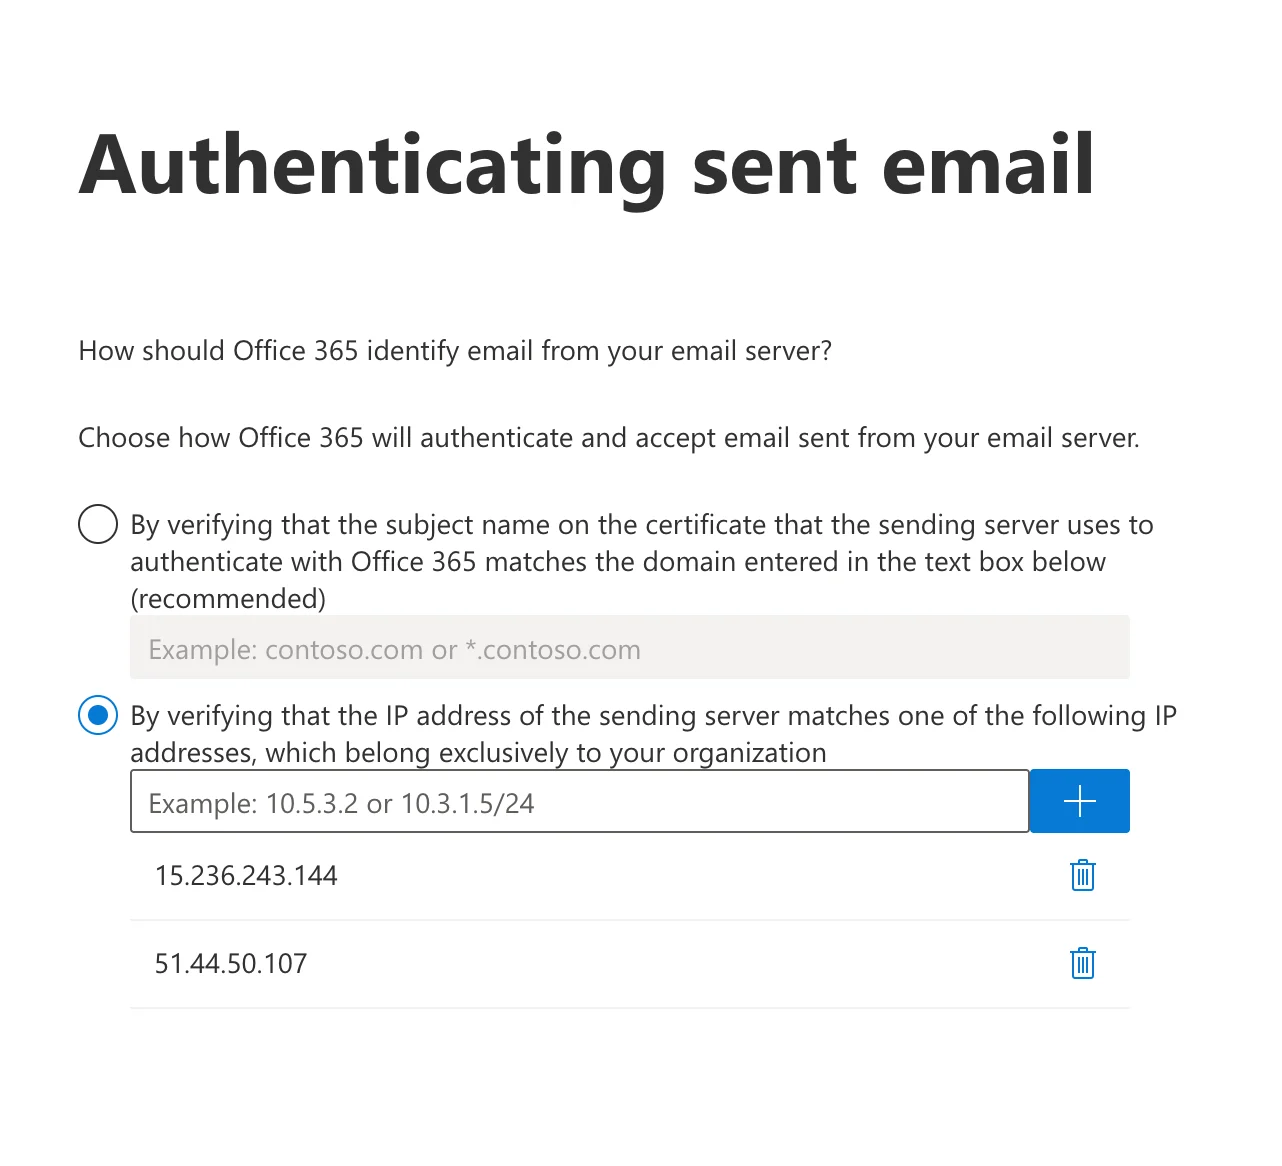
 Select **"By verifying that the IP address of the sending server matches one of the following IP addresses, which belong exclusively to your organization."**
Add the two following IPs to the list:
```text theme={null}
15.236.243.144
```
```text theme={null}
51.44.50.107
```
Select **"By verifying that the IP address of the sending server matches one of the following IP addresses, which belong exclusively to your organization."**
Add the two following IPs to the list:
```text theme={null}
15.236.243.144
```
```text theme={null}
51.44.50.107
```
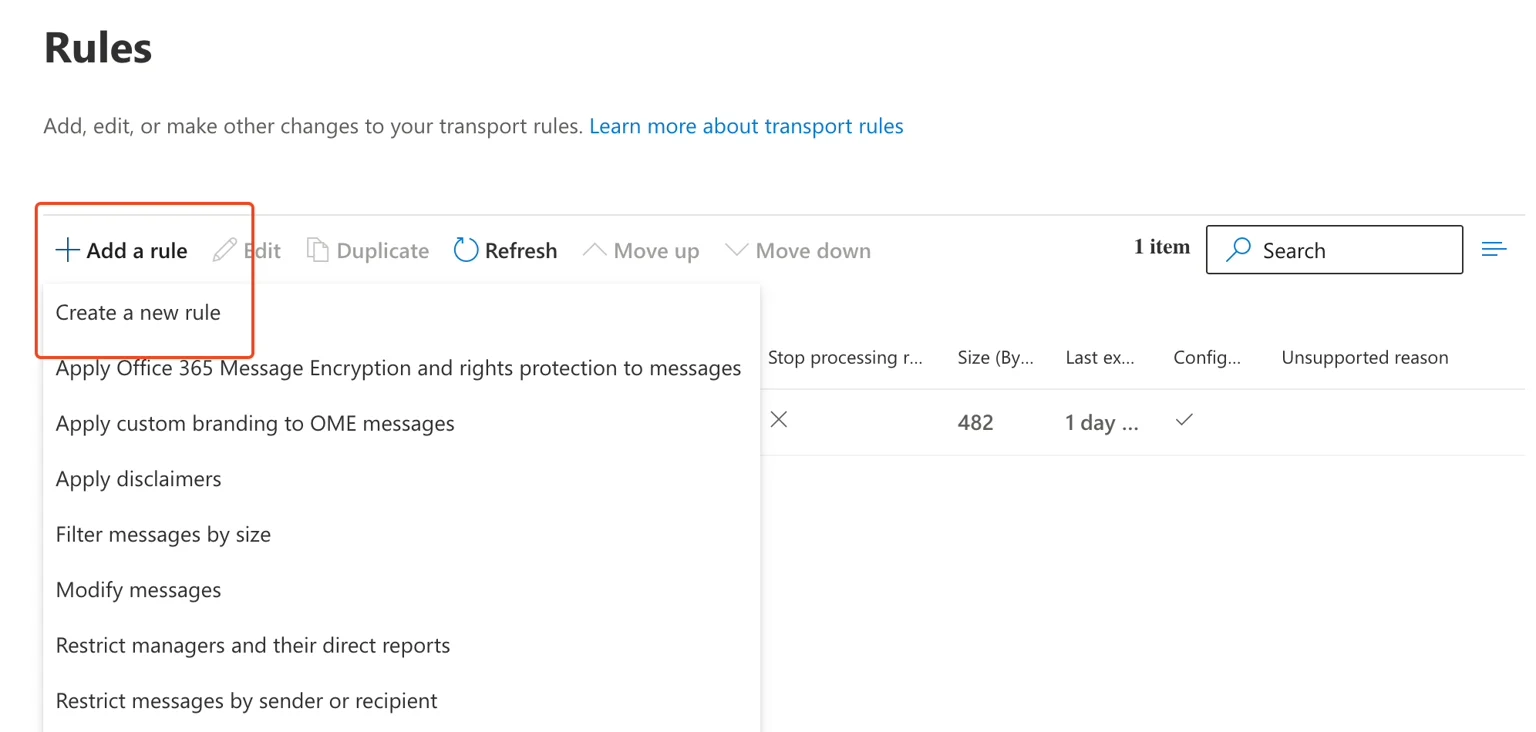
 In your Exchange admin interface, go to **Mail flow → Rules**.
**a.** Click **"Add a rule"**
**b.** Click **"Create a new rule"**
In your Exchange admin interface, go to **Mail flow → Rules**.
**a.** Click **"Add a rule"**
**b.** Click **"Create a new rule"**
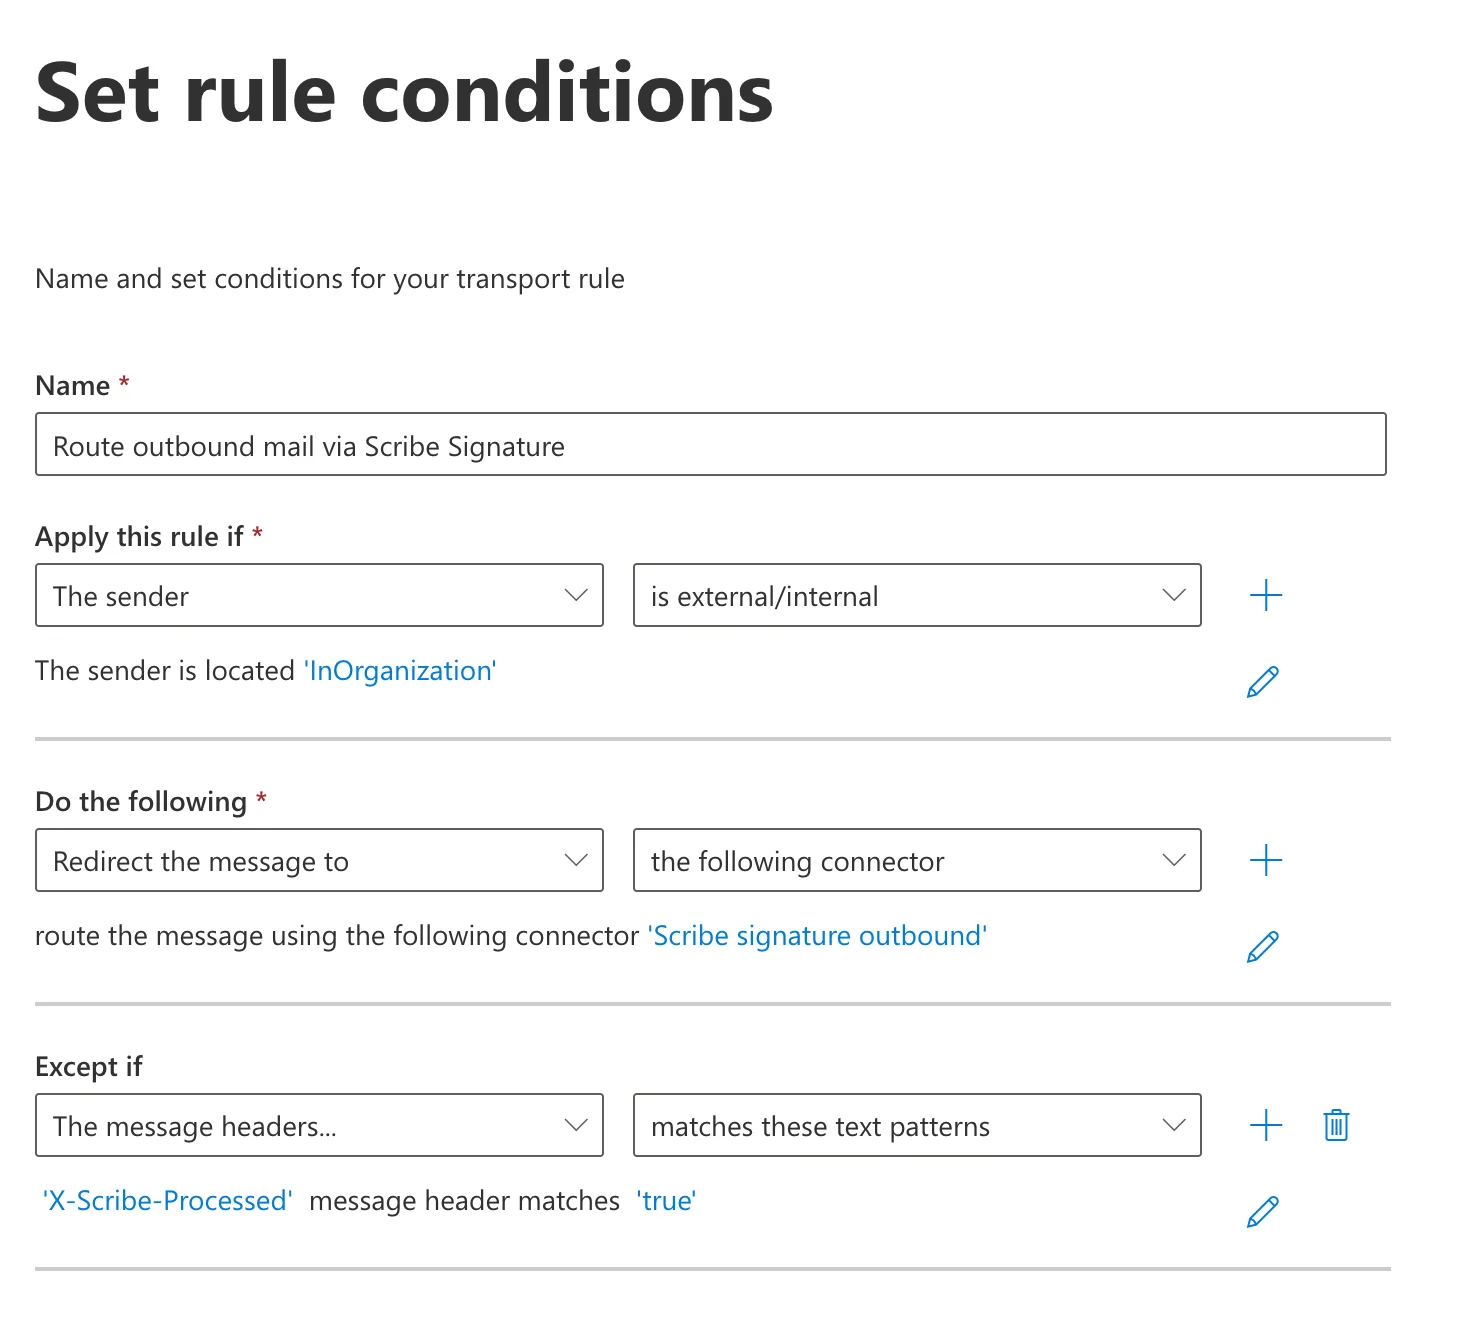
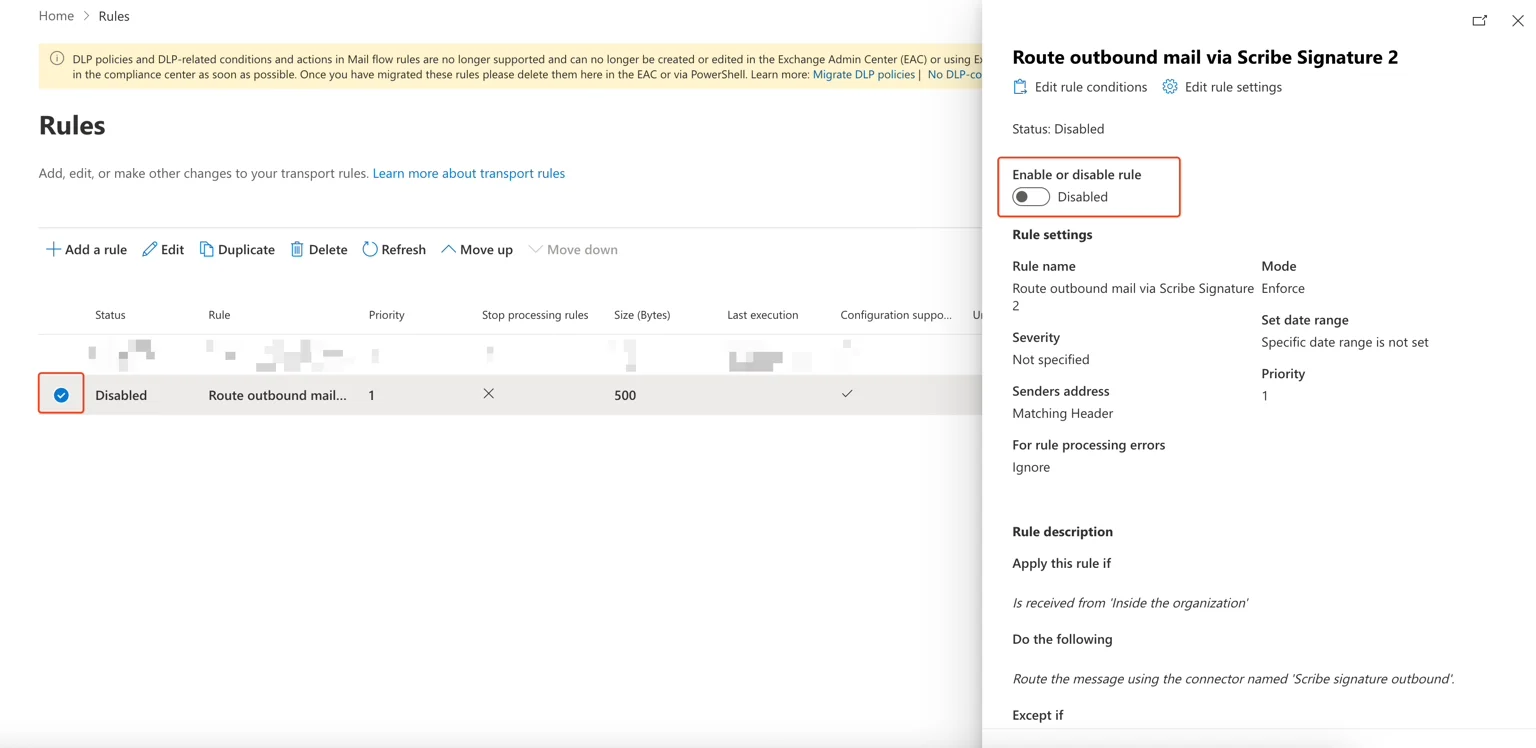
 Fill in the rule form as follows:
* **Name:** `Route outbound mail via Scribe Signature`
* **Apply this rule if:** The sender → is external/internal → The sender is located "InOrganization"
* **Do the following:** Redirect the message to → the following connector → select **"Scribe signature outbound"**
* **Except if:** The message headers → match these text patterns → `X-Scribe-Processed` message header matches `true`
The exception prevents Scribe from processing your emails multiple times.
Fill in the rule form as follows:
* **Name:** `Route outbound mail via Scribe Signature`
* **Apply this rule if:** The sender → is external/internal → The sender is located "InOrganization"
* **Do the following:** Redirect the message to → the following connector → select **"Scribe signature outbound"**
* **Except if:** The message headers → match these text patterns → `X-Scribe-Processed` message header matches `true`
The exception prevents Scribe from processing your emails multiple times.
 On the next step, you can leave the rule settings as is. Review your rule and save it. From the rules list, select your rule and enable it.
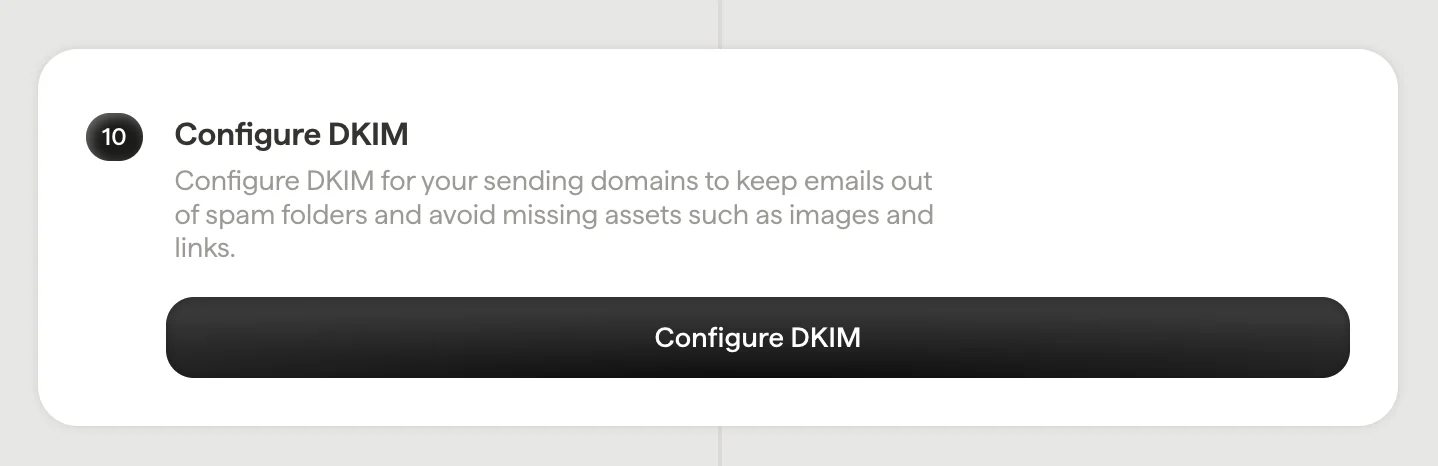
 Configure DKIM for your [sending domains](/en/configure-your-sending-domain) to keep emails out of spam folders and avoid missing assets such as images and links.
Click **Configure DKIM** in Scribe to start the configuration.
Configure DKIM for your [sending domains](/en/configure-your-sending-domain) to keep emails out of spam folders and avoid missing assets such as images and links.
Click **Configure DKIM** in Scribe to start the configuration.
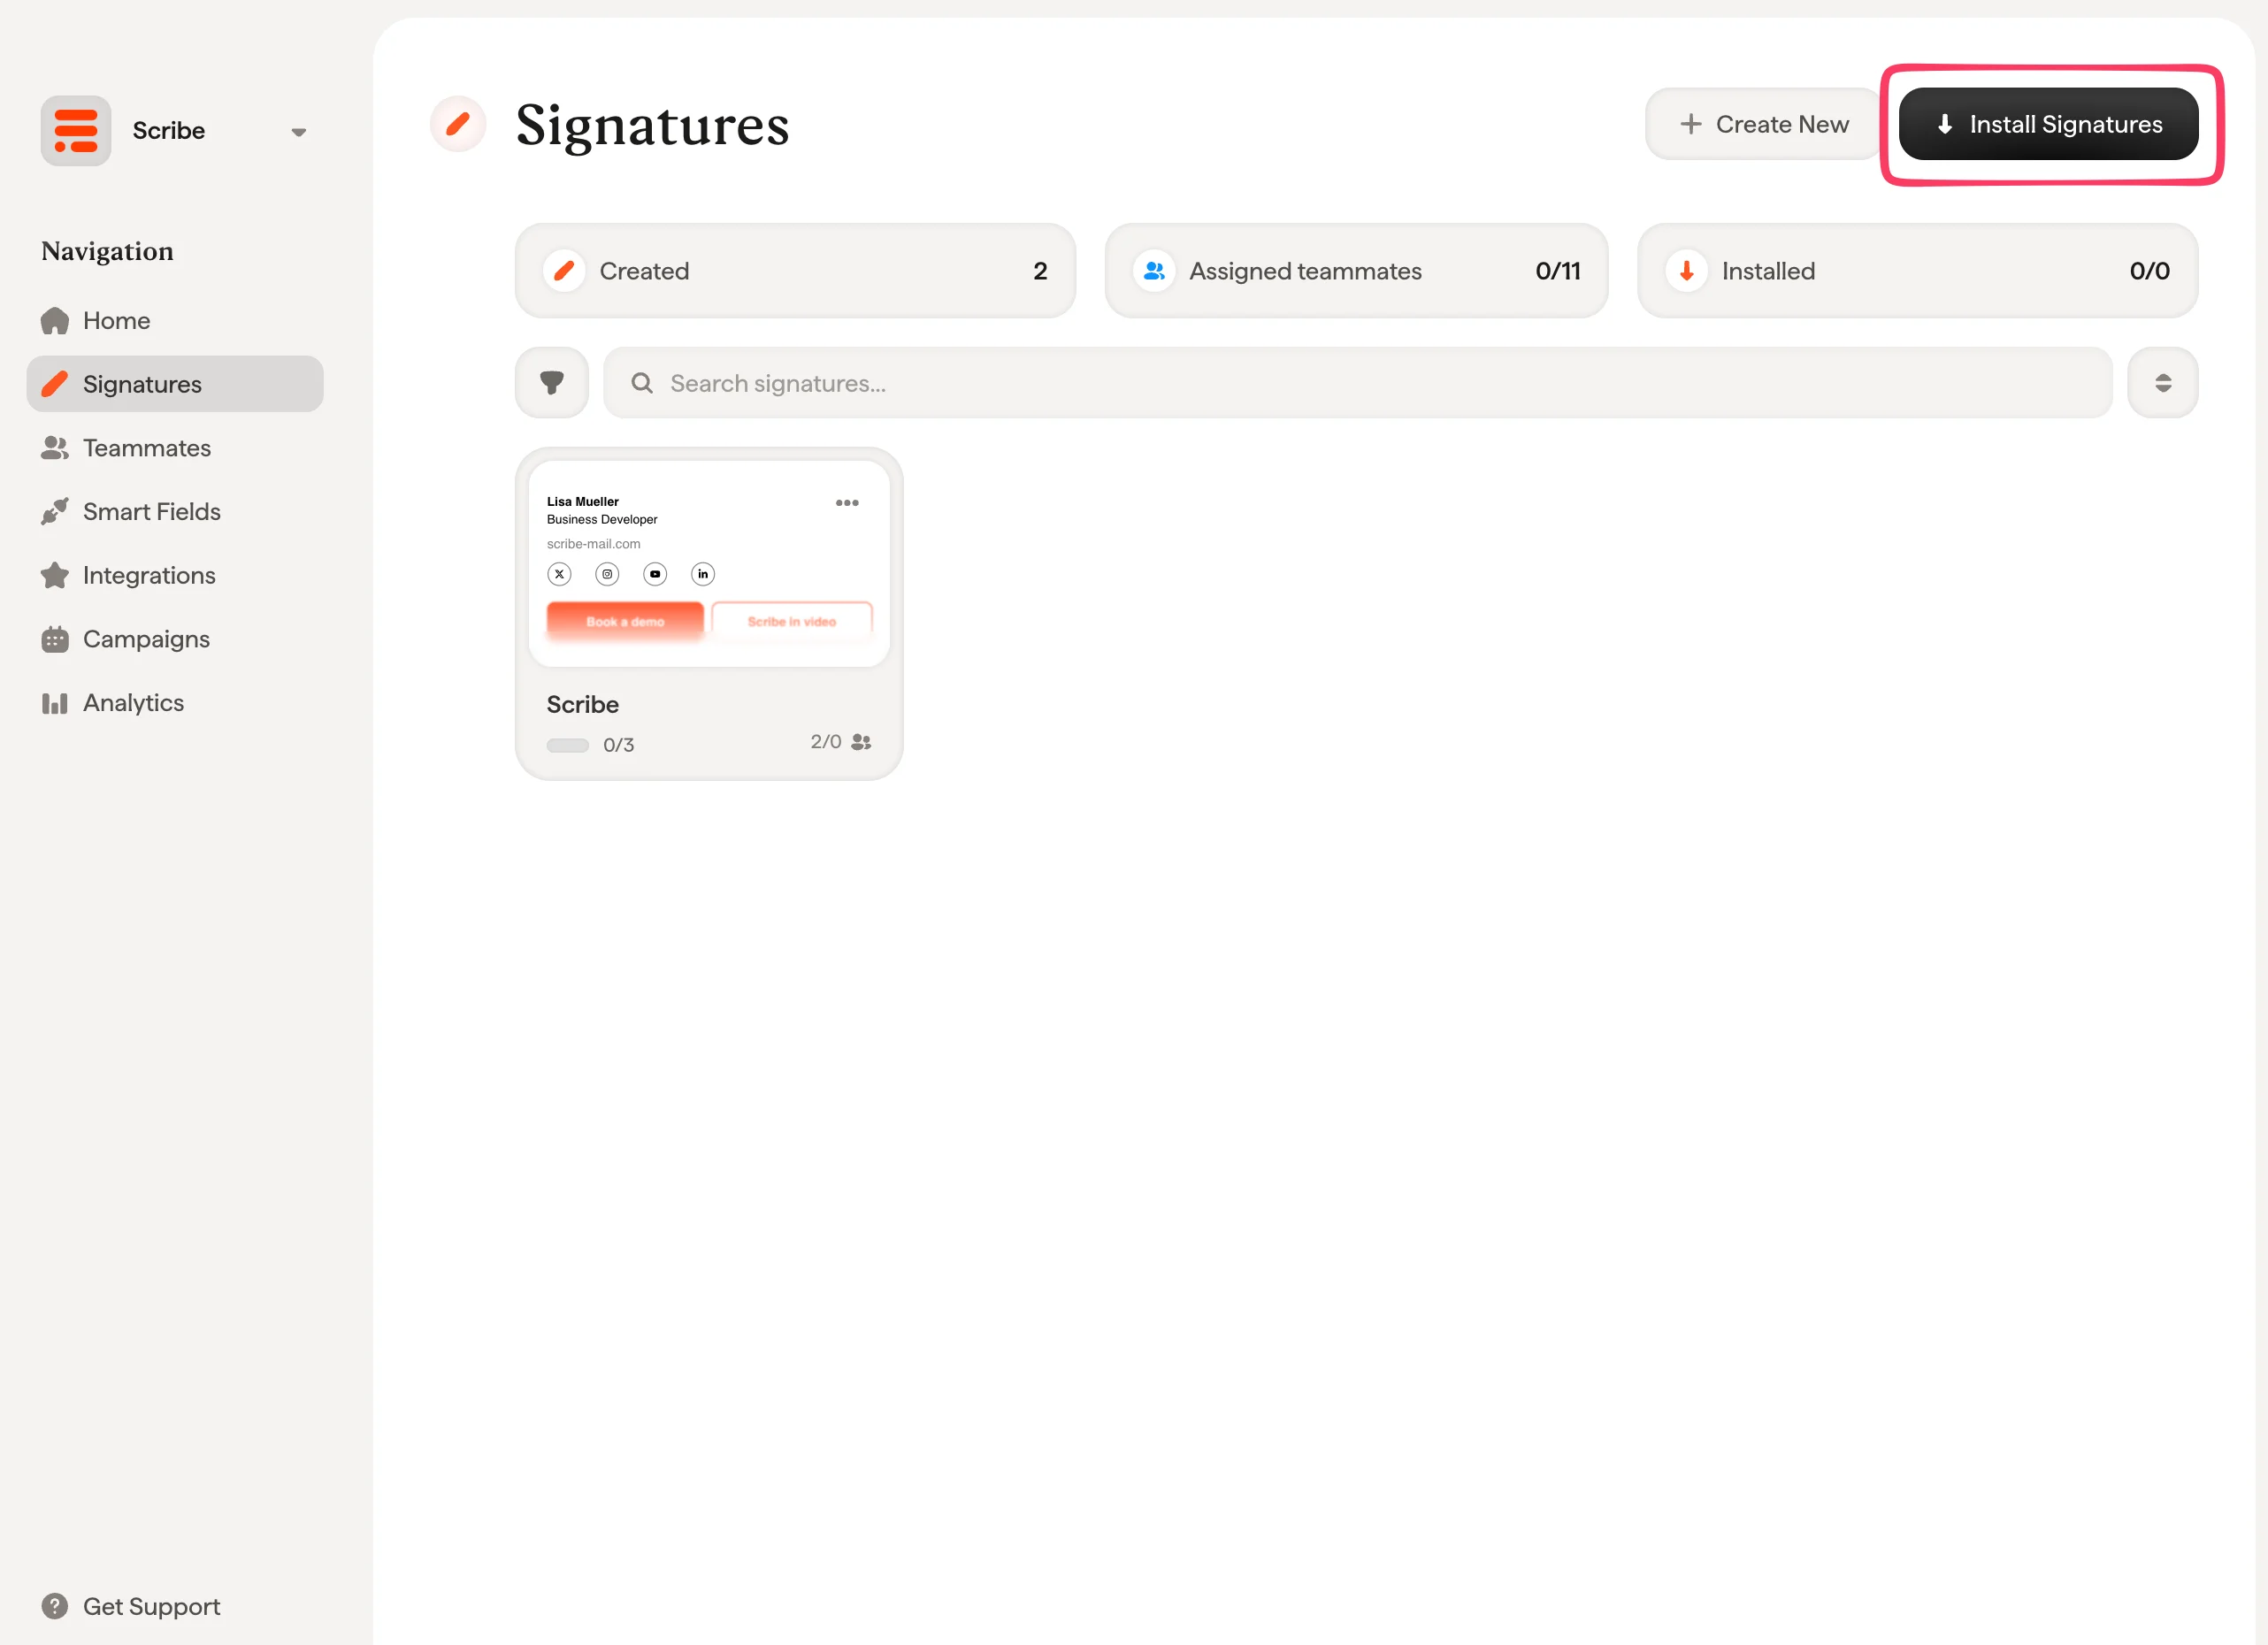
 From your signatures list, [install all signatures at once for your teammates](/en/install-signatures) or install them one by one for a progressive rollout.
 ## Related articles
* [Integrations overview](/en/integrations-overview): all the ways to deploy Scribe signatures, cloud or server side.
* [Google Workspace (server side)](/en/integrations/signatures/google-workspace-server-side): route mail through Scribe for all-device coverage.
* [Signature variants](/en/signature-variants): on-reply and internal variants for Outlook and server side.
## Related articles
* [Integrations overview](/en/integrations-overview): all the ways to deploy Scribe signatures, cloud or server side.
* [Google Workspace (server side)](/en/integrations/signatures/google-workspace-server-side): route mail through Scribe for all-device coverage.
* [Signature variants](/en/signature-variants): on-reply and internal variants for Outlook and server side.