> ## Documentation Index
> Fetch the complete documentation index at: https://help.scribe-mail.com/llms.txt
> Use this file to discover all available pages before exploring further.

# Okta

> Keep email signatures accurate and up to date by syncing user profile details from Okta, your identity provider, like name, job title, and department.

Follow these steps to [auto-fill your teammate's signatures](/en/smart-fields) using Okta as a data source.

<Info>
  **No action needed from your teammates.**
</Info>

<Info>
  **Changes in your Okta auto-sync to Scribe.**
</Info>

<Info>
  **SOC 2 Type II Certified.** [Your data is safe](/en/security/data-collection/okta).
</Info>

## Installation guide

### Prerequisites

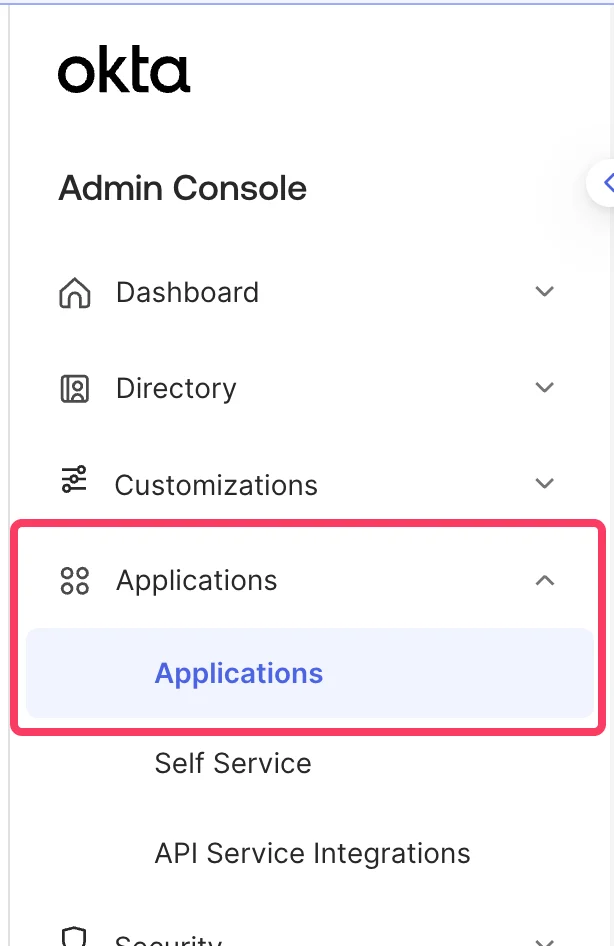
* Admin access to the Okta admin console
* A Scribe account with admin access

<Steps>
  <Step title="Navigate to your Okta admin console and select Menu > Applications > Applications">
    <Frame>
      <img src="https://mintcdn.com/scribe/pvZJQ56rCCLLmCwt/integrations/smart-fields/images/okta-step-1.png?fit=max&auto=format&n=pvZJQ56rCCLLmCwt&q=85&s=ff2517c303603b7a8ee43c864a190021" alt="Okta admin console menu with Applications highlighted" className="mx-auto" style={{ width:"44%" }} width="614" height="946" data-path="integrations/smart-fields/images/okta-step-1.png" />
    </Frame>
  </Step>

  <Step title="Click on Create App Integration">
    <Frame>
      <img src="https://mintcdn.com/scribe/pvZJQ56rCCLLmCwt/integrations/smart-fields/images/okta-step-2.png?fit=max&auto=format&n=pvZJQ56rCCLLmCwt&q=85&s=e104123b9975c8d53c9cf25bac8d1920" alt="Okta Applications page with Create App Integration button highlighted" className="mx-auto" style={{ width:"76%" }} width="1396" height="470" data-path="integrations/smart-fields/images/okta-step-2.png" />
    </Frame>
  </Step>

  <Step title="Choose 'OIDC - OpenID Connect' and 'Single-Page Application', then click 'Next'">
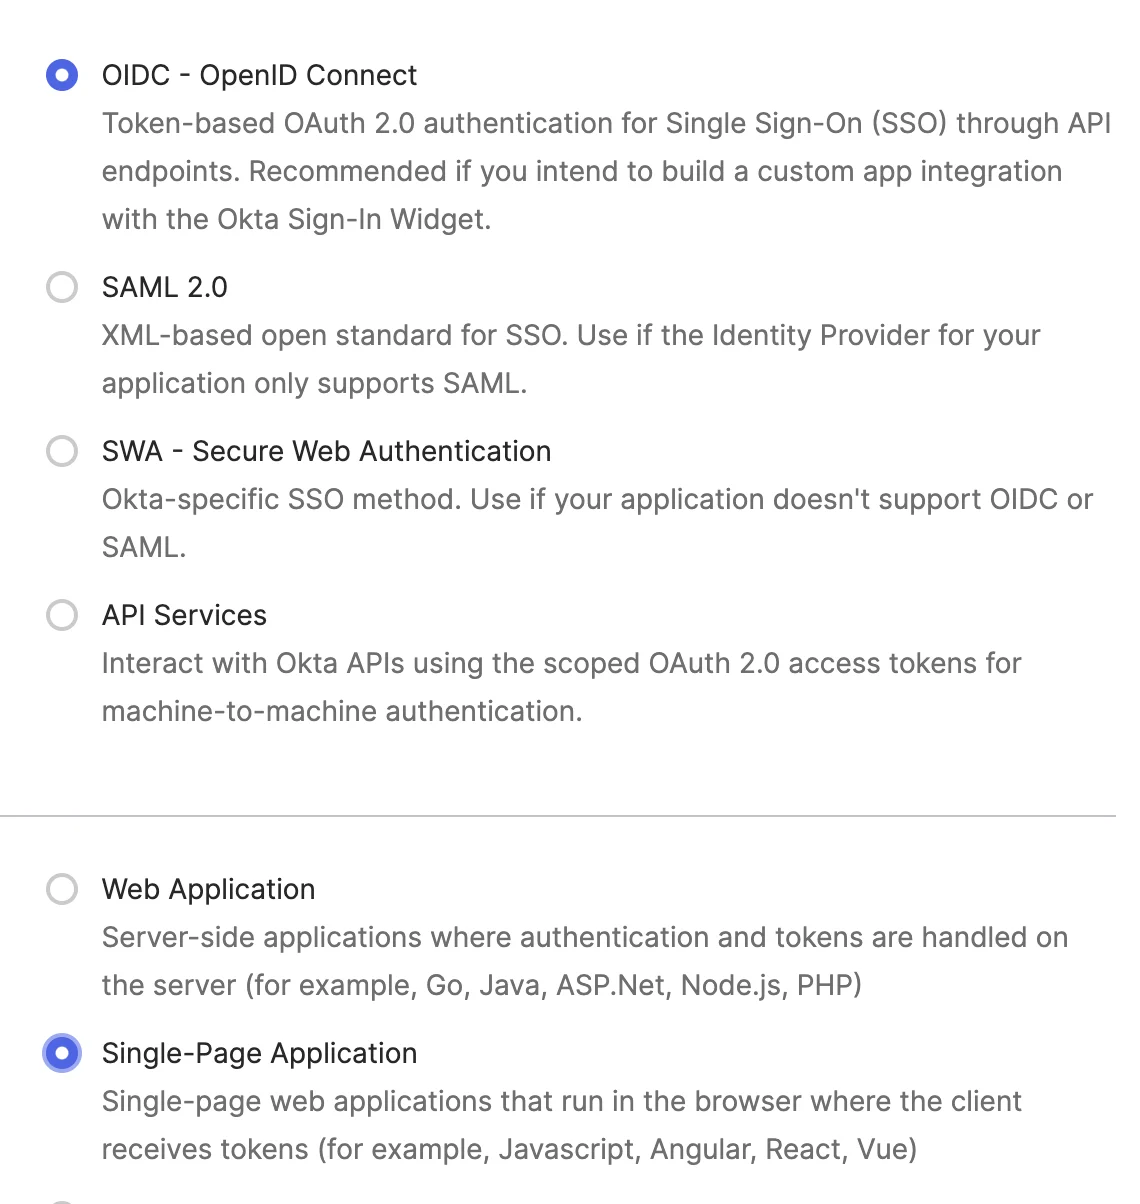
    Select **OIDC - OpenID Connect** as the sign-in method and **Single-Page Application** as the application type.

    <Frame>
      <img src="https://mintcdn.com/scribe/pvZJQ56rCCLLmCwt/integrations/smart-fields/images/okta-step-3.png?fit=max&auto=format&n=pvZJQ56rCCLLmCwt&q=85&s=5fd49d96bd05f7435efdb25dae391324" alt="Create App Integration dialog with OIDC and Single-Page Application selected" className="mx-auto" style={{ width:"64%" }} width="1140" height="1204" data-path="integrations/smart-fields/images/okta-step-3.png" />
    </Frame>
  </Step>

  <Step title="In 'General Settings', name your application and turn on the 'Refresh Token' option">
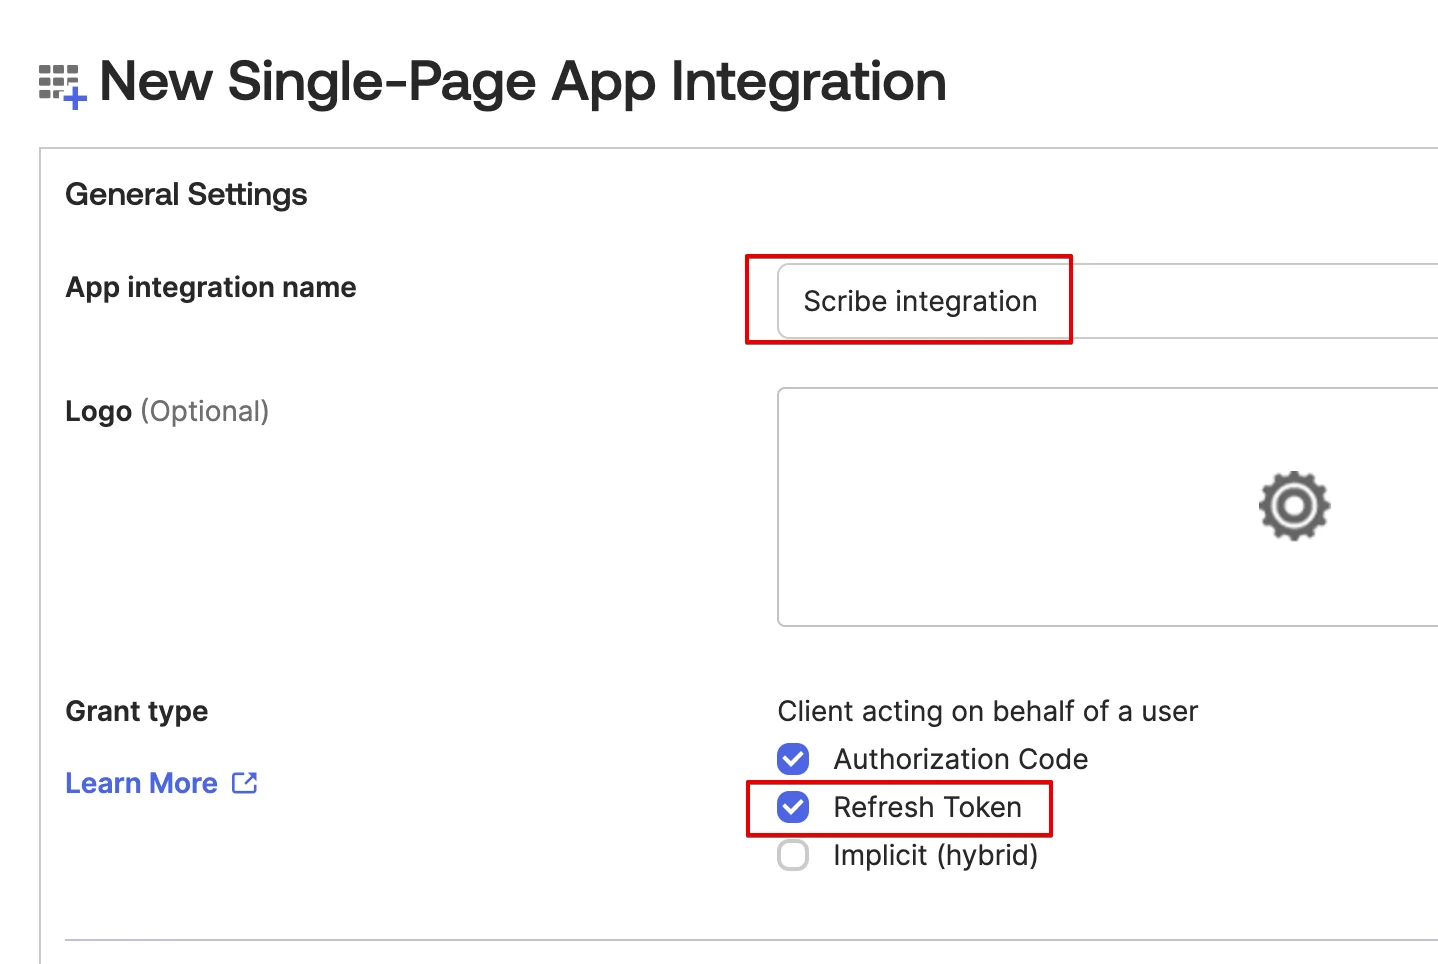
    Enter a name like `Scribe integration` and check the **Refresh Token** grant type.

    <Frame>
      <img src="https://mintcdn.com/scribe/pvZJQ56rCCLLmCwt/integrations/smart-fields/images/okta-step-4.png?fit=max&auto=format&n=pvZJQ56rCCLLmCwt&q=85&s=a322fac129afc0dccfb6009e8ae48704" alt="General Settings with app name and Refresh Token option highlighted" className="mx-auto" style={{ width:"70%" }} width="1438" height="964" data-path="integrations/smart-fields/images/okta-step-4.png" />
    </Frame>
  </Step>

  <Step title="In the 'Sign-in redirect URIs' section, copy the Scribe callback value">
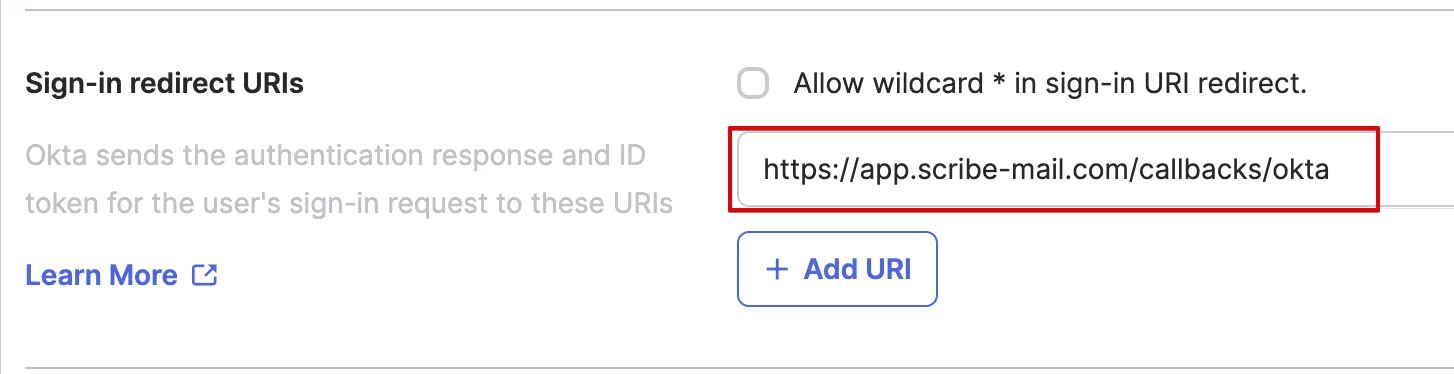
    Copy the callback URL below and paste it in the **Sign-in redirect URIs** field in Okta.

    ```text theme={null}
    https://app.scribe-mail.com/callbacks/okta
    ```

    <Frame>
      <img src="https://mintcdn.com/scribe/pvZJQ56rCCLLmCwt/integrations/smart-fields/images/okta-step-5.png?fit=max&auto=format&n=pvZJQ56rCCLLmCwt&q=85&s=b154965d8cc00cbecb93b5e680e51f36" alt="Sign-in redirect URIs field with Scribe callback URL" className="mx-auto" style={{ width:"86%" }} width="1454" height="374" data-path="integrations/smart-fields/images/okta-step-5.png" />
    </Frame>
  </Step>

  <Step title="In the 'Assignments' section, choose 'Allow everyone in your organization to access' and then hit 'Save'">
    <Frame>
      <img src="https://mintcdn.com/scribe/pvZJQ56rCCLLmCwt/integrations/smart-fields/images/okta-step-6.png?fit=max&auto=format&n=pvZJQ56rCCLLmCwt&q=85&s=670066f0a6ae3eb71f80dfcf35a529cd" alt="Assignments section with Allow everyone option selected" className="mx-auto" style={{ width:"85%" }} width="1496" height="374" data-path="integrations/smart-fields/images/okta-step-6.png" />
    </Frame>
  </Step>

  <Step title="Copy and paste the Client ID below">
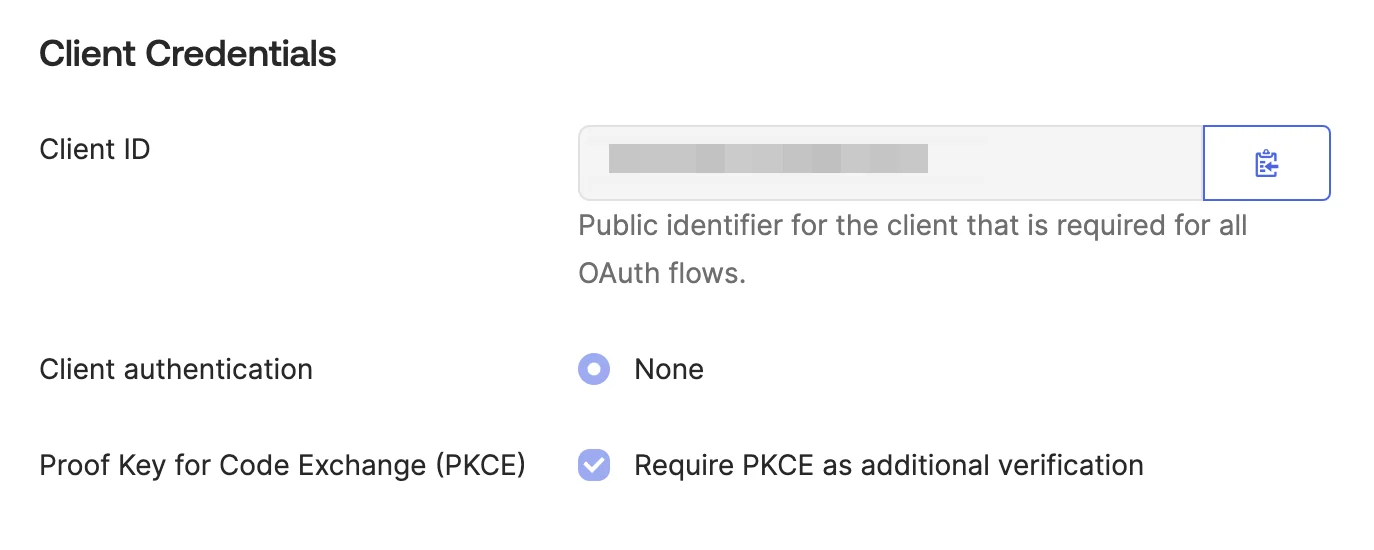
    In the **Client Credentials** section, copy the **Client ID** and paste it in the corresponding field in Scribe.

    <Frame>
      <img src="https://mintcdn.com/scribe/pvZJQ56rCCLLmCwt/integrations/smart-fields/images/okta-step-7.png?fit=max&auto=format&n=pvZJQ56rCCLLmCwt&q=85&s=6c9f393987ed5f0904ab508f235c6a25" alt="Client Credentials section showing Client ID" className="mx-auto" style={{ width:"75%" }} width="1374" height="550" data-path="integrations/smart-fields/images/okta-step-7.png" />
    </Frame>
  </Step>

  <Step title="Copy and paste your Okta Domain in Scribe">
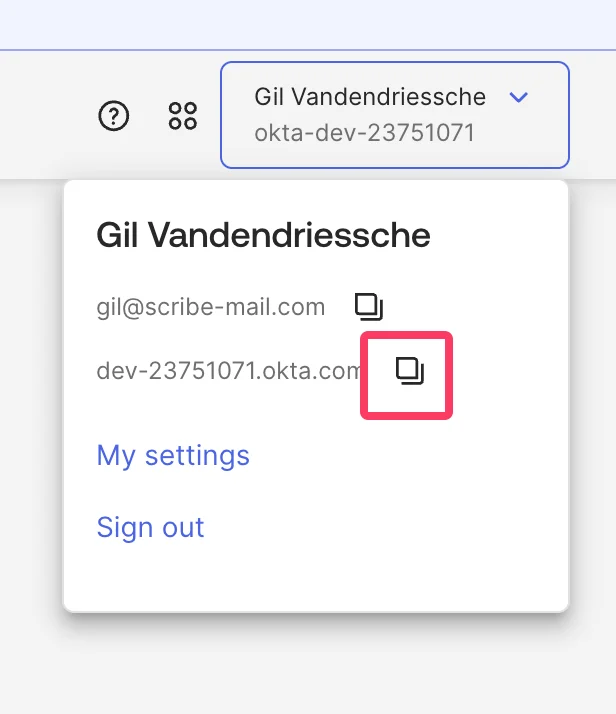
    Click on your profile in the top-right corner of the Okta admin console to find your Okta domain (e.g. `dev-12345678.okta.com`). Copy it and paste it in the **Domain** field in Scribe.

    <Frame>
      <img src="https://mintcdn.com/scribe/pvZJQ56rCCLLmCwt/integrations/smart-fields/images/okta-step-8.png?fit=max&auto=format&n=pvZJQ56rCCLLmCwt&q=85&s=b25633aff4c4351299767018a8eee320" alt="Okta profile dropdown showing the Okta domain" className="mx-auto" style={{ width:"58%" }} width="616" height="714" data-path="integrations/smart-fields/images/okta-step-8.png" />
    </Frame>
  </Step>

  <Step title="Grant access to okta.users.read and okta.schemas.read scopes">
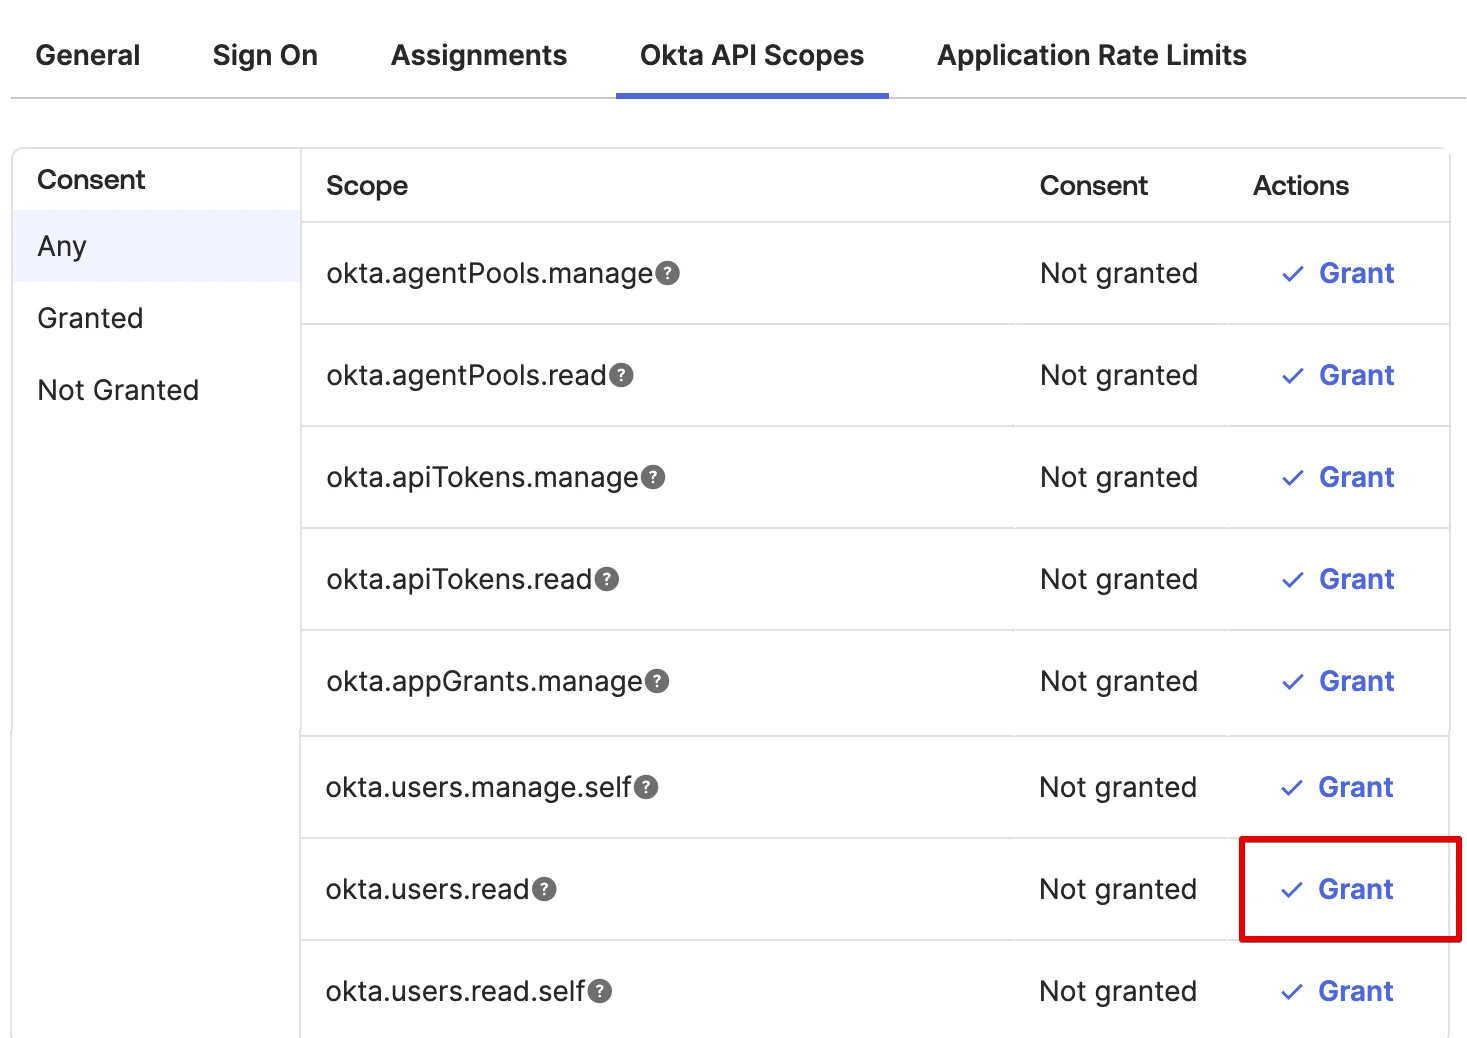
    In your Okta application, go to the **Okta API Scopes** tab and click **Grant** next to `okta.users.read` and `okta.schemas.read`.

    <Frame>
      <img src="https://mintcdn.com/scribe/pvZJQ56rCCLLmCwt/integrations/smart-fields/images/okta-step-9.png?fit=max&auto=format&n=pvZJQ56rCCLLmCwt&q=85&s=4d96c026697de4bb987b1c21fbc922d1" alt="Okta API Scopes tab with okta.users.read Grant button highlighted" className="mx-auto" style={{ width:"81%" }} width="1467" height="1038" data-path="integrations/smart-fields/images/okta-step-9.png" />
    </Frame>
  </Step>

  <Step title="Click 'Connect Okta' below and follow the pop-up instructions">
    <Frame>
      <img src="https://mintcdn.com/scribe/xbQhr3JjkYildsKM/images/okta-connect-button-in-scribe.png?fit=max&auto=format&n=xbQhr3JjkYildsKM&q=85&s=7841f68b05894b34d2ba074b4bd5cb67" alt="Connect Okta button in Scribe with pop-up instructions prompt" width="1440" height="366" data-path="images/okta-connect-button-in-scribe.png" />
    </Frame>
  </Step>
</Steps>

## Related articles

* [Payfit](/en/integrations/smart-fields/payfit-smart-fields): sync Payfit data into your signatures.
* [Rippling](/en/integrations/smart-fields/rippling-smart-fields): sync Rippling data into your signatures.
* [Assign teammates to a signature](/en/assign-teammates-to-a-signature): use Smart Field conditions to assign signatures automatically.
