> ## Documentation Index
> Fetch the complete documentation index at: https://help.scribe-mail.com/llms.txt
> Use this file to discover all available pages before exploring further.
# Google Workspace(サーバーサイド)
> Scribeのセキュアなサーバー経由で送信メールをルーティングし、あらゆるデバイスからチームのGoogle Workspaceメールに自動でScribe署名を追加します。
**一元的なワンクリックインストール。** チームメンバーの操作は不要です。ユーザーがメール作成時に署名を目にすることはありません。署名の挿入はScribeのセキュアなサーバーで処理されます。
**対応プラットフォーム:** Web、デスクトップ、Apple Mail、iOS、Android
## インストールガイド
これは上級者向けの機能です。この連携の設定にはITサポートが必要です。
* メール作成時にユーザーには署名が表示されません。
* メールはScribeのセキュアなサーバーを経由して処理され、署名が挿入されます。Scribeがメールの内容を読み取ったり編集したりすることはありません。
* [クラウド連携](/ja/integrations/signatures/google-workspace-client-side)とサーバーサイド連携を併用できます。両方が接続されている場合、Scribeはクラウド連携を優先し、ユーザーがメール作成時に署名を確認できるようにします。
Scribeのセキュアなサーバー経由でメールをルーティングするため、Google Workspace Gmailにホストを作成します。Google Adminで **Apps → Google Workspace → Gmail** に進み、'Hosts' をクリックします。
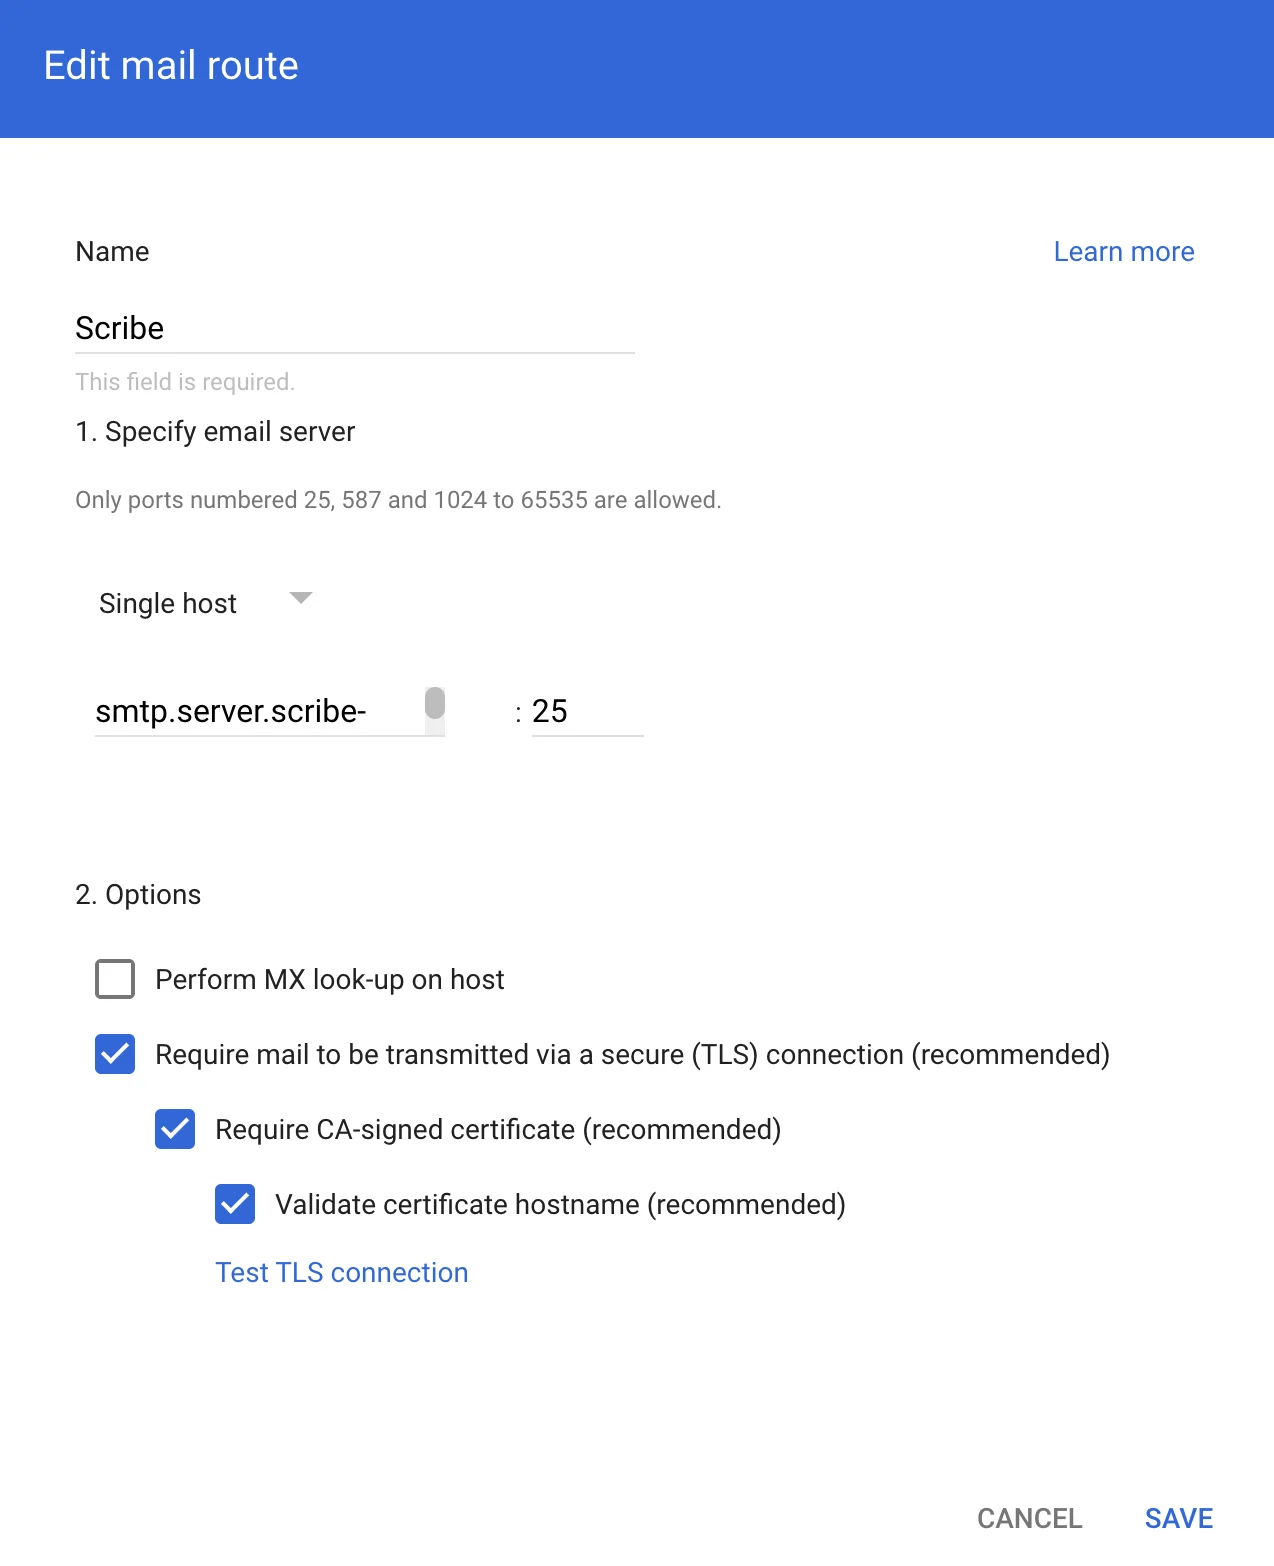
 次の情報をフォームに入力してください:
**a. Name:** Scribe
**b. Select:** "Single host"
**c. Host name or IP:**
```text theme={null}
smtp.server.scribe-mail.com
```
**d. Port:** 25
**e. Select:** 以下のスクリーンショットと同じオプション
次の情報をフォームに入力してください:
**a. Name:** Scribe
**b. Select:** "Single host"
**c. Host name or IP:**
```text theme={null}
smtp.server.scribe-mail.com
```
**d. Port:** 25
**e. Select:** 以下のスクリーンショットと同じオプション
 Scribeから返送されたメールを受信者へルーティングするため、Google Adminで **Apps → Google Workspace → Gmail** に進み、'Routing' をクリックします。
 次のページで、"SMTP relay service" の下の **Configure** をクリックします。
 次の情報をフォームに入力します:
**a. Description:** Receive from Scribe
**b. Authentication:** "Only accept mail from the specified IP addresses" にチェックを入れ、次を追加します:
```text theme={null}
15.236.243.144
```
および
```text theme={null}
51.44.50.107
```
**c. 選択:** "Require TLS encryption"
**d. クリック:** "Save"
次の情報をフォームに入力します:
**a. Description:** Receive from Scribe
**b. Authentication:** "Only accept mail from the specified IP addresses" にチェックを入れ、次を追加します:
```text theme={null}
15.236.243.144
```
および
```text theme={null}
51.44.50.107
```
**c. 選択:** "Require TLS encryption"
**d. クリック:** "Save"
 Google Adminで、**Apps → Google Workspace → Gmail** に移動し、'Compliance' をクリックします。
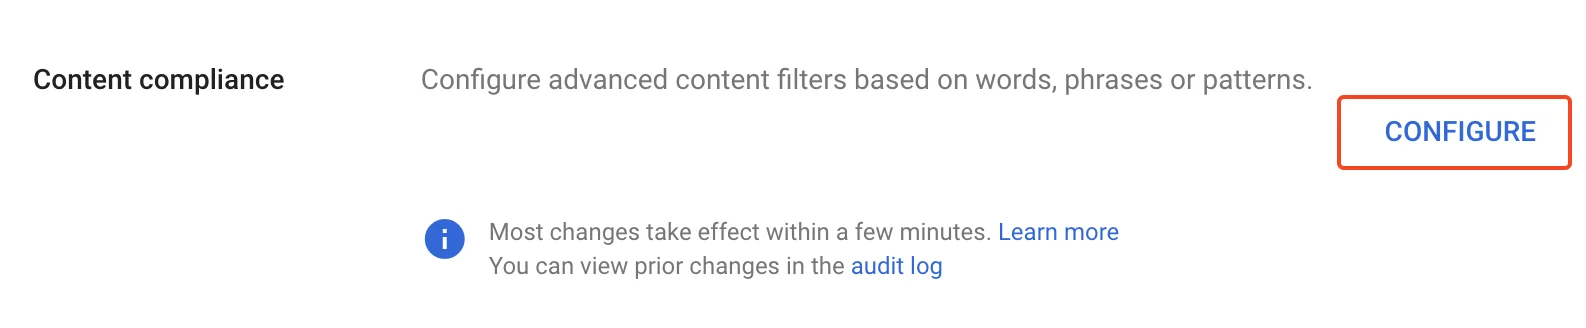
 次のページで、"Content compliance" の下の **Configure** をクリックします。
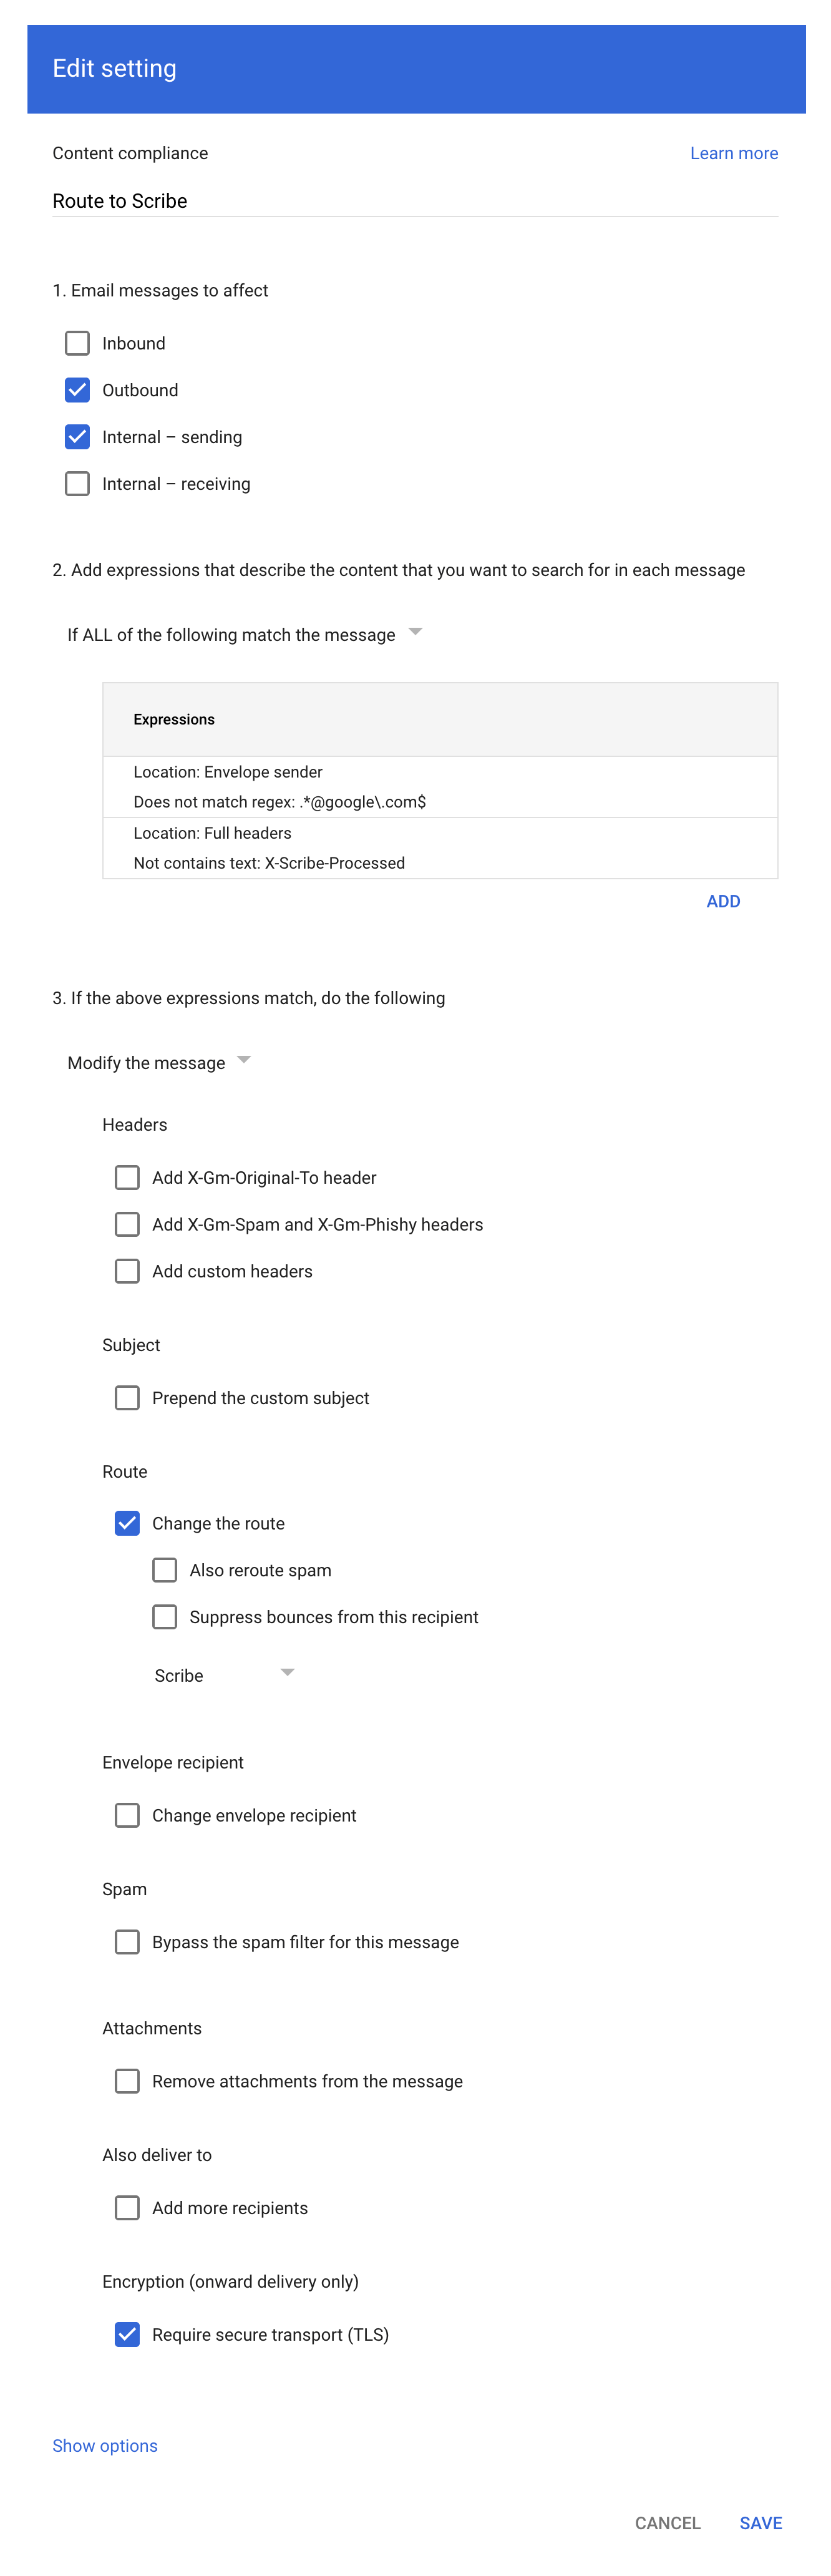
 スクリーンショットのとおりにフォームへ入力します:
**a. Description:** Route to Scribe
**b. 選択:** "Email messages to affect" で "Outbound" と "Internal - sending"
**c. 2つ目の設定項目("Add expressions…")で、** マッチング条件を **"If ALL of the following match the message"** に設定し、**ADD** をクリックして次の2つの Advanced content match 式を追加してください。
* Location: Full headers、Match type: Does not contain text、Content: `X-Scribe-Processed` — メールを複数回処理することを防ぎます。
* Location: Envelope sender、Match type: Does not match regex、Regexp: `.*@google\.com$` — Google フォームの受信通知([forms-receipts-noreply@google.com](mailto:forms-receipts-noreply@google.com) から送信)などのシステムメールを除外します。これらは Scribe を経由するルーティングだと Google の SMTP リレーで拒否されます。
**d. 3つ目の設定項目で、** ルートを本ガイドのパート1で作成したホストに変更してください。
**e. 選択:** "Require secure transport (TLS)"
**f. クリック:** "Save"
スクリーンショットのとおりにフォームへ入力します:
**a. Description:** Route to Scribe
**b. 選択:** "Email messages to affect" で "Outbound" と "Internal - sending"
**c. 2つ目の設定項目("Add expressions…")で、** マッチング条件を **"If ALL of the following match the message"** に設定し、**ADD** をクリックして次の2つの Advanced content match 式を追加してください。
* Location: Full headers、Match type: Does not contain text、Content: `X-Scribe-Processed` — メールを複数回処理することを防ぎます。
* Location: Envelope sender、Match type: Does not match regex、Regexp: `.*@google\.com$` — Google フォームの受信通知([forms-receipts-noreply@google.com](mailto:forms-receipts-noreply@google.com) から送信)などのシステムメールを除外します。これらは Scribe を経由するルーティングだと Google の SMTP リレーで拒否されます。
**d. 3つ目の設定項目で、** ルートを本ガイドのパート1で作成したホストに変更してください。
**e. 選択:** "Require secure transport (TLS)"
**f. クリック:** "Save"
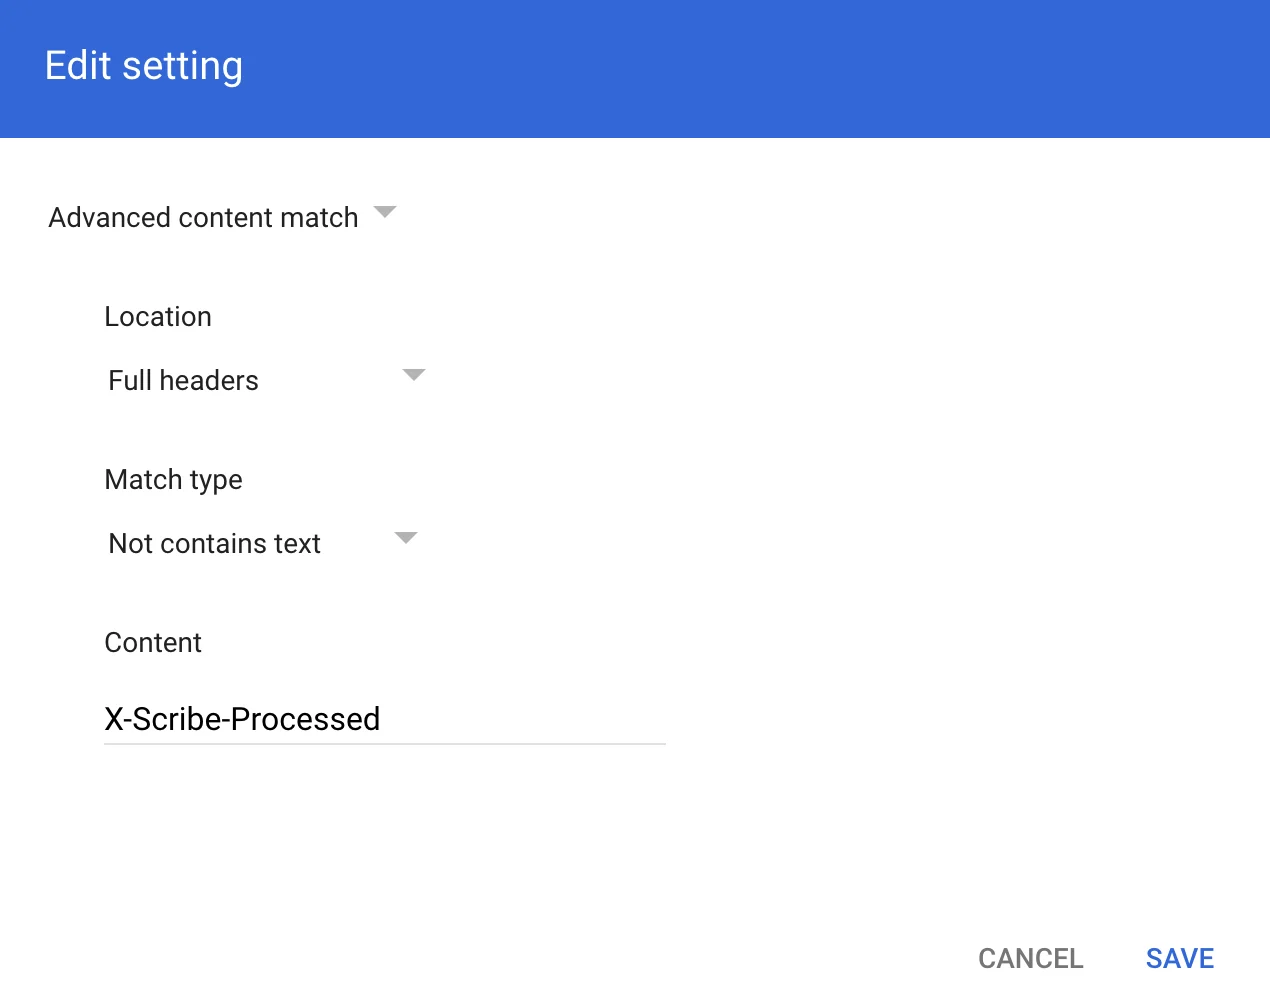
 Compliance rule expression のモーダルで、スクリーンショットのとおりに情報を追加してください。
Advanced content match:
* **Location:** Full headers
* **Match type:** Not contains text
* **Content:** X-Scribe-Processed
Compliance rule expression のモーダルで、スクリーンショットのとおりに情報を追加してください。
Advanced content match:
* **Location:** Full headers
* **Match type:** Not contains text
* **Content:** X-Scribe-Processed
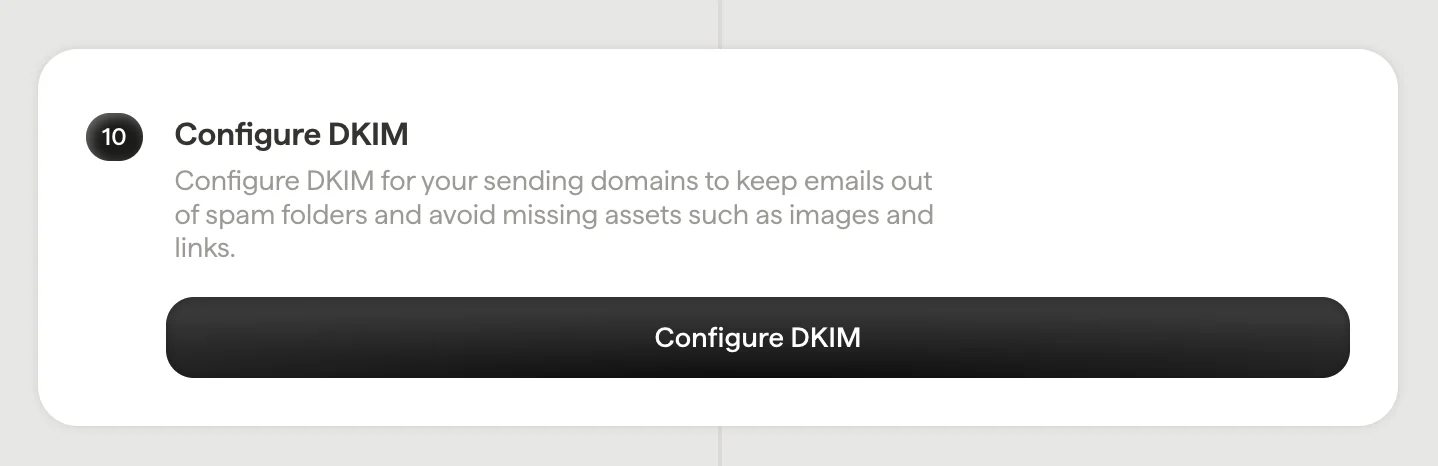
 [送信ドメイン](/ja/configure-your-sending-domain) に DKIM を設定し、メールが迷惑メールフォルダーに振り分けられたり、画像やリンクなどのアセットが欠落したりするのを防いでください。
Scribe で **Configure DKIM** をクリックして設定を開始してください。
[送信ドメイン](/ja/configure-your-sending-domain) に DKIM を設定し、メールが迷惑メールフォルダーに振り分けられたり、画像やリンクなどのアセットが欠落したりするのを防いでください。
Scribe で **Configure DKIM** をクリックして設定を開始してください。
 署名一覧から、[チームメンバー全員の署名をまとめてインストール](/ja/install-signatures)するか、段階的に展開するために1つずつインストールしてください。
 ## 関連記事
* [連携の概要](/ja/integrations-overview):クラウドまたはサーバーサイドでScribe署名を展開するすべての方法。
* [Microsoft 365(サーバーサイド)](/ja/integrations/signatures/microsoft-365-server-side):メールをScribe経由でルーティングし、すべてのデバイスをカバー。
* [署名のバリアント](/ja/signature-variants):Outlookとサーバーサイド向けの返信時用・社内用バリアント。
## 関連記事
* [連携の概要](/ja/integrations-overview):クラウドまたはサーバーサイドでScribe署名を展開するすべての方法。
* [Microsoft 365(サーバーサイド)](/ja/integrations/signatures/microsoft-365-server-side):メールをScribe経由でルーティングし、すべてのデバイスをカバー。
* [署名のバリアント](/ja/signature-variants):Outlookとサーバーサイド向けの返信時用・社内用バリアント。