> ## Documentation Index
> Fetch the complete documentation index at: https://help.scribe-mail.com/llms.txt
> Use this file to discover all available pages before exploring further.
# Microsoft 365: サーバーサイド
> Microsoft 365 向けにサーバーサイドのメール署名展開を設定します。メールはScribeのセキュアなサーバーを経由し、あらゆるデバイスやクライアントから署名が付与されます。
サーバーサイドのインストールにより、あらゆるデバイスやクライアントから送信されるメールに署名が自動的に付与されます。
**一元化されたワンクリックインストール。** チームメンバーの操作は不要です。ユーザーがメール作成中に署名を確認することはありません。メールはScribeのセキュアなサーバーを経由して署名が挿入されます。
**対応プラットフォーム:** Web、デスクトップ、Apple Mail、iOS、Android
## インストールガイド
これは上級者向けの機能です。この連携の設定にはITサポートが必要です。
* メール作成時にユーザーには署名が表示されません。
* 署名を挿入するため、メールはScribeのセキュアなサーバーを経由して処理されます。Scribeがメールを読み取ったり編集したりすることはありません。
* [クラウド型連携](/ja/integrations/signatures/microsoft-365-client-side)とサーバー型連携を併用できます。両方が接続されている場合、Scribeはクラウド型連携を優先し、メール作成時にユーザーが署名を確認できるようにします。
### 前提条件
* **Microsoft 365 の管理者権限**(Exchange 管理センター)
* Scribeで作成済みの署名が1件以上
設定は4つのパートで構成されます:送信コネクタの作成、受信コネクタの作成、メールフロールールの作成、DKIM の設定です。
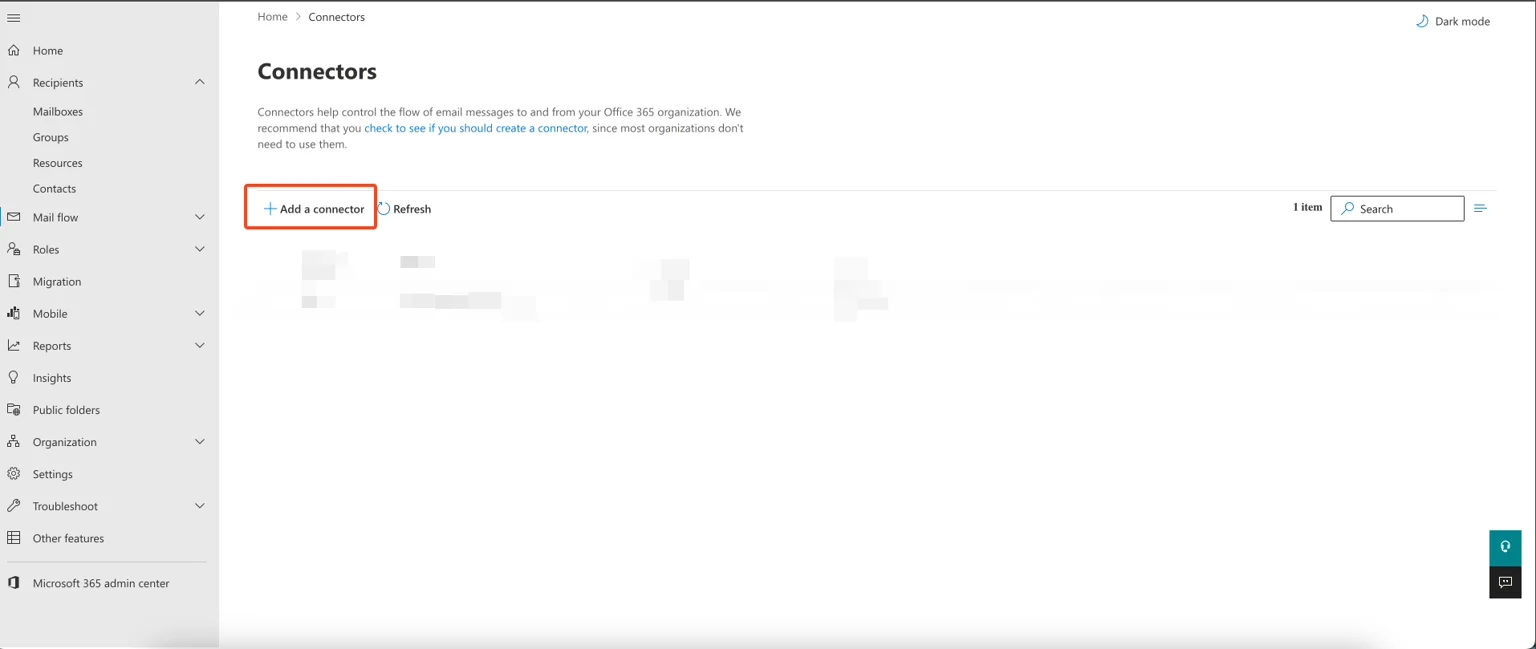
メールをScribeのセキュアなサーバー経由でルーティングするために、Exchange 管理センターで送信コネクタを作成します。Exchange 管理画面で **メールフロー → コネクタ** に進み、**"Add a connector."** をクリックしてください。
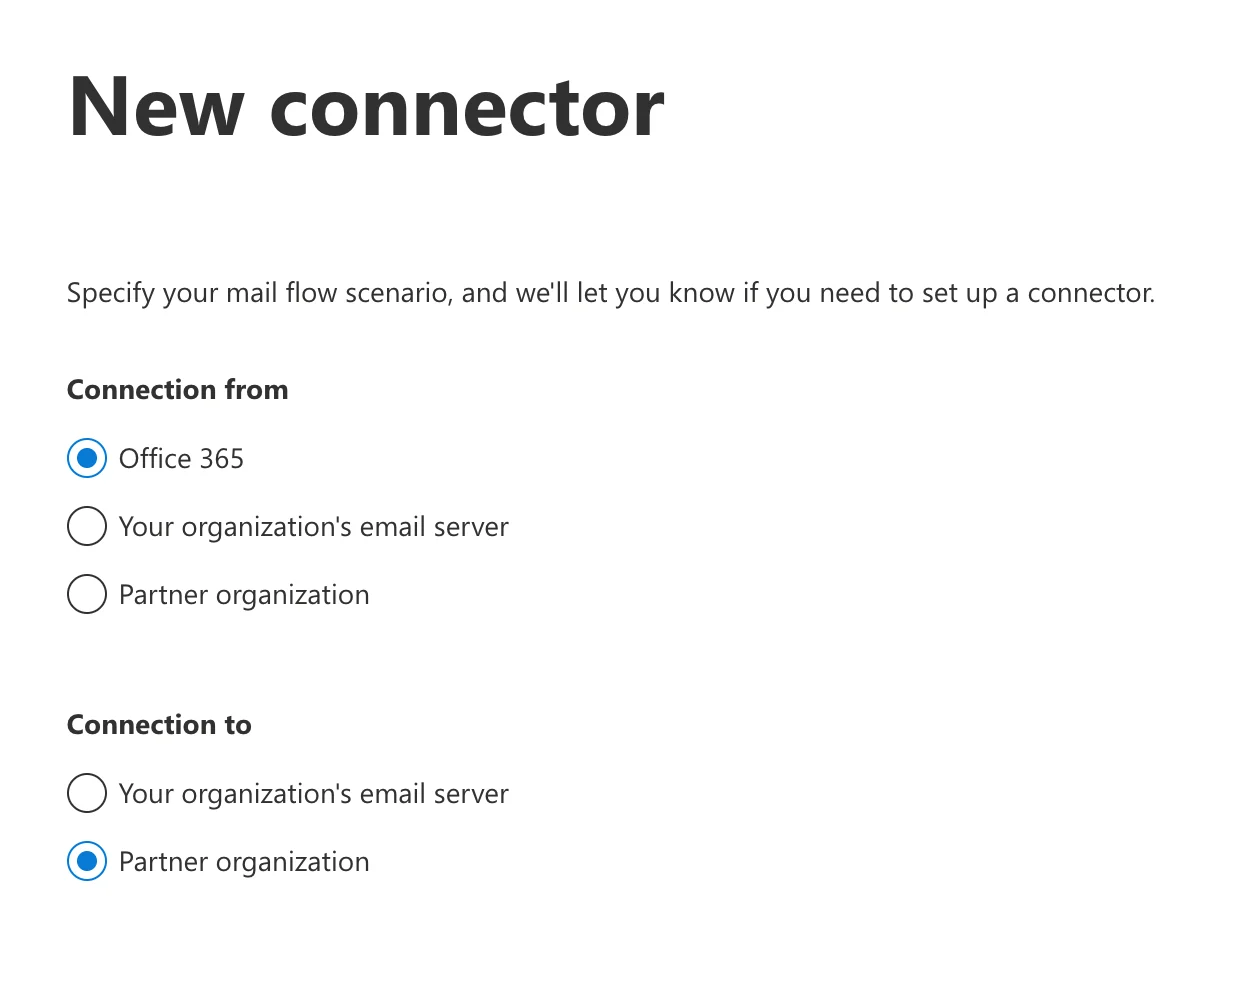
 接続元には **"Office 365"**、接続先には **"Partner organization"** を選択してください。
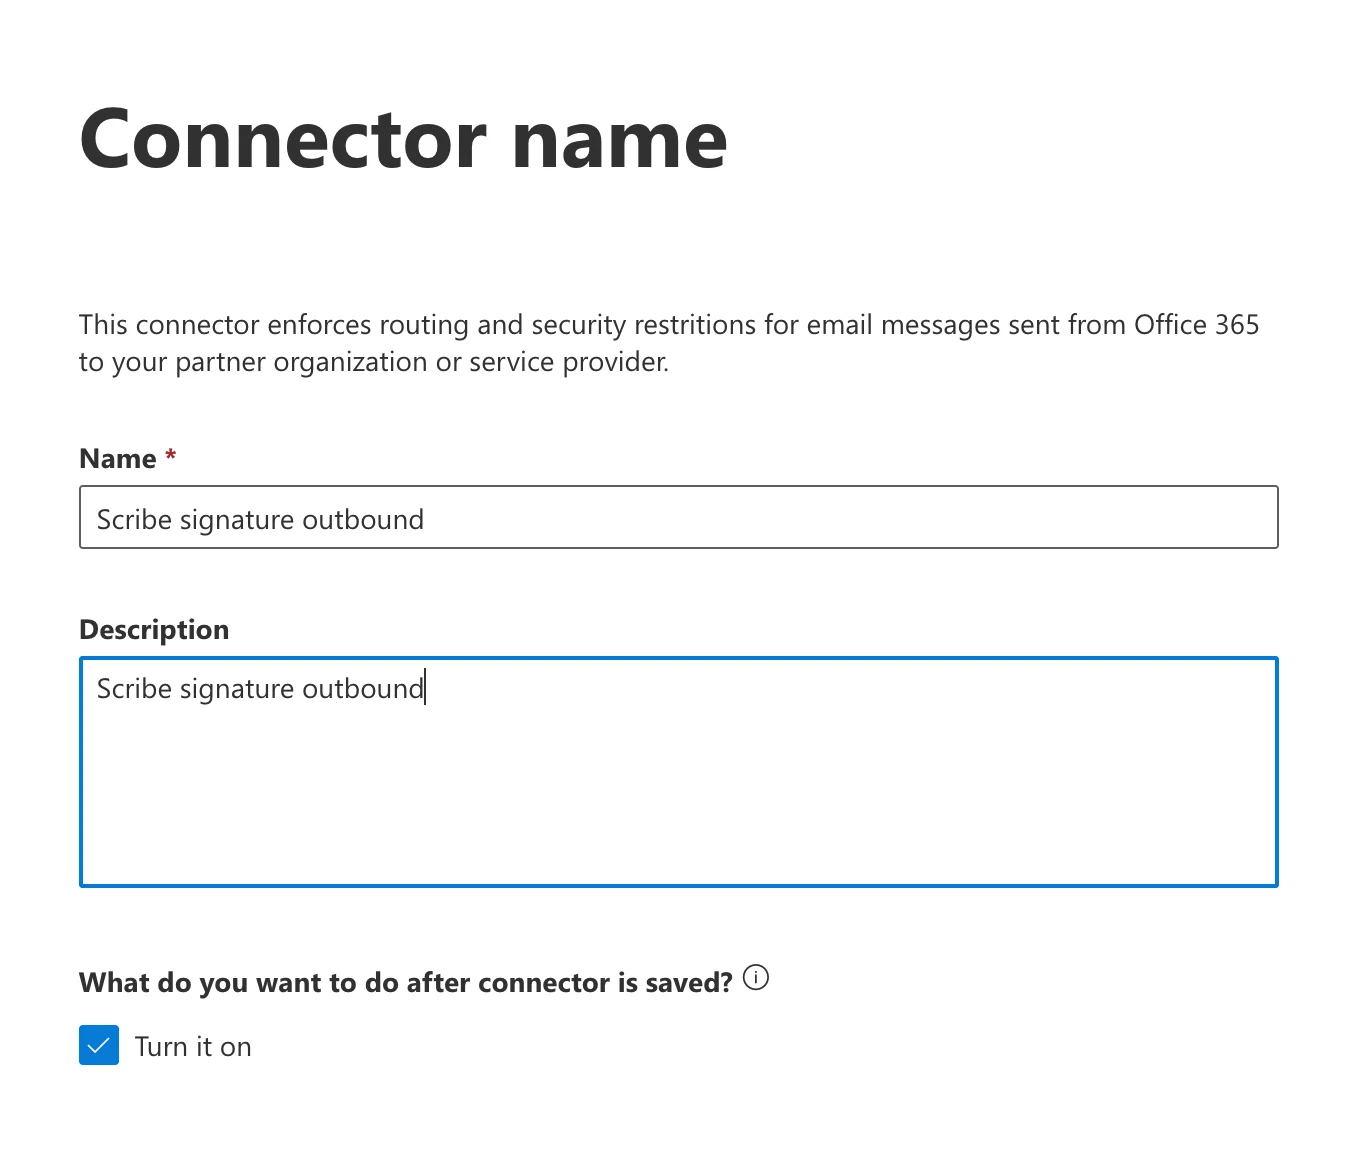
 コネクタ名と説明を入力します。必要に応じて **"Turn it on"** にチェックを入れて、すぐに有効化します。
* **名前:** `Scribe signature outbound`
* **説明:** `Scribe signature outbound`
コネクタ名と説明を入力します。必要に応じて **"Turn it on"** にチェックを入れて、すぐに有効化します。
* **名前:** `Scribe signature outbound`
* **説明:** `Scribe signature outbound`
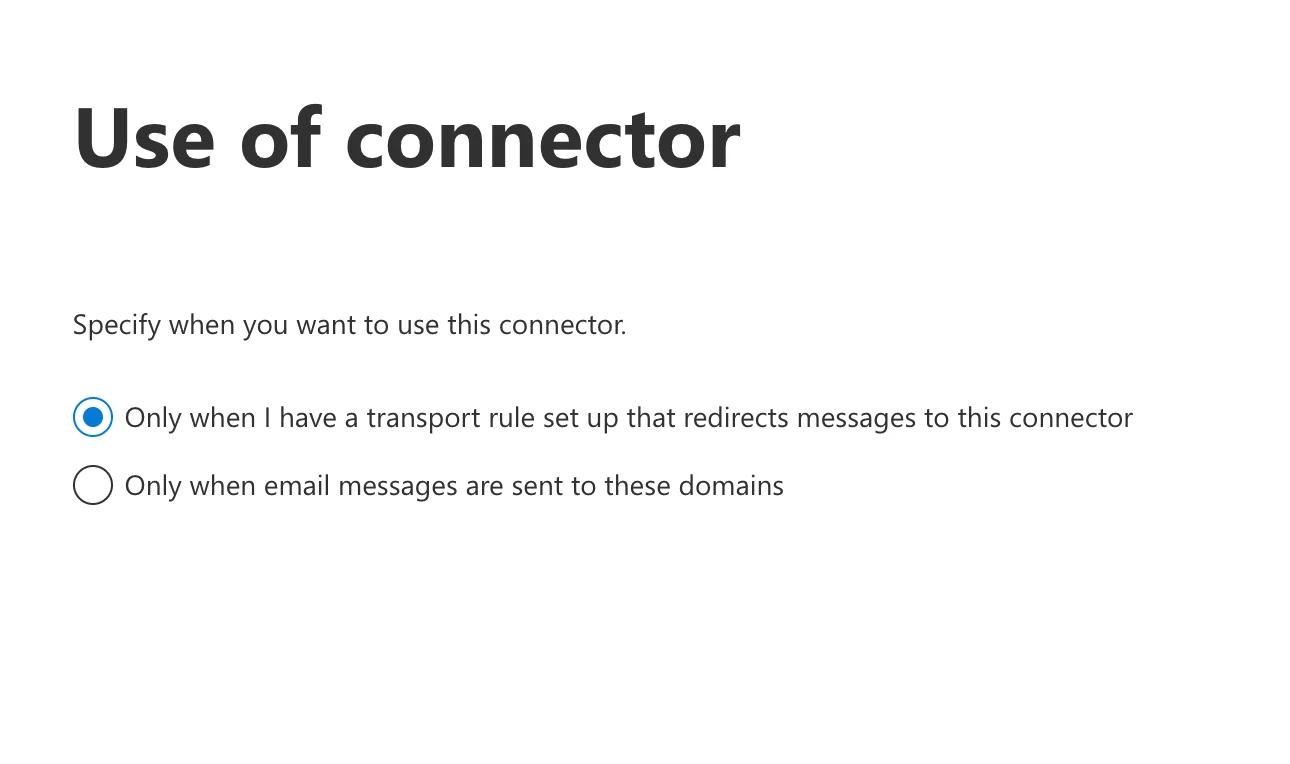
 **"Only when I have a transport rule set up that redirects messages to this connector."** を選択します。
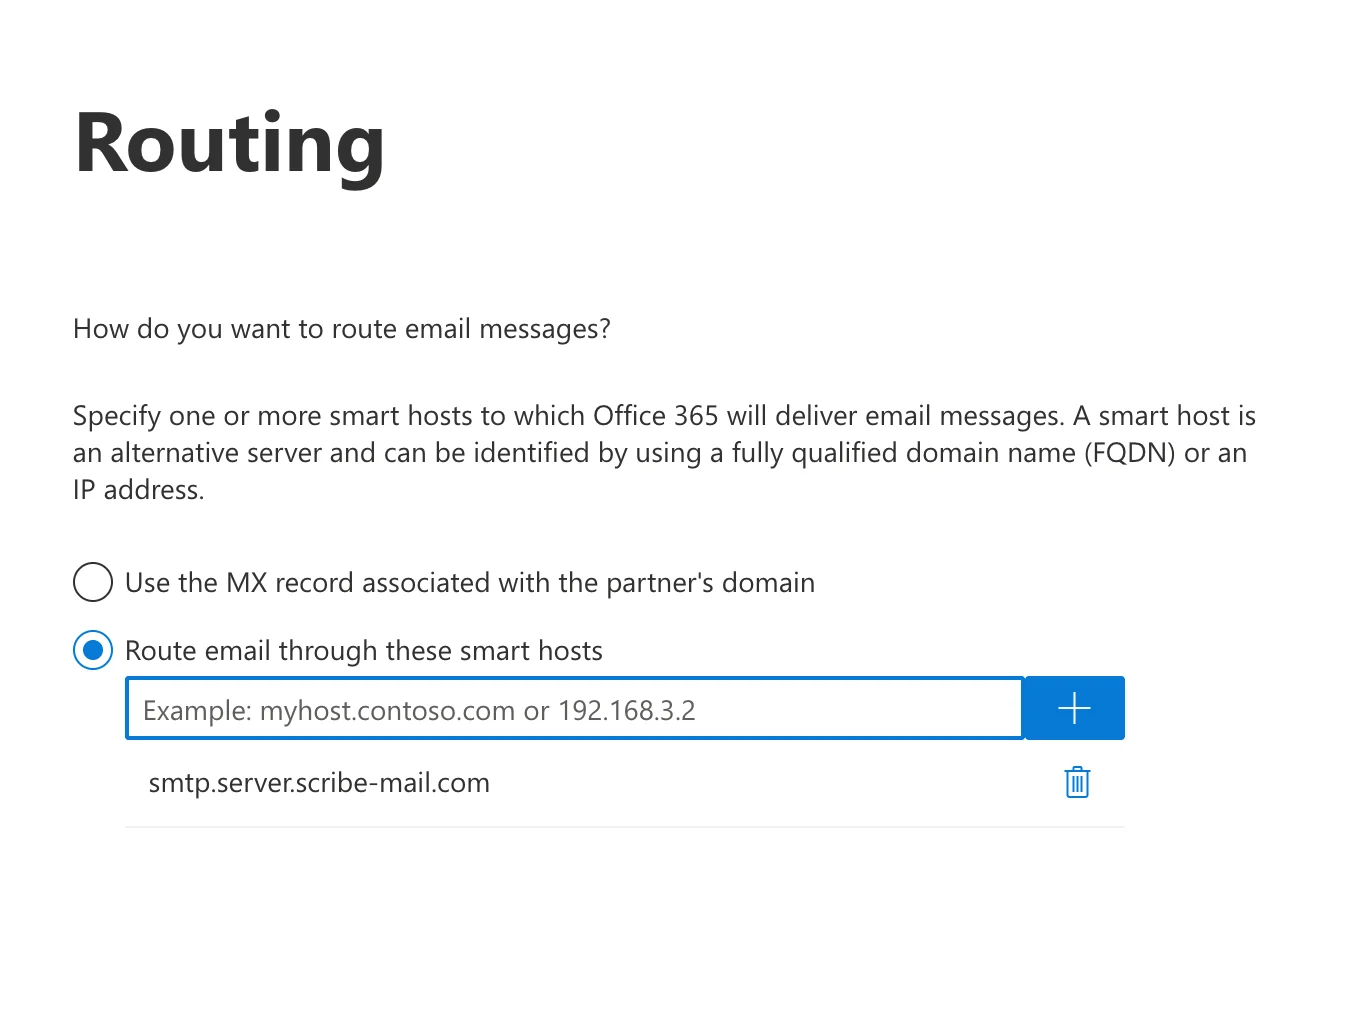
 **"Route email through these smart hosts"** を選択し、リストに次のホストを追加します:
```text theme={null}
smtp.server.scribe-mail.com
```
**"Route email through these smart hosts"** を選択し、リストに次のホストを追加します:
```text theme={null}
smtp.server.scribe-mail.com
```
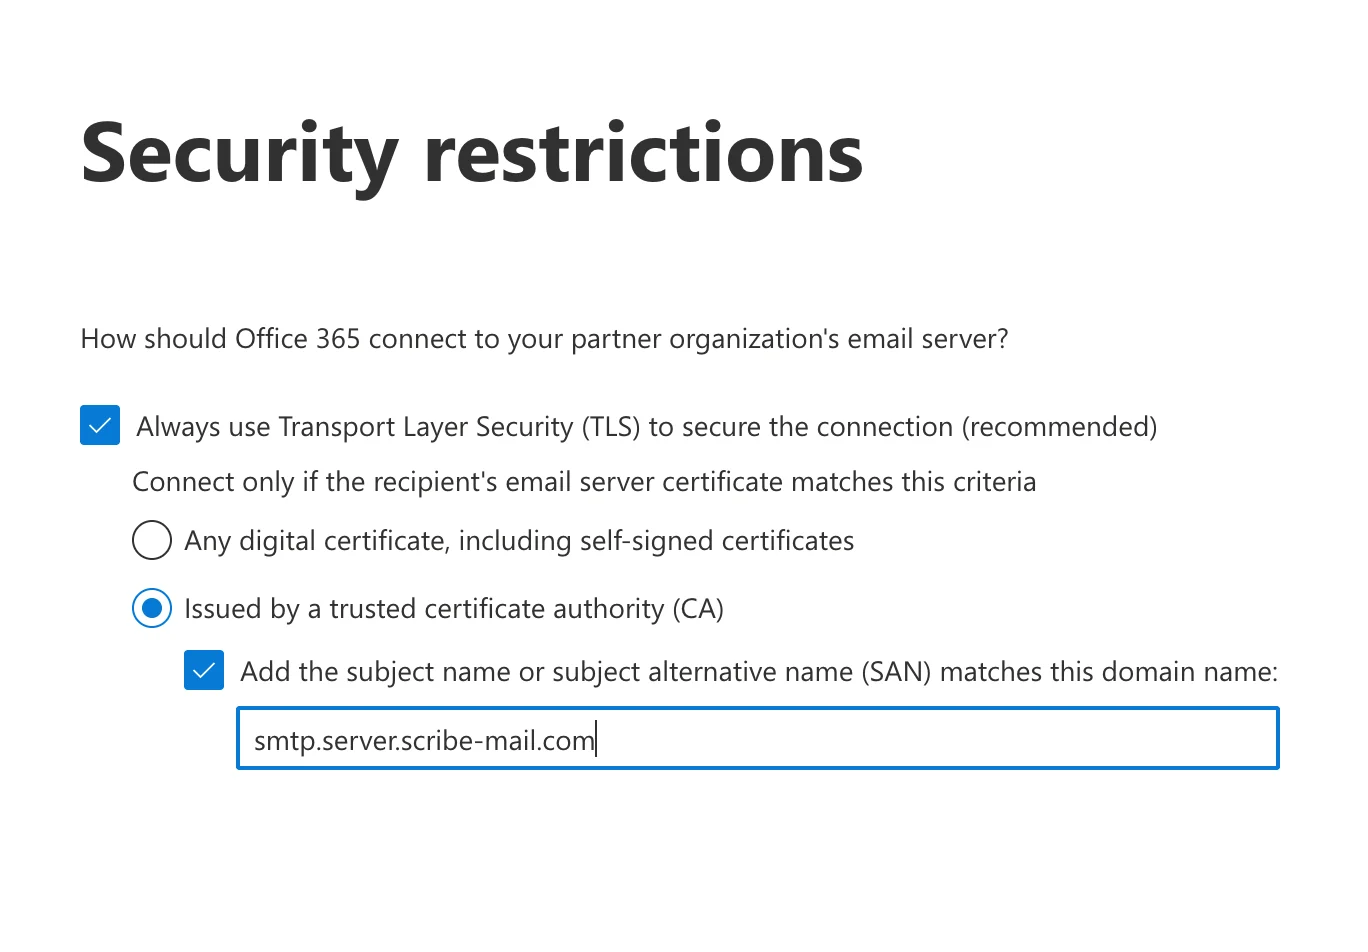
 **"Always use Transport Layer Security (TLS) to secure the connection (recommended)"** を選択し、次の操作を行います:
**a.** 選択:**"Issued by a trusted certificate authority (CA)."**
**b.** チェック:**"Add the subject name or subject alternative name (SAN) matches this domain name."**
**c.** フィールドに次の内容を入力します:
```text theme={null}
smtp.server.scribe-mail.com
```
**"Always use Transport Layer Security (TLS) to secure the connection (recommended)"** を選択し、次の操作を行います:
**a.** 選択:**"Issued by a trusted certificate authority (CA)."**
**b.** チェック:**"Add the subject name or subject alternative name (SAN) matches this domain name."**
**c.** フィールドに次の内容を入力します:
```text theme={null}
smtp.server.scribe-mail.com
```
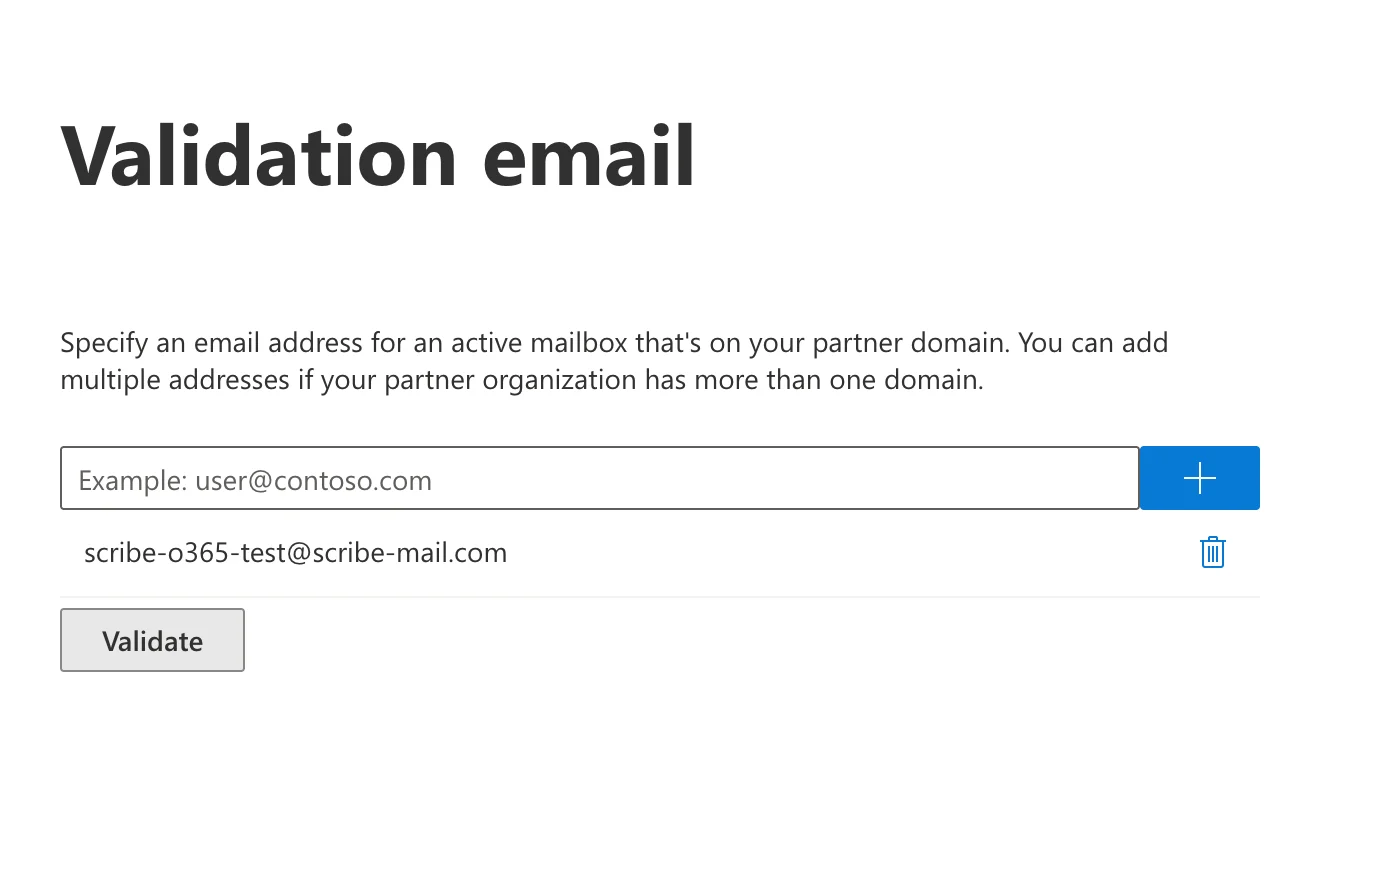
 テストメールとして次の内容を入力し、検証を開始します:
```text theme={null}
scribe-o365-test@scribe-mail.com
```
検証に失敗することもありますが、検証せずにそのまま進めても問題ありません。
テストメールとして次の内容を入力し、検証を開始します:
```text theme={null}
scribe-o365-test@scribe-mail.com
```
検証に失敗することもありますが、検証せずにそのまま進めても問題ありません。
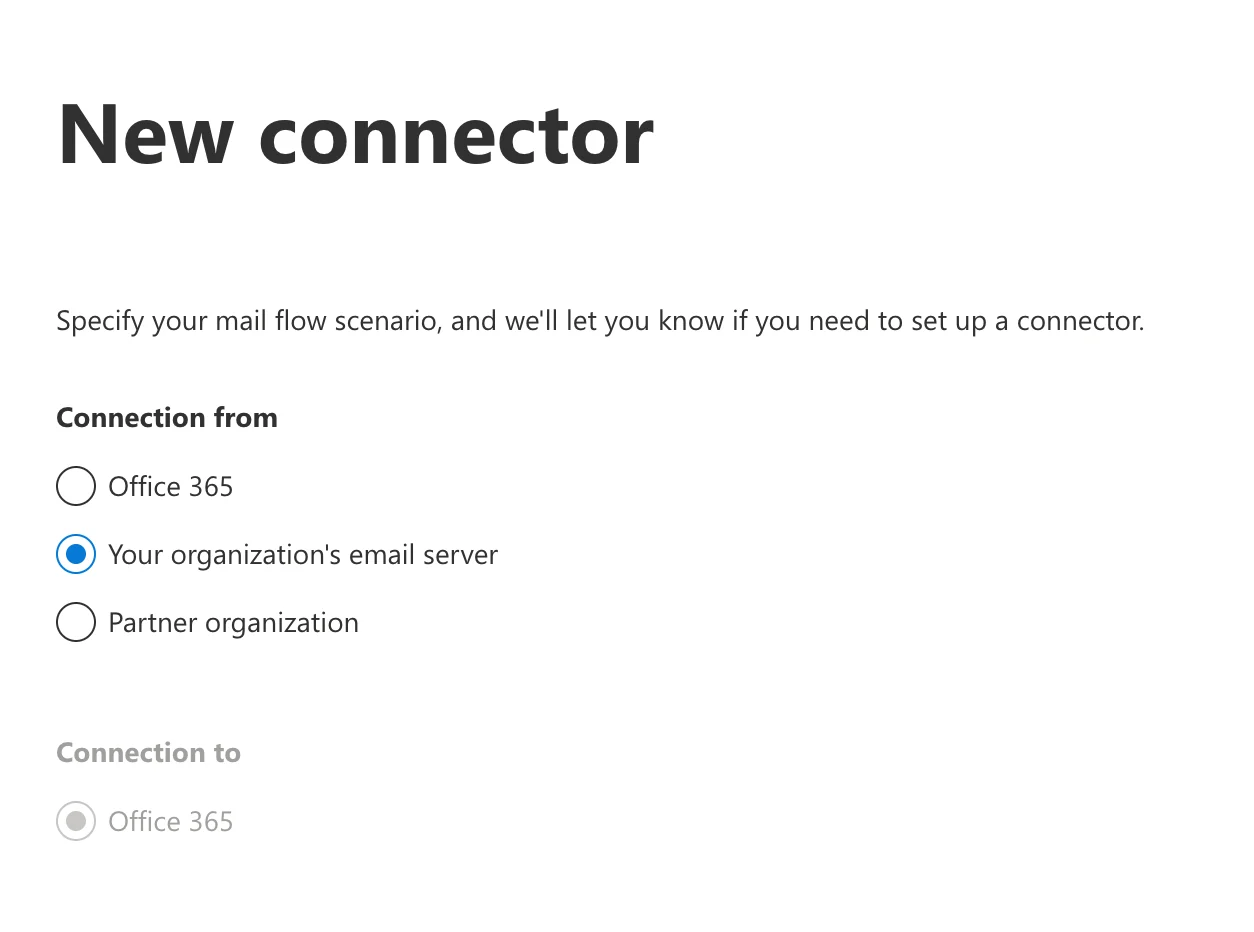
 Exchange 管理画面で **メールフロー → コネクタ** に移動し、**"Add connector."** をクリックしてください。**"Your organization's email server"** からの接続を選択します(接続先は自動的に Office 365 に設定されます)。
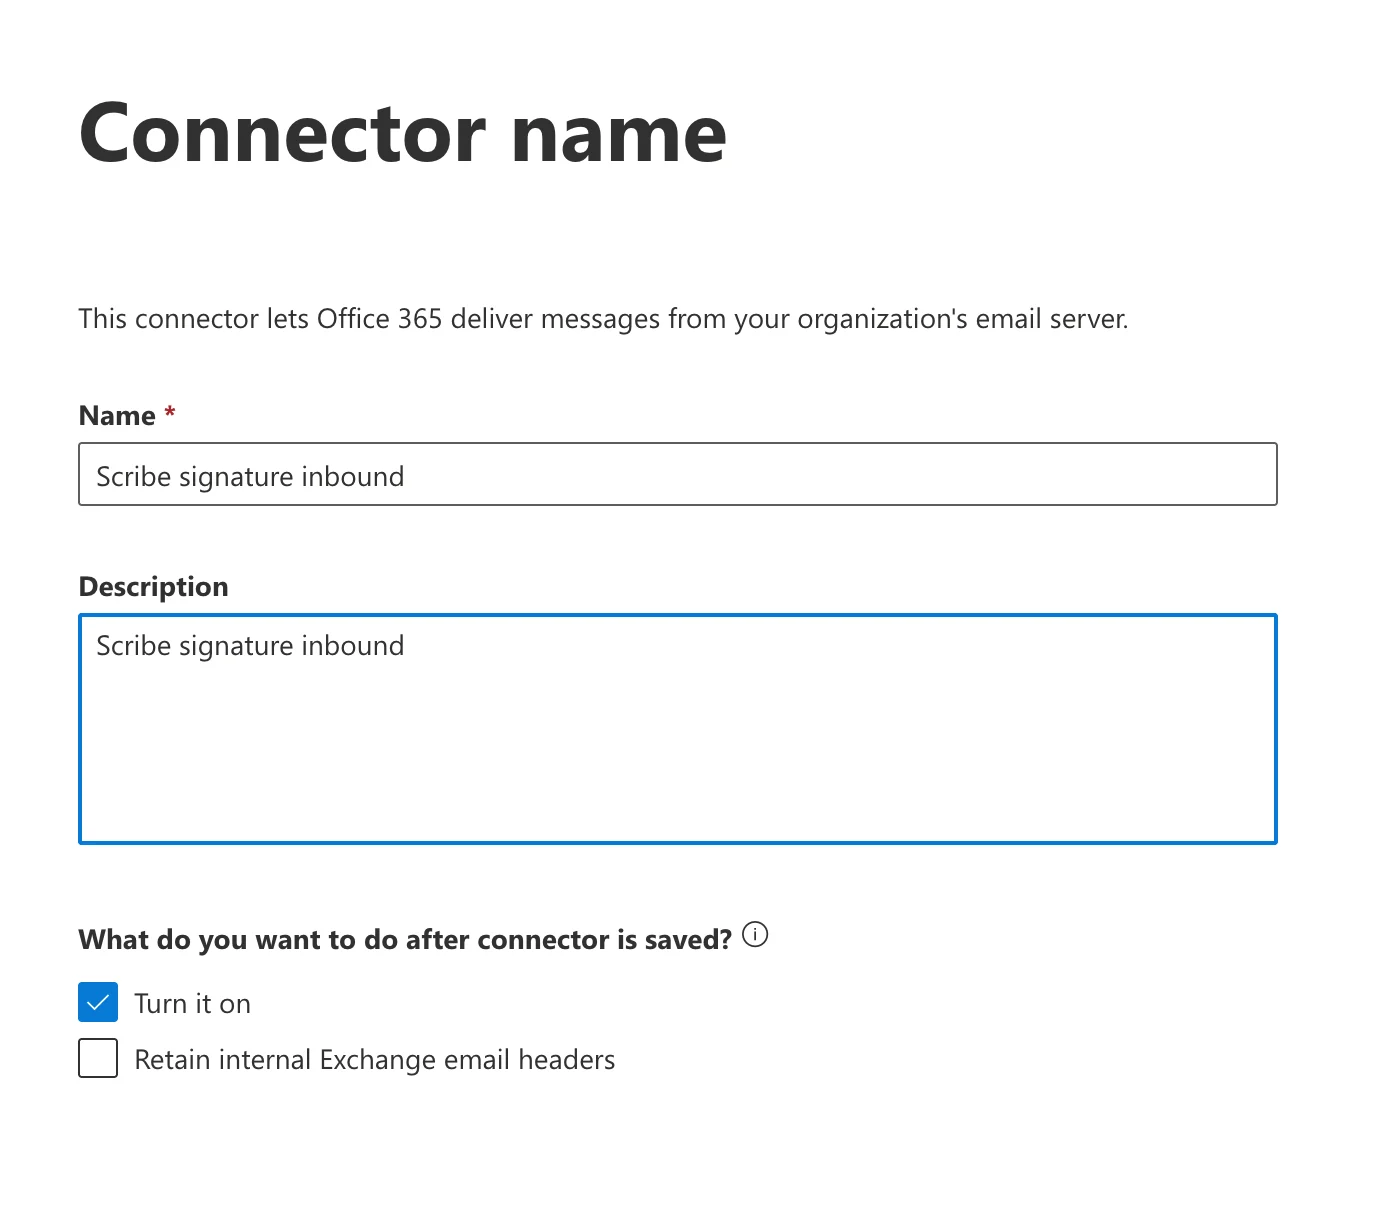
 名前と説明を入力してください。**"Turn it on"** にチェックを入れると、コネクタを即時に有効化できます。
* **名前:** `Scribe signature inbound`
* **説明:** `Scribe signature inbound`
名前と説明を入力してください。**"Turn it on"** にチェックを入れると、コネクタを即時に有効化できます。
* **名前:** `Scribe signature inbound`
* **説明:** `Scribe signature inbound`
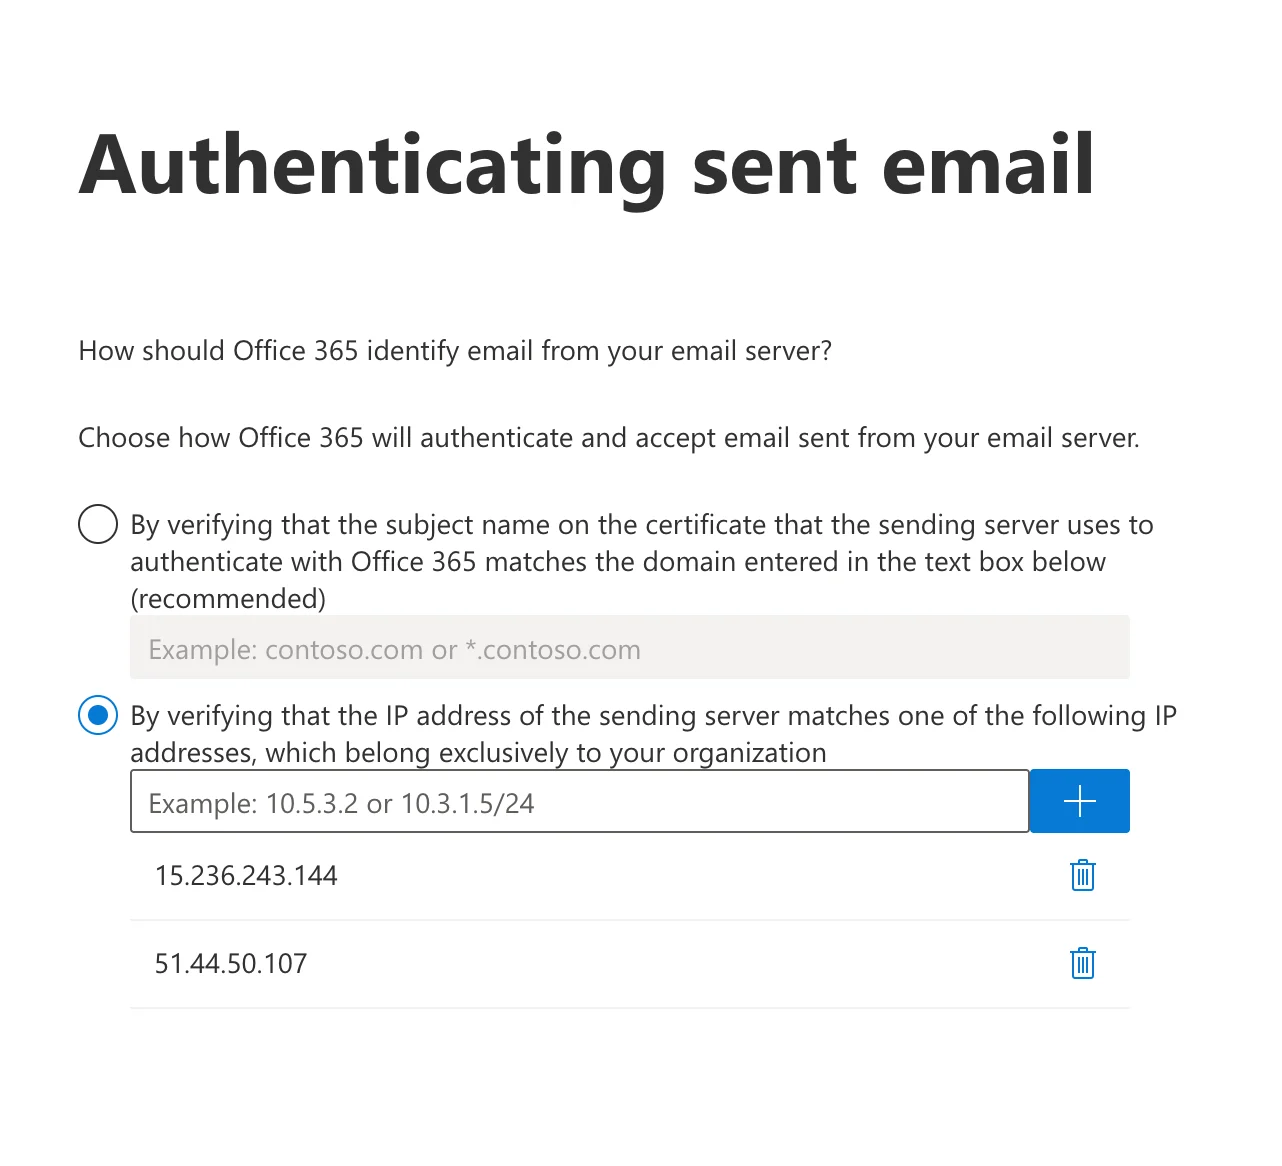
 **"By verifying that the IP address of the sending server matches one of the following IP addresses, which belong exclusively to your organization."** を選択してください。
次の2つのIPをリストに追加してください:
```text theme={null}
15.236.243.144
```
```text theme={null}
51.44.50.107
```
**"By verifying that the IP address of the sending server matches one of the following IP addresses, which belong exclusively to your organization."** を選択してください。
次の2つのIPをリストに追加してください:
```text theme={null}
15.236.243.144
```
```text theme={null}
51.44.50.107
```
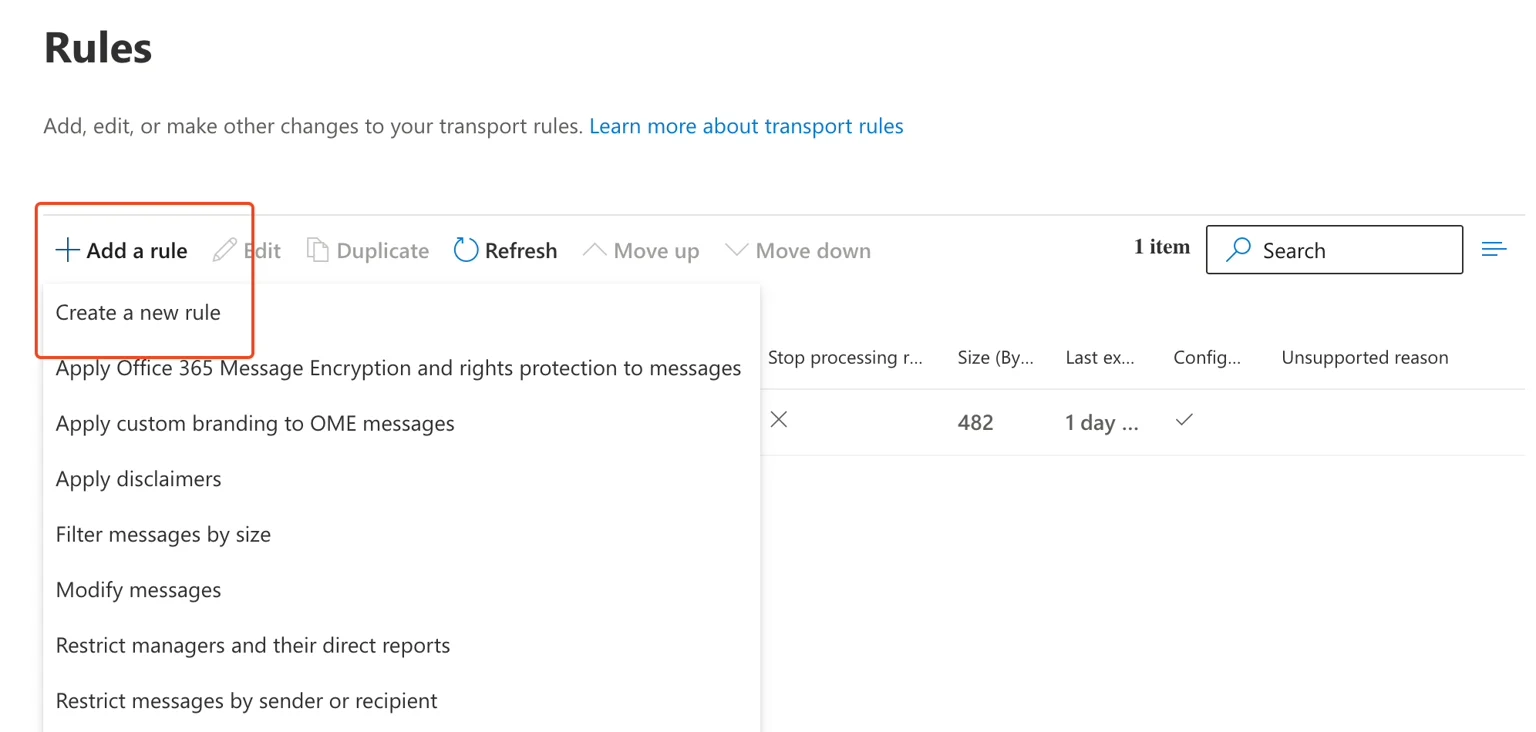
 Exchange 管理画面で **メールフロー → ルール** に移動してください。
**a.** **"Add a rule"** をクリック
**b.** **"Create a new rule"** をクリック
Exchange 管理画面で **メールフロー → ルール** に移動してください。
**a.** **"Add a rule"** をクリック
**b.** **"Create a new rule"** をクリック
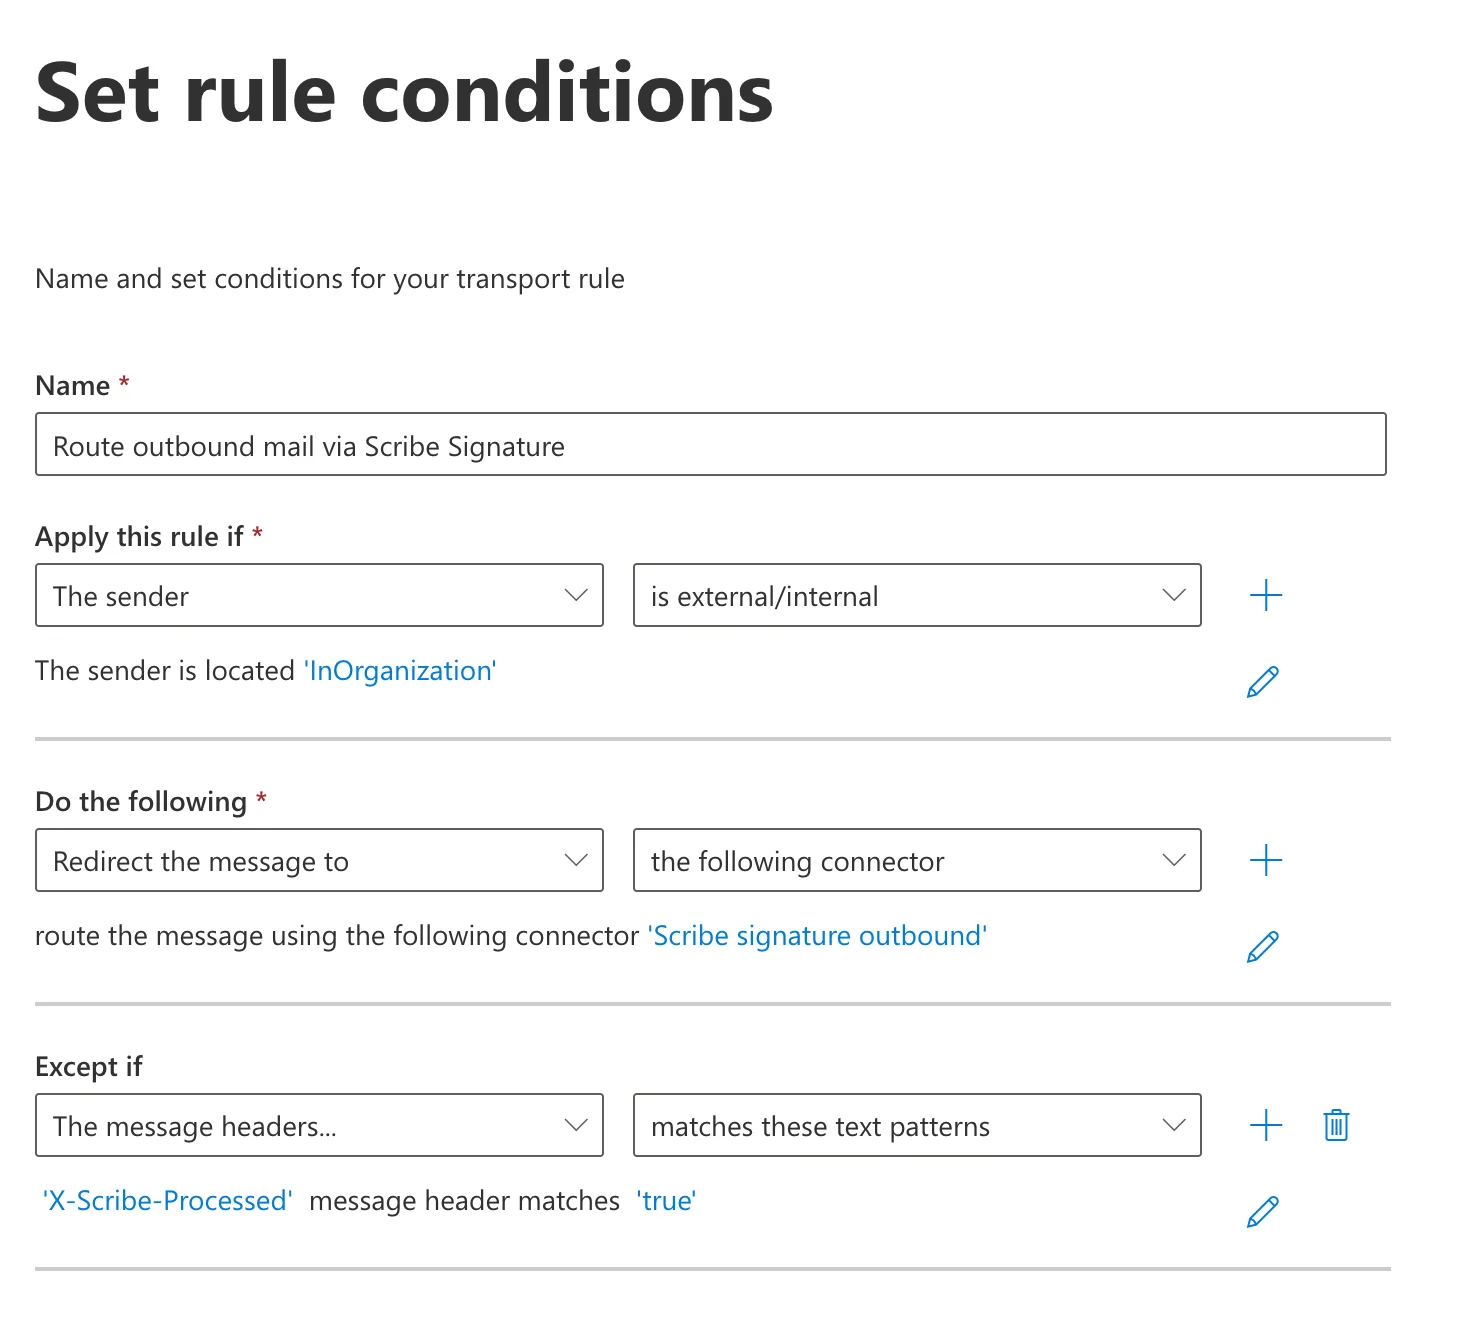
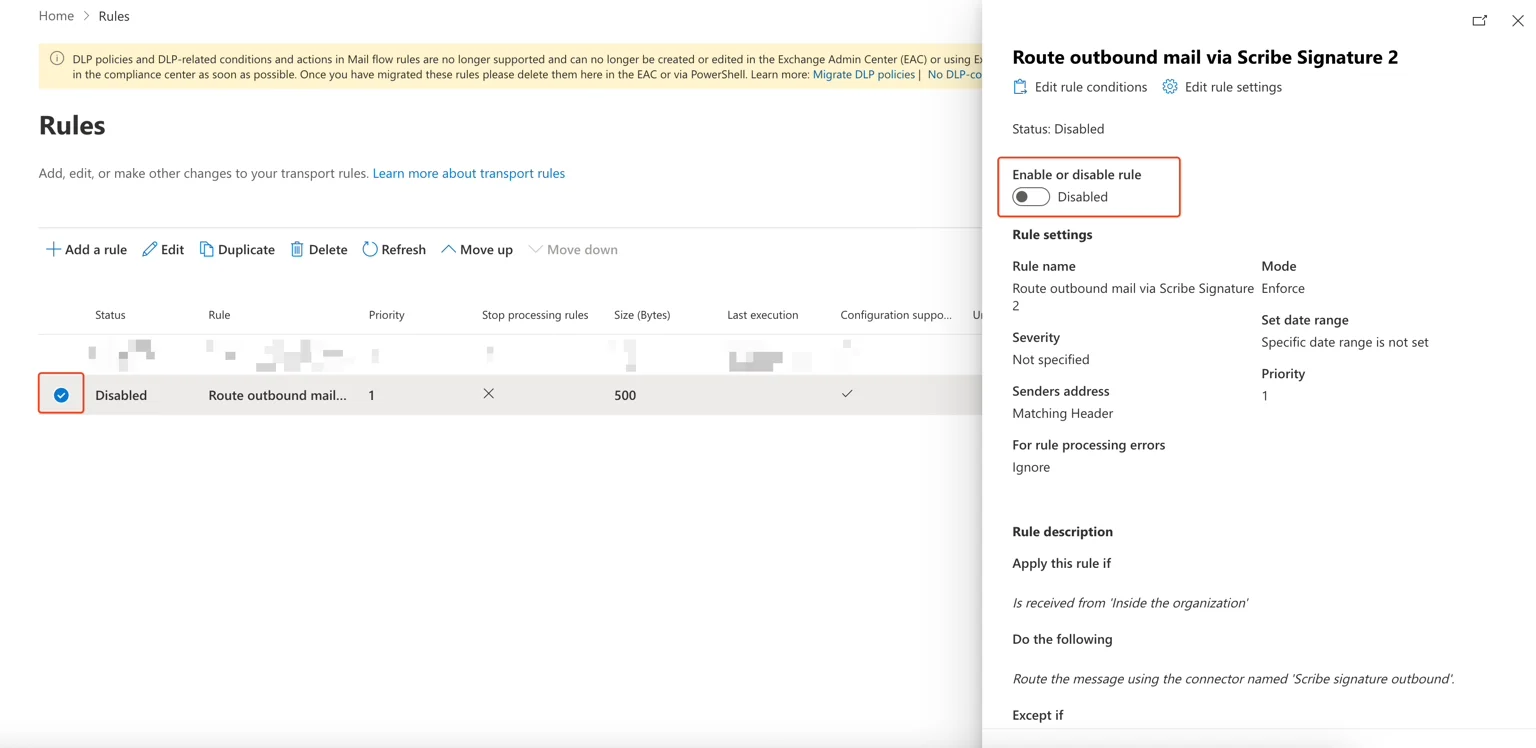
 ルールフォームを次のように入力してください:
* **名前:** `Route outbound mail via Scribe Signature`
* **このルールを適用する条件:** 送信者 → 外部/内部 → 送信者の場所が "InOrganization"
* **実行する処理:** メッセージをリダイレクト → 次のコネクタへ → **"Scribe signature outbound"** を選択
* **次の場合を除く:** メッセージヘッダー → 次のテキストパターンと一致 → `X-Scribe-Processed` メッセージヘッダーが `true` に一致
この例外により、Scribeがメールを複数回処理することを防ぎます。
ルールフォームを次のように入力してください:
* **名前:** `Route outbound mail via Scribe Signature`
* **このルールを適用する条件:** 送信者 → 外部/内部 → 送信者の場所が "InOrganization"
* **実行する処理:** メッセージをリダイレクト → 次のコネクタへ → **"Scribe signature outbound"** を選択
* **次の場合を除く:** メッセージヘッダー → 次のテキストパターンと一致 → `X-Scribe-Processed` メッセージヘッダーが `true` に一致
この例外により、Scribeがメールを複数回処理することを防ぎます。
 次のステップでは、ルール設定はそのままで問題ありません。ルールを確認して保存してください。ルール一覧から作成したルールを選択し、有効化します。
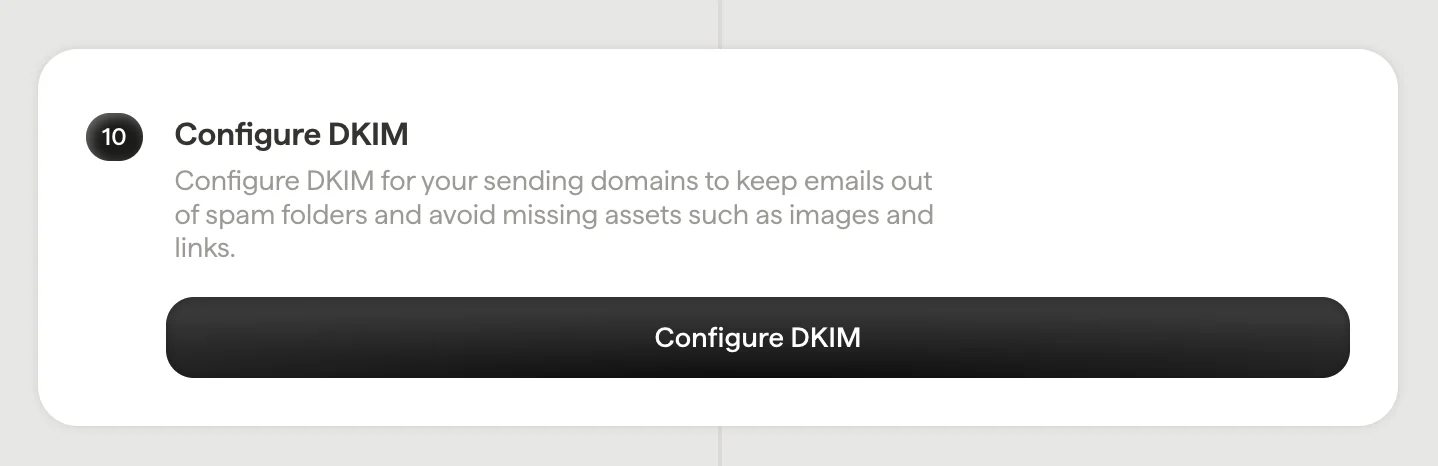
 [送信ドメイン](/ja/configure-your-sending-domain)に対してDKIMを設定し、メールが迷惑メールフォルダーに振り分けられたり、画像やリンクなどの要素が欠落したりするのを防ぎます。
Scribeで **Configure DKIM** をクリックして設定を開始します。
[送信ドメイン](/ja/configure-your-sending-domain)に対してDKIMを設定し、メールが迷惑メールフォルダーに振り分けられたり、画像やリンクなどの要素が欠落したりするのを防ぎます。
Scribeで **Configure DKIM** をクリックして設定を開始します。
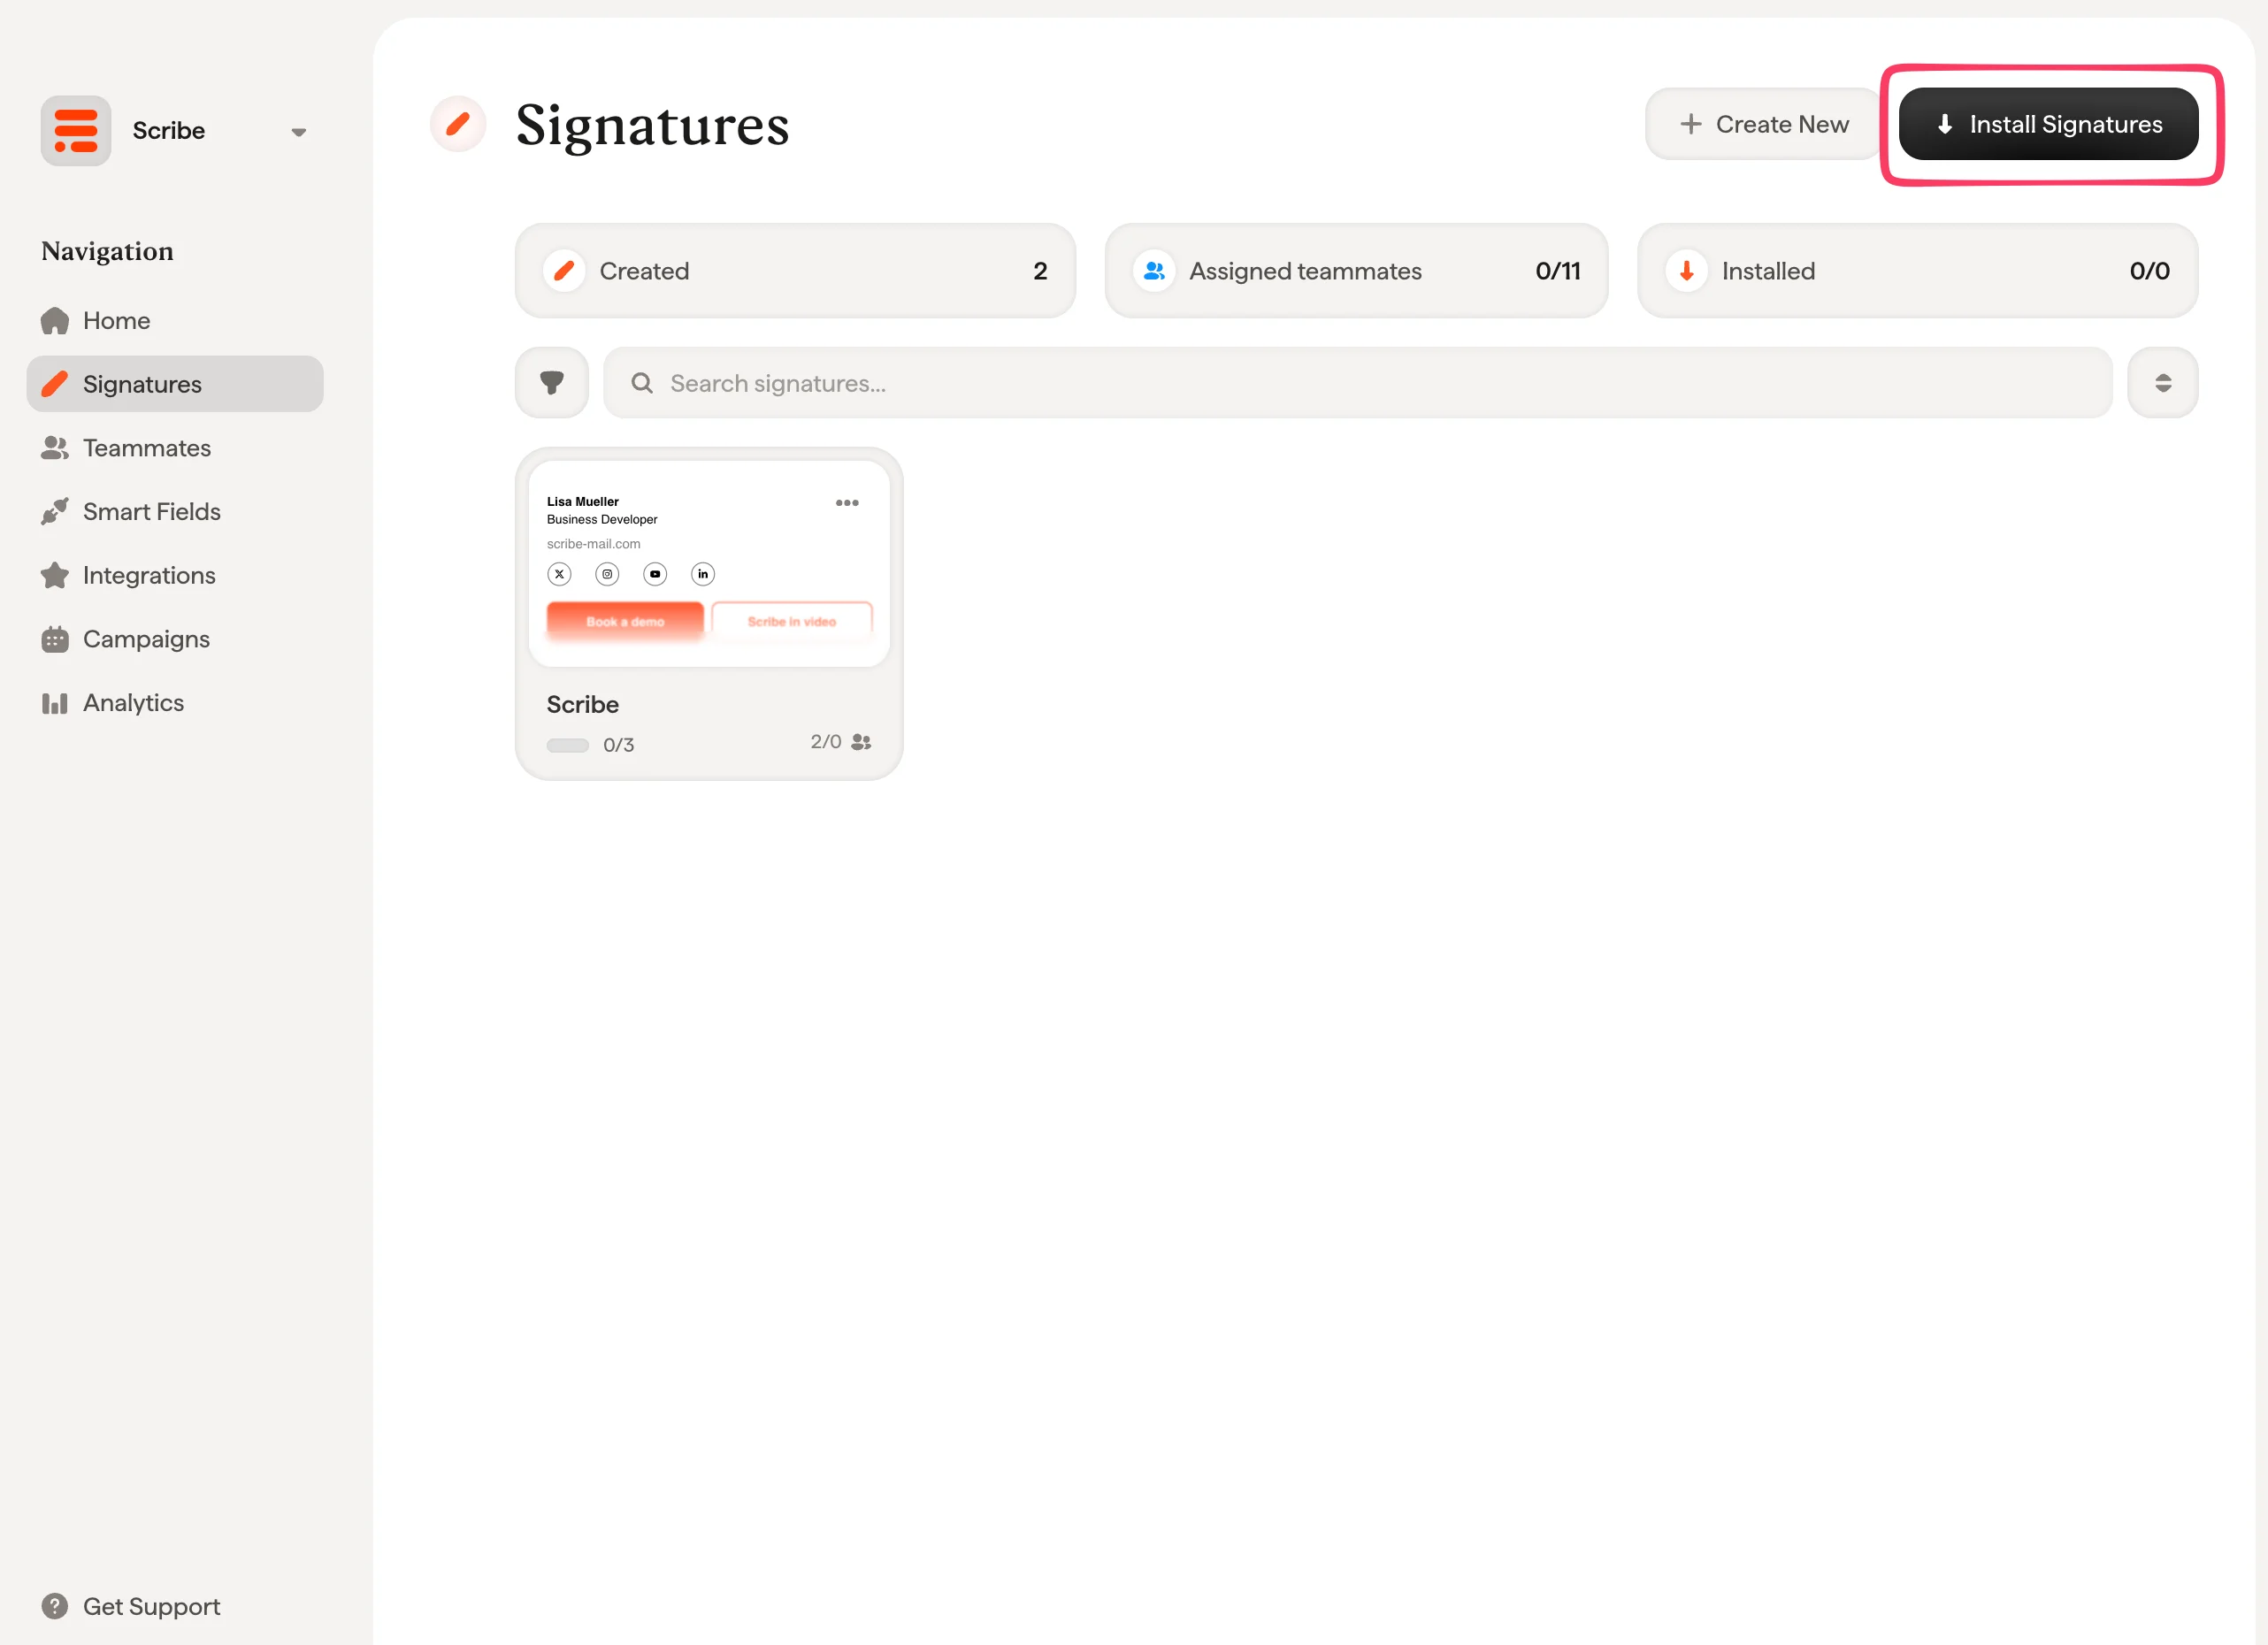
 署名一覧から、[チームメンバー全員の署名を一括でインストール](/ja/install-signatures)するか、段階的に展開するため一つずつインストールします。
 ## 関連記事
* [連携の概要](/ja/integrations-overview):クラウド型・サーバー型を含む、Scribe署名の導入方法を網羅。
* [Google Workspace(サーバー型)](/ja/integrations/signatures/google-workspace-server-side):Scribe経由でメールを配信し、全デバイスをカバー。
* [署名のバリアント](/ja/signature-variants):Outlookおよびサーバー型向けの返信時用・社内向けバリアント。
## 関連記事
* [連携の概要](/ja/integrations-overview):クラウド型・サーバー型を含む、Scribe署名の導入方法を網羅。
* [Google Workspace(サーバー型)](/ja/integrations/signatures/google-workspace-server-side):Scribe経由でメールを配信し、全デバイスをカバー。
* [署名のバリアント](/ja/signature-variants):Outlookおよびサーバー型向けの返信時用・社内向けバリアント。