> ## Documentation Index
> Fetch the complete documentation index at: https://help.scribe-mail.com/llms.txt
> Use this file to discover all available pages before exploring further.
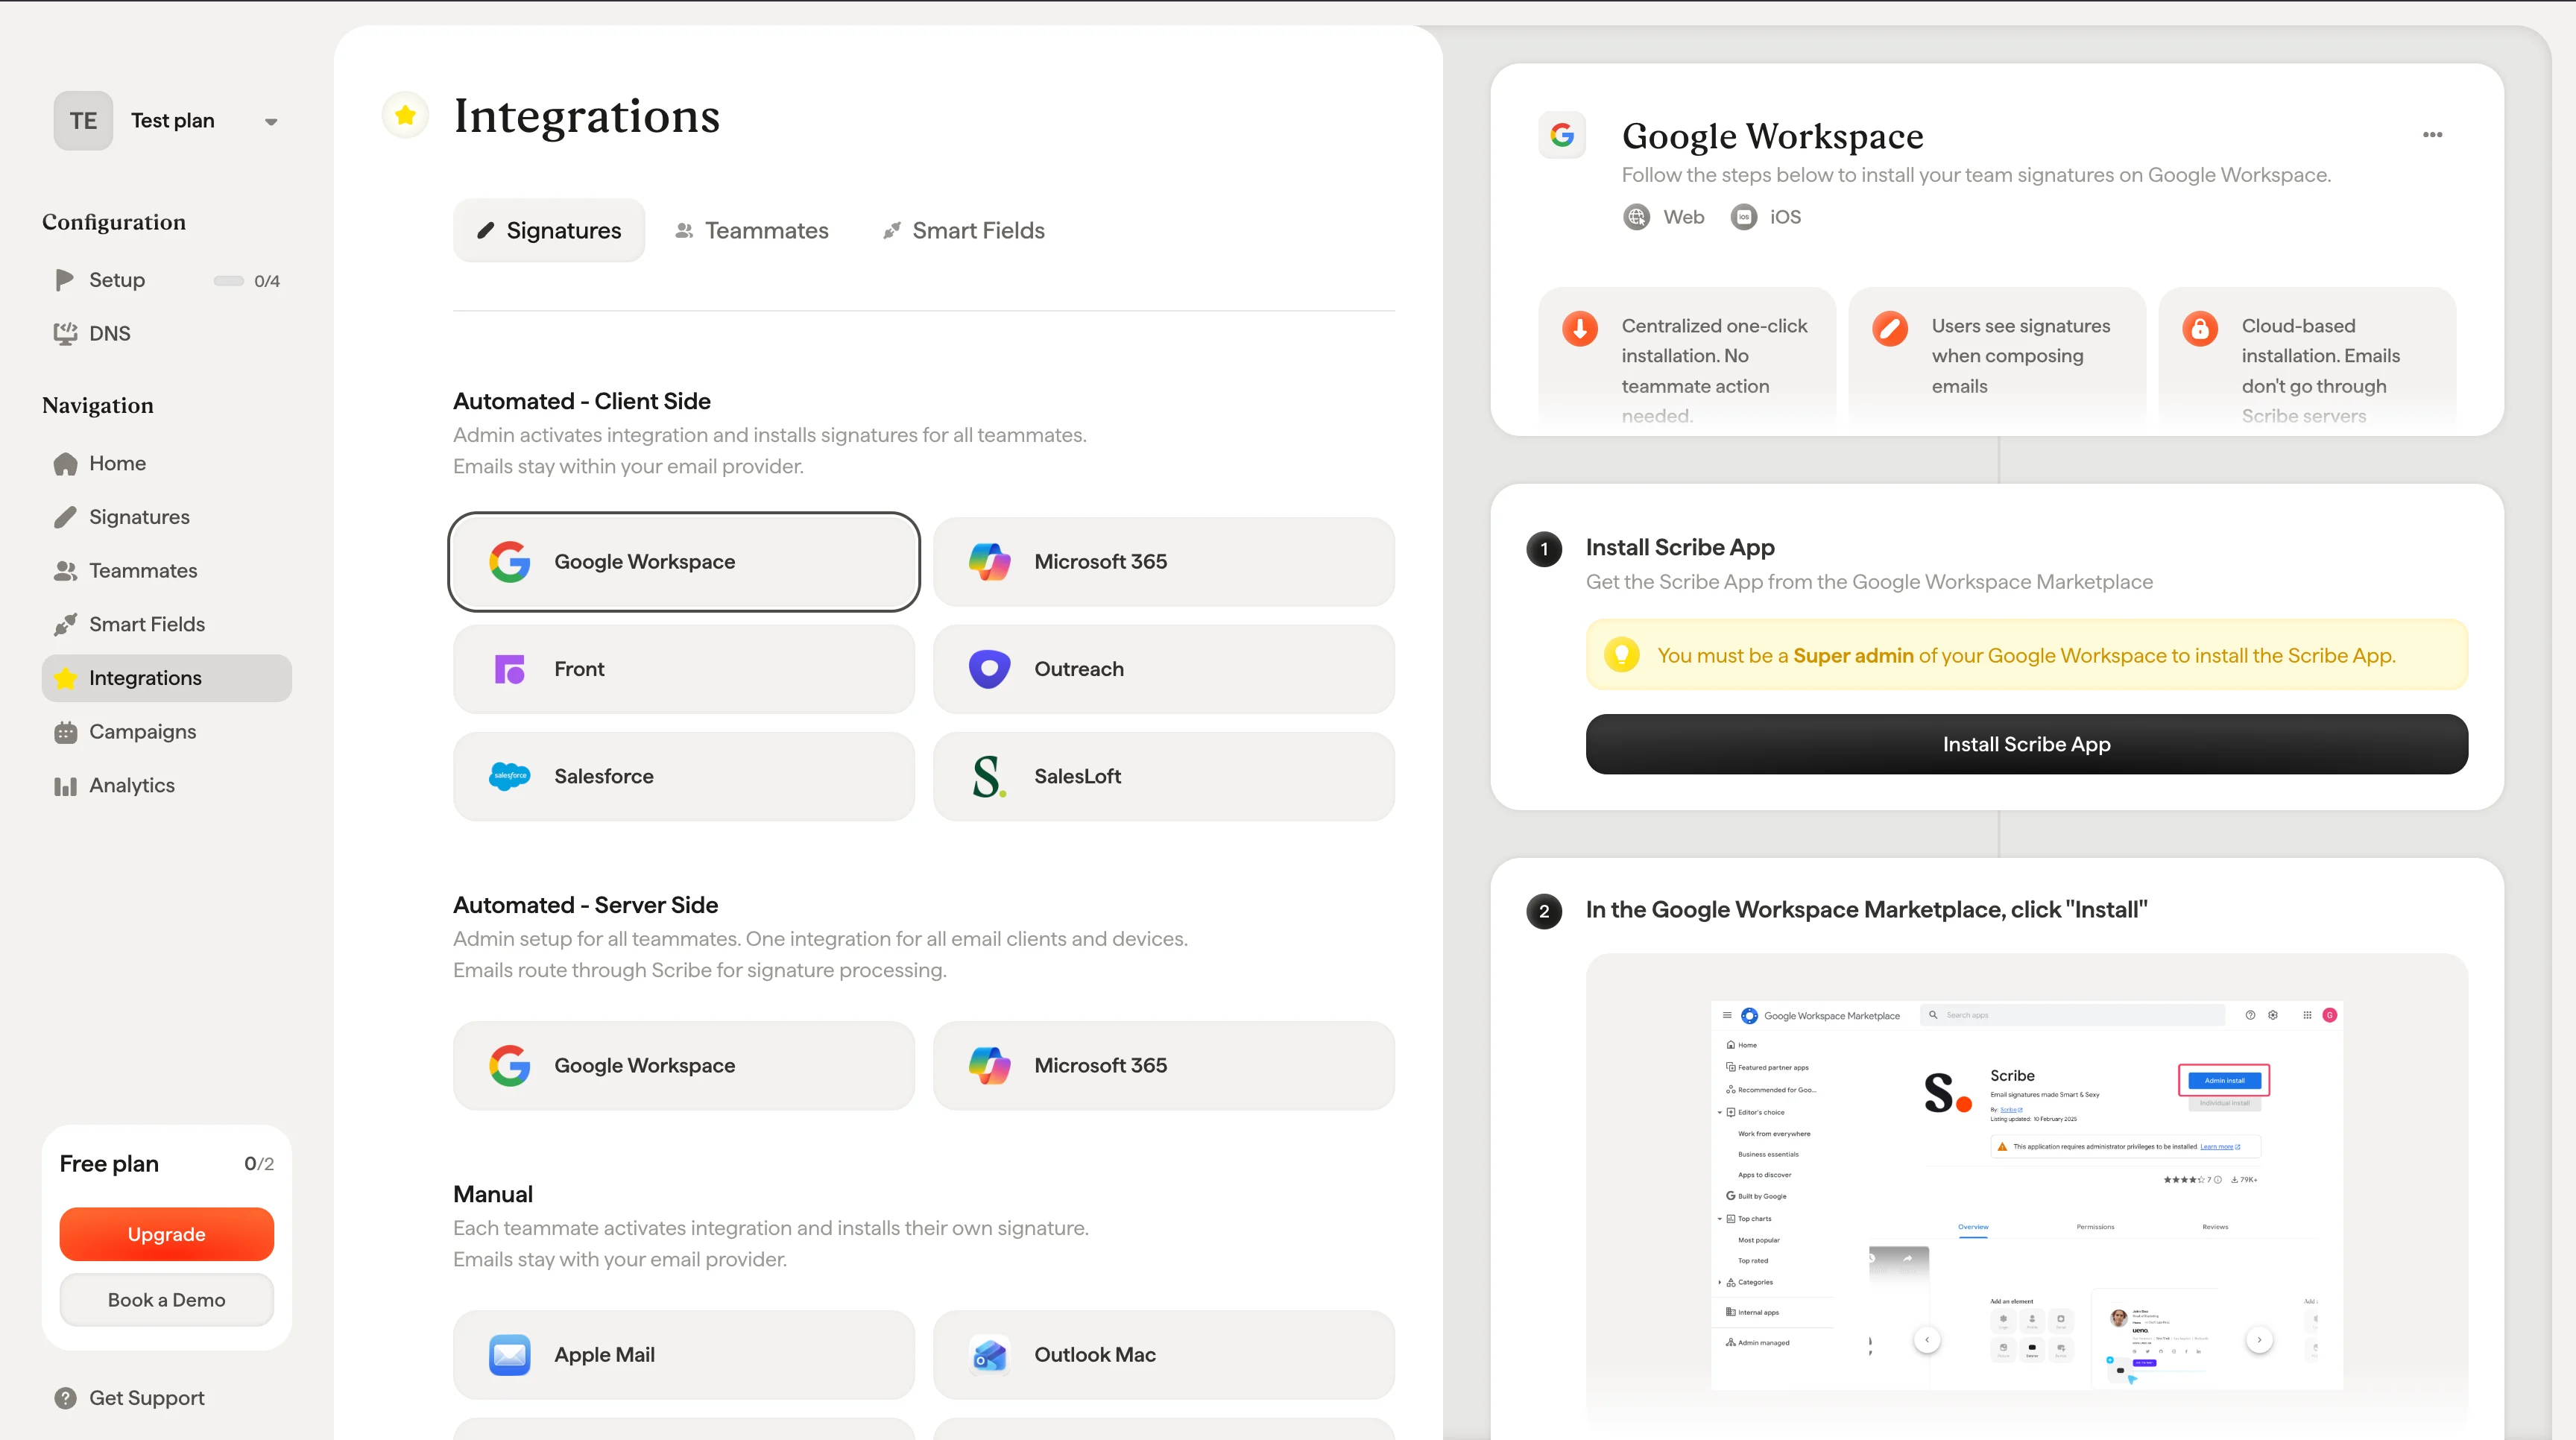
# Google Workspace

> 슈퍼 관리자로서 Scribe 부가 기능을 추가하면, 팀의 Google Workspace 전체에 Scribe 이메일 서명을 한 번의 클릭으로 설치할 수 있어요. 팀원의 별도 작업은 필요하지 않습니다.

<Info>
  **중앙 집중식 원클릭 설치.** 팀원이 별도로 조치할 필요가 없어요. 사용자는 이메일 작성 시 서명을 볼 수 있어요. 클라우드 기반 설치: [이메일은 Scribe 서버를 거치지 않아요](/ko/integrations/signatures/google-workspace-server-side).
</Info>

<Info>
  **지원 플랫폼:** 웹, iOS
</Info>

## 설치 가이드

<Warning>
  Scribe 앱을 설치하려면 Google Workspace의 **슈퍼 관리자**여야 해요.
</Warning>

<Steps>
  <Step title="Scribe 앱 설치">
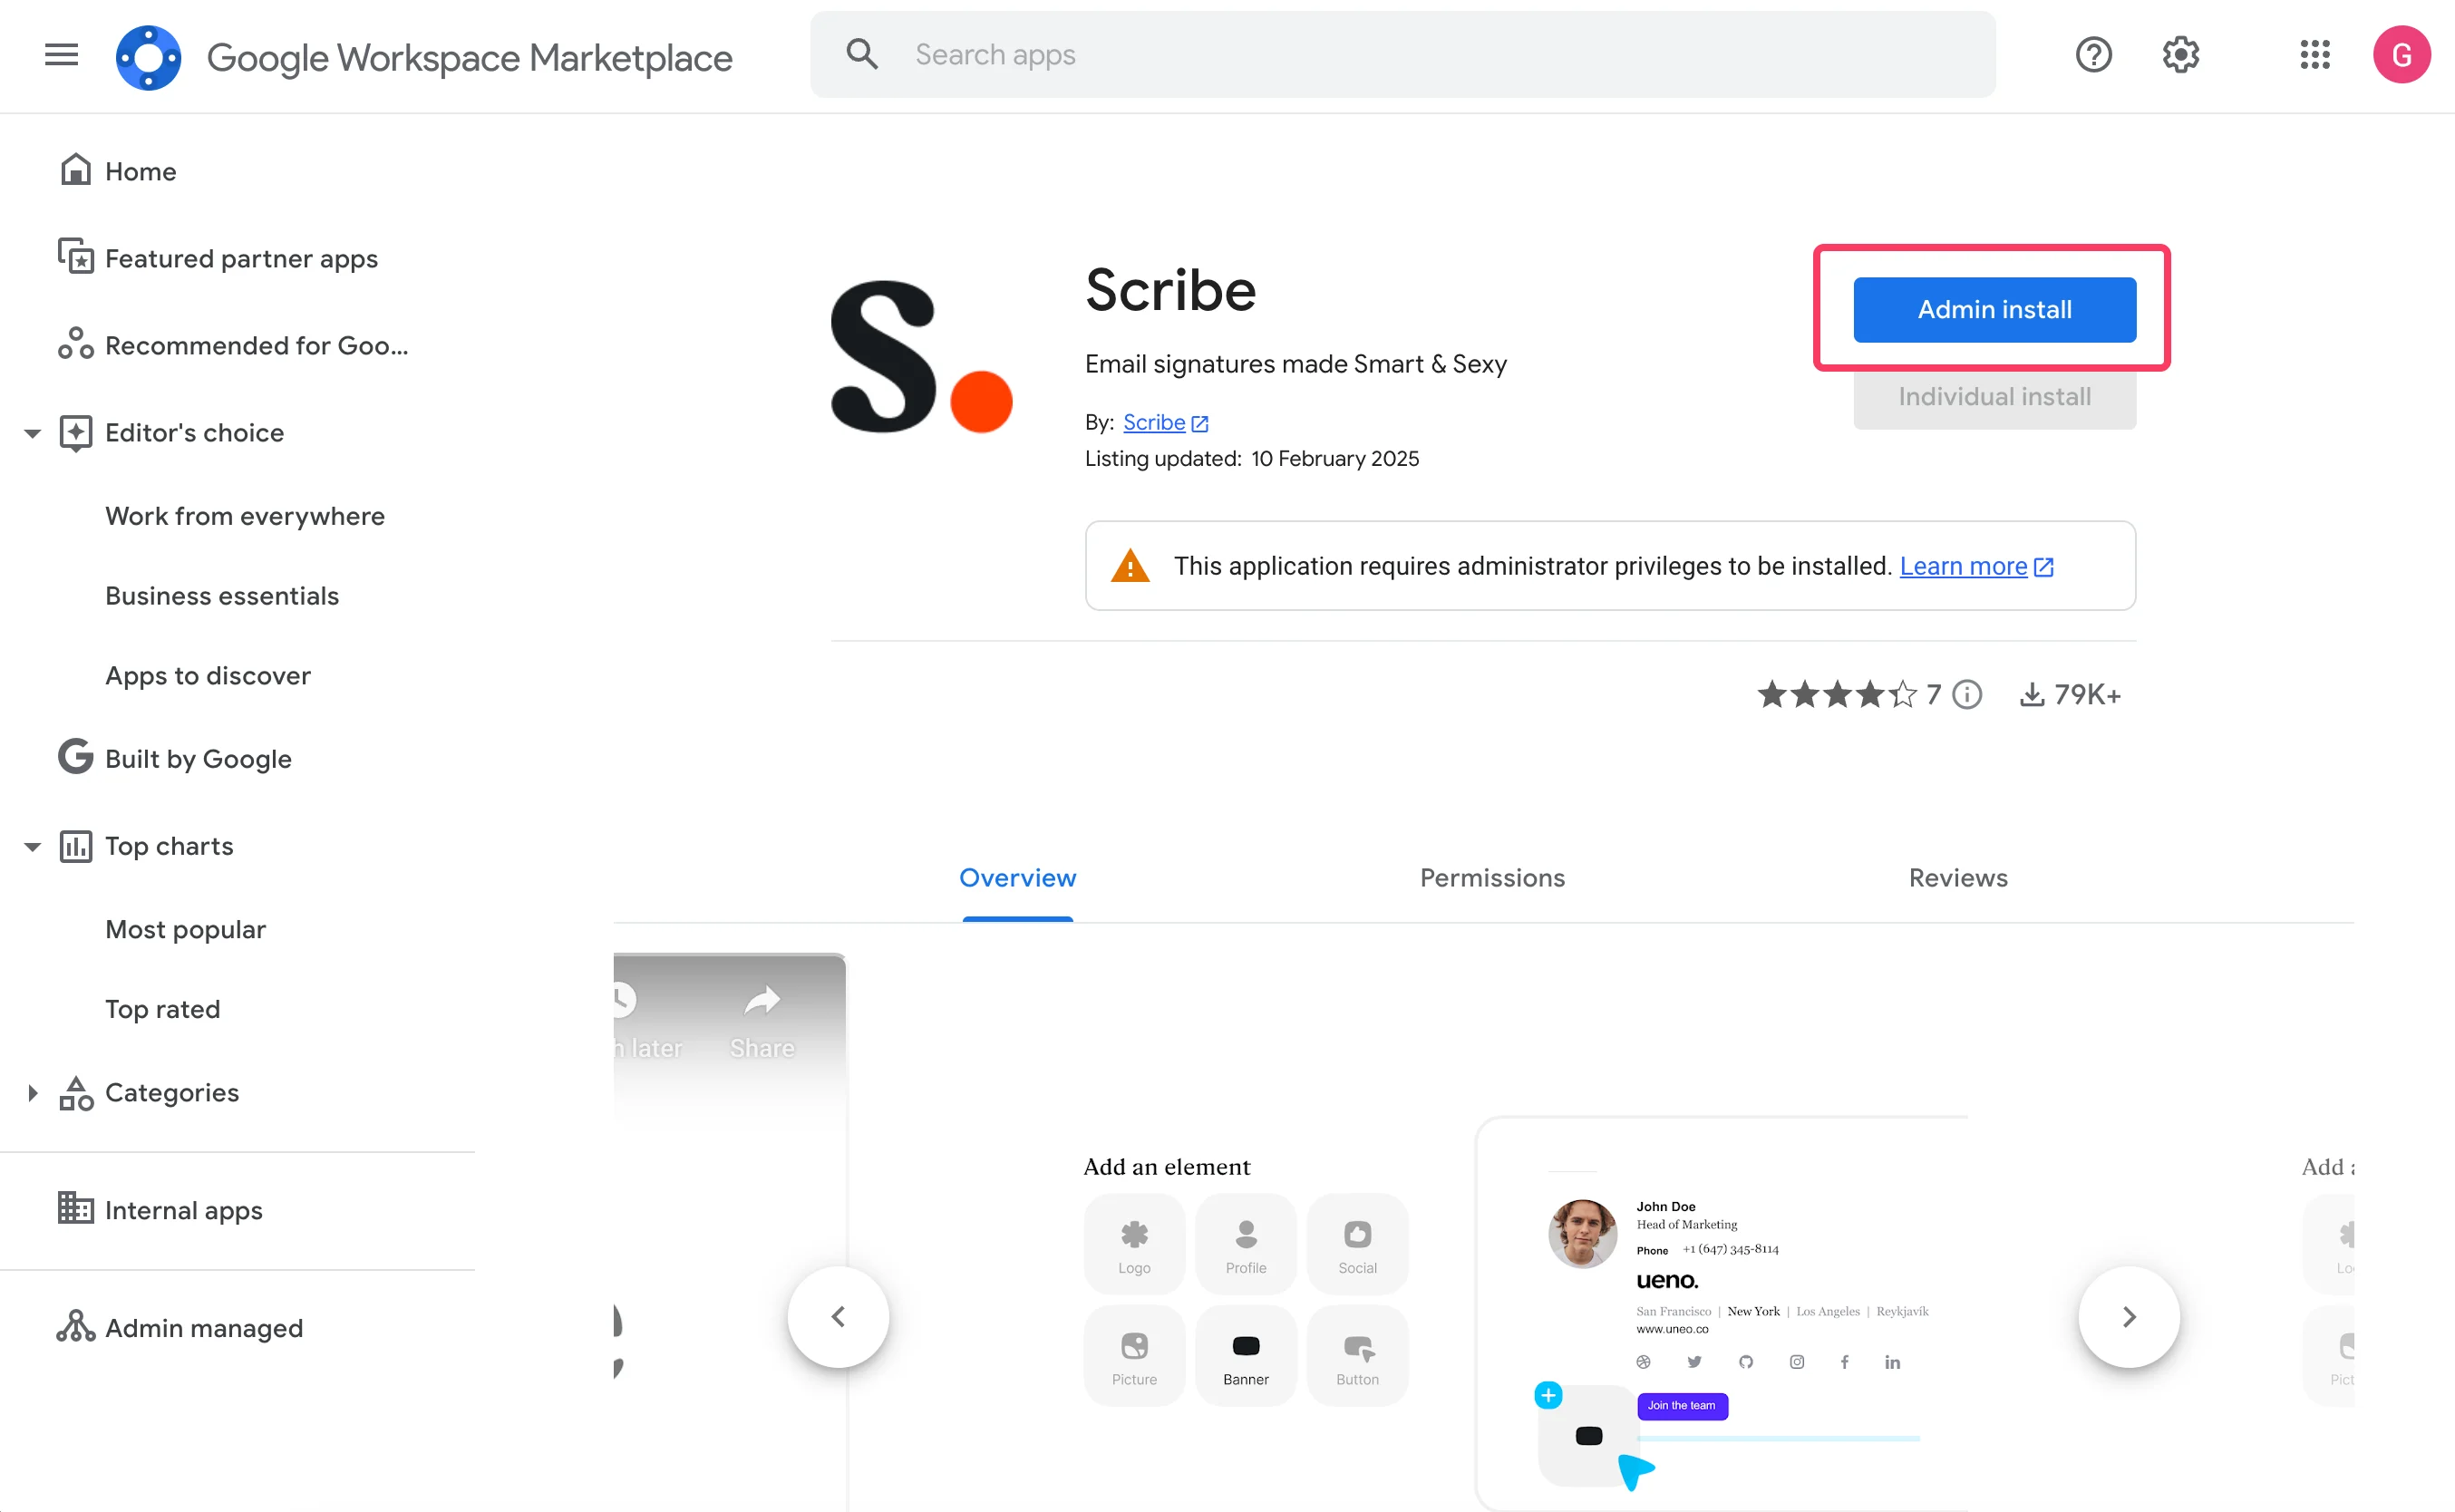
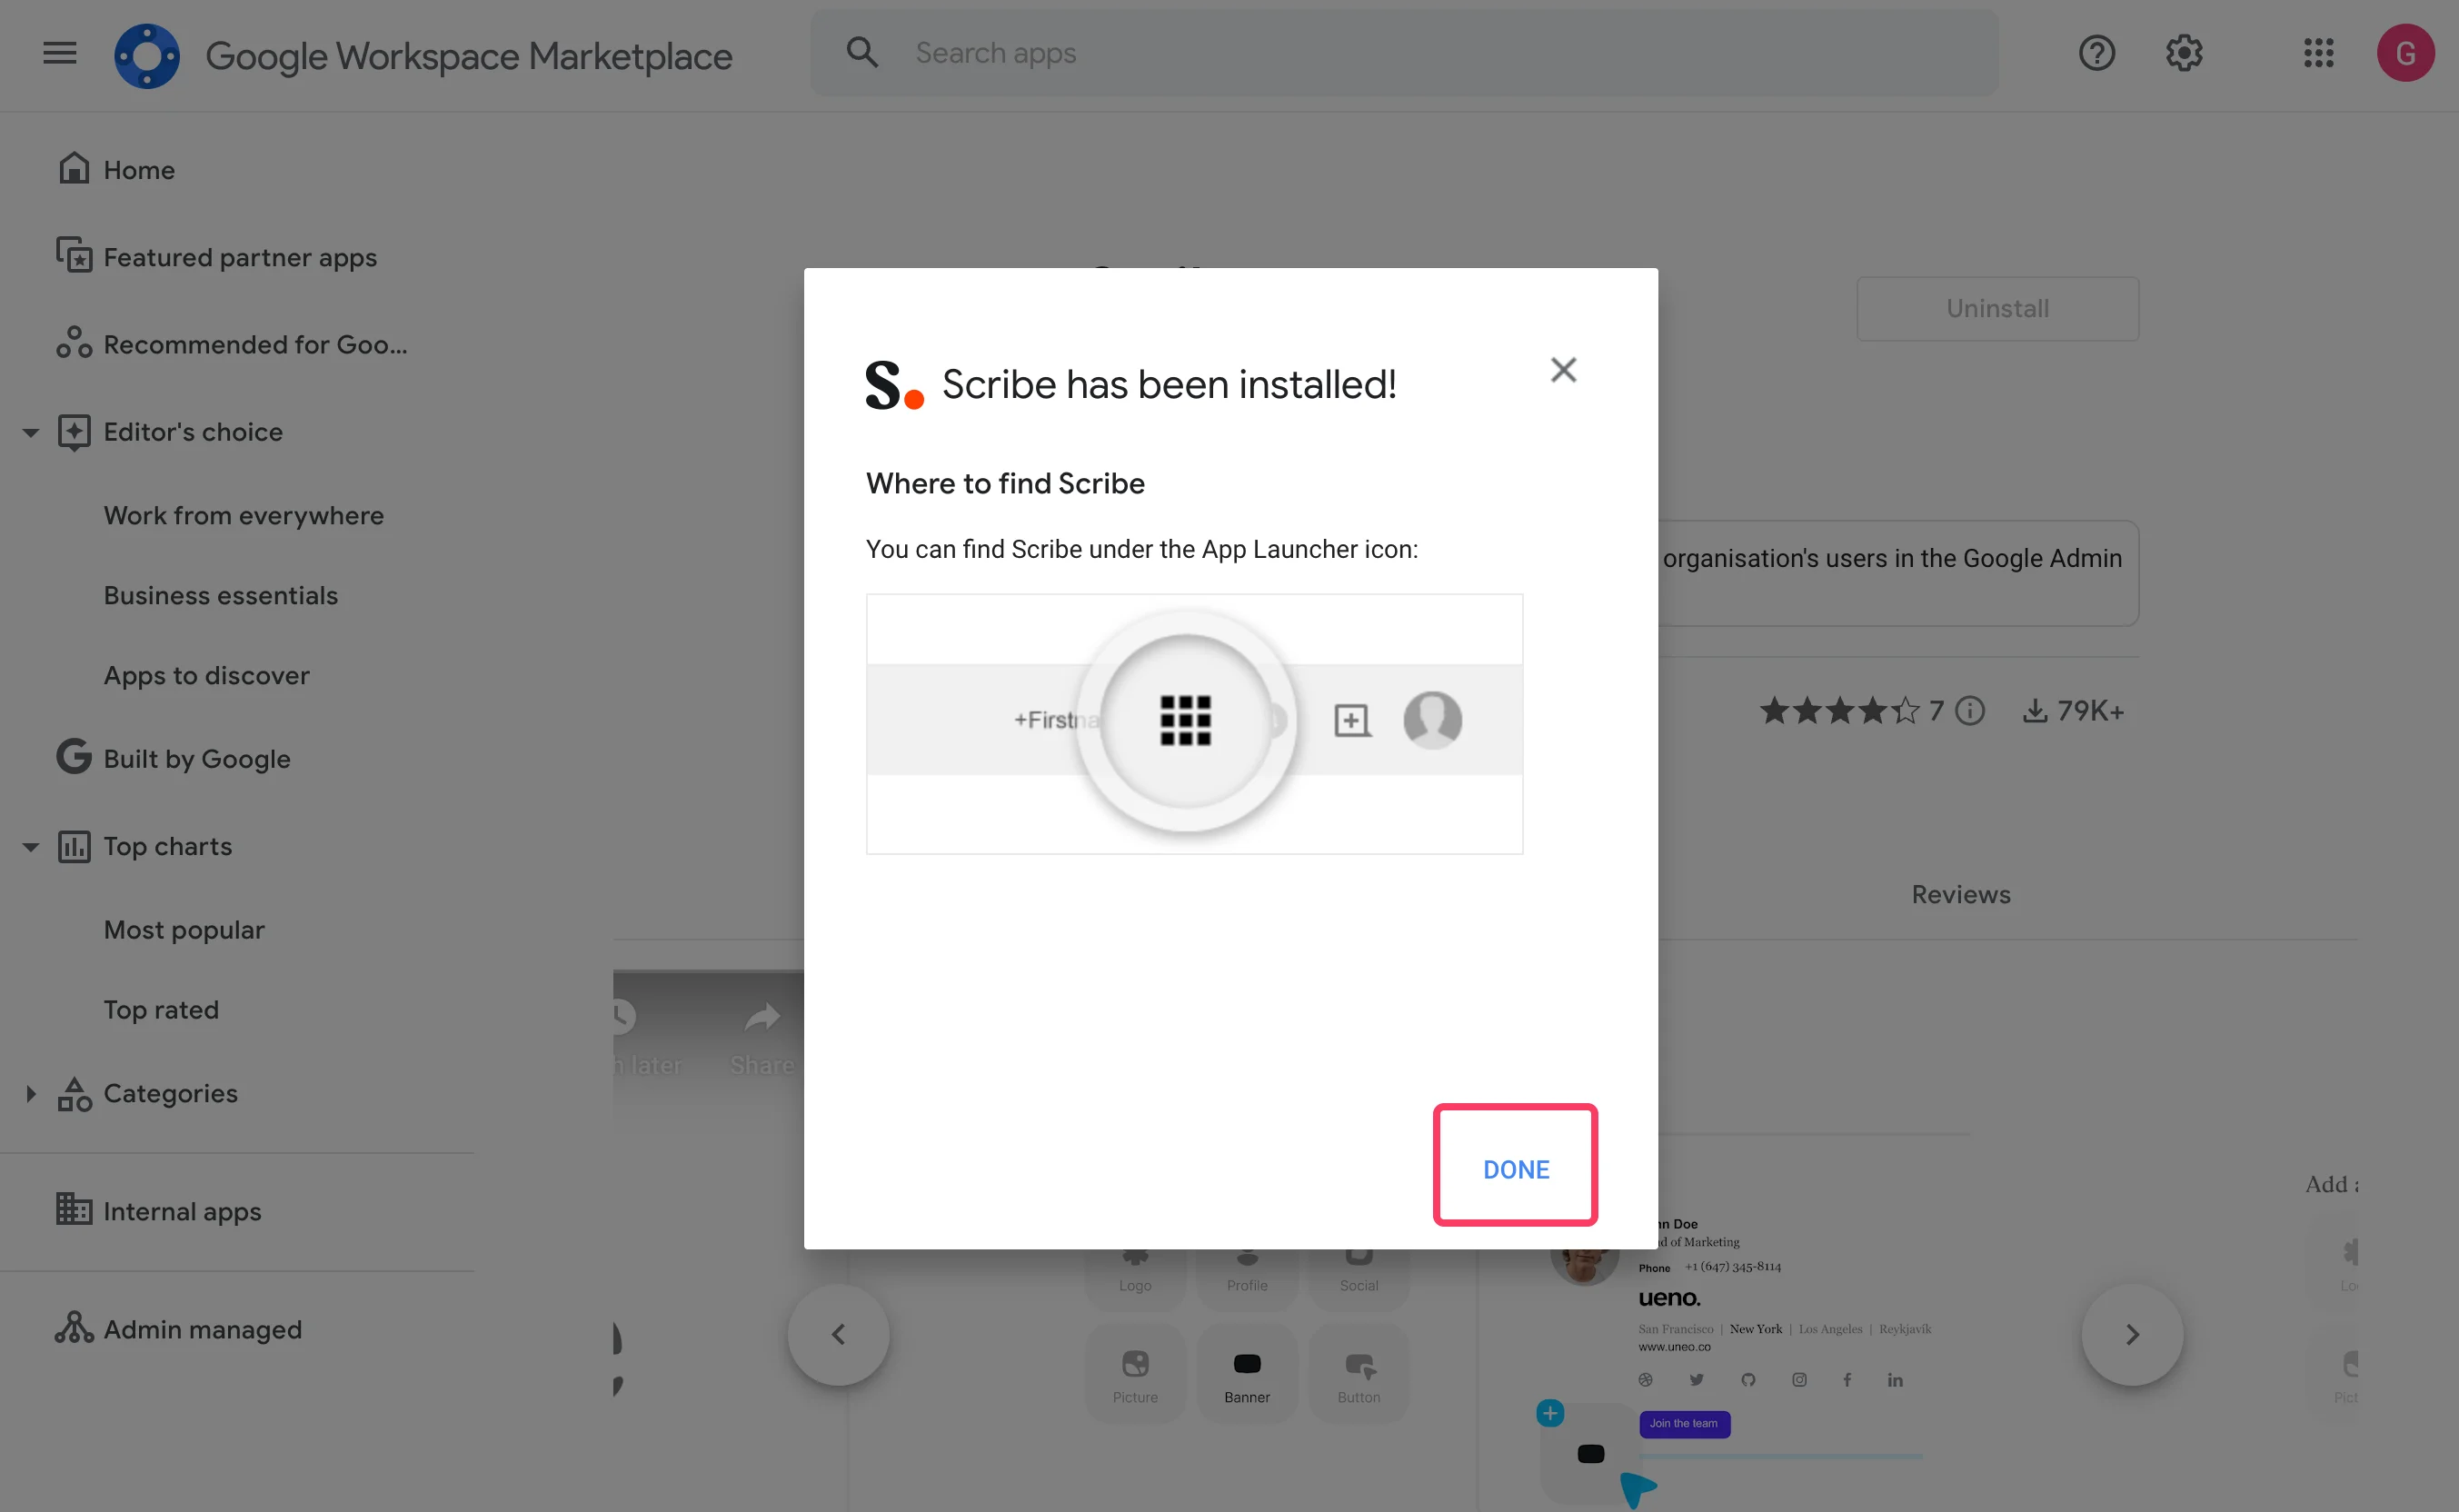
    Google Workspace Marketplace에서 Scribe 앱을 받으세요.

    Scribe에서 **Install Scribe App**을 클릭하면 Google Workspace Marketplace가 열려요.

    <Frame>
      <img src="https://mintcdn.com/scribe/Z_G2D9X-Tlrxu_Eh/images/google-workspace-install-scribe-app-button.png?fit=max&auto=format&n=Z_G2D9X-Tlrxu_Eh&q=85&s=81129db47cad097bef6fe5c4a671dfad" alt="Scribe Google Workspace 설정의 Install Scribe App 버튼" width="3456" height="1932" data-path="images/google-workspace-install-scribe-app-button.png" />
    </Frame>
  </Step>

  <Step title="Google Workspace Marketplace에서 &#x22;Install&#x22;을 클릭하세요">
    <Frame>
      <img src="https://mintcdn.com/scribe/I5V9iTucPI_EY3nq/integrations/signatures/images/gw-step-2.png?fit=max&auto=format&n=I5V9iTucPI_EY3nq&q=85&s=a48f84df85039c58b423b68ae8fc65f4" alt="Admin Install 버튼이 강조 표시된 Google Workspace Marketplace의 Scribe 앱 목록" width="2708" height="1668" data-path="integrations/signatures/images/gw-step-2.png" />
    </Frame>
  </Step>

  <Step title="&#x22;Admin install&#x22; 모달에서 &#x22;Continue&#x22;를 클릭하세요">
    <Frame>
      <img src="https://mintcdn.com/scribe/I5V9iTucPI_EY3nq/integrations/signatures/images/gw-step-3.png?fit=max&auto=format&n=I5V9iTucPI_EY3nq&q=85&s=de382ac3ca41cf702f31bbc8576ef1dc" alt="Continue 버튼이 강조 표시된 Google Workspace Marketplace의 Admin install 모달" width="2696" height="1662" data-path="integrations/signatures/images/gw-step-3.png" />
    </Frame>
  </Step>

  <Step title="데이터 접근 권한 확인">
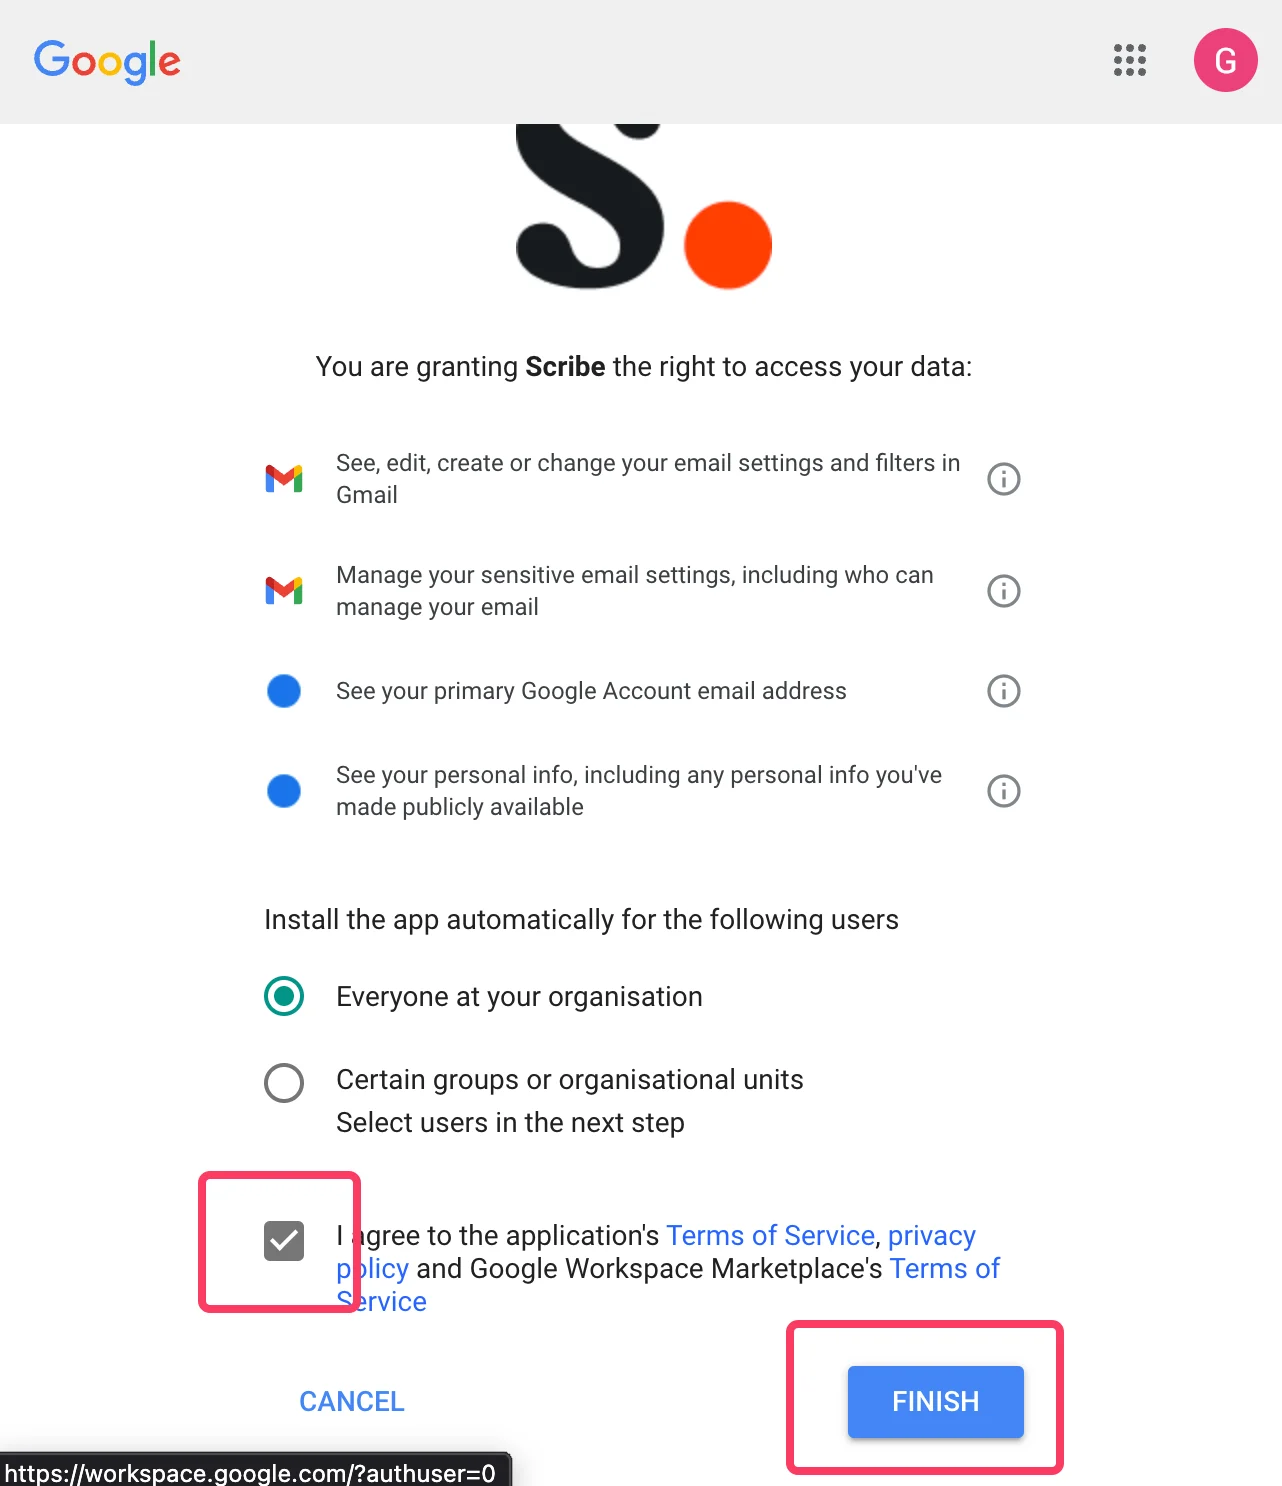
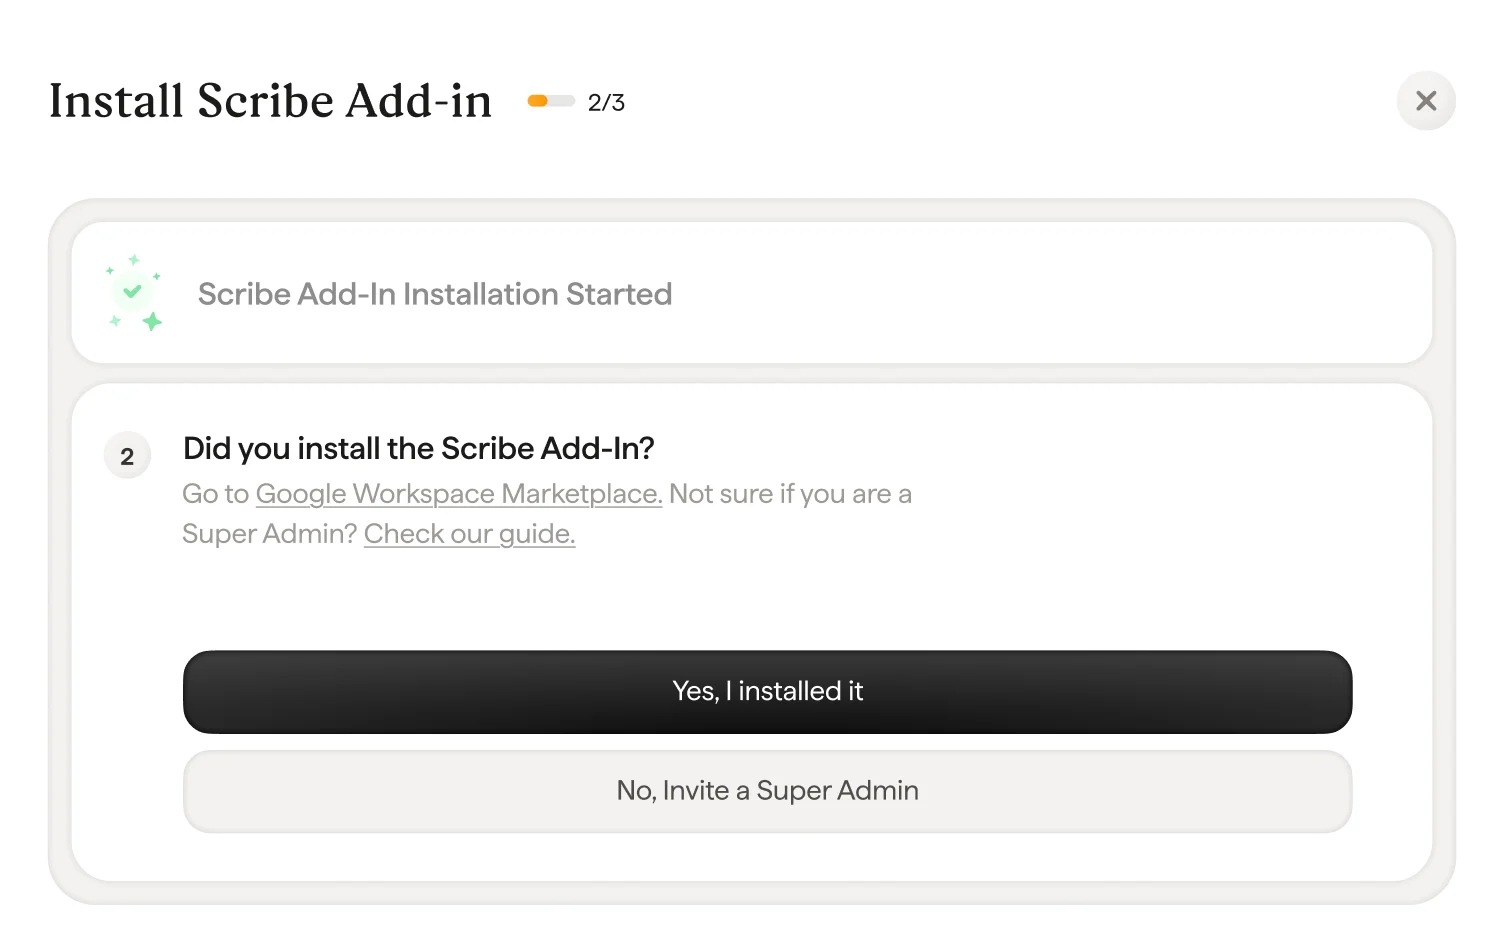
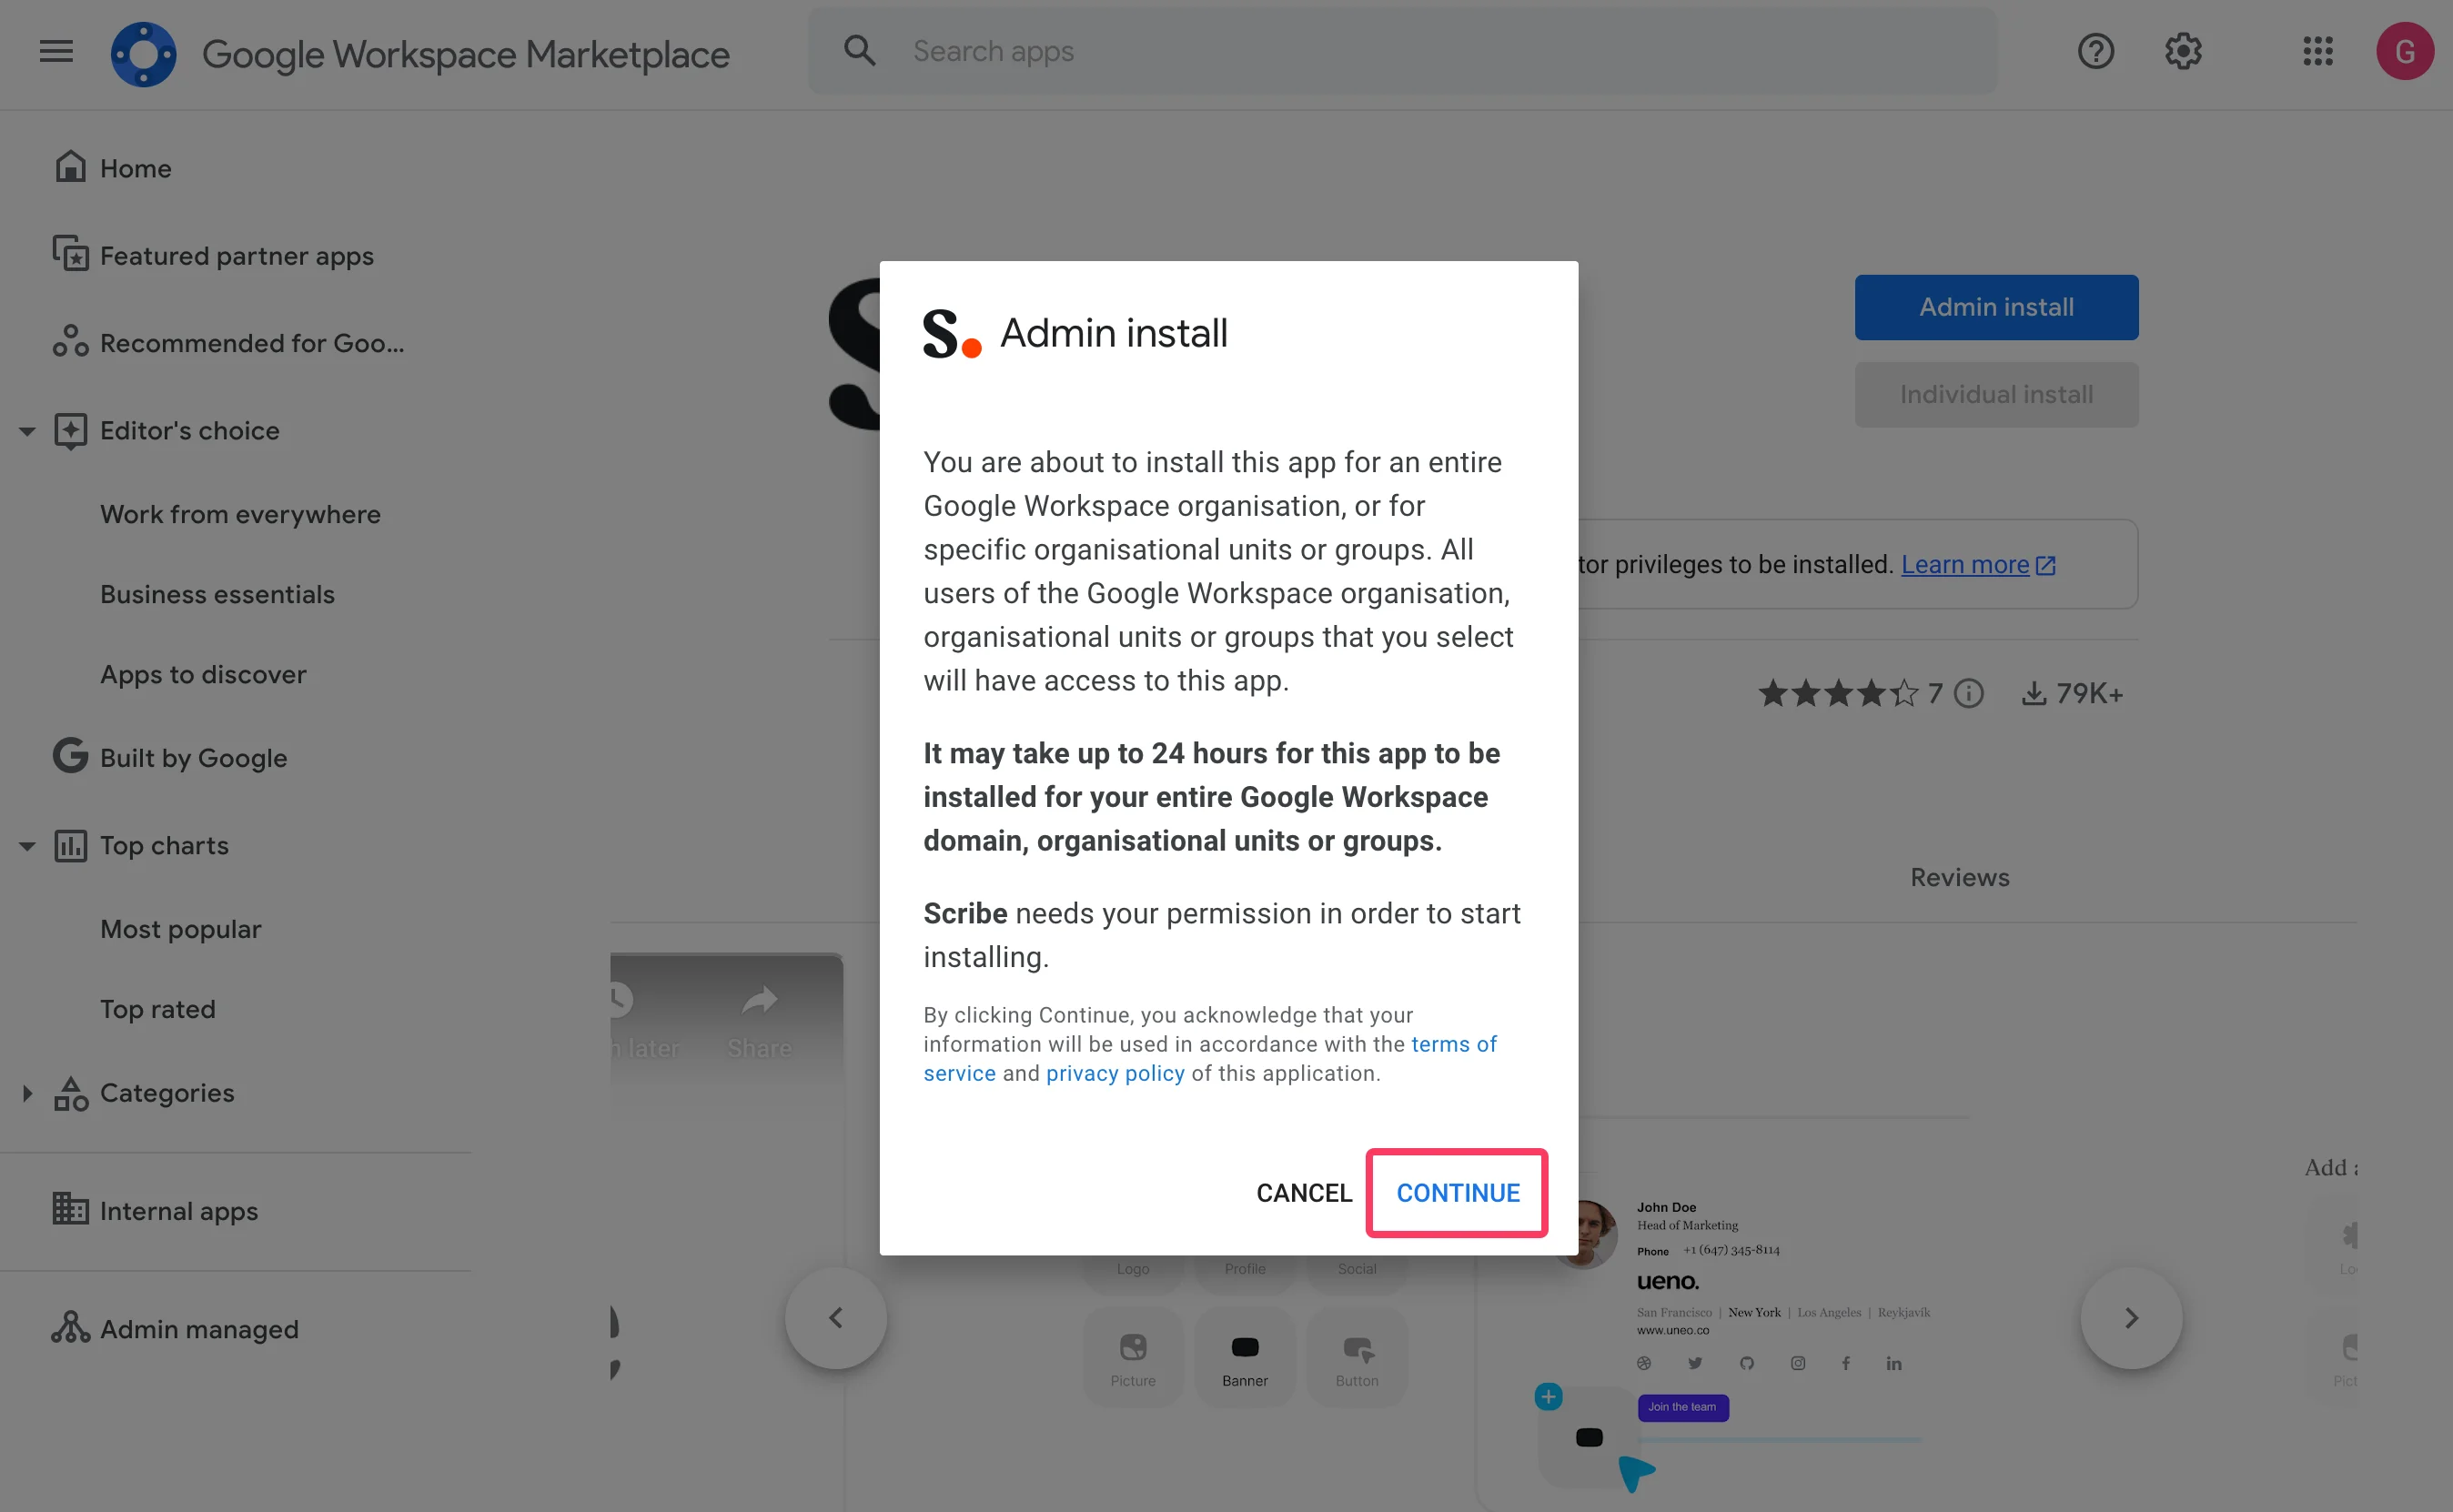
    "Everyone at your organization"과 "I agree to the application terms of service."를 반드시 선택하세요.

    <Frame>
      <img src="https://mintcdn.com/scribe/I5V9iTucPI_EY3nq/integrations/signatures/images/gw-step-4.png?fit=max&auto=format&n=I5V9iTucPI_EY3nq&q=85&s=69c222aa3d1317946df0ba5562498481" alt="Everyone at your organization이 선택되고 서비스 약관 체크박스가 강조 표시된 Google 데이터 접근 권한 확인 화면" className="mx-auto" style={{ width:"68%" }} width="1282" height="1486" data-path="integrations/signatures/images/gw-step-4.png" />
    </Frame>
  </Step>

  <Step title="&#x22;Done&#x22;을 클릭하고 Scribe로 돌아가세요">
    <Frame>
      <img src="https://mintcdn.com/scribe/I5V9iTucPI_EY3nq/integrations/signatures/images/gw-step-5.png?fit=max&auto=format&n=I5V9iTucPI_EY3nq&q=85&s=4b864e736a0d2419c73d425a1cd17676" alt="Done 버튼이 강조 표시된 Scribe 설치 완료 확인 모달" width="2706" height="1664" data-path="integrations/signatures/images/gw-step-5.png" />
    </Frame>
  </Step>

  <Step title="Scribe에서 &#x22;Yes I installed it&#x22;을 클릭해 부가 기능 설치를 확인하세요">
    <Frame>
      <img src="https://mintcdn.com/scribe/I5V9iTucPI_EY3nq/integrations/signatures/images/gw-step-6.png?fit=max&auto=format&n=I5V9iTucPI_EY3nq&q=85&s=0f1b7c8df87de1e02214609e2406e7db" alt="Yes I installed it 버튼이 있는 Scribe 부가 기능 확인 화면" width="1504" height="951" data-path="integrations/signatures/images/gw-step-6.png" />
    </Frame>
  </Step>

  <Step title="Google 검증 대기">
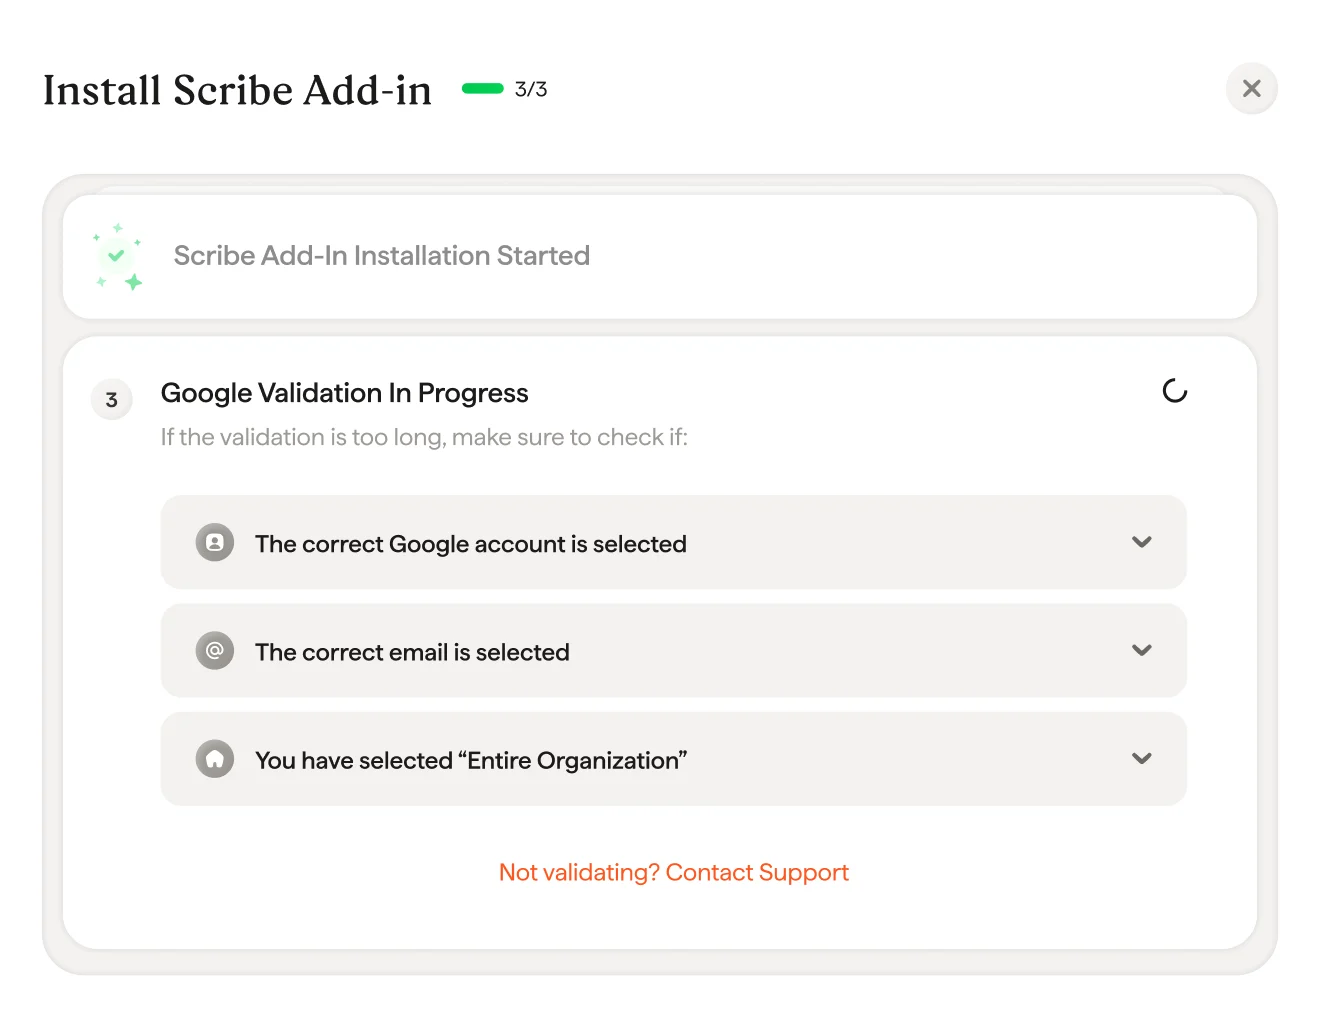
    검증은 보통 몇 초면 끝나요. 그렇지 않다면 모달의 문제 해결 목록을 확인하세요.

    <Frame>
      <img src="https://mintcdn.com/scribe/I5V9iTucPI_EY3nq/integrations/signatures/images/gw-step-7.png?fit=max&auto=format&n=I5V9iTucPI_EY3nq&q=85&s=2129366880b09719832617b555734dfa" alt="문제 해결 체크리스트가 있는 Google 검증 진행 중 화면" width="1320" height="1016" data-path="integrations/signatures/images/gw-step-7.png" />
    </Frame>
  </Step>

  <Step title="Scribe 부가 기능 설치 완료">
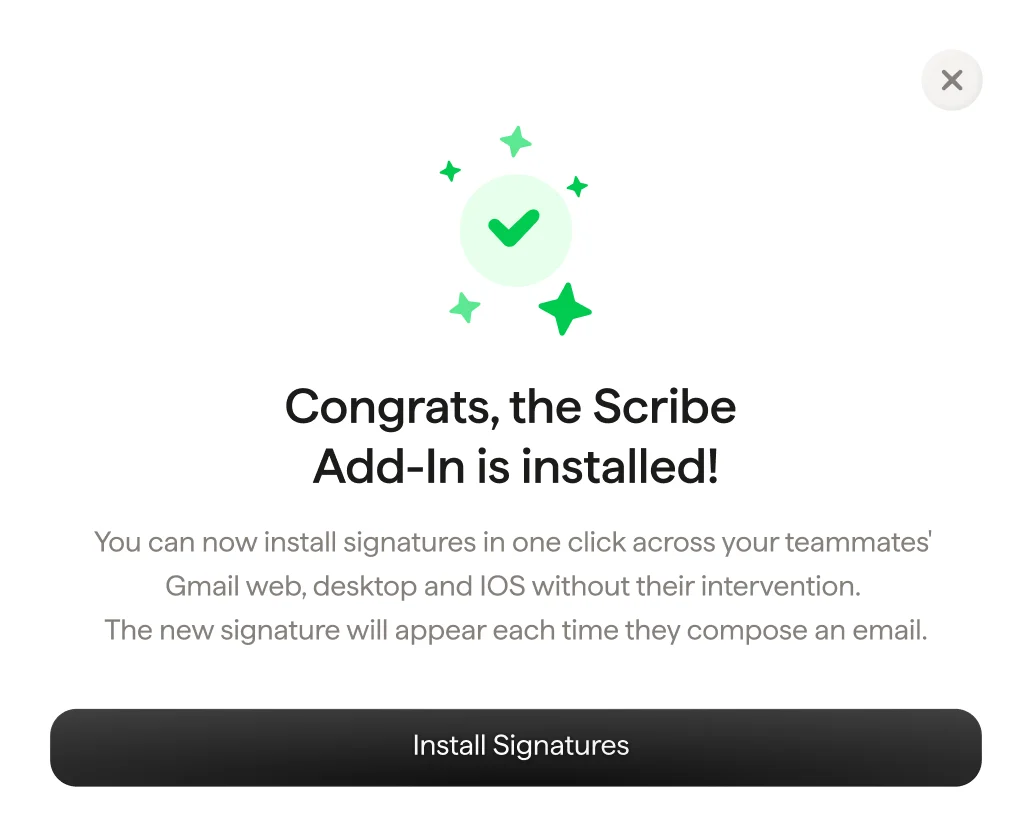
    검증 모달이 나타나면 "Install signature"를 클릭해 Scribe 서명 목록으로 이동하세요.

    <Frame>
      <img src="https://mintcdn.com/scribe/I5V9iTucPI_EY3nq/integrations/signatures/images/gw-step-8.png?fit=max&auto=format&n=I5V9iTucPI_EY3nq&q=85&s=838f8310a4802a92ab3433b06cc02945" alt="Scribe 추가 기능이 설치되었음을 알리는 확인 화면과 서명 설치 버튼" className="mx-auto" style={{ width:"82%" }} width="1032" height="836" data-path="integrations/signatures/images/gw-step-8.png" />
    </Frame>
  </Step>

  <Step title="팀 서명 설치">
    서명 목록에서 [팀원에게 모든 서명을 한 번에 설치](/ko/install-signatures)하거나, 단계적 배포를 위해 하나씩 설치할 수 있어요.

    <Frame>
      <img src="https://mintcdn.com/scribe/I5V9iTucPI_EY3nq/integrations/signatures/images/gw-step-9.png?fit=max&auto=format&n=I5V9iTucPI_EY3nq&q=85&s=7966ca1cc3ae1bd87801ce67cd060f10" alt="Install Signatures 버튼이 강조된 Scribe 서명 목록" width="2564" height="1860" data-path="integrations/signatures/images/gw-step-9.png" />
    </Frame>
  </Step>
</Steps>

## 관련 문서

* [연동 개요](/ko/integrations-overview): 클라우드 또는 서버 측에서 Scribe 서명을 배포하는 모든 방법.
* [Microsoft 365](/ko/integrations/signatures/microsoft-365-client-side): Microsoft 365와 Outlook을 위한 원클릭 클라우드 설치.
* [설치 상태 및 오류](/ko/signature-installation-statuses-and-errors): 각 설치 상태의 의미와 오류 해결 방법.
