> ## Documentation Index
> Fetch the complete documentation index at: https://help.scribe-mail.com/llms.txt
> Use this file to discover all available pages before exploring further.

# Google Workspace

> Google Workspace를 Scribe에 연결하고 조직 단위와 그룹에서 원하는 팀원만 선택해 동기화하세요. 세부 정보와 이후의 변경 사항은 자동으로 최신 상태로 유지돼요.

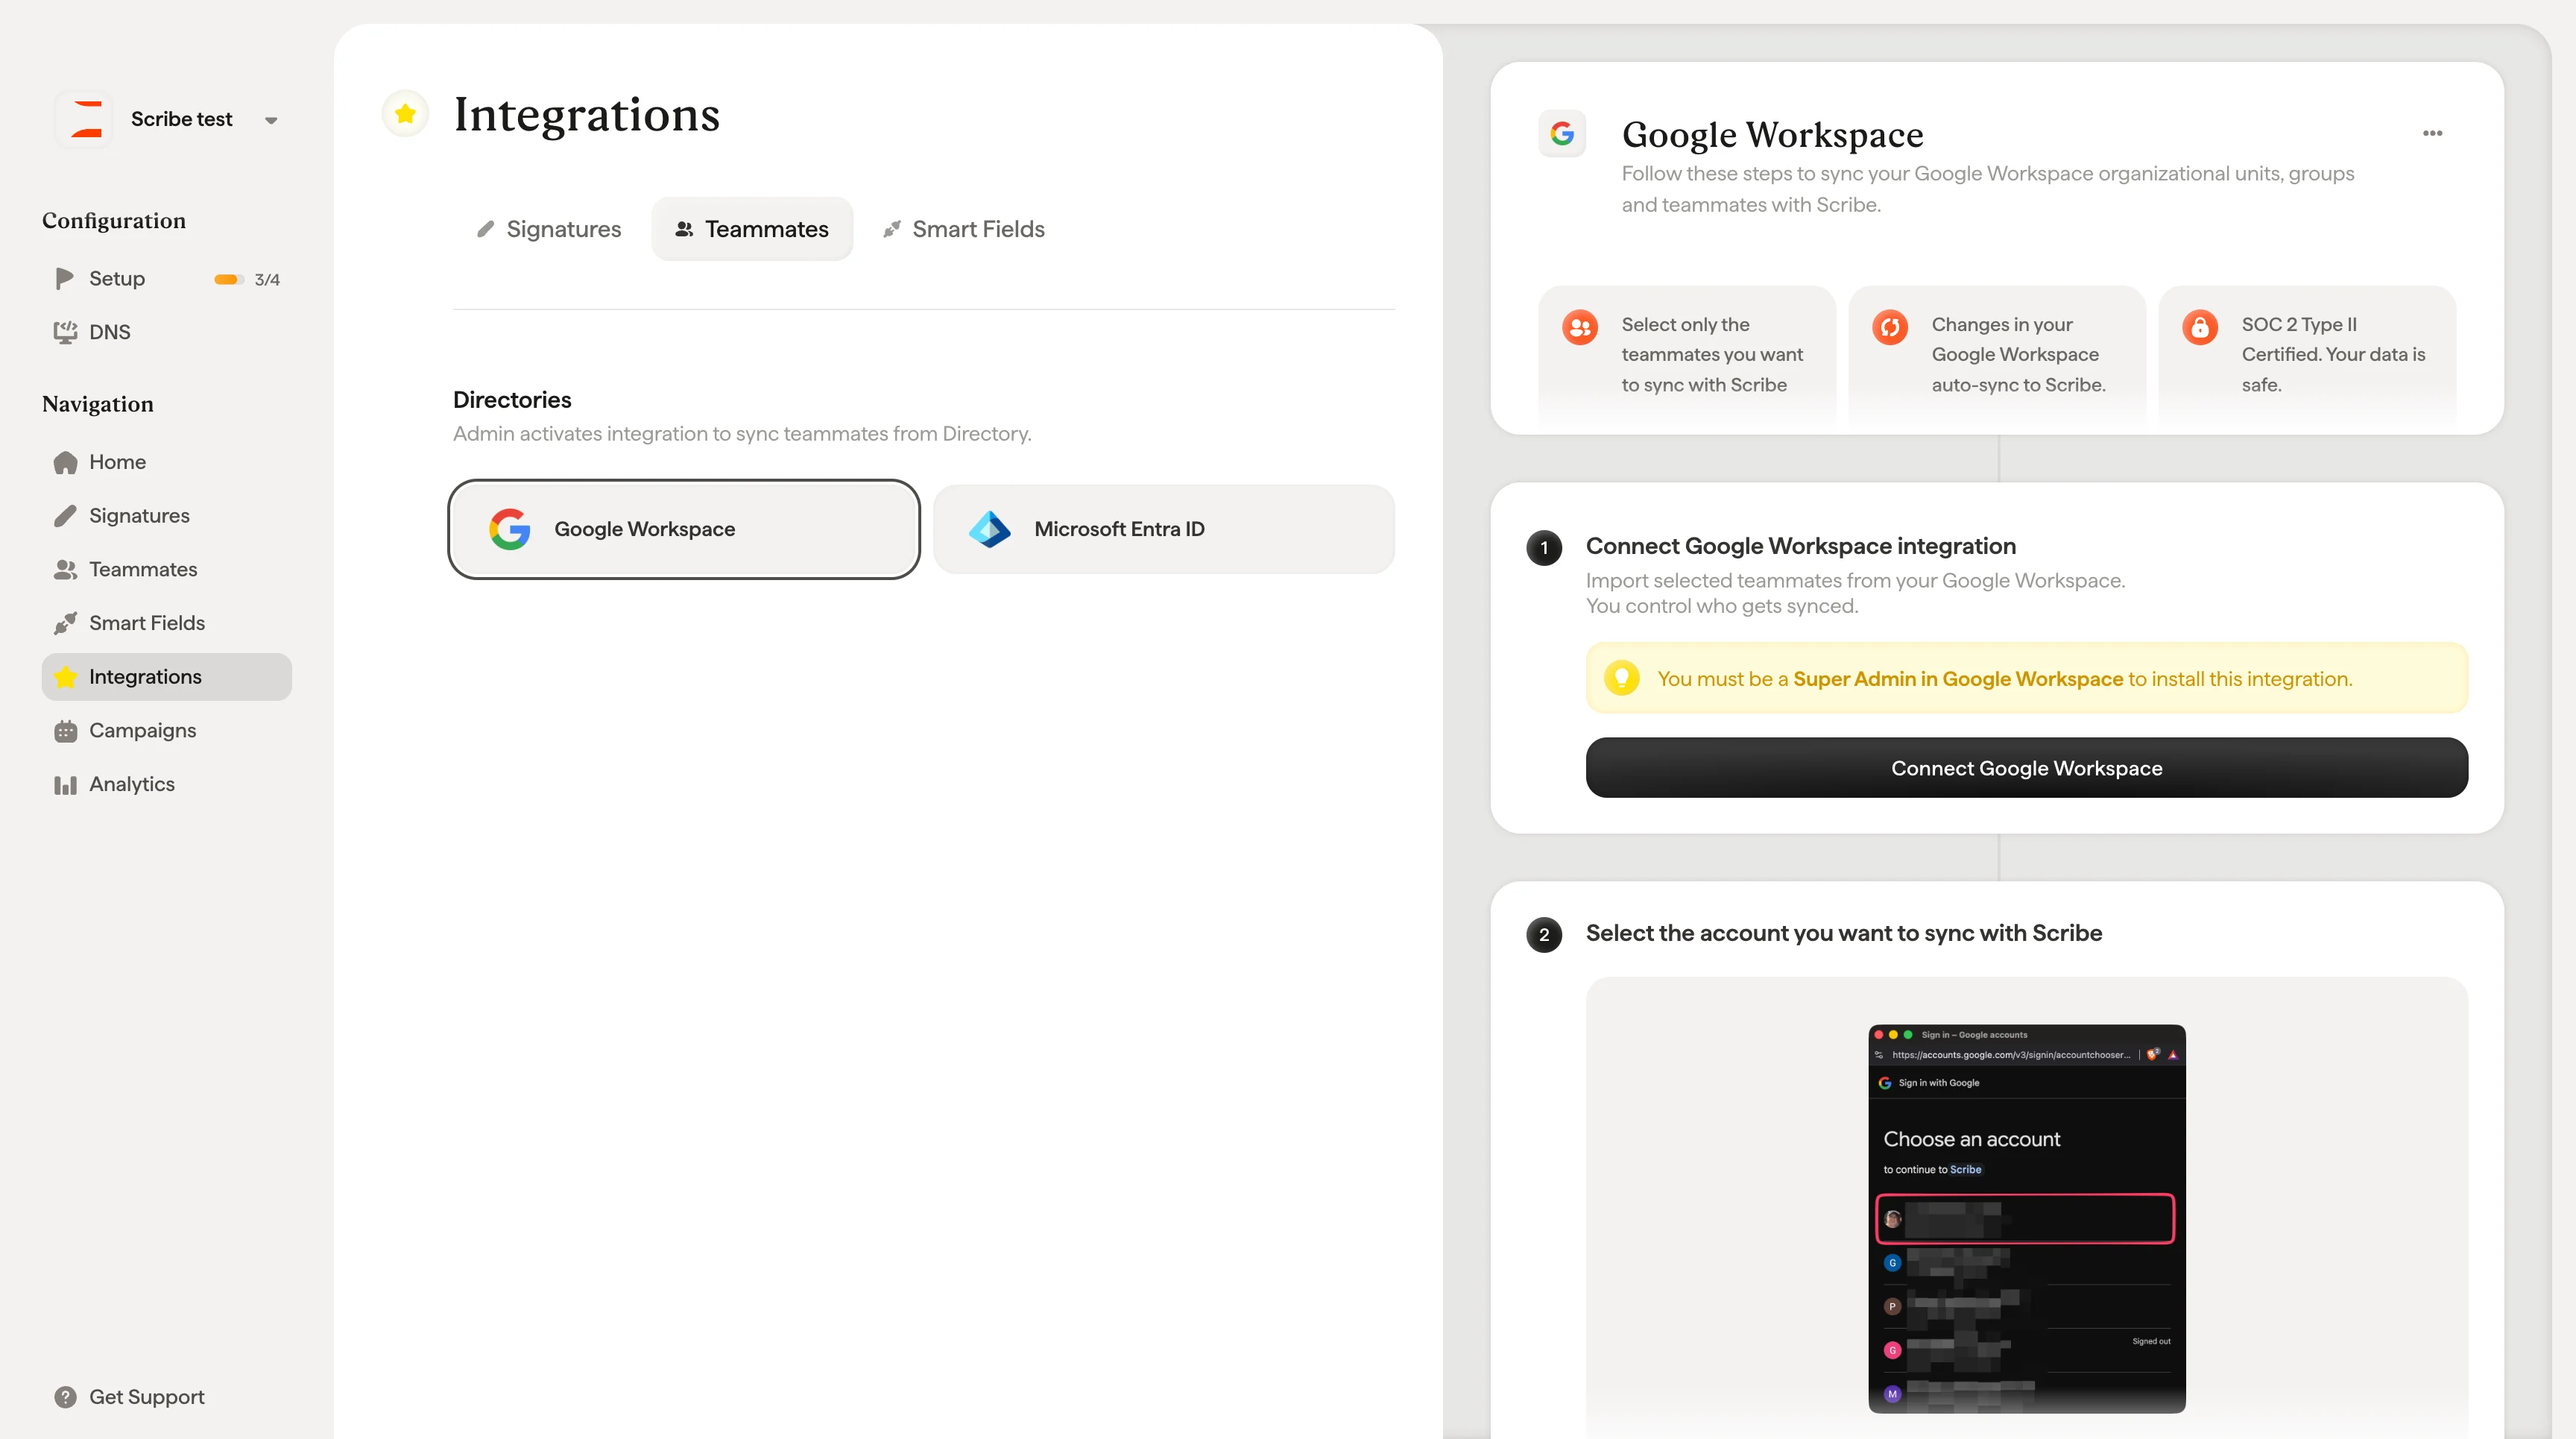
다음 단계를 따라 Google Workspace의 조직 단위, 그룹, 팀원을 Scribe와 동기화하세요.

<Info>
  **Scribe와 동기화할 팀원만 선택하세요.**
</Info>

<Info>
  **Google Workspace의 변경 사항은 Scribe에 자동으로 동기화돼요.**
</Info>

<Info>
  **SOC 2 Type II 인증.** 데이터는 안전하게 보호돼요.
</Info>

## 설치 가이드

### 사전 준비

* 관리자 권한이 있는 Scribe 계정
* **Super Admin** 권한이 있는 Google Workspace 계정

<Steps>
  <Step title="Google Workspace 연동 연결">
    Google Workspace에서 선택한 팀원을 가져오세요. 누구를 동기화할지 직접 정할 수 있어요.

    <Warning>
      이 연동을 설치하려면 Google Workspace의 **Super Admin**이어야 해요.
    </Warning>

    설정을 시작하려면 **Connect Google Workspace**를 클릭하세요.

    <Frame>
      <img src="https://mintcdn.com/scribe/Z_G2D9X-Tlrxu_Eh/images/google-workspace-teammates-connect-button.png?fit=max&auto=format&n=Z_G2D9X-Tlrxu_Eh&q=85&s=120b0fbbdf629b7901ab3c86fa5eba9e" alt="Scribe 팀원 설정의 Google Workspace 연결 버튼" width="3456" height="1930" data-path="images/google-workspace-teammates-connect-button.png" />
    </Frame>
  </Step>

  <Step title="Scribe와 동기화할 계정 선택">
    <Frame>
      <img src="https://mintcdn.com/scribe/pvZJQ56rCCLLmCwt/integrations/teammates/images/google-workspace-step-2.png?fit=max&auto=format&n=pvZJQ56rCCLLmCwt&q=85&s=c69f8e458a8e3a034dd726de24acb05f" alt="Google 계정 선택 화면" className="mx-auto" style={{ width:"59%" }} width="1000" height="1228" data-path="integrations/teammates/images/google-workspace-step-2.png" />
    </Frame>
  </Step>

  <Step title="계정으로 로그인">
    <Frame>
      <img src="https://mintcdn.com/scribe/pvZJQ56rCCLLmCwt/integrations/teammates/images/google-workspace-step-3.png?fit=max&auto=format&n=pvZJQ56rCCLLmCwt&q=85&s=cdad4d134da444212af5b06fe277f842" alt="Google 계정으로 Scribe에 로그인" className="mx-auto" style={{ width:"51%" }} width="1002" height="1562" data-path="integrations/teammates/images/google-workspace-step-3.png" />
    </Frame>
  </Step>

  <Step title="모든 범위 동의">
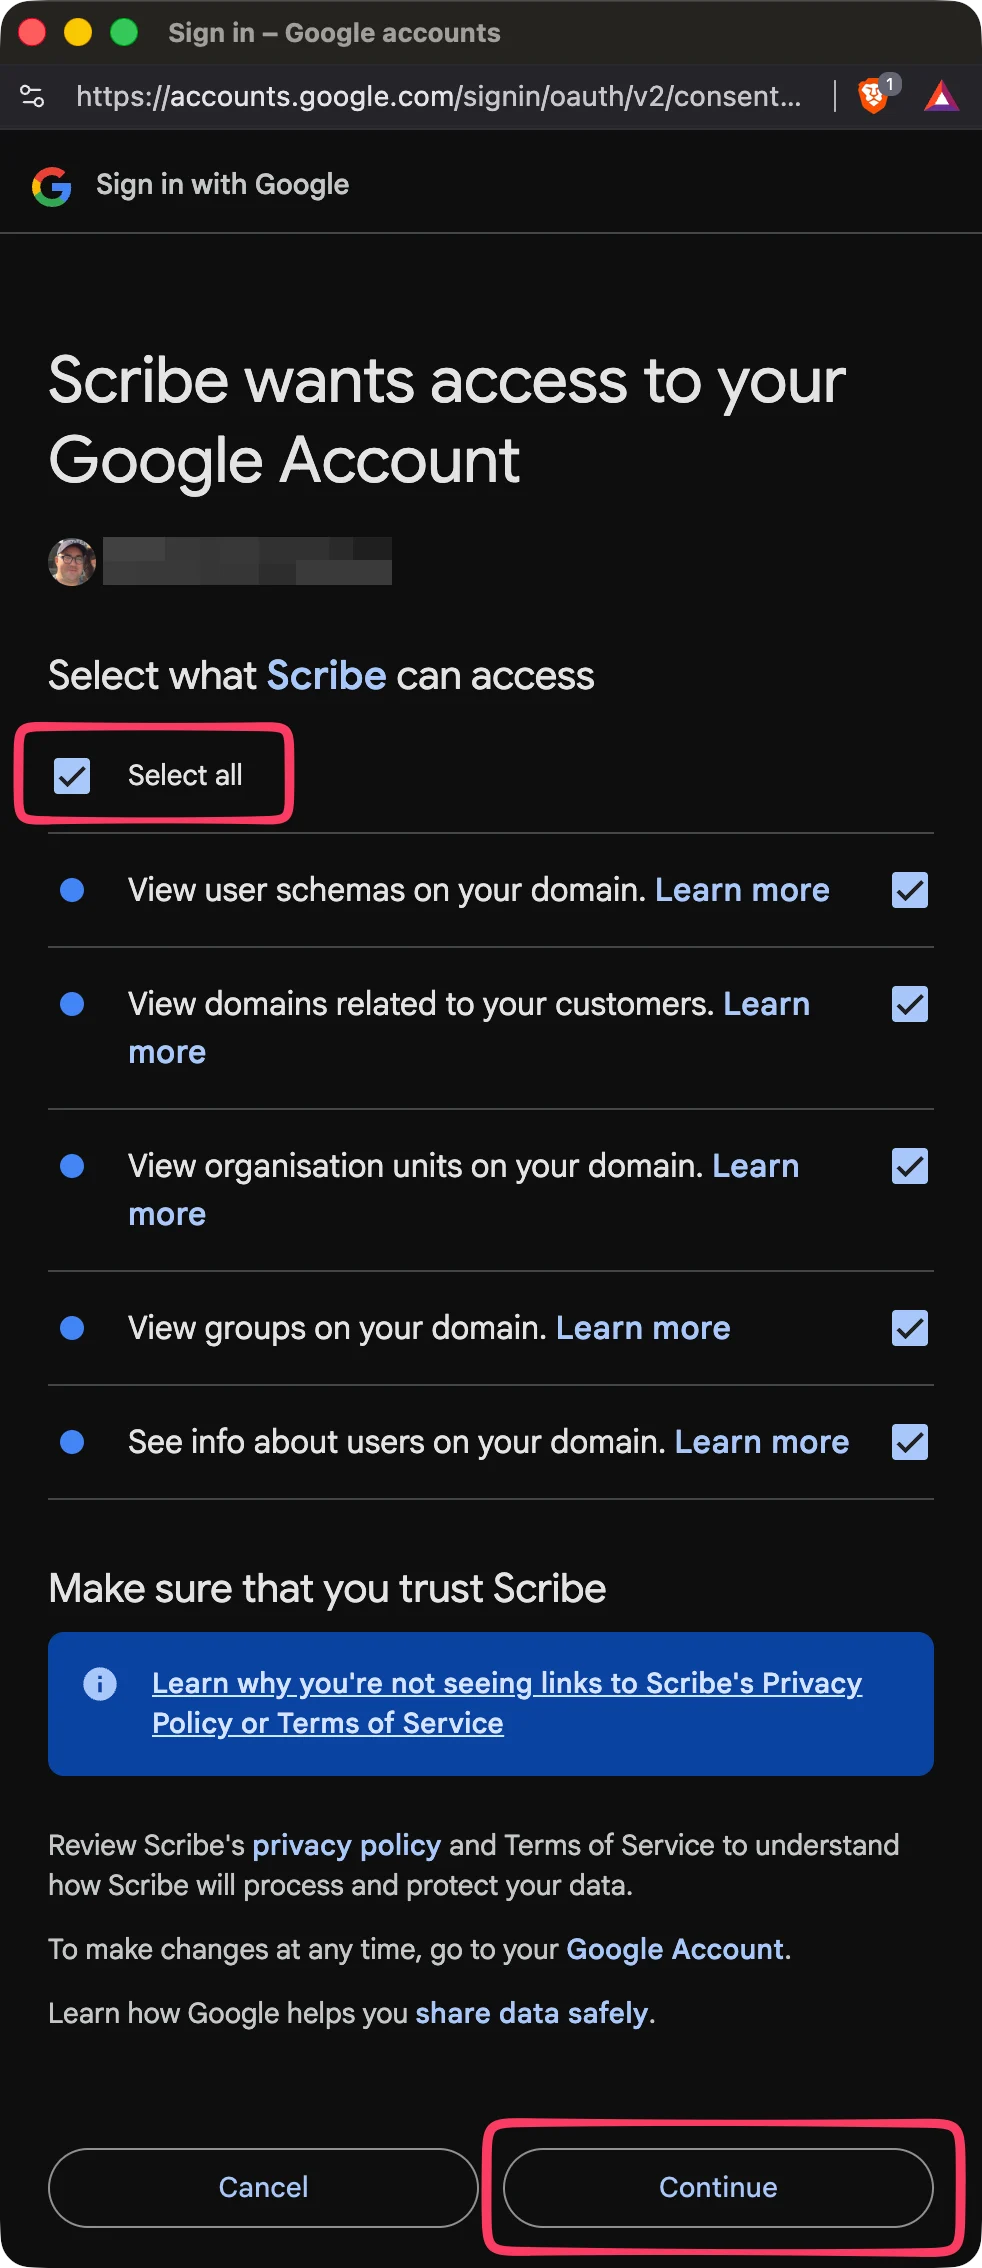
    Scribe는 SOC 2 Type II를 준수해요. Google API에서 사용하는 범위는 [여기](https://support.google.com/a/answer/162106)에서 확인할 수 있어요. 이메일을 발송하거나 읽지 않아요.

    <Frame>
      <img src="https://mintcdn.com/scribe/pvZJQ56rCCLLmCwt/integrations/teammates/images/google-workspace-step-4.png?fit=max&auto=format&n=pvZJQ56rCCLLmCwt&q=85&s=f4378bd11d5da43e9e1af3b665d52503" alt="Google API 범위 선택" className="mx-auto" style={{ width:"42%" }} width="982" height="2268" data-path="integrations/teammates/images/google-workspace-step-4.png" />
    </Frame>
  </Step>

  <Step title="Scribe와 동기화할 팀원 선택">
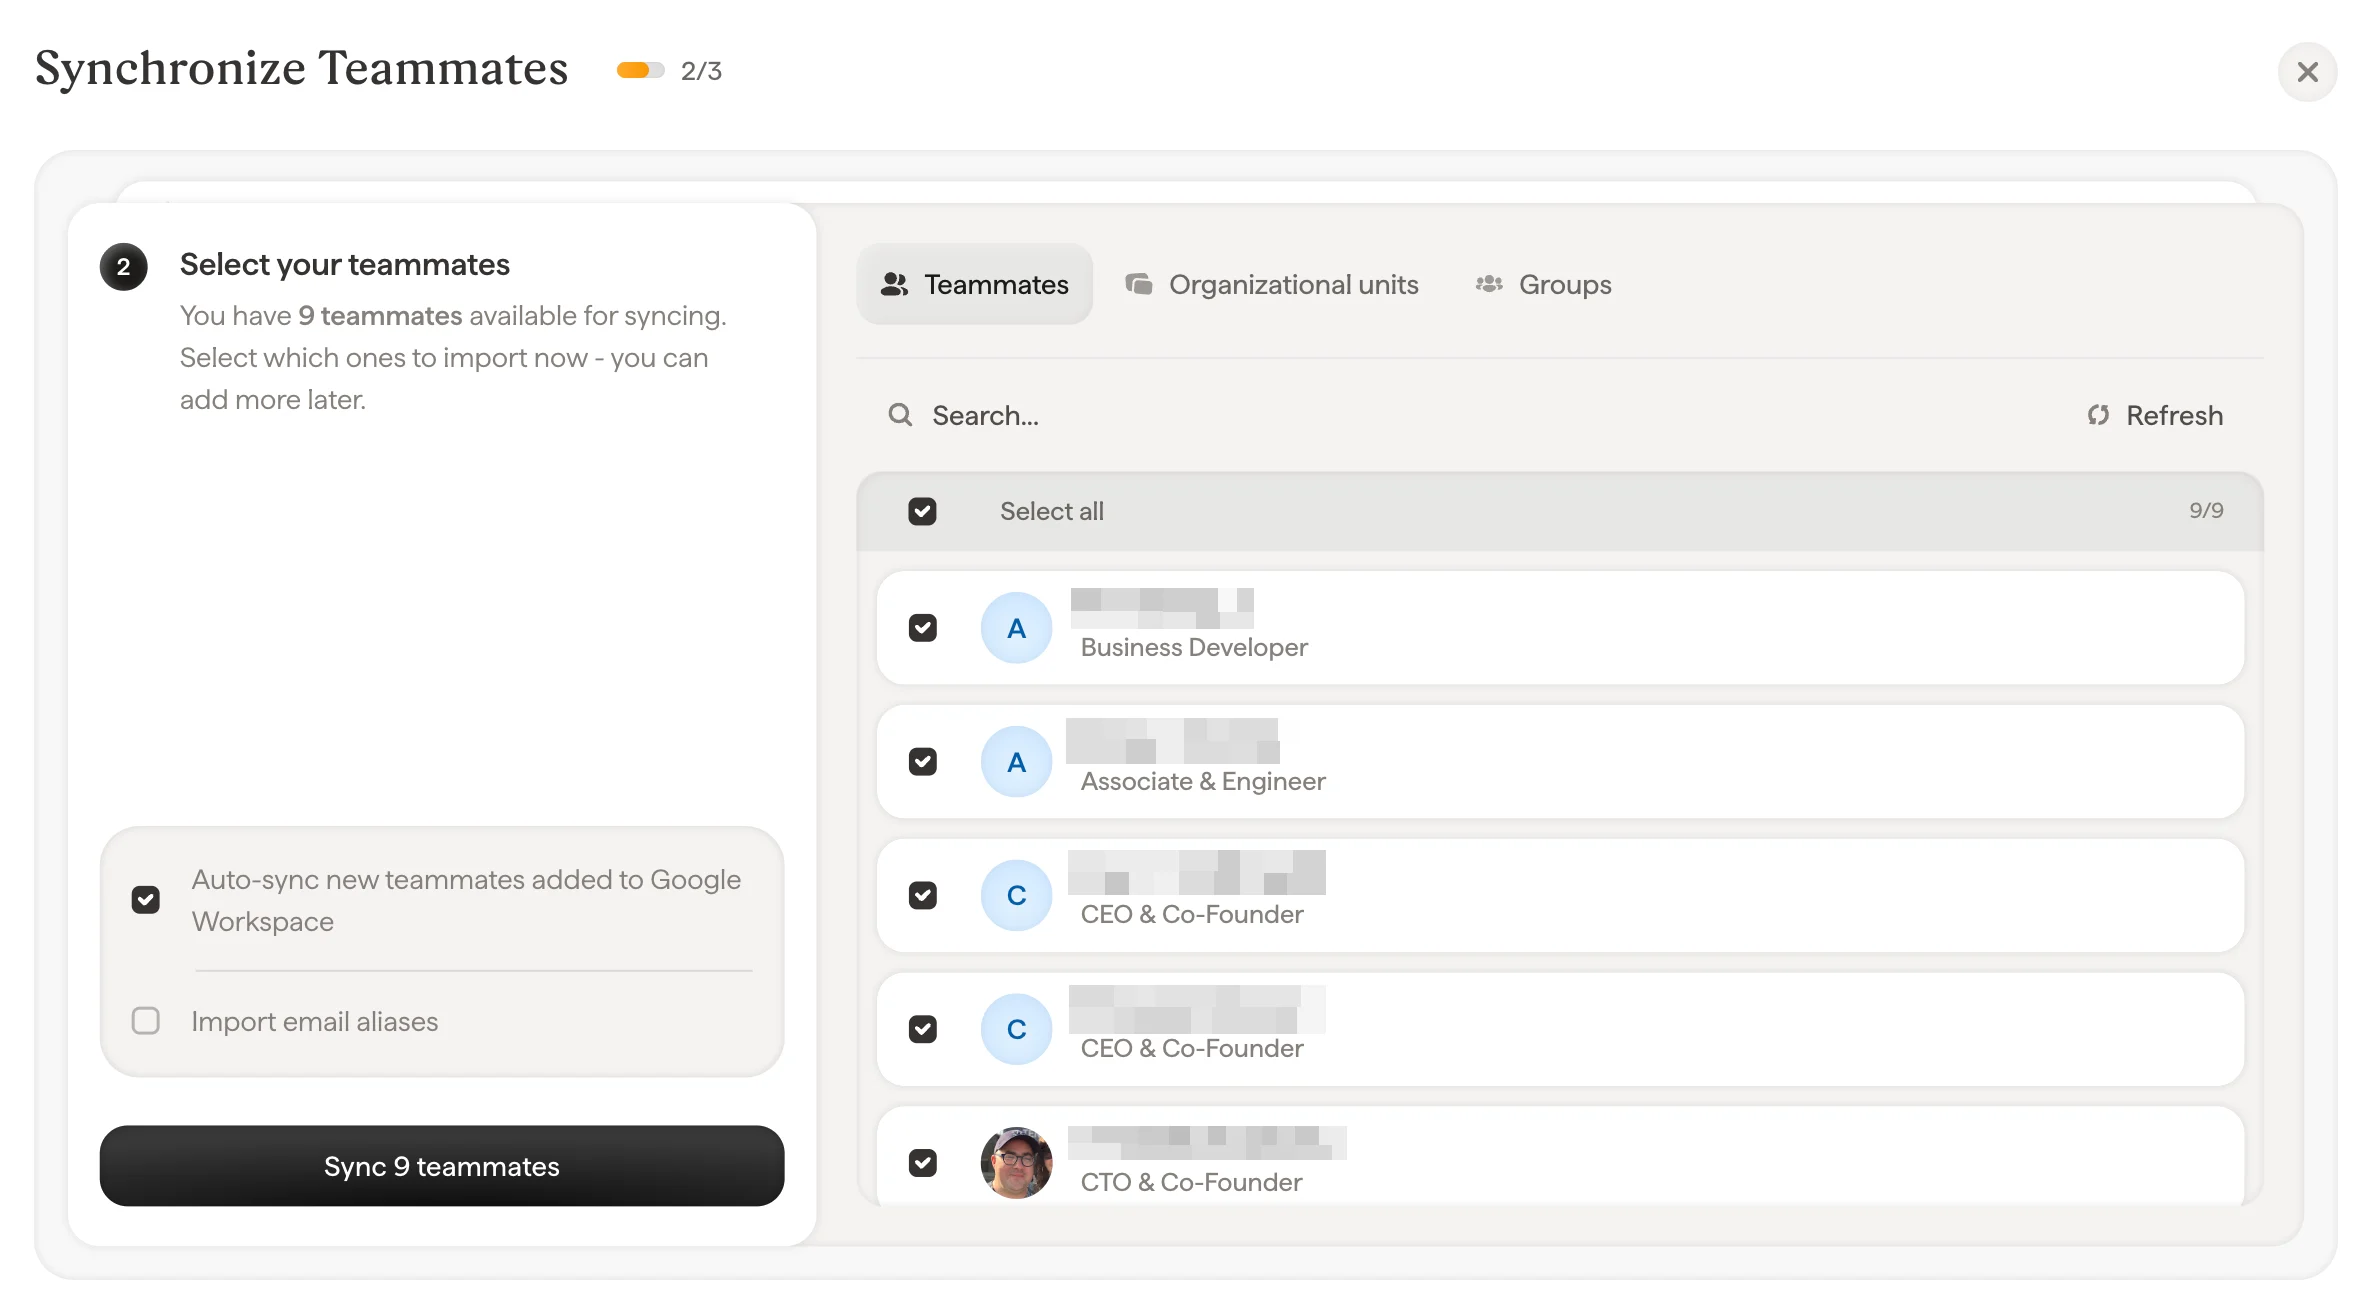
    팀원 목록, 부서(Units), 그룹(Groups)에서 팀원을 선택할 수 있어요. 지금 가져올 팀원을 선택하세요. 나중에 더 추가할 수 있어요. 팀원 정보도 함께 동기화되므로 [Smartfield](/ko/smart-fields)를 사용해 서명을 자동 입력할 수 있어요.

    <Frame>
      <img src="https://mintcdn.com/scribe/pvZJQ56rCCLLmCwt/integrations/teammates/images/google-workspace-step-5.png?fit=max&auto=format&n=pvZJQ56rCCLLmCwt&q=85&s=d1b1bb5e43a7c07a73eb187dee0dfa3e" alt="팀원 동기화 대화상자" width="2372" height="1312" data-path="integrations/teammates/images/google-workspace-step-5.png" />
    </Frame>
  </Step>

  <Step title="완료, 팀원이 Scribe와 동기화되었습니다">
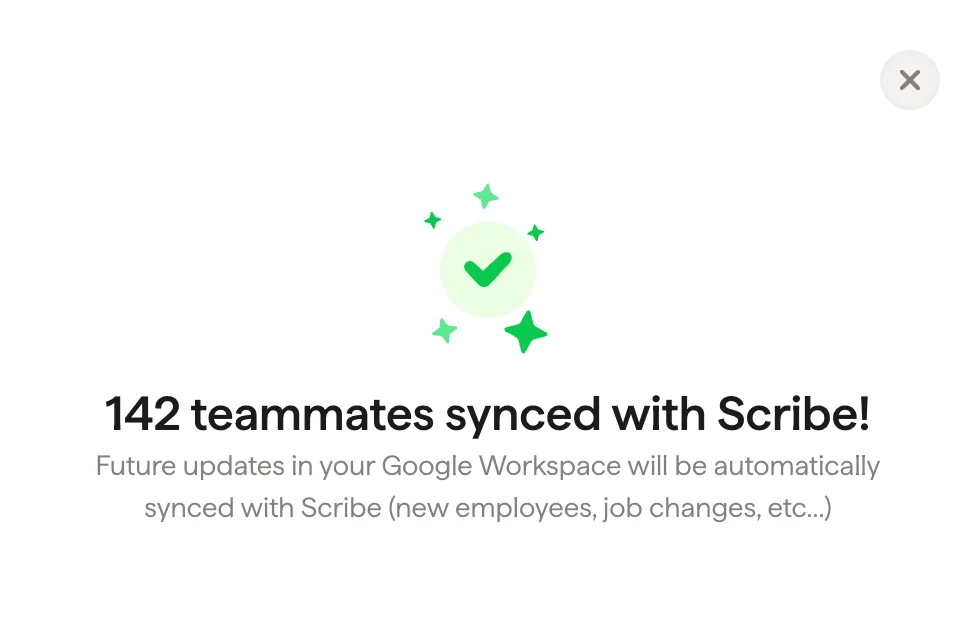
    서명 메뉴로 이동해 [팀원 할당](/ko/assign-teammates-to-a-signature)을 진행하고 서명을 만드세요. 앞으로 Google Workspace에서의 변경 사항(신규 입사자, 직무 변경 등)은 Scribe와 자동으로 동기화돼요.

    <Frame>
      <img src="https://mintcdn.com/scribe/pvZJQ56rCCLLmCwt/integrations/teammates/images/google-workspace-step-6.png?fit=max&auto=format&n=pvZJQ56rCCLLmCwt&q=85&s=c834c9e2d8e575f1ba6a533a36fffe06" alt="팀원 동기화 완료 확인" className="mx-auto" style={{ width:"66%" }} width="968" height="638" data-path="integrations/teammates/images/google-workspace-step-6.png" />
    </Frame>
  </Step>
</Steps>

## 관련 문서

* [팀원 개요](/ko/teammates/teammates-overview)
* [Microsoft Entra ID](/ko/integrations/teammates/microsoft-entra-id-teammates)
* [Scribe의 보안 정책](/ko/what-scribe-does-concerning-security)
