> ## Documentation Index
> Fetch the complete documentation index at: https://help.scribe-mail.com/llms.txt
> Use this file to discover all available pages before exploring further.
# Google Workspace API 액세스 거부
> 팀원이 속한 조직 단위 또는 그룹에 Scribe 부가기능을 사용하도록 설정하여 Google Workspace API 액세스 거부 오류를 해결하세요.
"Google Workspace API has forbidden access to this teammate's signature" 메시지가 표시되면, Scribe가 해당 팀원의 서명을 설치할 수 없는 상태예요. 팀원이 속한 조직 단위 또는 그룹에 Scribe [Google Workspace 부가기능](/ko/integrations/signatures/google-workspace-client-side)이 사용 중지되어 있을 때 발생해요.
부가기능에 액세스할 수 있는 사용자는 관리자가 Google Workspace 관리 콘솔에서 설정해요. Scribe가 서명을 설치할 수 있도록, 해당 팀원의 조직 단위나 그룹 또는 전체 사용자에 대해 부가기능을 사용 설정하세요.
이 설정을 변경하려면 Google Workspace의 슈퍼 관리자여야 해요. 슈퍼 관리자가 아니라면 IT 담당자를 초대하세요.
## 부가기능에 액세스할 수 있는 사용자 변경
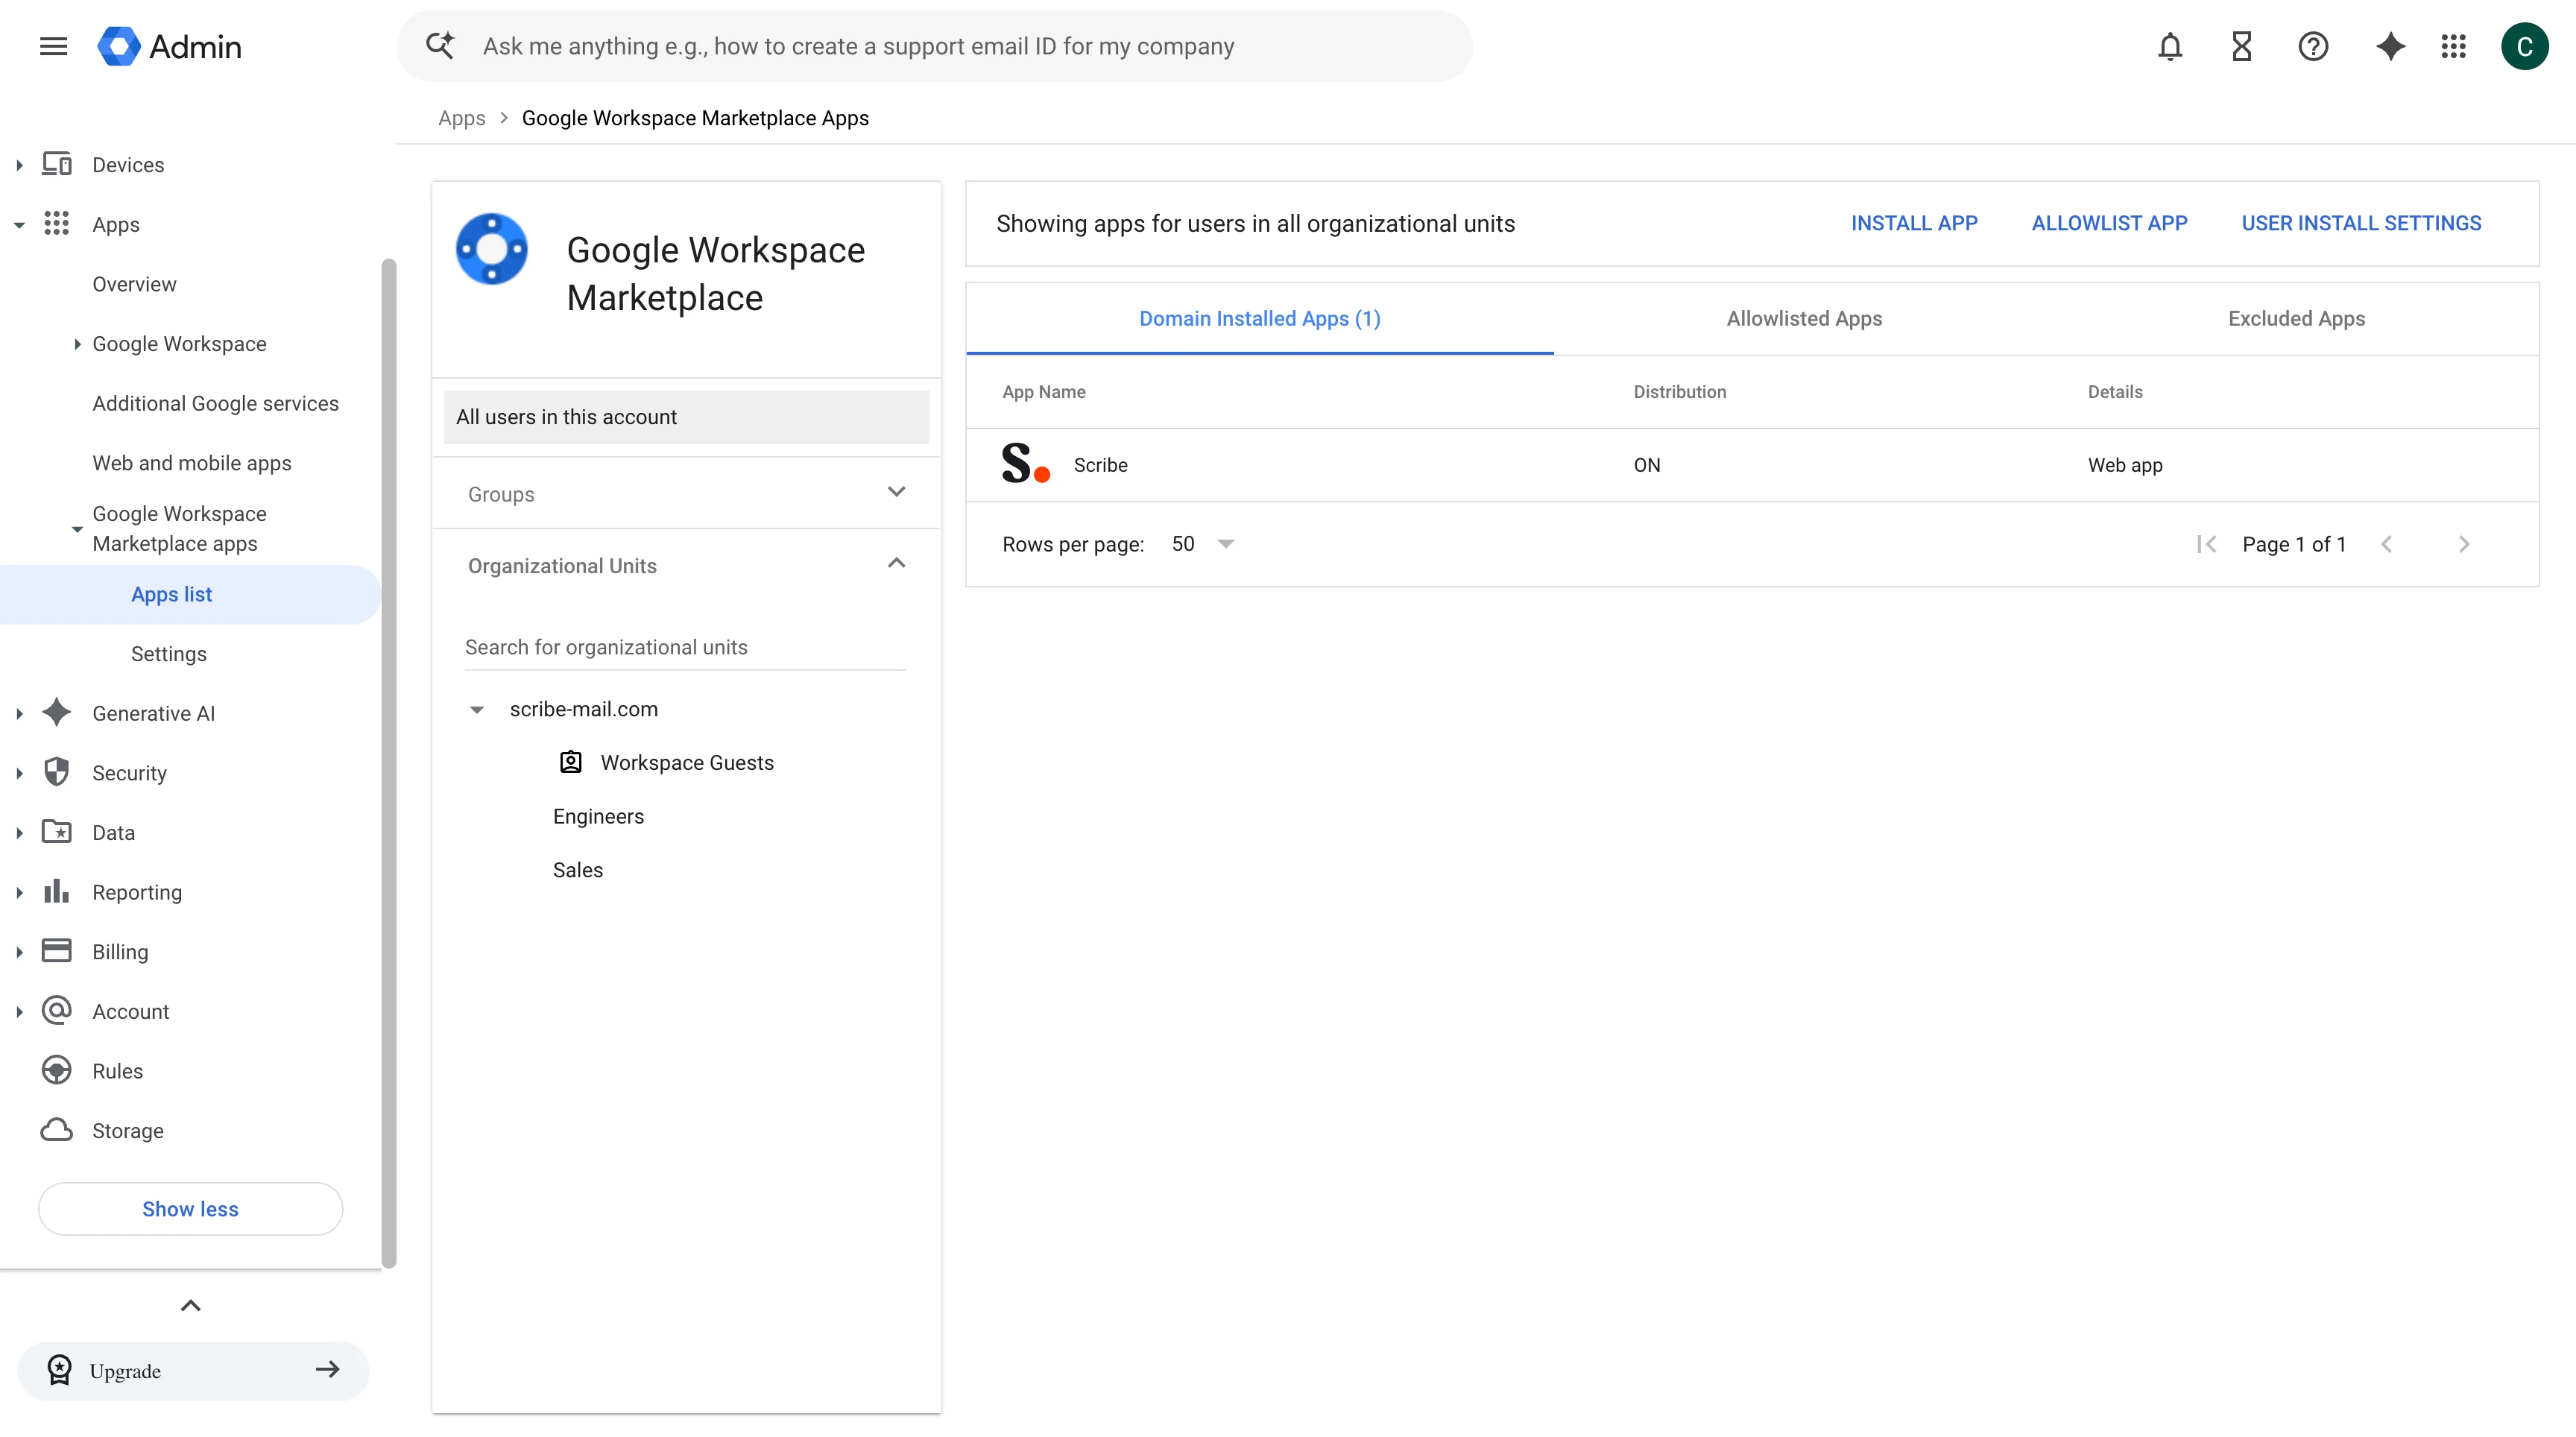
[Google Workspace 관리 콘솔](https://admin.google.com/)을 연 다음, Apps, Google Workspace Marketplace apps, Apps list로 이동하세요.
설치된 Marketplace 앱 목록에서 Scribe를 선택하세요.
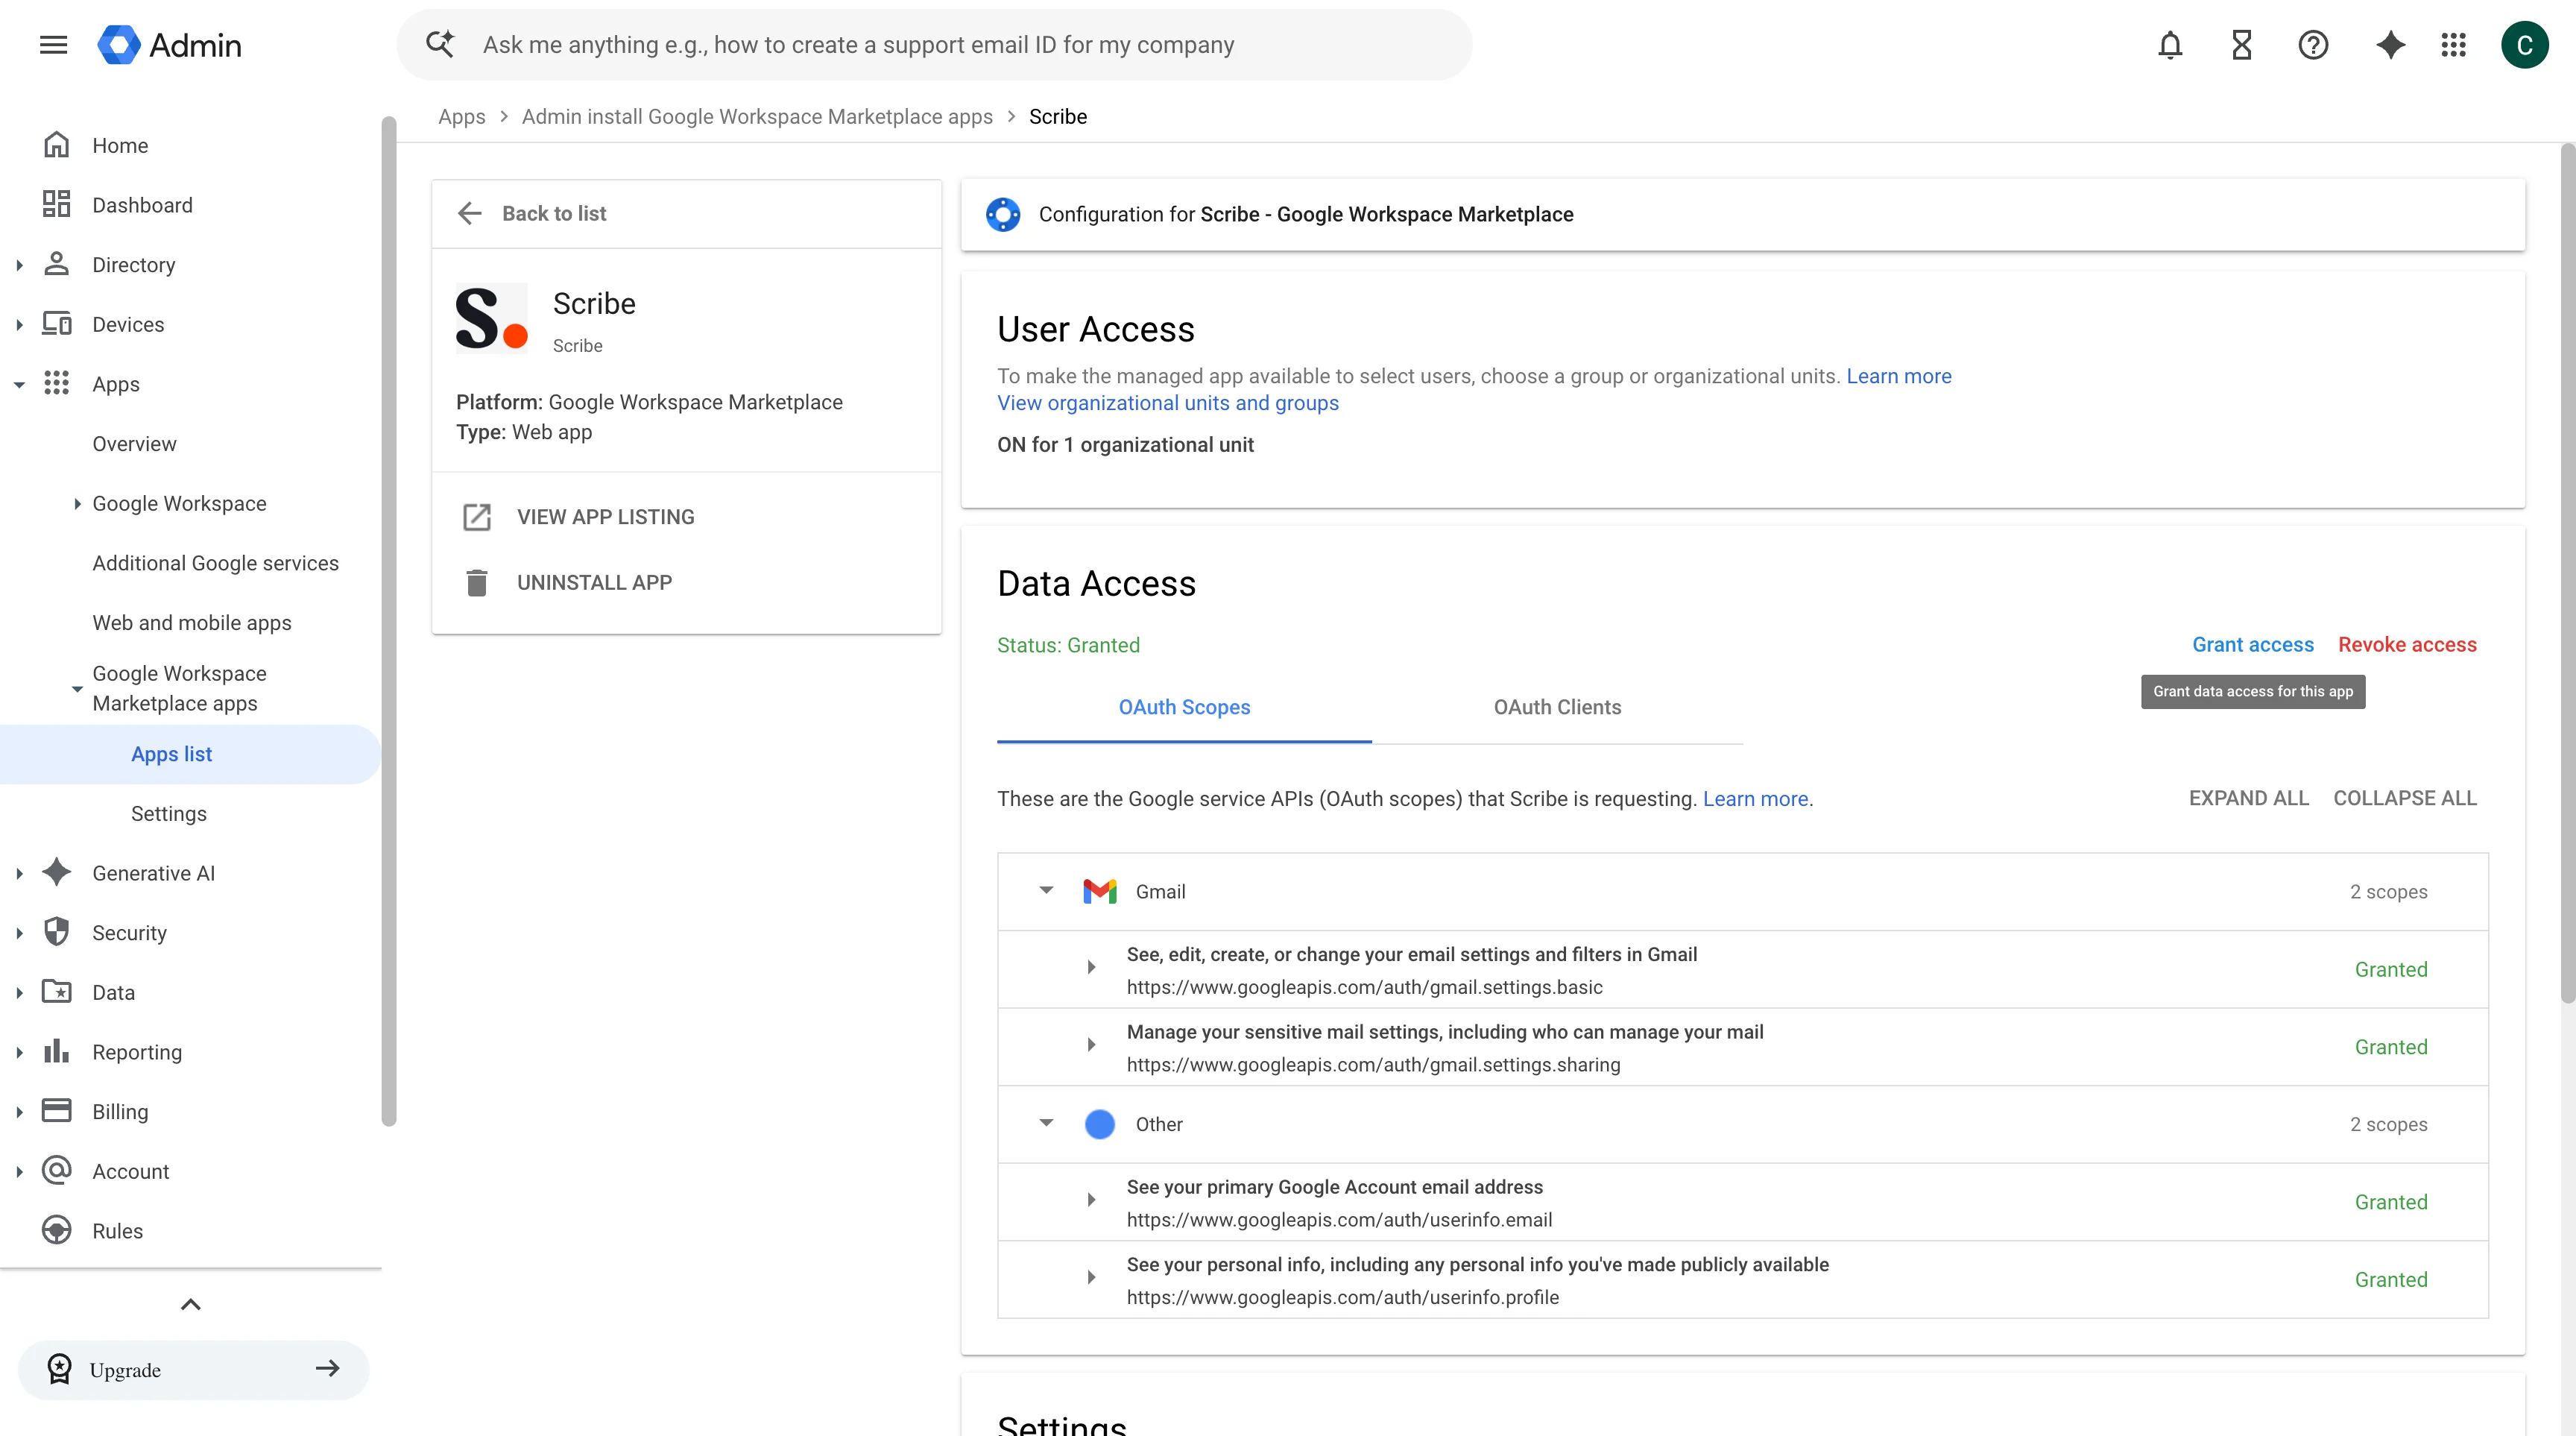
 User Access 섹션에서 View organizational units and groups를 클릭하세요. 이 섹션에는 부가기능이 현재 사용 설정된 조직 단위 수도 표시돼요.
 서명 설치에 실패한 팀원이 포함된 조직 단위 또는 그룹을 선택한 다음, App distribution을 On으로 설정하세요. 전체 도메인에 부가기능을 제공하려면 On for everyone을 선택하세요. Save를 클릭하세요.
 Scribe로 돌아가 팀원의 서명을 다시 설치하세요. 부가 기능에 액세스 권한이 부여되면 상태가 '실패'에서 '설치됨'으로 바뀌어요.
Google Workspace 관리 콘솔의 변경 사항이 적용되기까지 몇 분 정도 걸릴 수 있어요. 저장 직후에도 서명 설치가 실패하면 몇 분 기다린 후 다시 설치해 보세요.
## 관련 문서
* [서명 설치 상태 및 오류](/ko/signature-installation-statuses-and-errors)
* [Google Workspace 액세스 권한 손실](/ko/troubleshooting/google-workspace-access-lost)
* [Google 부가 기능 검증 실패](/ko/troubleshooting/google-add-in-not-validating)
* [관리자 정책 적용됨](/ko/troubleshooting/admin-policy-enforced)
Scribe로 돌아가 팀원의 서명을 다시 설치하세요. 부가 기능에 액세스 권한이 부여되면 상태가 '실패'에서 '설치됨'으로 바뀌어요.
Google Workspace 관리 콘솔의 변경 사항이 적용되기까지 몇 분 정도 걸릴 수 있어요. 저장 직후에도 서명 설치가 실패하면 몇 분 기다린 후 다시 설치해 보세요.
## 관련 문서
* [서명 설치 상태 및 오류](/ko/signature-installation-statuses-and-errors)
* [Google Workspace 액세스 권한 손실](/ko/troubleshooting/google-workspace-access-lost)
* [Google 부가 기능 검증 실패](/ko/troubleshooting/google-add-in-not-validating)
* [관리자 정책 적용됨](/ko/troubleshooting/admin-policy-enforced)