> ## Documentation Index
> Fetch the complete documentation index at: https://help.scribe-mail.com/llms.txt
> Use this file to discover all available pages before exploring further.
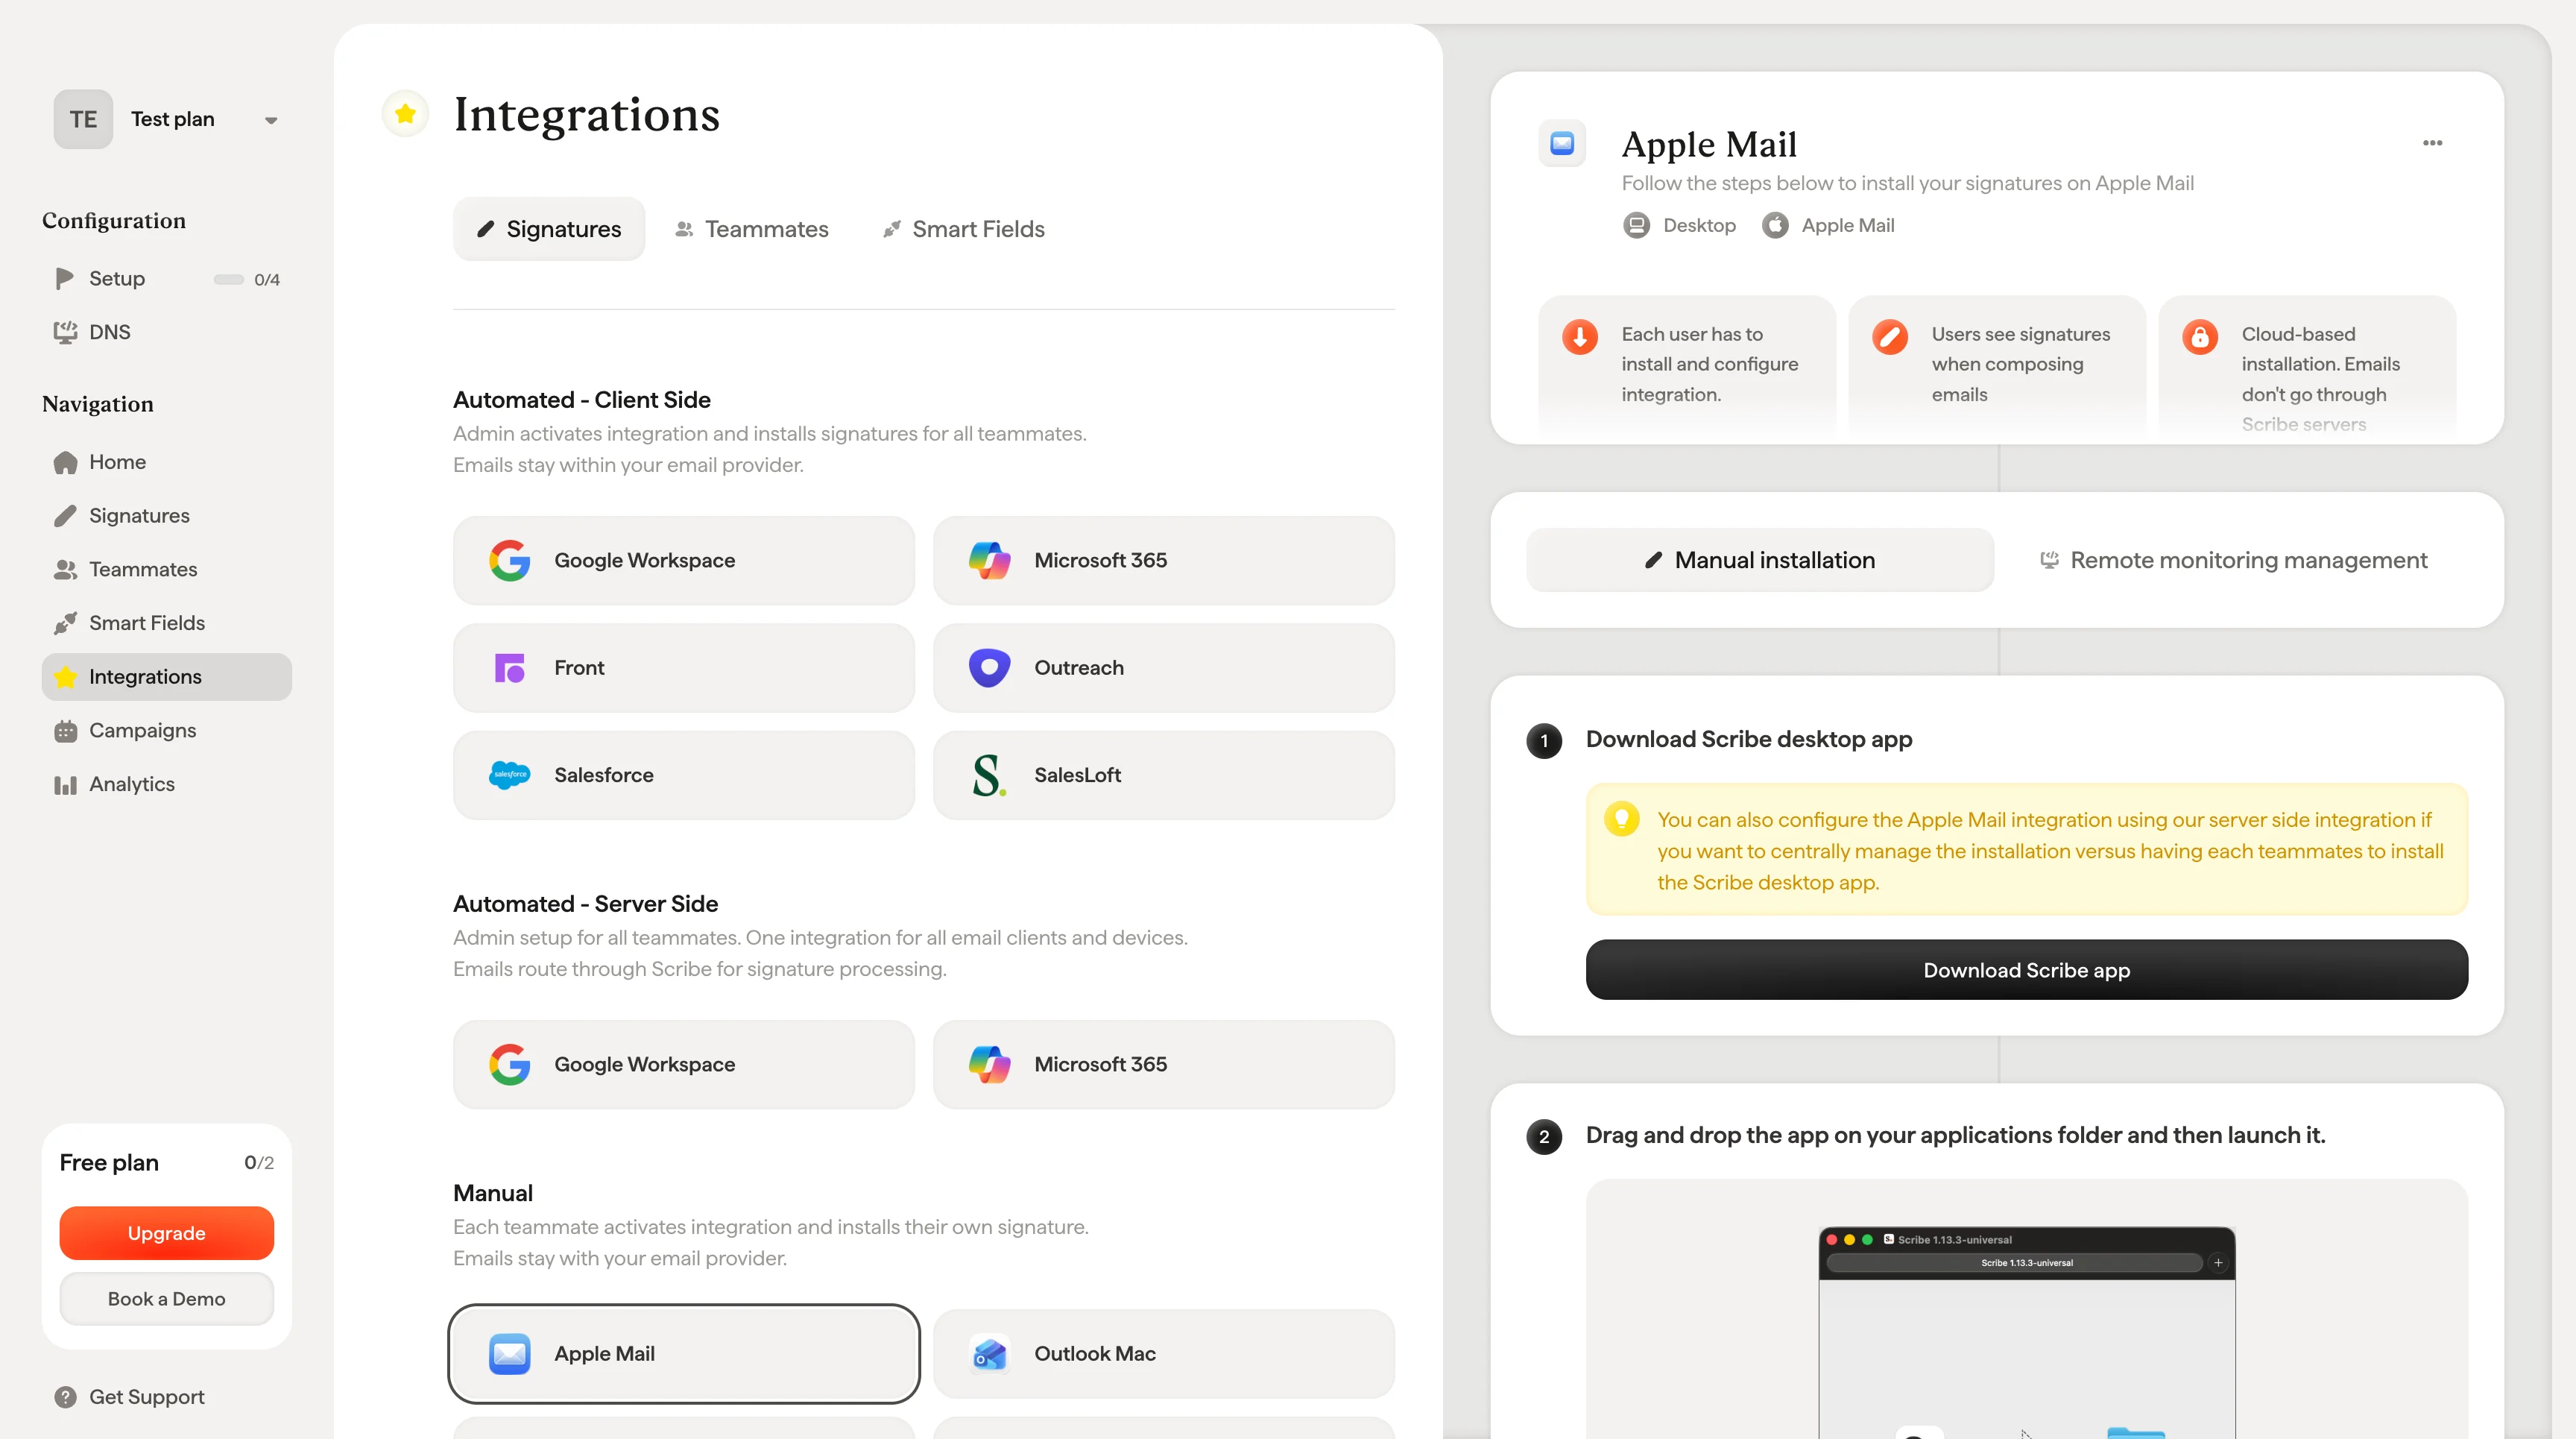
# Apple Mail
> Installeer Scribe-e-mailhandtekeningen binnen enkele minuten in Apple Mail: download de Scribe-desktopapp en zet de integratie aan op je Mac.
Volg de onderstaande stappen om [je handtekeningen te installeren](/nl/install-signatures) in Apple Mail.
**Elke gebruiker moet de integratie zelf installeren en configureren.**
**Gebruikers zien handtekeningen tijdens het opstellen van e-mails.**
**Cloudgebaseerde installatie.** E-mails gaan niet via de servers van Scribe.
## Installatiehandleiding
### Vereisten
* Een Scribe-account
* Minstens één handtekening aangemaakt in Scribe
* macOS met Apple Mail geïnstalleerd
Je kunt de Apple Mail-integratie ook configureren via onze server-side integratie als je [de installatie centraal wilt beheren](/nl/integrations/signatures/apple-mail-rmm) in plaats van elk teamlid de Scribe-desktopapp te laten installeren.
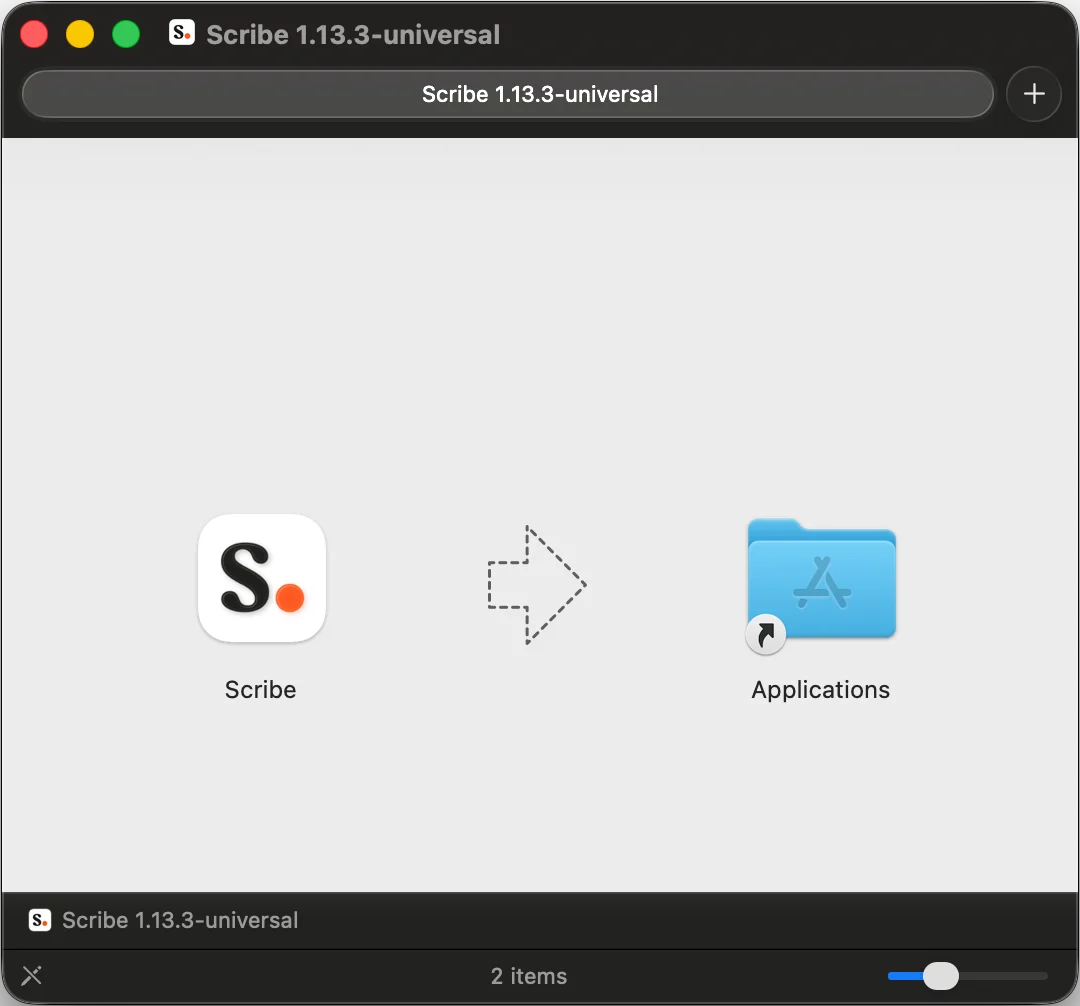
Download de Scribe-desktopapp via de integratiepagina.
 Log in op de Scribe-app zoals je dat ook doet op de website van Scribe.
 Klik op het instellingenwieltje en activeer Apple Mail.

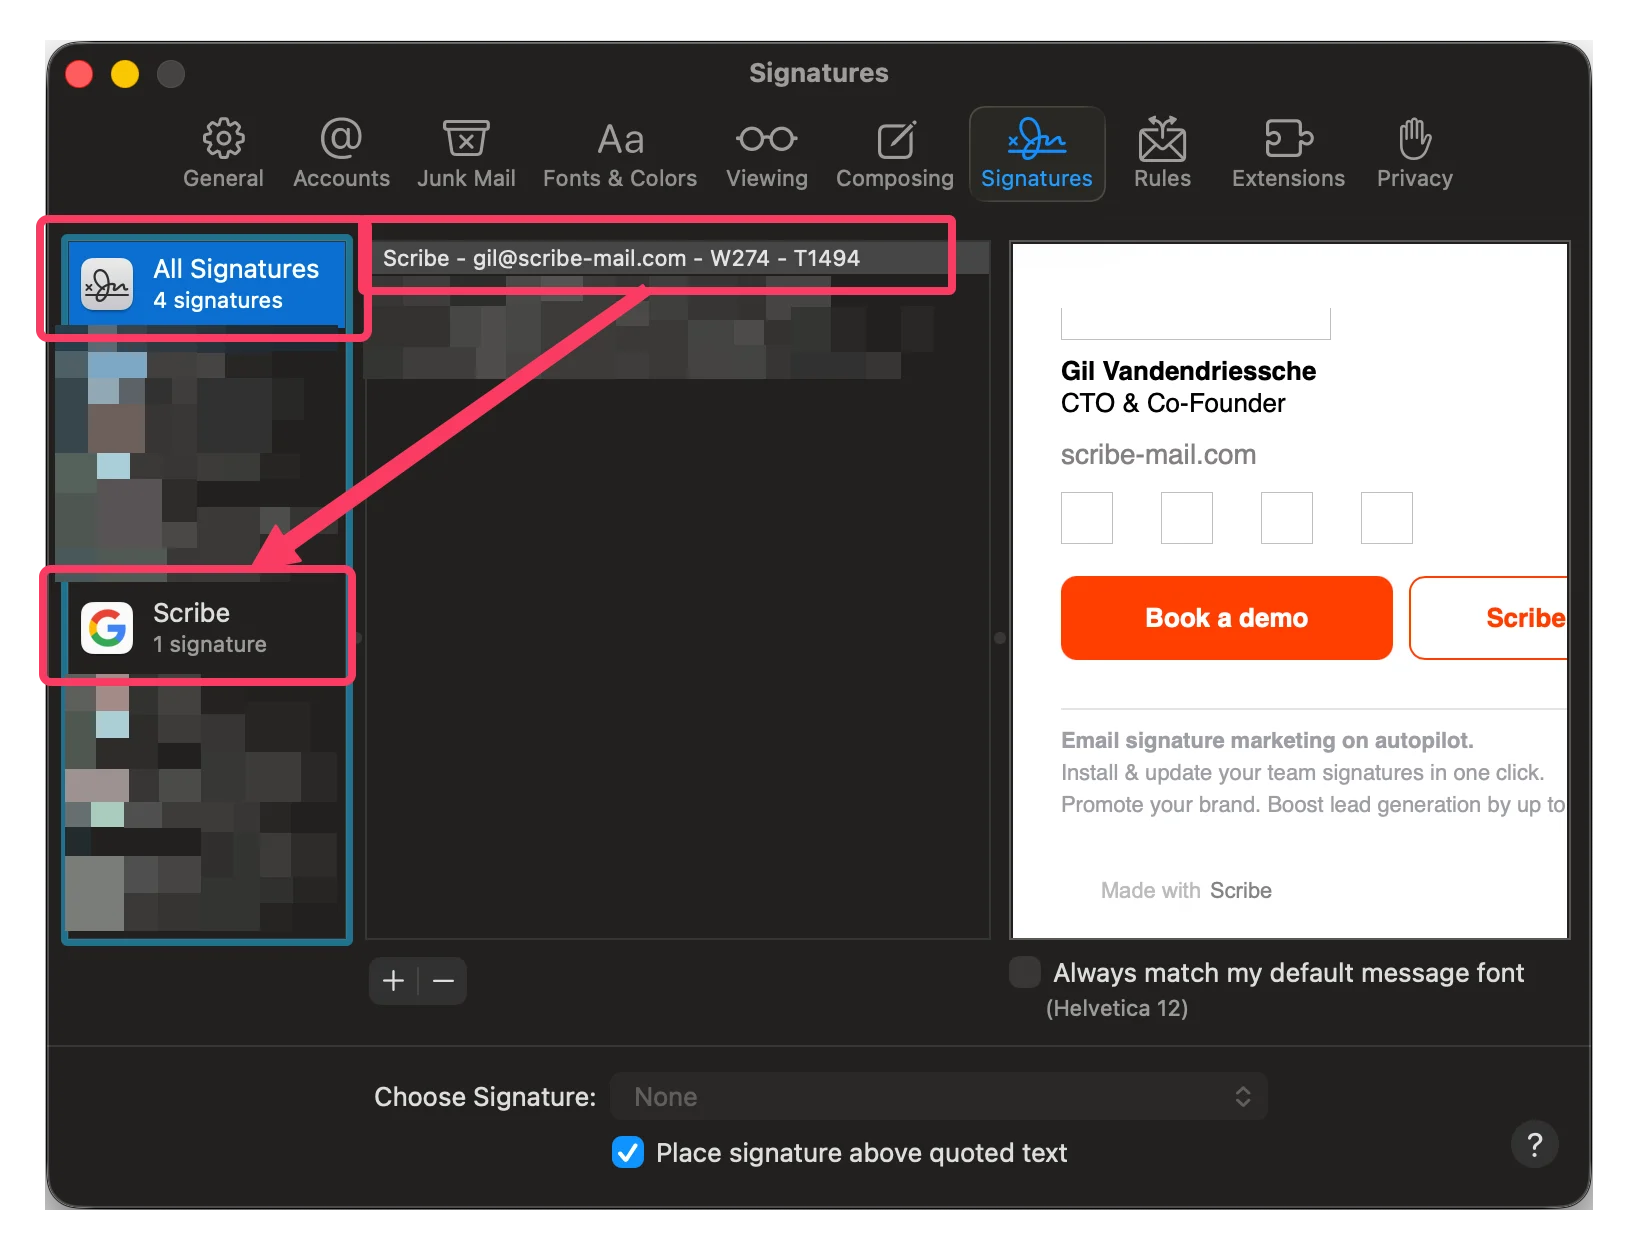
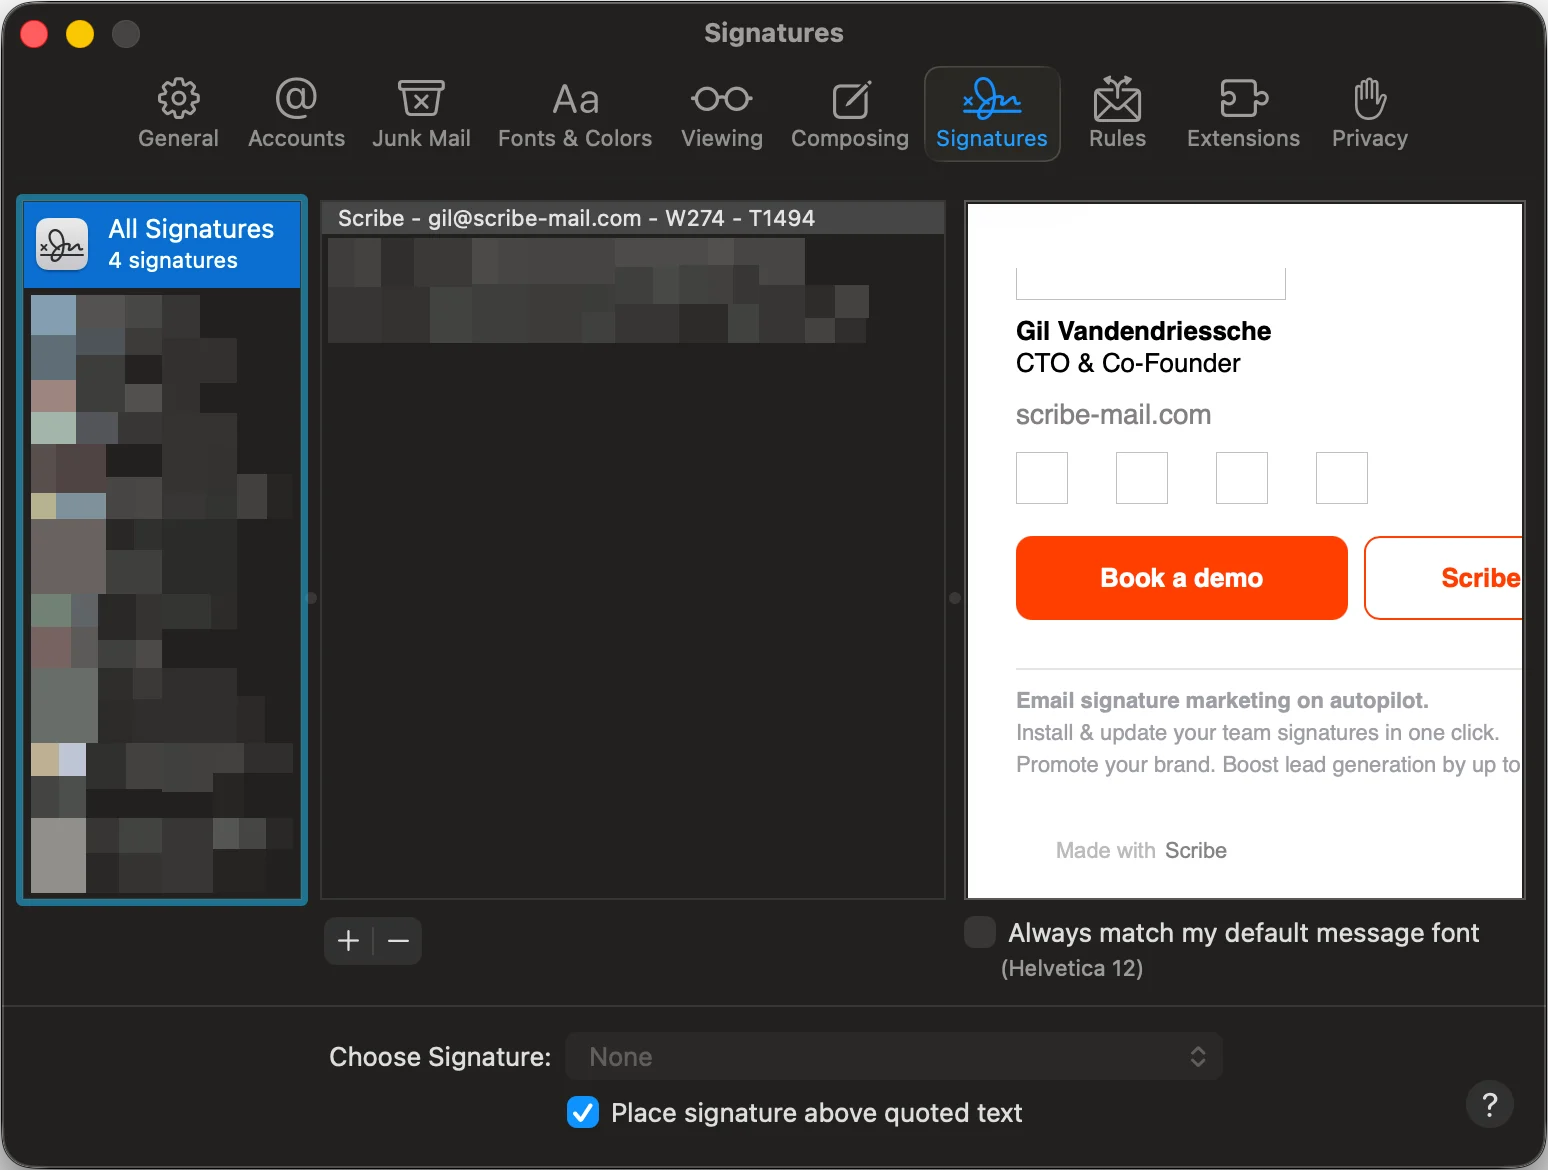 Klik op het tabblad 'All signatures'. Sleep vervolgens je Scribe-handtekening naar het gekoppelde e-mailaccount.
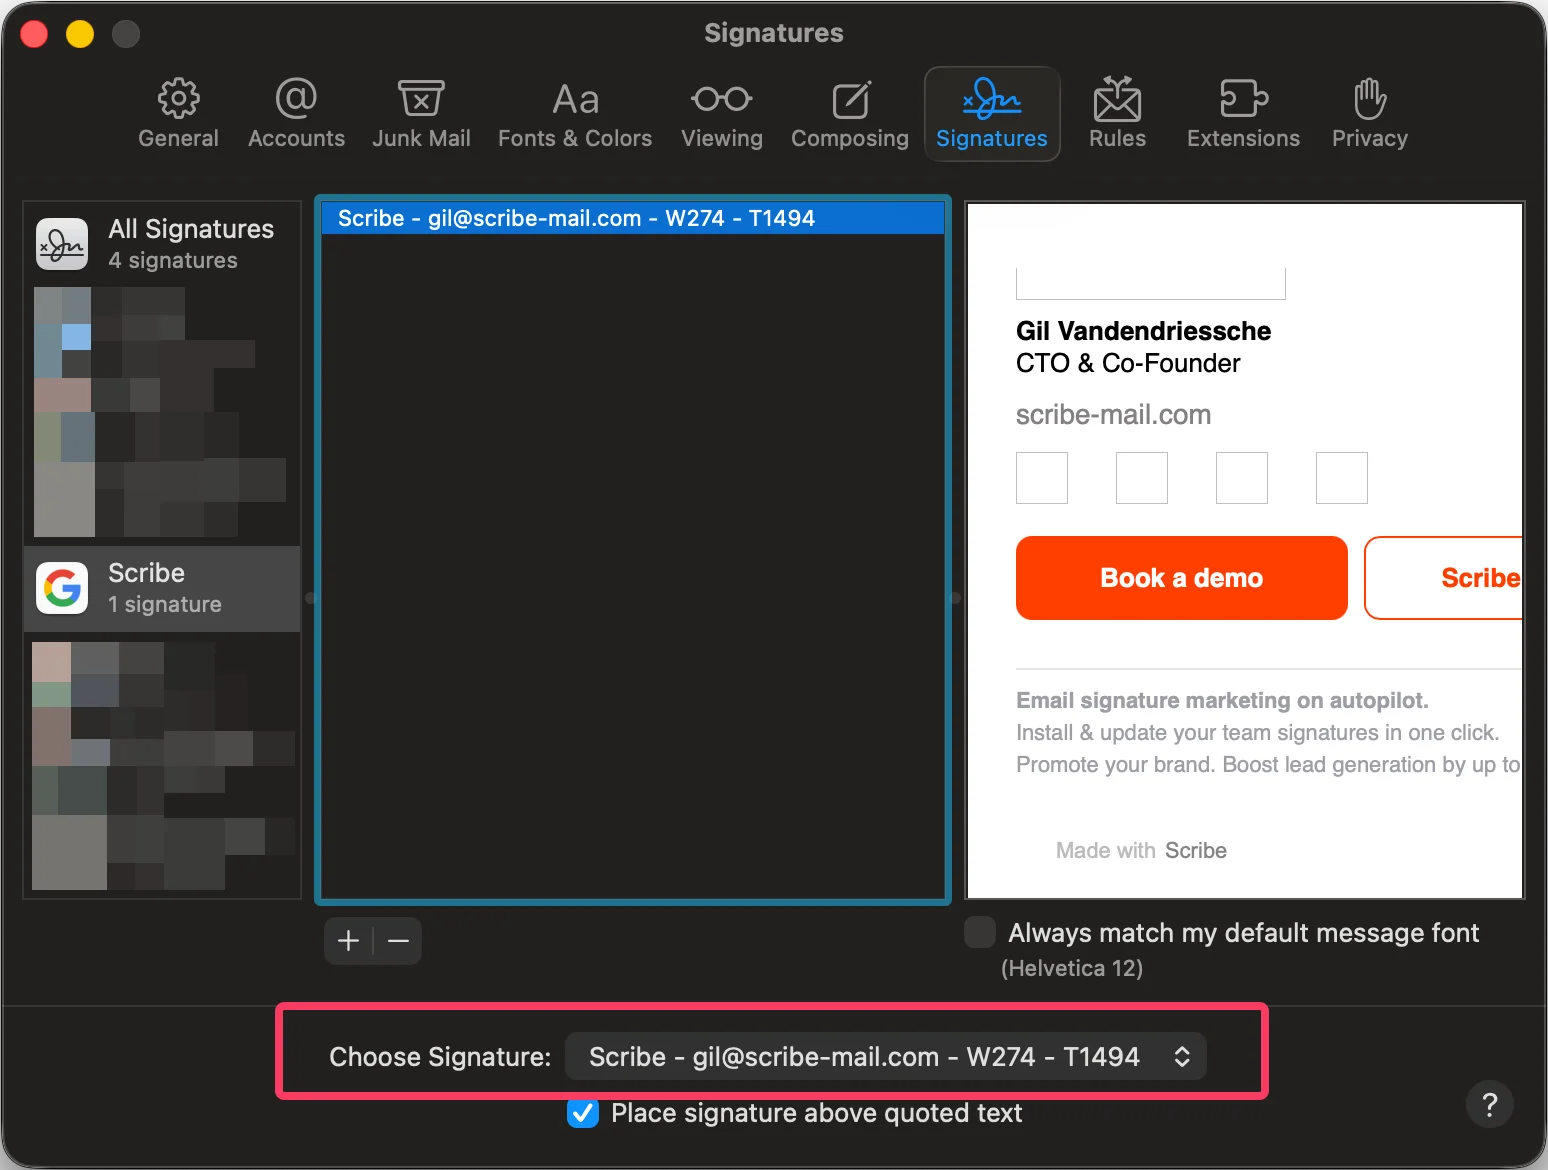
 Kies je Scribe-handtekening in het veld 'choose your signature'.
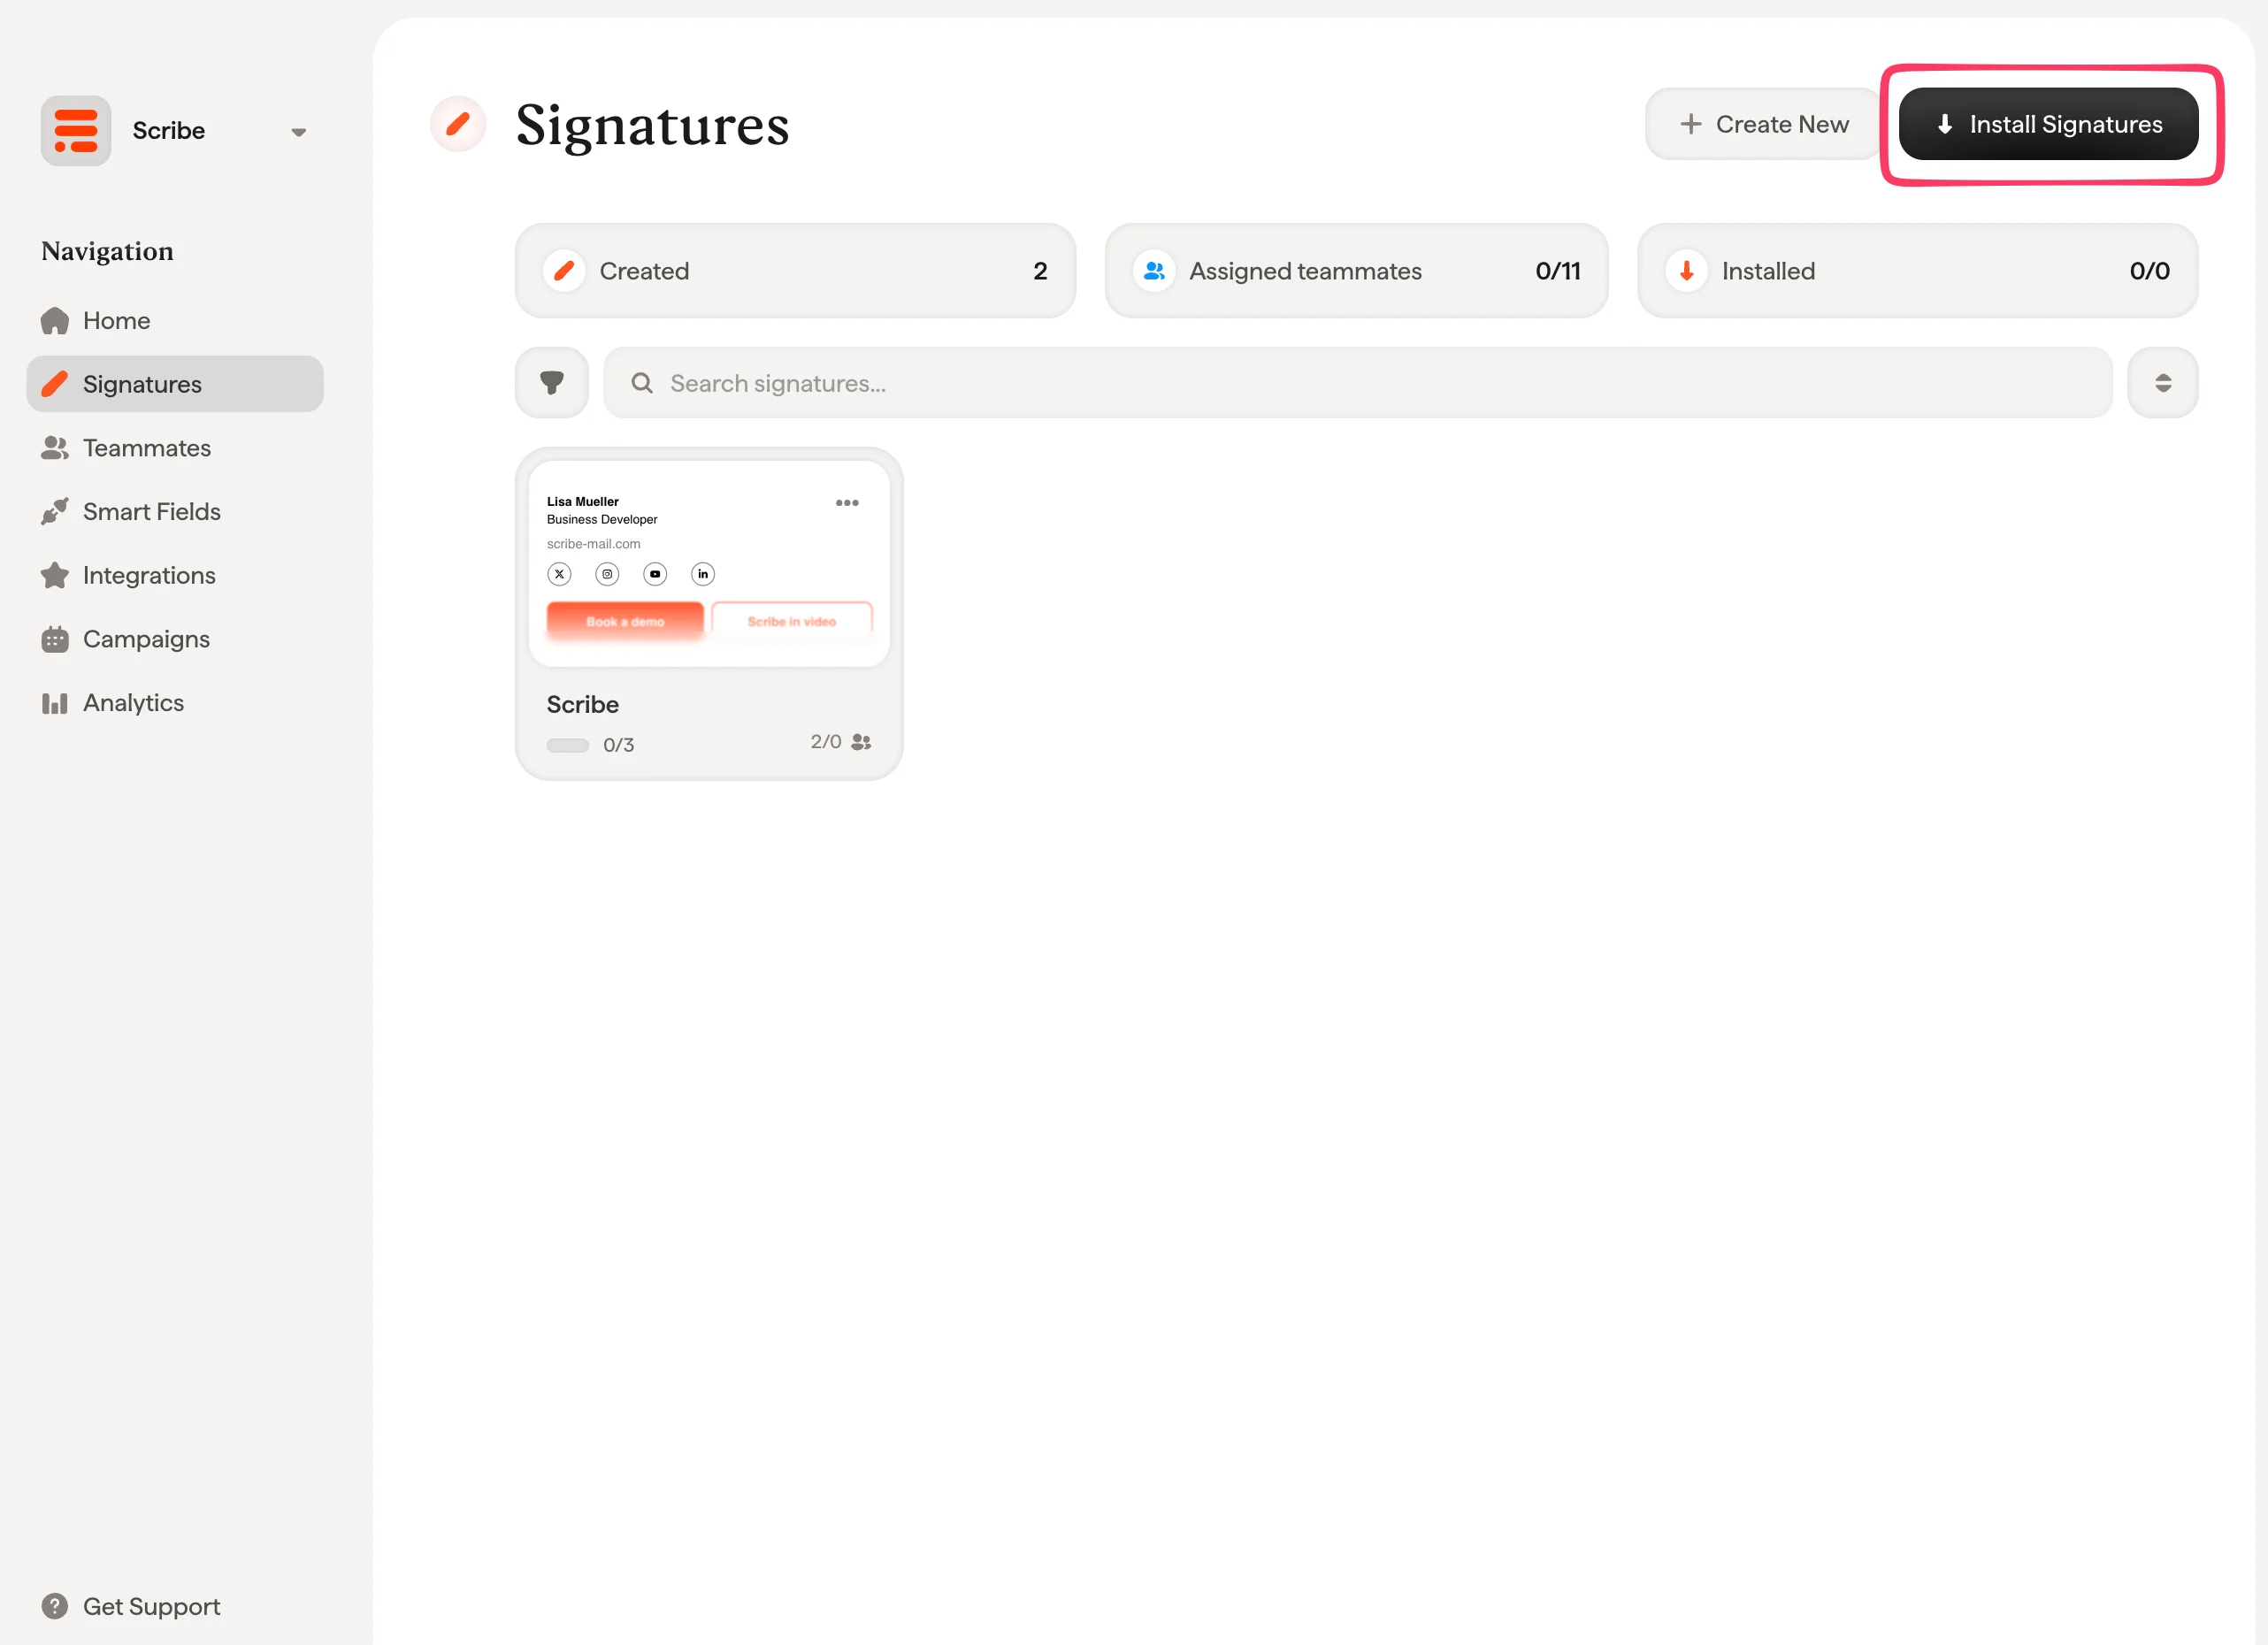
 Installeer vanuit je handtekeningenlijst alle handtekeningen tegelijk voor je teamleden, of installeer ze één voor één voor een geleidelijke uitrol.
 ## Gerelateerde artikelen
* [Overzicht van integraties](/nl/integrations-overview): alle manieren om Scribe-handtekeningen uit te rollen, in de cloud of server-side.
* [Afbeeldingen worden niet weergegeven](/nl/troubleshooting/images-are-not-showing): los ontbrekende afbeeldingen in geïnstalleerde handtekeningen op.
* [Handtekening kan niet worden geïnstalleerd](/nl/troubleshooting/unable-to-install-signature): los een handtekening op die niet wil installeren.
## Gerelateerde artikelen
* [Overzicht van integraties](/nl/integrations-overview): alle manieren om Scribe-handtekeningen uit te rollen, in de cloud of server-side.
* [Afbeeldingen worden niet weergegeven](/nl/troubleshooting/images-are-not-showing): los ontbrekende afbeeldingen in geïnstalleerde handtekeningen op.
* [Handtekening kan niet worden geïnstalleerd](/nl/troubleshooting/unable-to-install-signature): los een handtekening op die niet wil installeren.