> ## Documentation Index
> Fetch the complete documentation index at: https://help.scribe-mail.com/llms.txt
> Use this file to discover all available pages before exploring further.
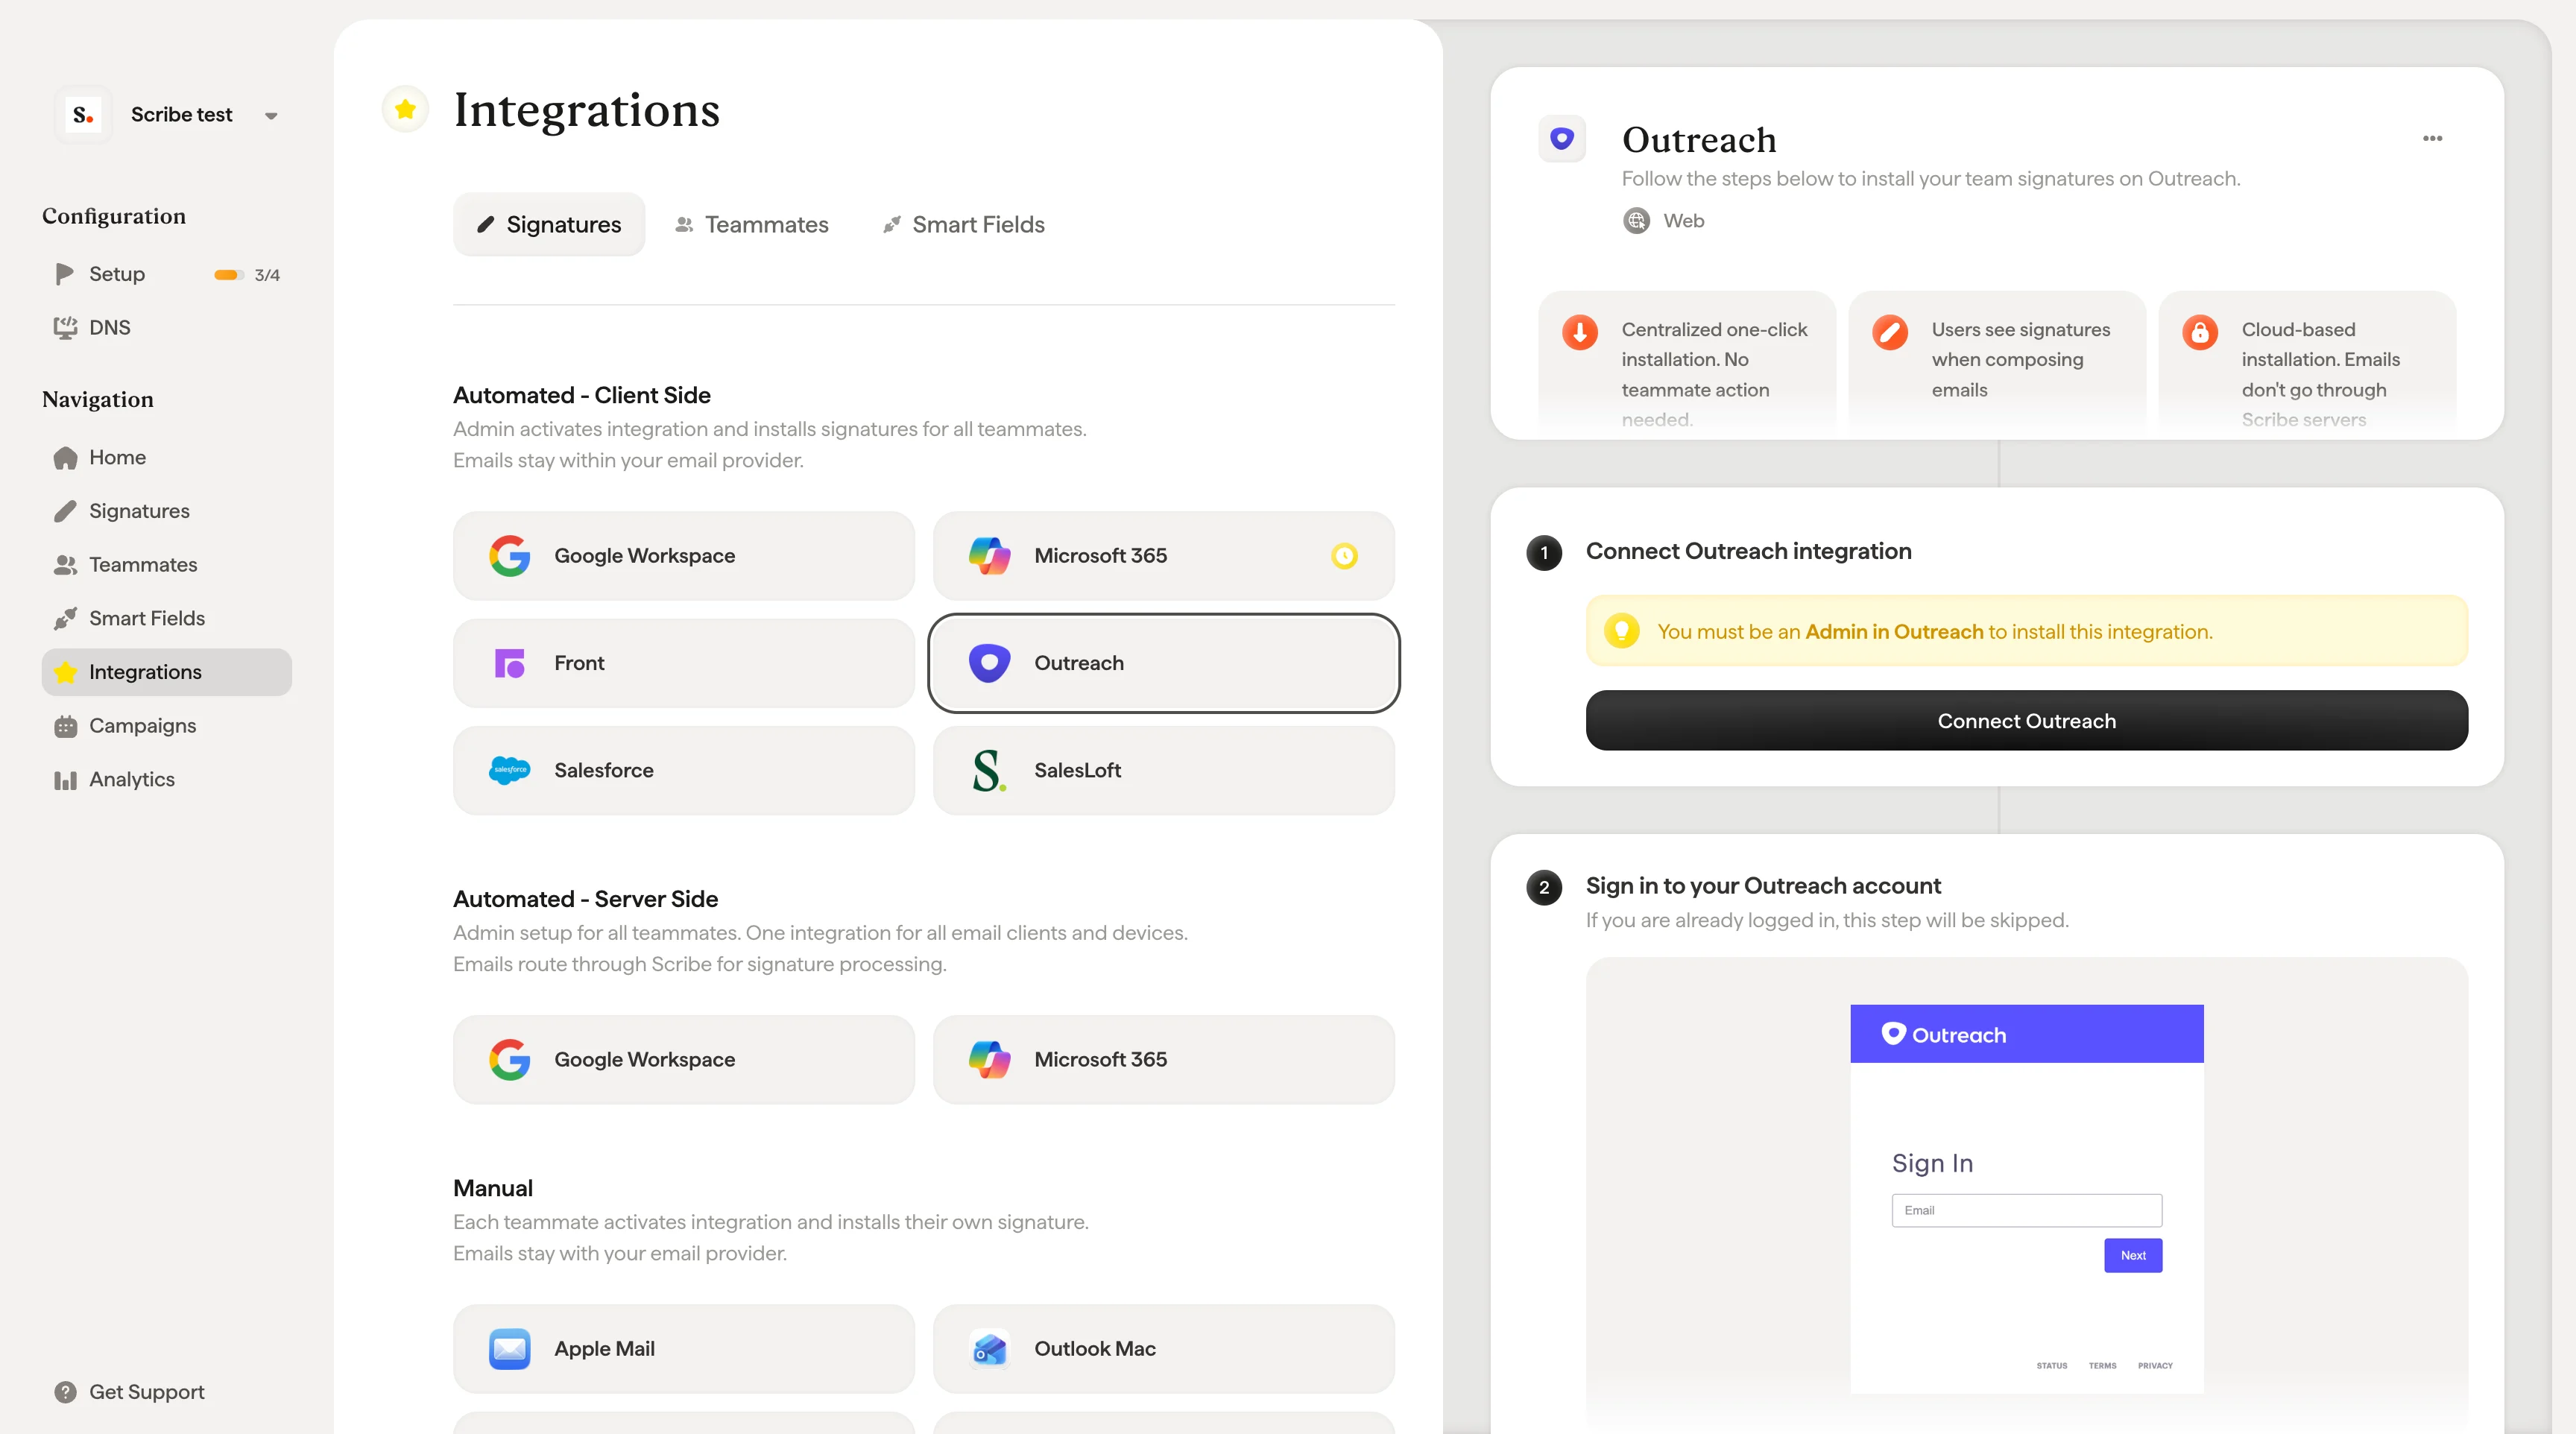
# Outreach
> Installeer Scribe e-mailhandtekeningen in één klik bij het hele team in Outreach door de integratie als Outreach-beheerder te koppelen — zonder dat teamleden iets hoeven te doen.
**Gecentraliseerde installatie met één klik.** Teamleden hoeven niets te doen. Gebruikers zien de handtekening bij het opstellen van e-mails. Cloudgebaseerde installatie: e-mails lopen niet via de Scribe-servers.
**Ondersteunde platforms:** Web
## Installatiehandleiding
Je moet **beheerder in Outreach** zijn om deze integratie te installeren.
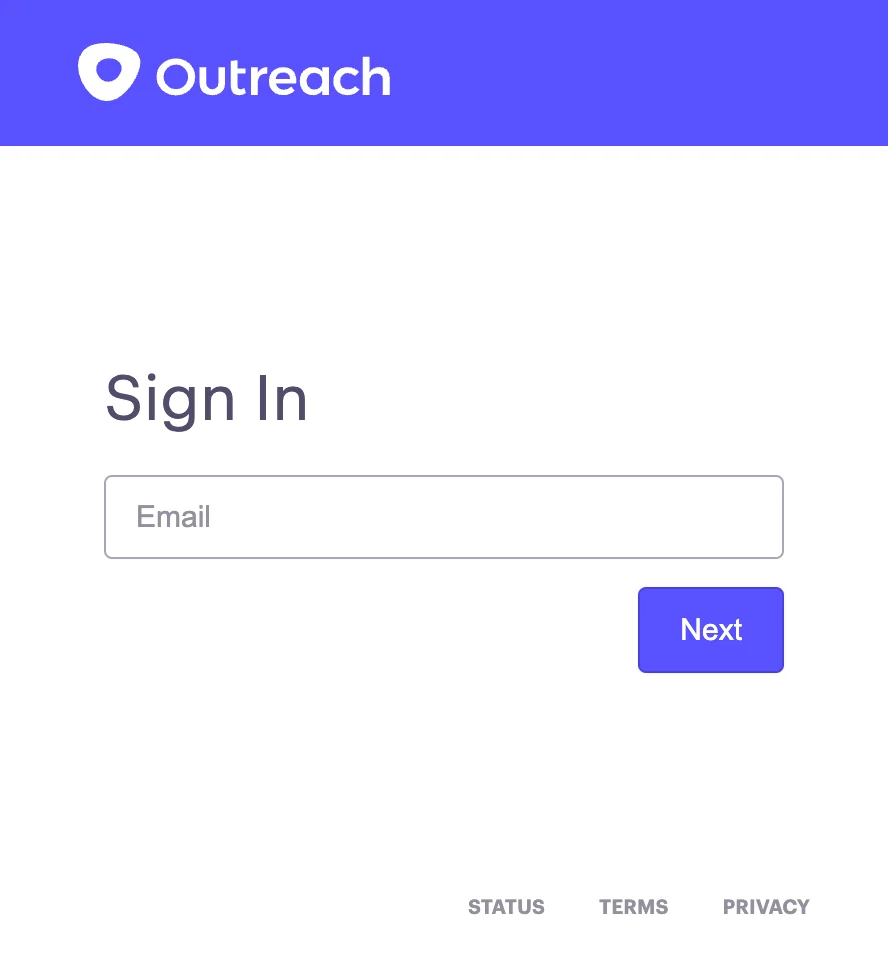
Klik op **Connect Outreach** in Scribe om de integratie te starten.
 Ben je al aangemeld, dan wordt deze stap overgeslagen.
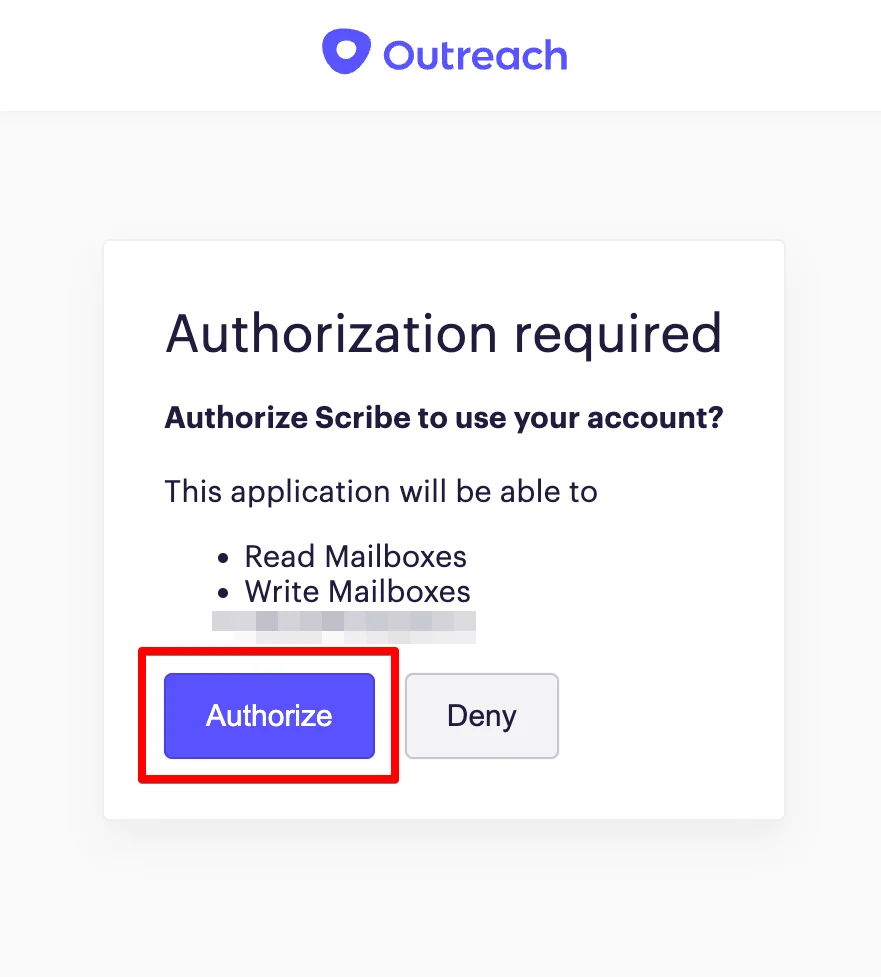
 Zodra je autoriseert, wordt de integratie automatisch gekoppeld.
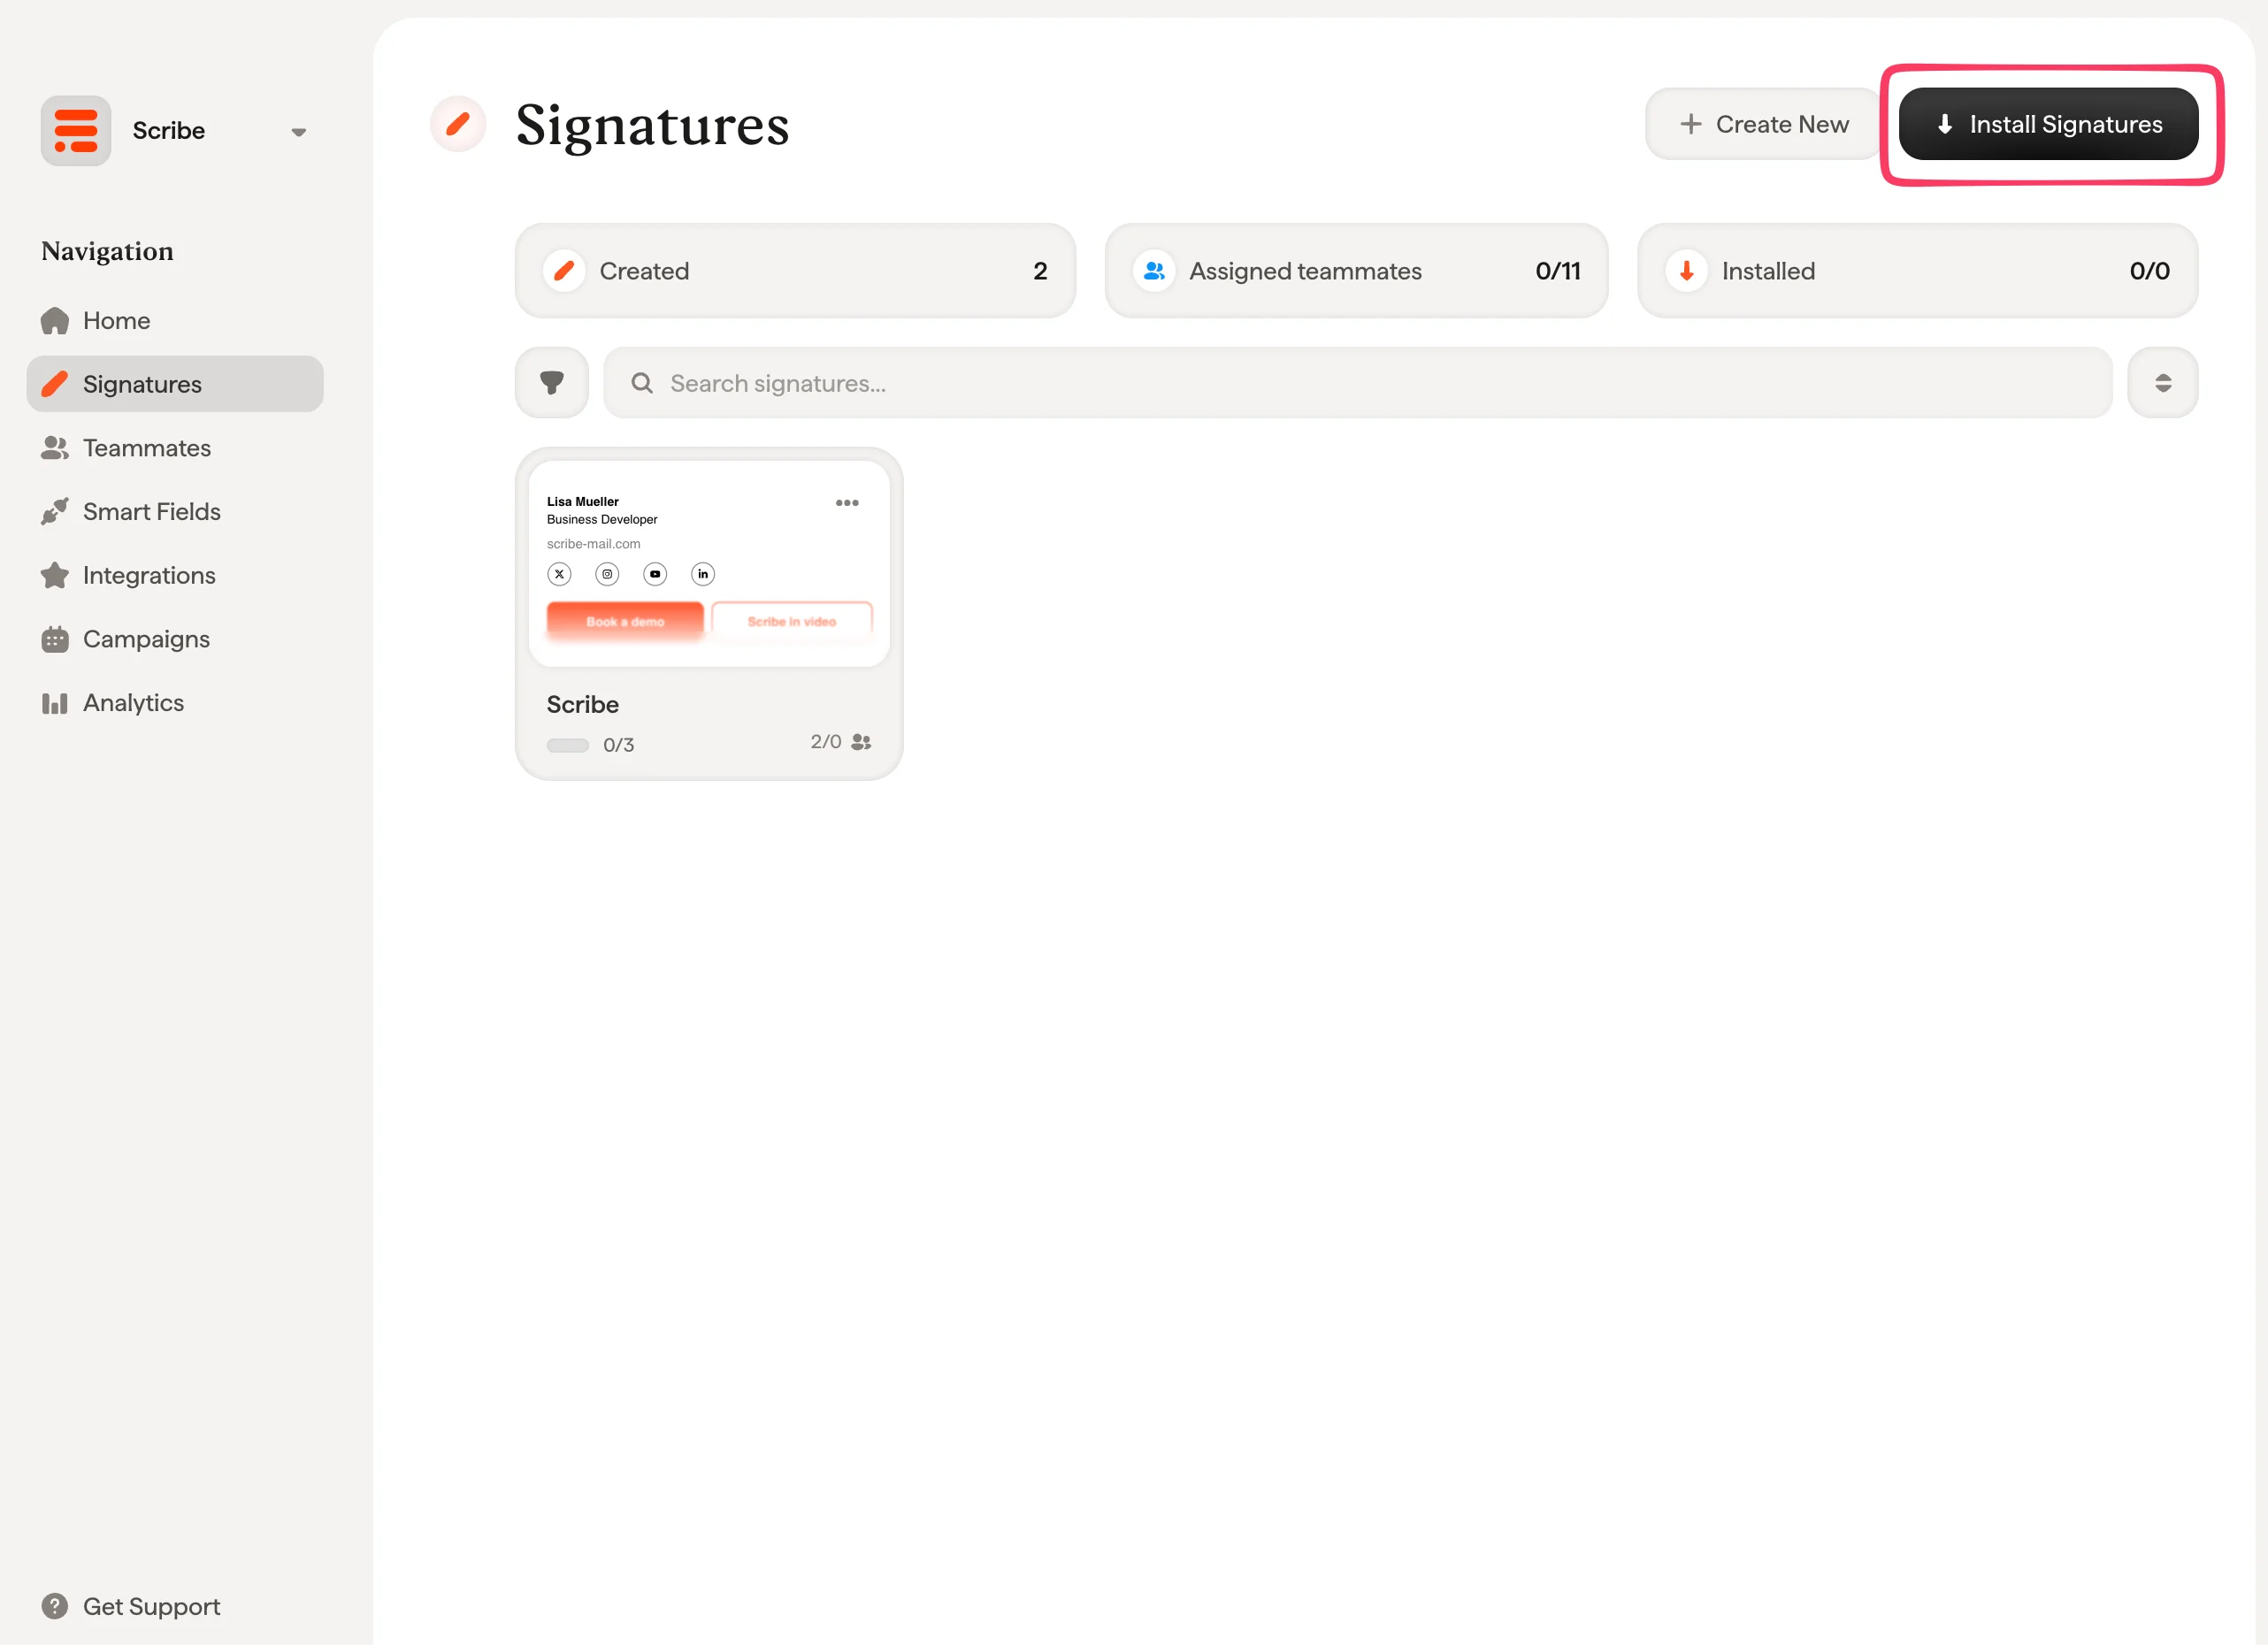
 Vanuit je handtekeninglijst kun je [alle handtekeningen in één keer installeren voor je teamleden](/nl/install-signatures) of ze één voor één installeren voor een gefaseerde uitrol.
 ## Gerelateerde artikelen
* [Overzicht van integraties](/nl/integrations-overview): alle manieren om Scribe-handtekeningen uit te rollen, in de cloud of op de server.
* [Salesforce](/nl/integrations/signatures/salesforce-client-side): Scribe-handtekeningen installeren in Salesforce.
* [SalesLoft](/nl/integrations/signatures/salesloft-client-side): Scribe-handtekeningen installeren in Salesloft.
* [Outreach Smartfields](/nl/integrations/smart-fields/outreach-smart-fields): Outreach-gegevens synchroniseren met Smartfields in handtekeningen.
## Gerelateerde artikelen
* [Overzicht van integraties](/nl/integrations-overview): alle manieren om Scribe-handtekeningen uit te rollen, in de cloud of op de server.
* [Salesforce](/nl/integrations/signatures/salesforce-client-side): Scribe-handtekeningen installeren in Salesforce.
* [SalesLoft](/nl/integrations/signatures/salesloft-client-side): Scribe-handtekeningen installeren in Salesloft.
* [Outreach Smartfields](/nl/integrations/smart-fields/outreach-smart-fields): Outreach-gegevens synchroniseren met Smartfields in handtekeningen.