> ## Documentation Index
> Fetch the complete documentation index at: https://help.scribe-mail.com/llms.txt
> Use this file to discover all available pages before exploring further.
# HTML-handtekening installeren in Outlook
> Installeer je Scribe e-mailhandtekening in Outlook op het web door de HTML in de instellingen te plakken en als standaard in te stellen voor nieuwe berichten en antwoorden.
Volg deze stappen om je Scribe HTML-handtekening te installeren in Outlook op het web.
Deze instructies gelden voor **Outlook op het web** (outlook.office.com). Voor Outlook desktop op Windows of Mac raden we de integratie [Outlook Windows](/nl/integrations/signatures/outlook-windows) of [Outlook Mac](/nl/integrations/signatures/outlook-mac) aan.
## Vereisten
* Je Scribe-handtekening-HTML gekopieerd naar het klembord ([hier kopiëren](/nl/integrations/signatures/signature-html))
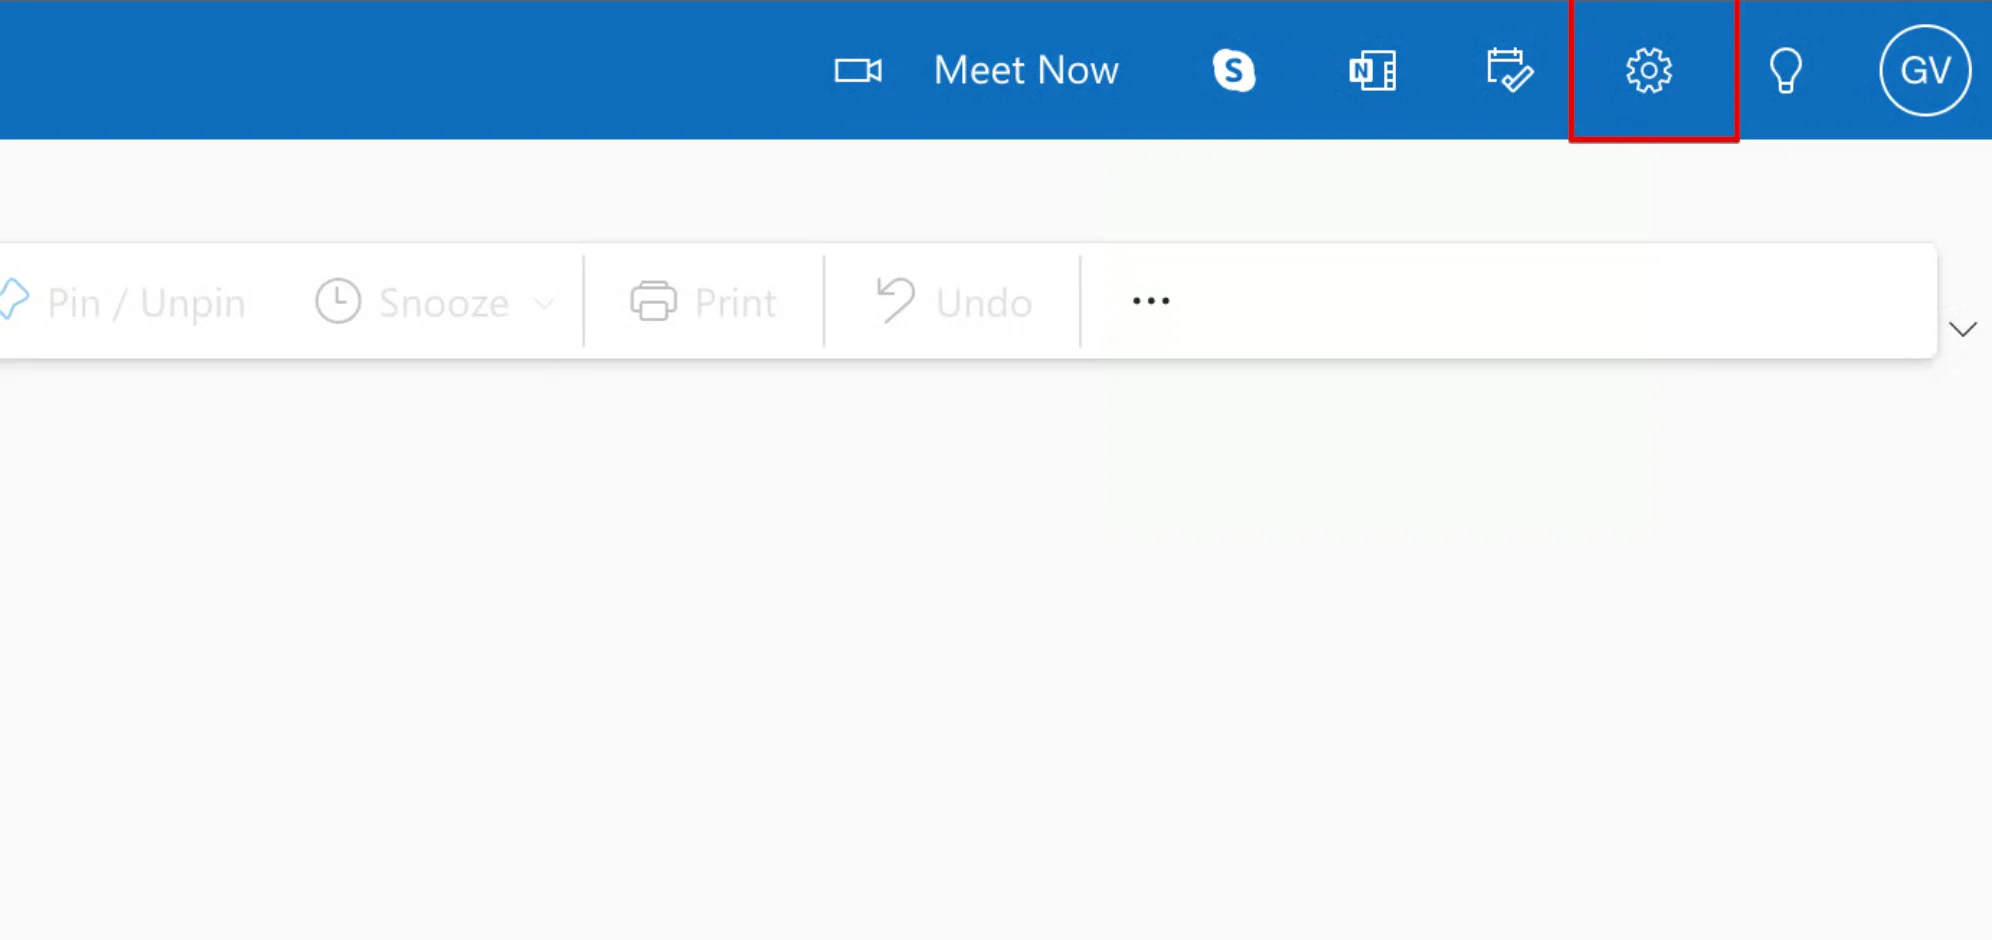
Klik in Outlook op het web op het tandwielicoon rechtsboven om **Settings** te openen.
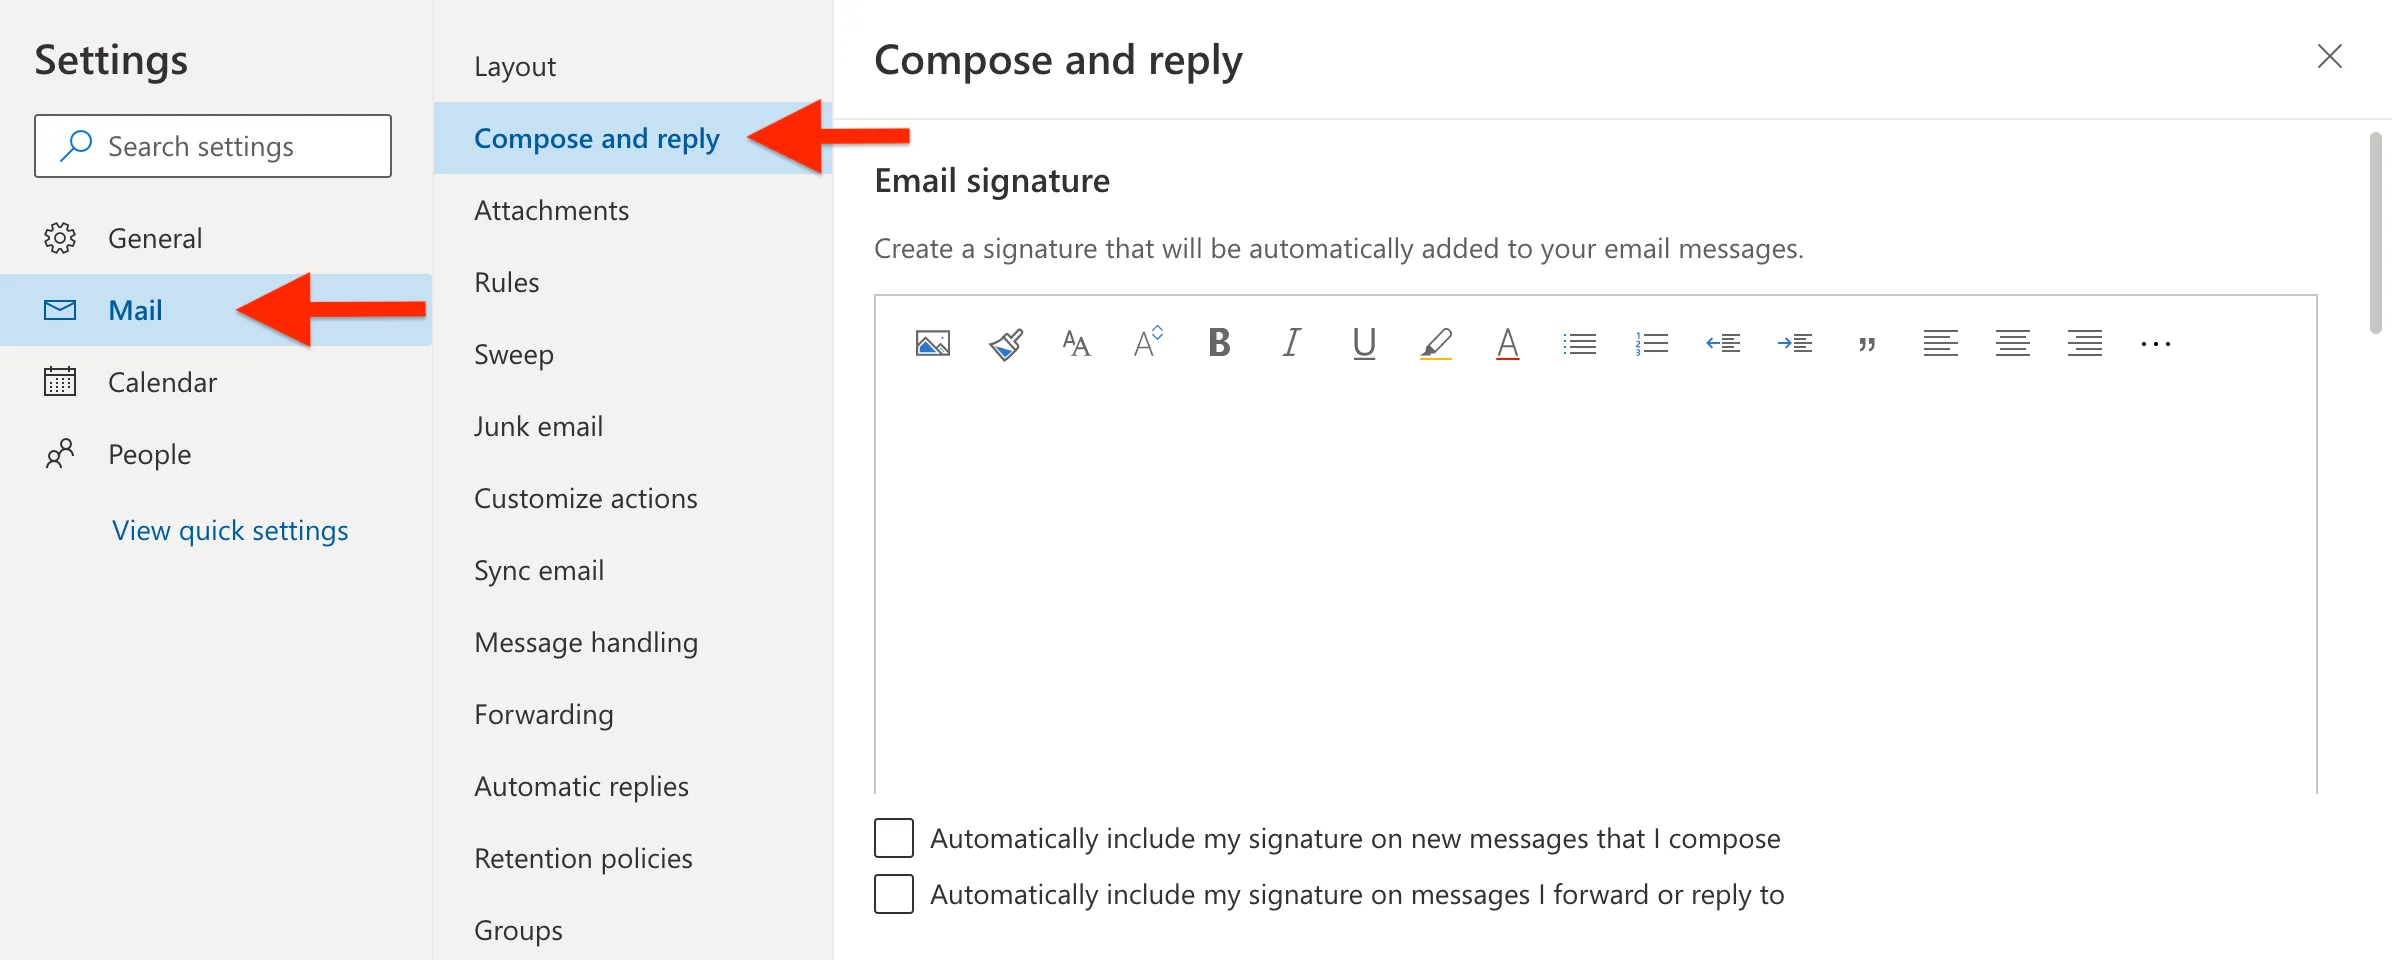
 Navigeer in het instellingenpaneel naar **Email** en selecteer vervolgens **Compose and reply**.
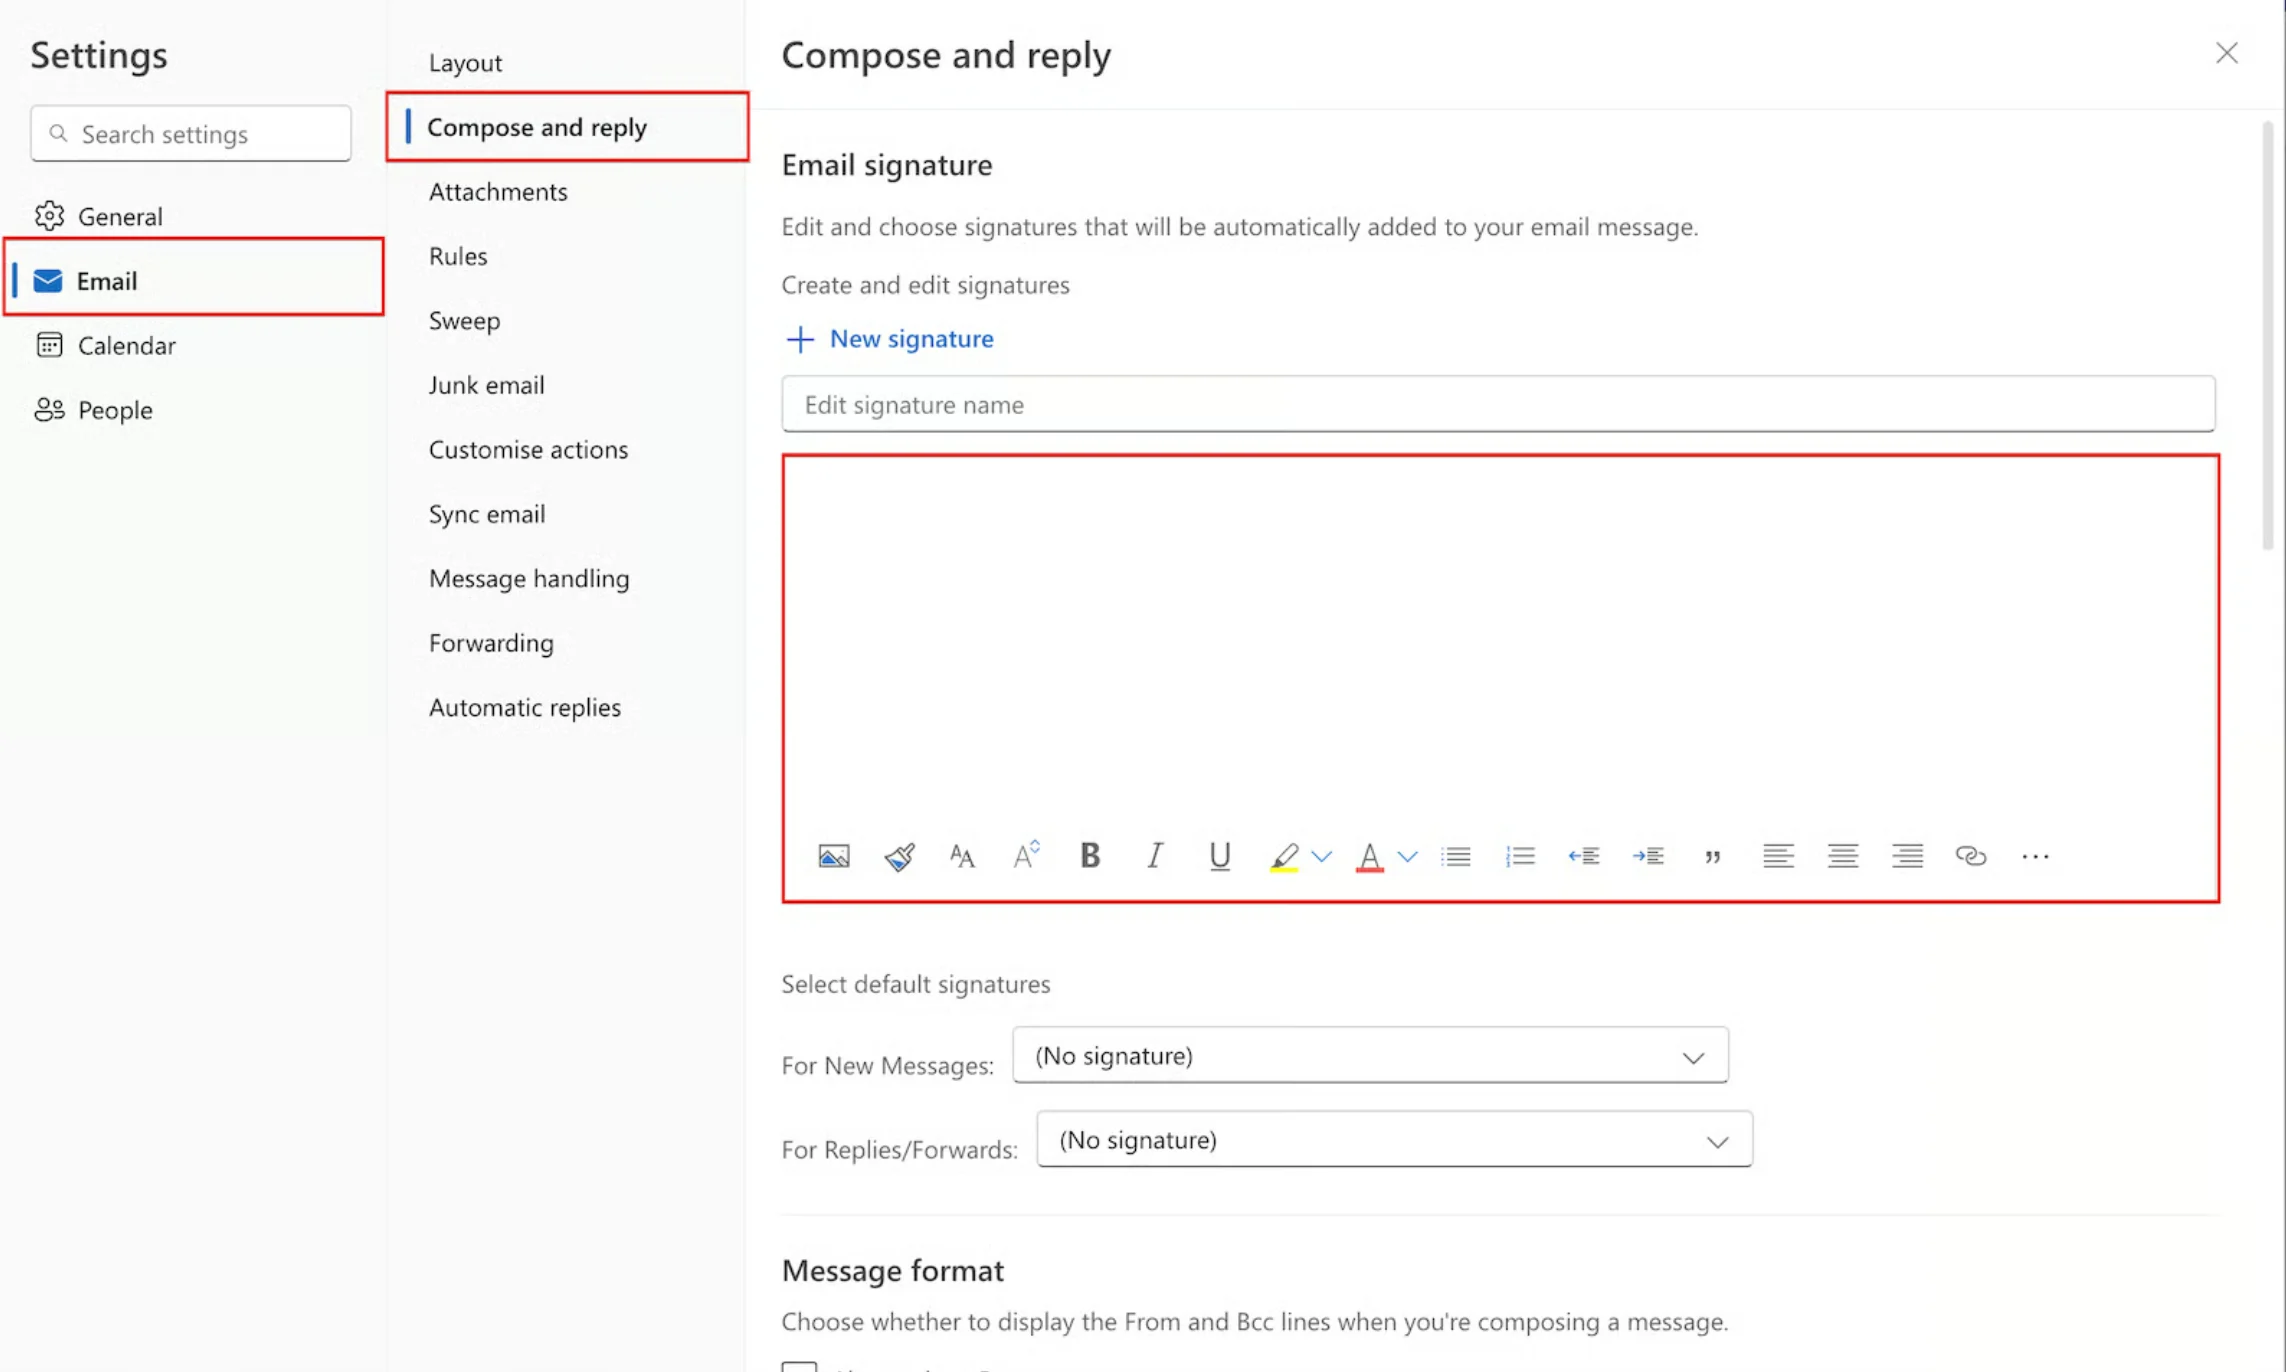
 Klik in het handtekeningtekstvak en plak je Scribe HTML-handtekening met **Ctrl+V** (Windows) of **Cmd+V** (Mac).
Plak in het bewerkingsgebied van de handtekening, niet in het naamveld. Outlook geeft de HTML automatisch weer als opgemaakte handtekening.
Klik in het handtekeningtekstvak en plak je Scribe HTML-handtekening met **Ctrl+V** (Windows) of **Cmd+V** (Mac).
Plak in het bewerkingsgebied van de handtekening, niet in het naamveld. Outlook geeft de HTML automatisch weer als opgemaakte handtekening.
 Stel onderaan het handtekeninggedeelte je standaardhandtekeningen in:
* **Voor nieuwe berichten:** selecteer je Scribe-handtekening
* **Voor antwoorden/doorsturen:** selecteer je Scribe-handtekening
Stel onderaan het handtekeninggedeelte je standaardhandtekeningen in:
* **Voor nieuwe berichten:** selecteer je Scribe-handtekening
* **Voor antwoorden/doorsturen:** selecteer je Scribe-handtekening
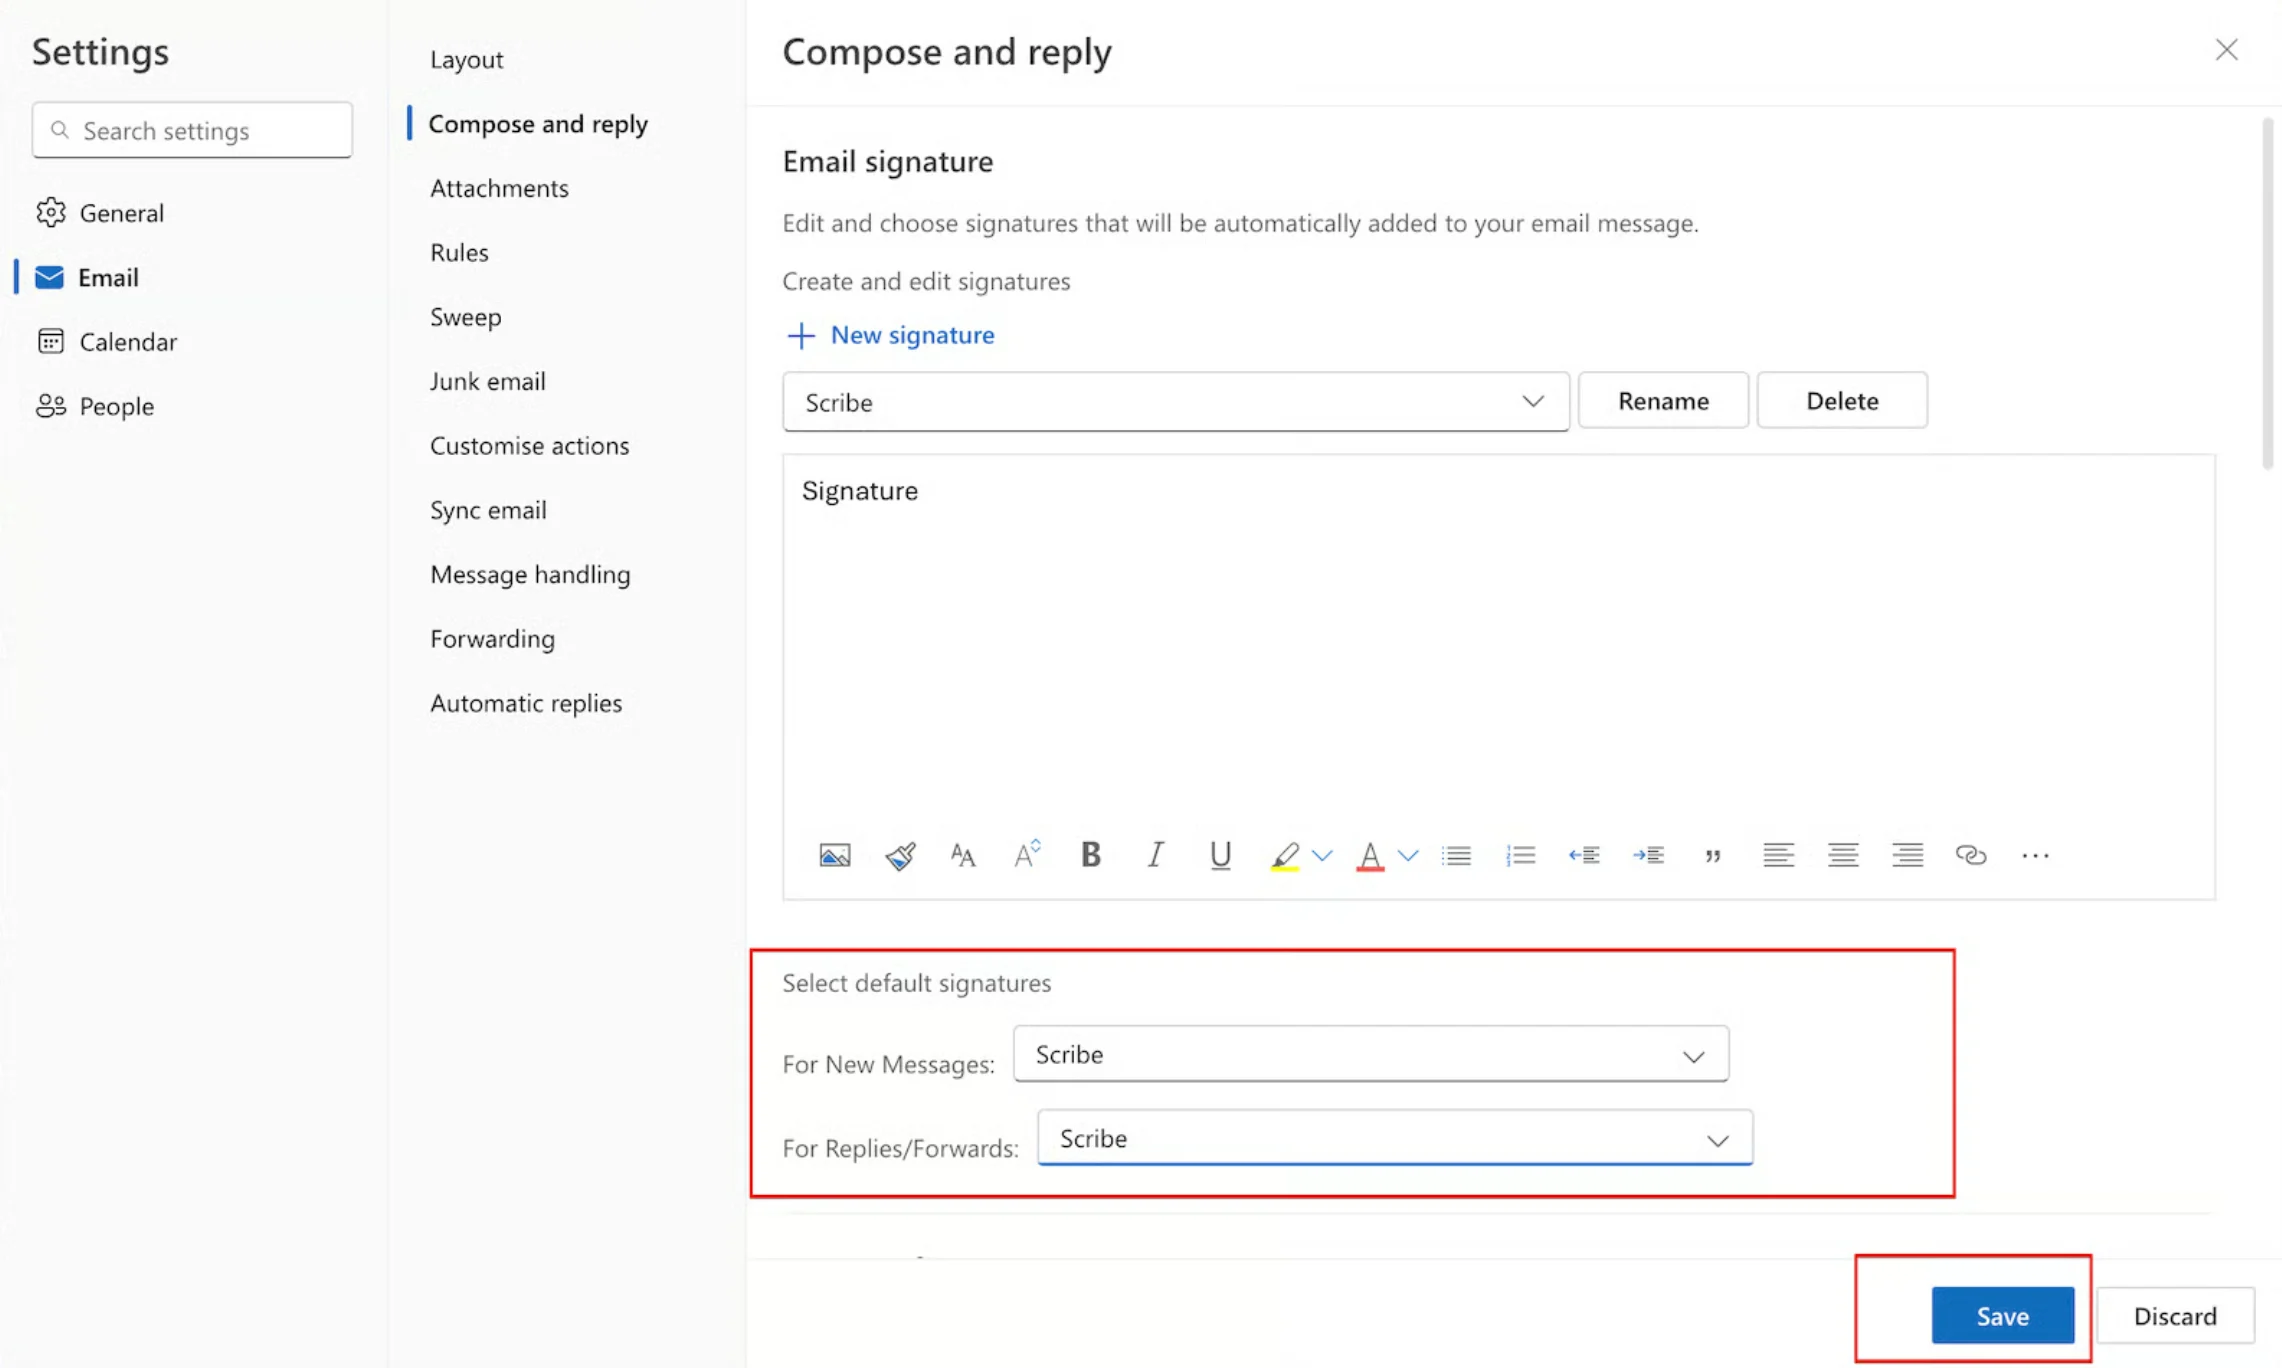 Klik op **Save** om je nieuwe handtekening toe te passen.