> ## Documentation Index
> Fetch the complete documentation index at: https://help.scribe-mail.com/llms.txt
> Use this file to discover all available pages before exploring further.
# Installer HTML-signatur i Outlook
> Installer Scribe-e-postsignaturen din i Outlook på nett ved å lime HTML-en inn i innstillingene og angi den som standard for nye meldinger og svar.
Følg disse trinnene for å installere Scribe HTML-signaturen din i Outlook på nett.
Disse instruksjonene gjelder **Outlook på nett** (outlook.office.com). For Outlook-skrivebordsversjonen på Windows eller Mac anbefaler vi å bruke integrasjonen [Outlook Windows](/no/integrations/signatures/outlook-windows) eller [Outlook Mac](/no/integrations/signatures/outlook-mac) i stedet.
## Forutsetninger
* Scribe-signaturens HTML kopiert til utklippstavlen ([kopier den herfra](/no/integrations/signatures/signature-html))
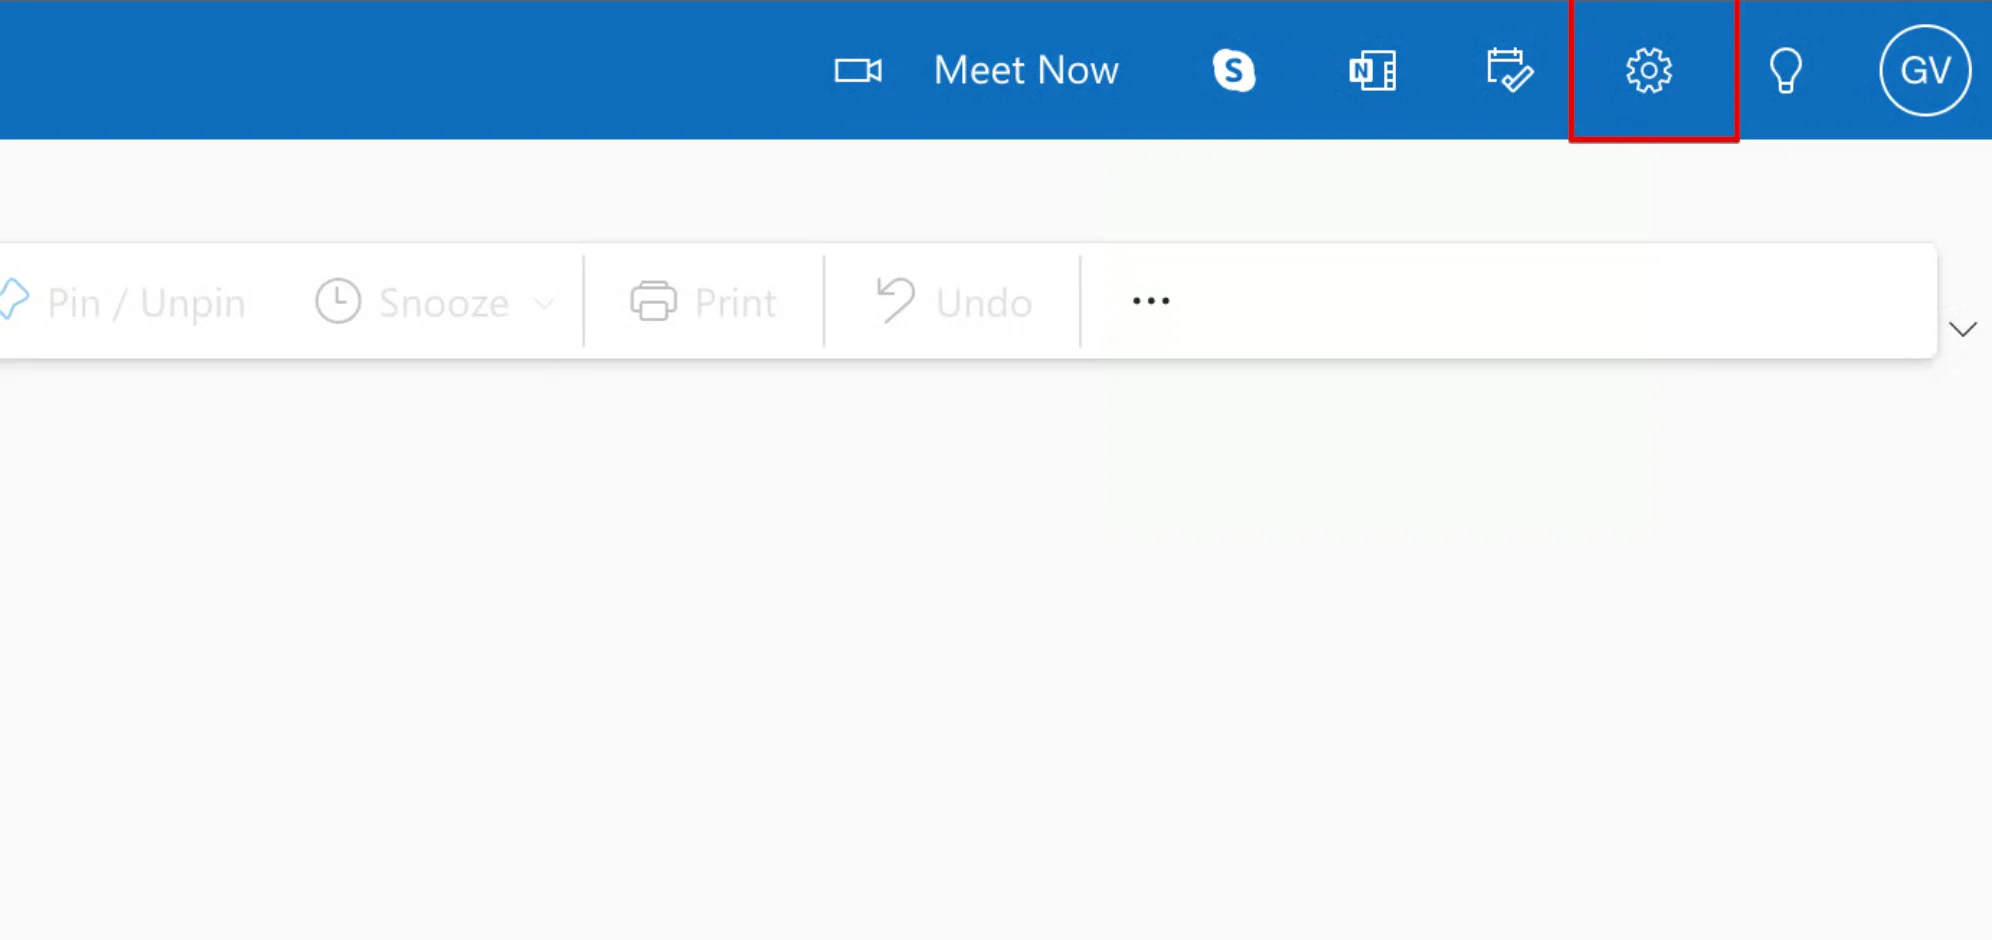
I Outlook på nett klikker du på tannhjulikonet øverst til høyre for å åpne **Innstillinger**.
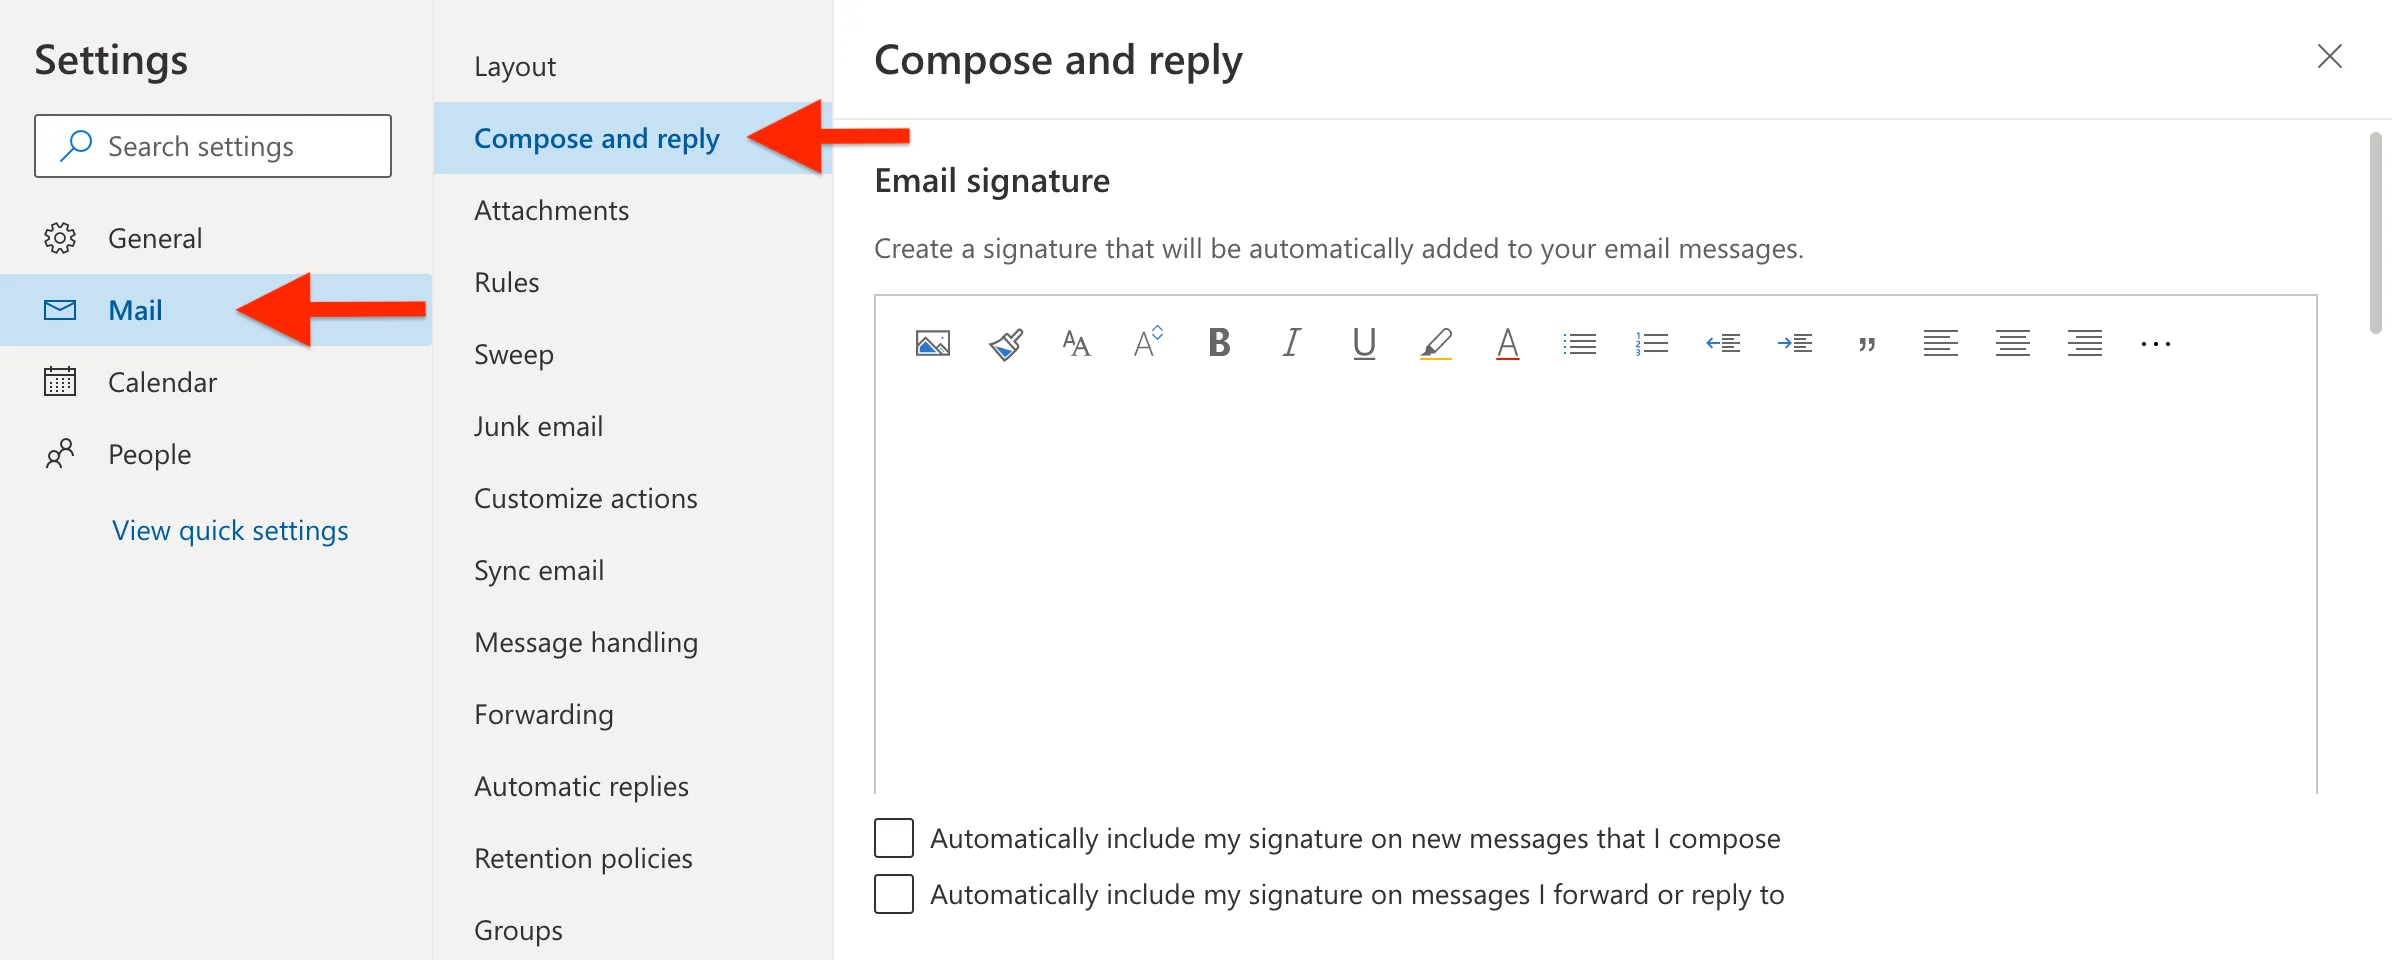
 I innstillingspanelet navigerer du til **E-post**, og velger deretter **Skriv og svar**.
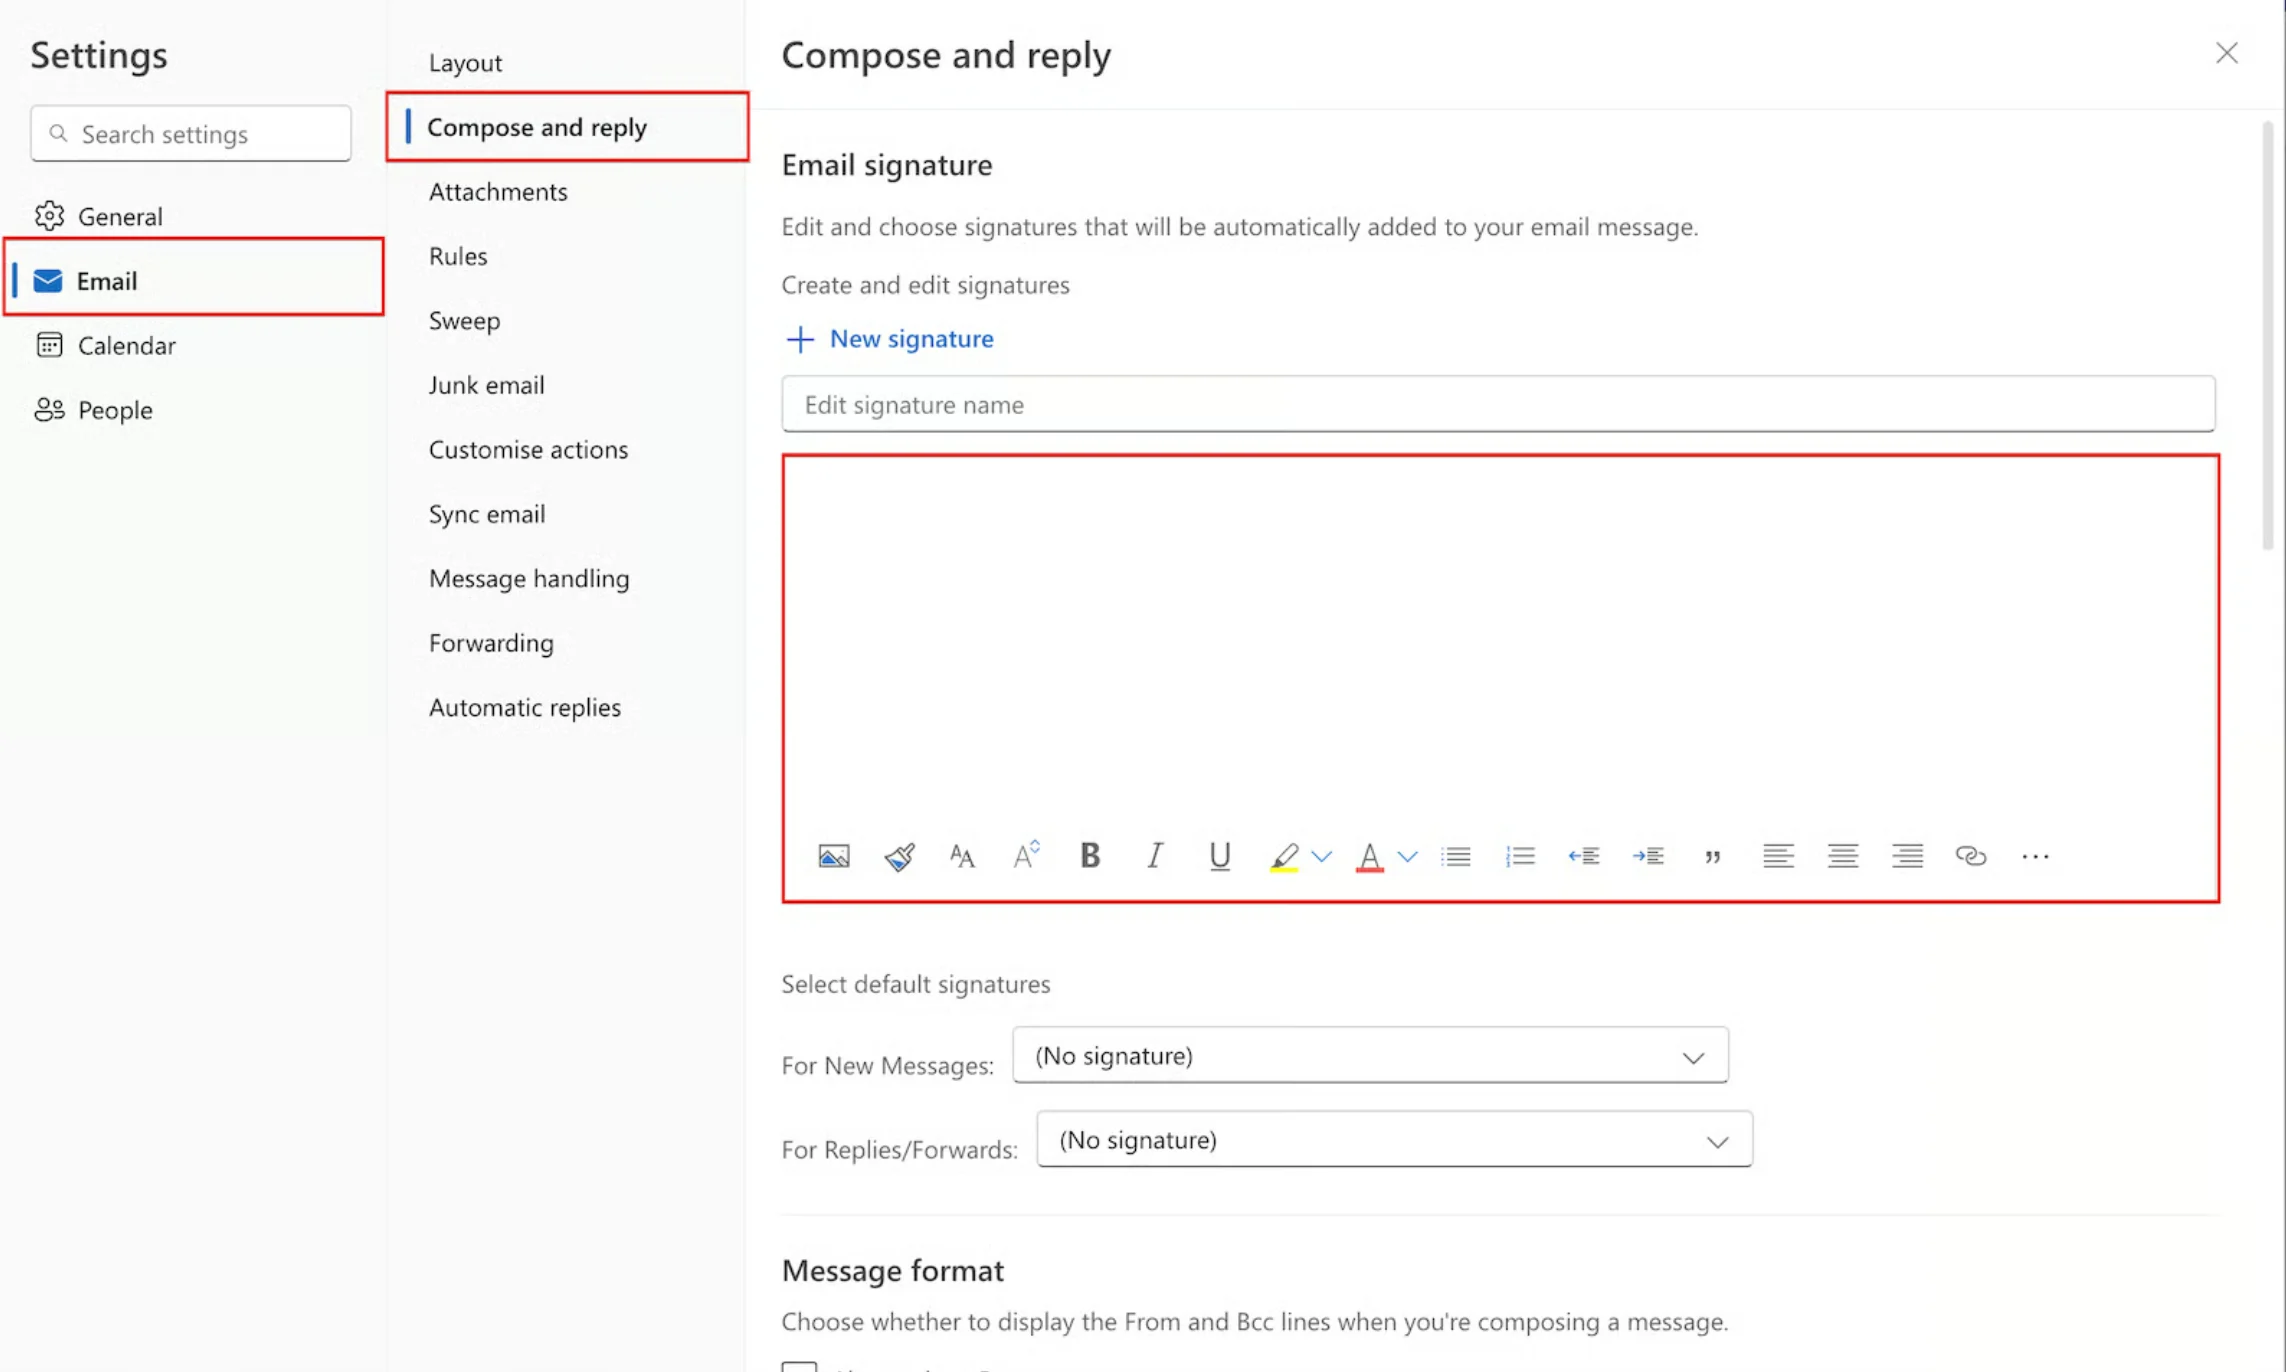
 Klikk inne i signatur-tekstboksen, og lim deretter inn Scribe HTML-signaturen din med **Ctrl+V** (Windows) eller **Cmd+V** (Mac).
Pass på å lime inn i signaturredigeringsområdet, ikke i navnefeltet. Outlook gjengir HTML-en automatisk som en formatert signatur.
Klikk inne i signatur-tekstboksen, og lim deretter inn Scribe HTML-signaturen din med **Ctrl+V** (Windows) eller **Cmd+V** (Mac).
Pass på å lime inn i signaturredigeringsområdet, ikke i navnefeltet. Outlook gjengir HTML-en automatisk som en formatert signatur.
 Nederst i signaturseksjonen angir du standardsignaturene dine:
* **For nye meldinger:** velg Scribe-signaturen din
* **For svar/videresendinger:** velg Scribe-signaturen din
Nederst i signaturseksjonen angir du standardsignaturene dine:
* **For nye meldinger:** velg Scribe-signaturen din
* **For svar/videresendinger:** velg Scribe-signaturen din
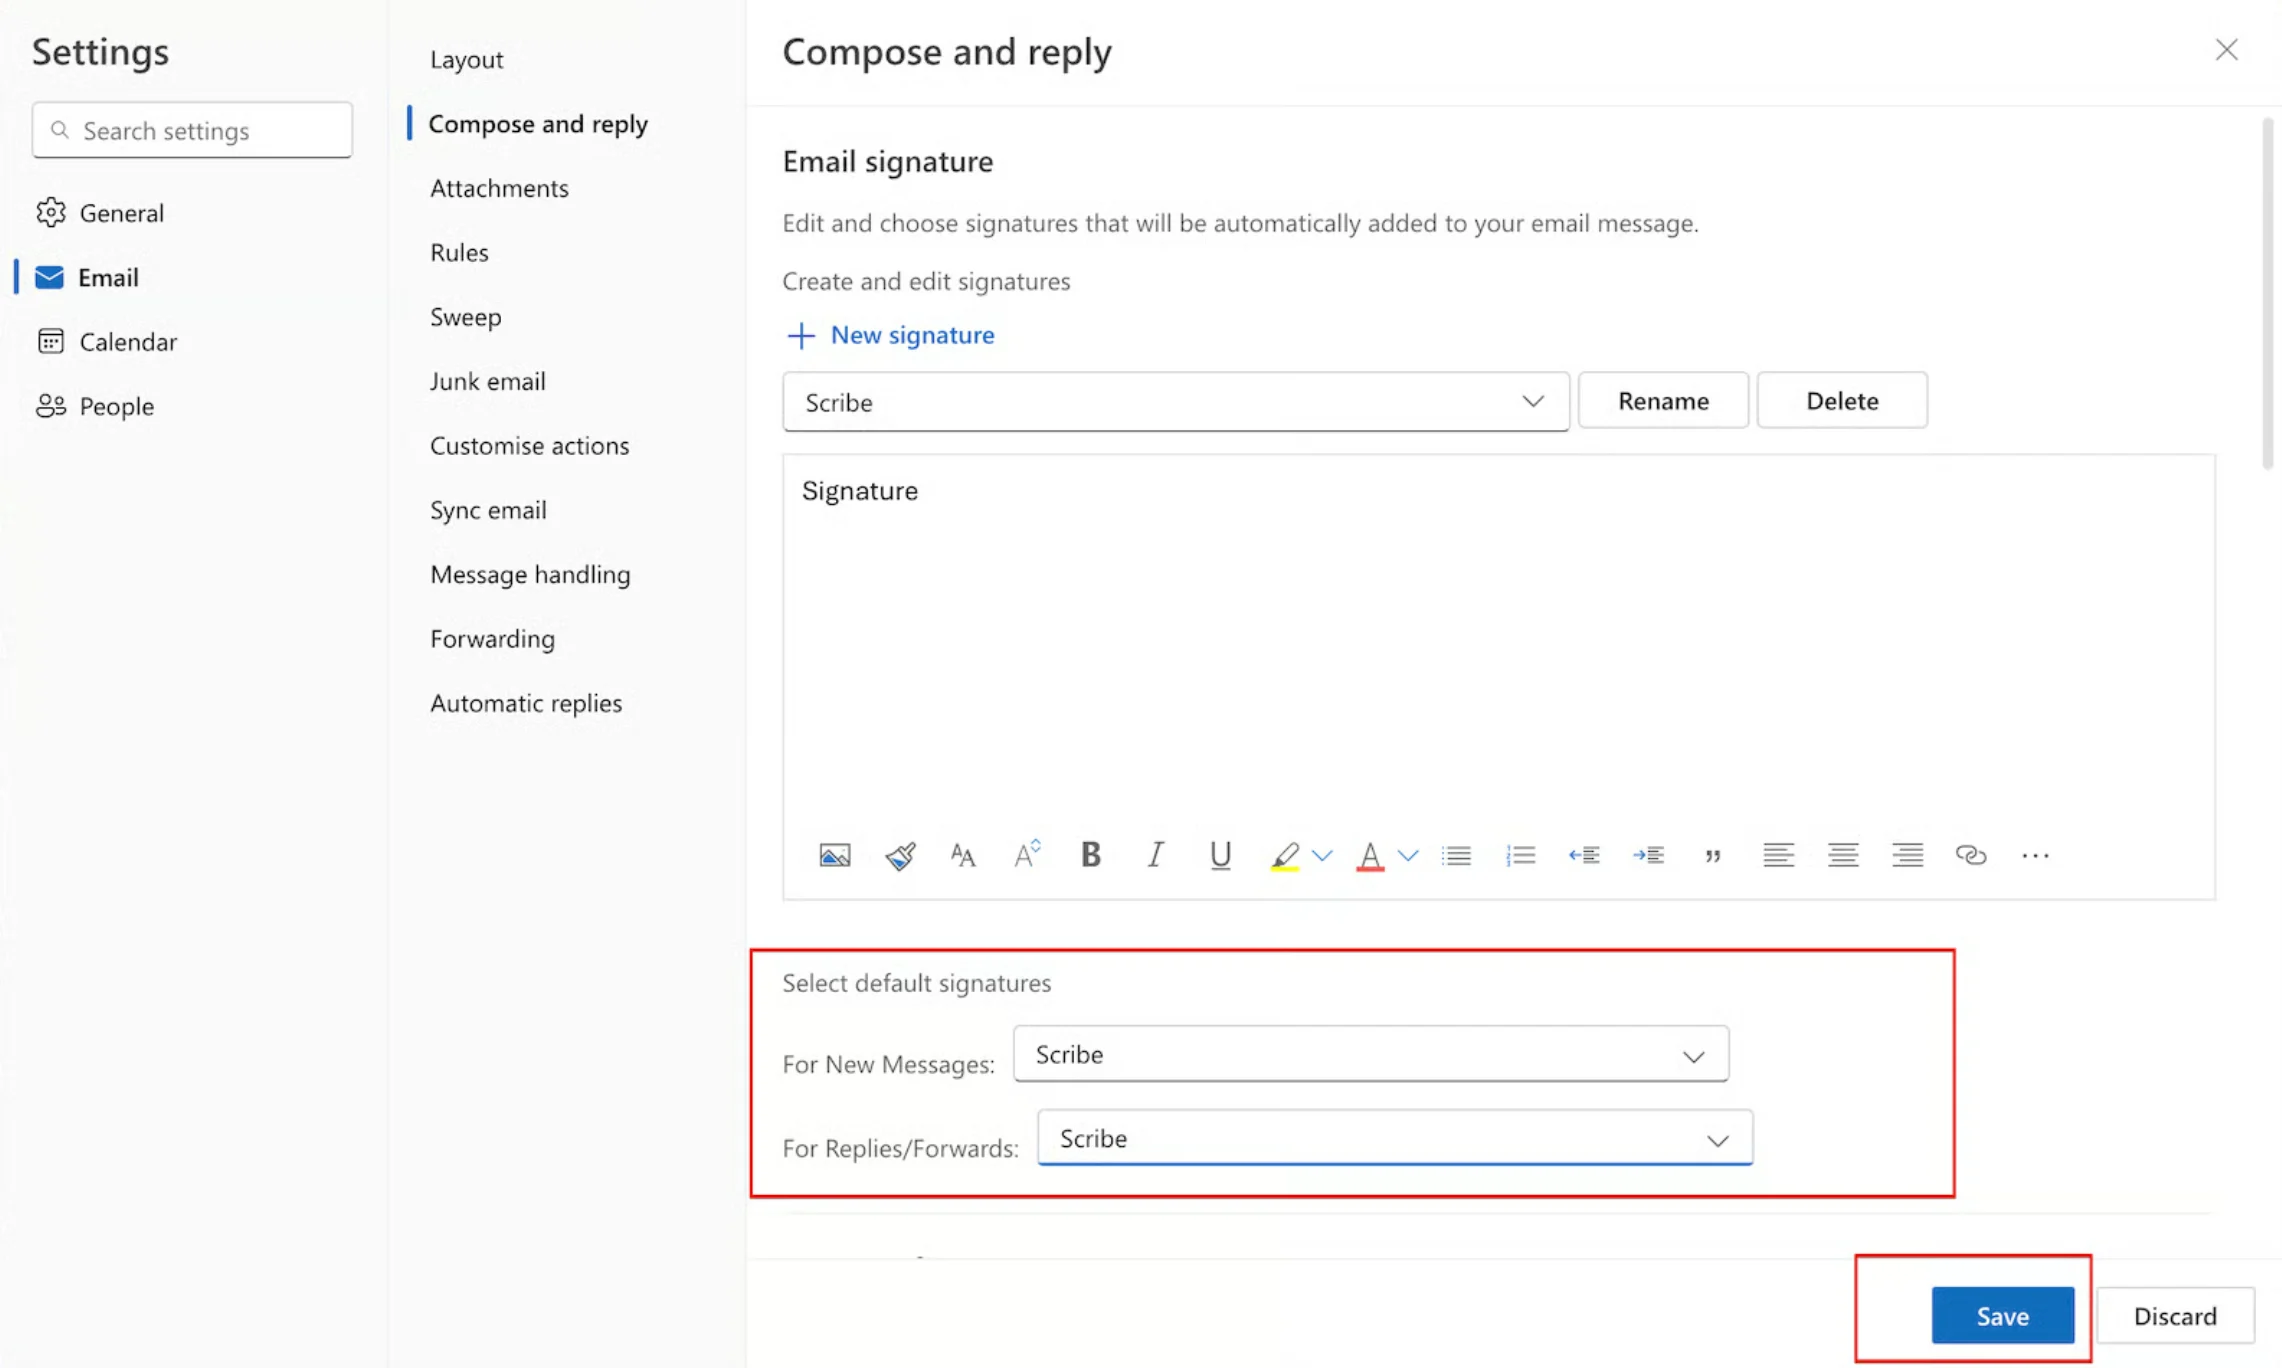 Klikk på **Lagre** for å bruke den nye signaturen.