

How it works
Server-side installation changes your mail routing, not your teammates’ mailboxes. Nothing is installed on their devices, and no add-in runs in their email client. Instead, the setup below adds one hop to your outbound mail flow, and the signature is added to each message while it is in transit.- A teammate sends an email. Exchange Online accepts it from whatever client or device they used, so the same rule covers web, desktop, Apple Mail, iOS and Android. Tools that send through a teammate’s mailbox are covered too: HubSpot sales emails, and any other CRM or sequencer connected to the mailbox, pick up the signature with no extra setup, as long as the From address belongs to a teammate whose signature you have installed. A tool that sends from its own servers instead of through Exchange Online, such as HubSpot marketing email, never reaches this rule and gets no signature.
- Exchange Online routes the message to Scribe. The mail flow rule you create below matches senders located inside your organization and redirects them to the outbound connector, which routes to the smart host
smtp.server.scribe-mail.comover TLS. - Scribe adds the signature. Scribe inserts the teammate’s published signature, choosing the right variant for the context, then re-signs the message so it still authenticates after the change, and stamps it with an
X-Scribe-Processedheader. - The message returns to Exchange Online. Scribe hands it back through the inbound connector, which is configured to accept connections only from Scribe’s two IP addresses.
- Exchange Online delivers it. The
X-Scribe-Processedheader matches the rule’s exception, so the rule does not fire a second time and the message goes out to the recipient the same way any other message does.
X-Scribe-Processed, a routing header telling the relay where to hand the message back, a refreshed DKIM-Signature, an ARC chain, and the Content-Type matching the rewritten body. Your recipients, subject, attachments and the text your teammate wrote are passed through unchanged.
Installation guide
Prerequisites
- Microsoft 365 admin access (Exchange admin center)
- At least one signature created in Scribe
Create an outbound connector
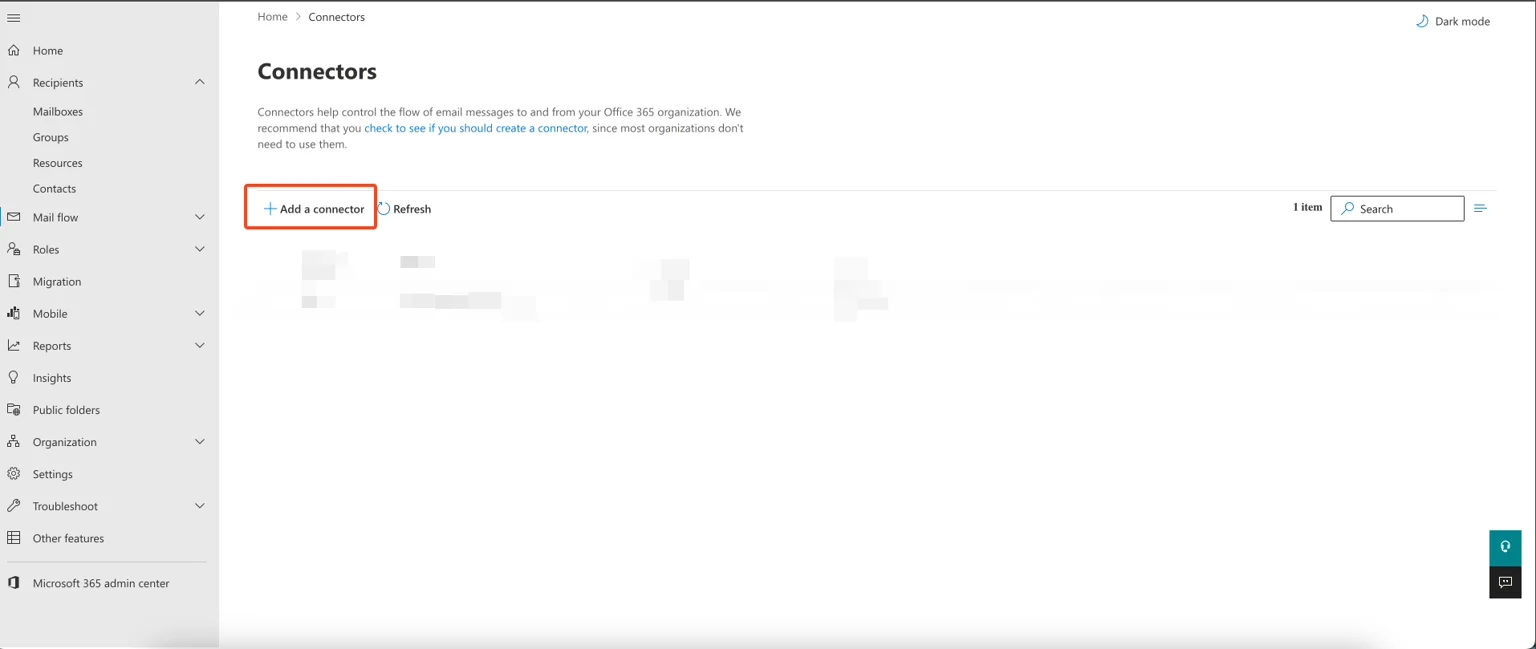
Exchange admin: Connectors page
Select connection type
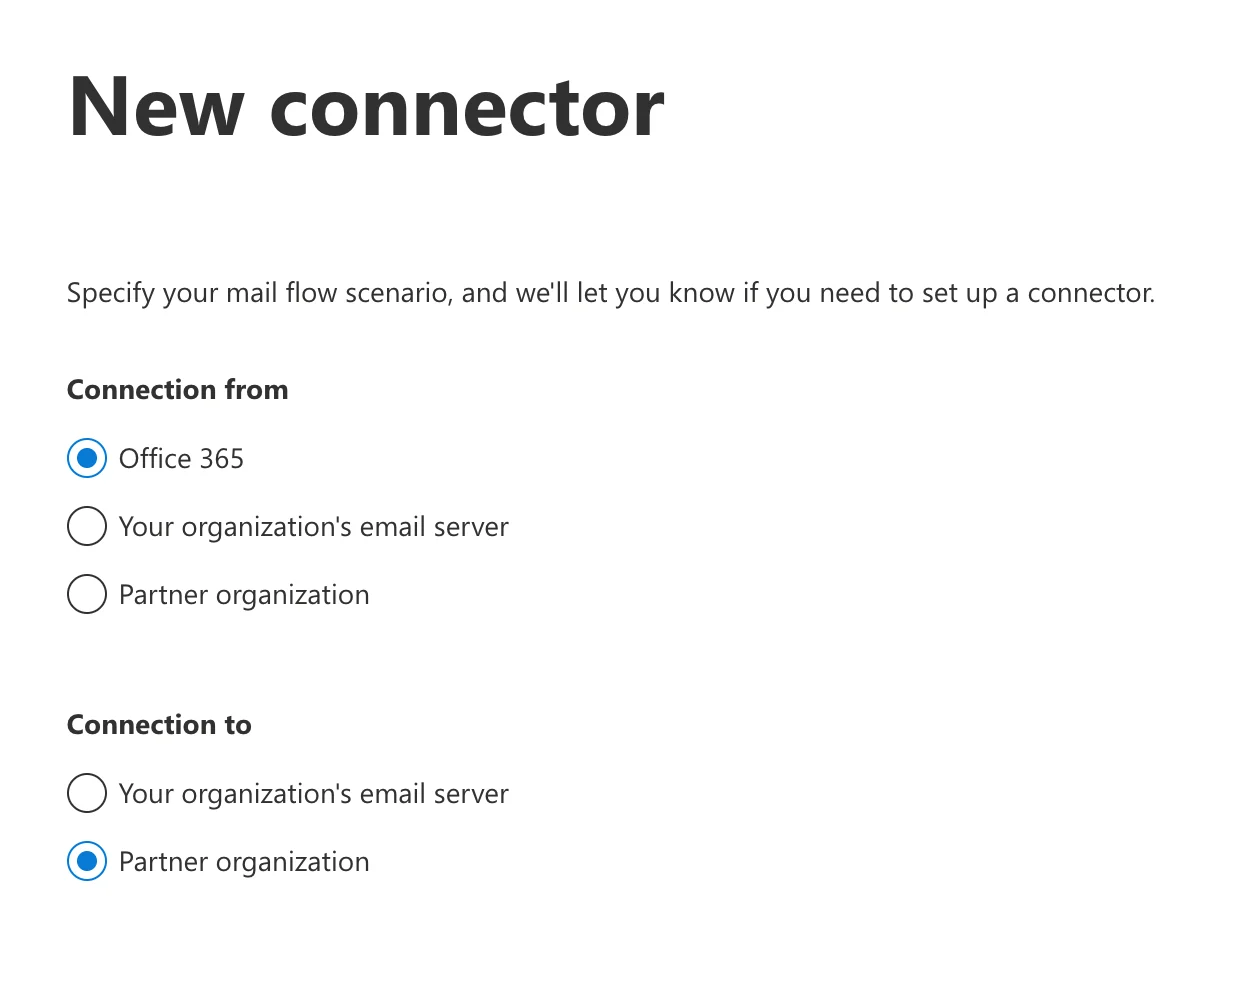
New connector: Connection type selection
Configure connector details
- Name:
Scribe signature outbound - Description:
Scribe signature outbound
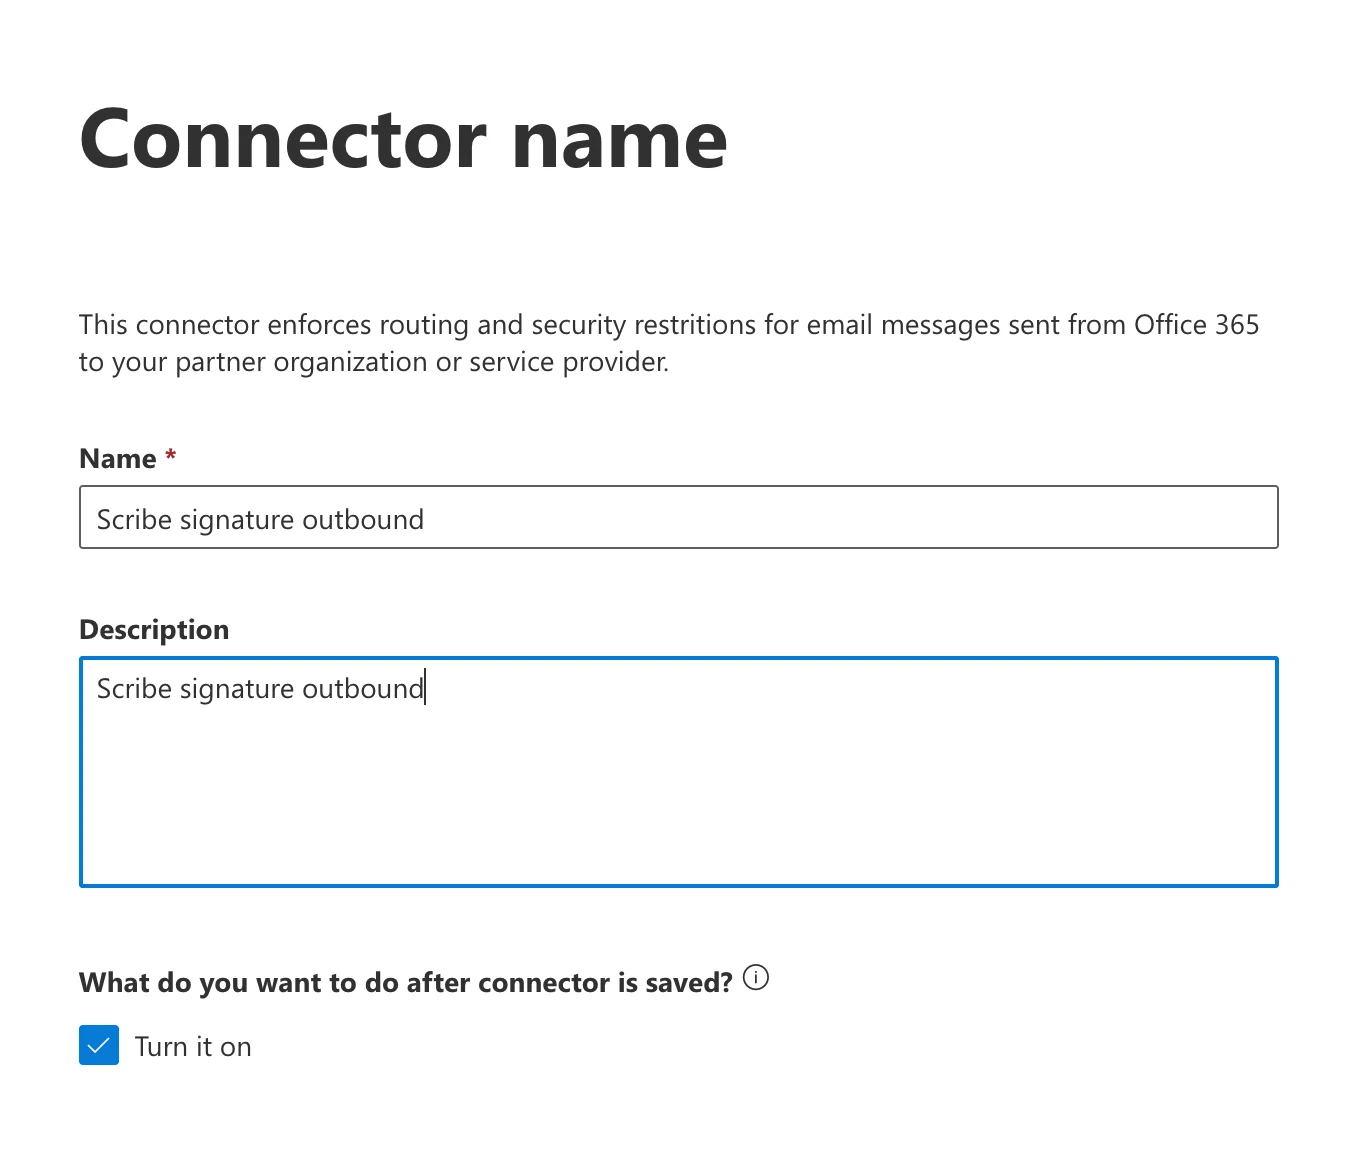
Connector name and description
Select use of connector
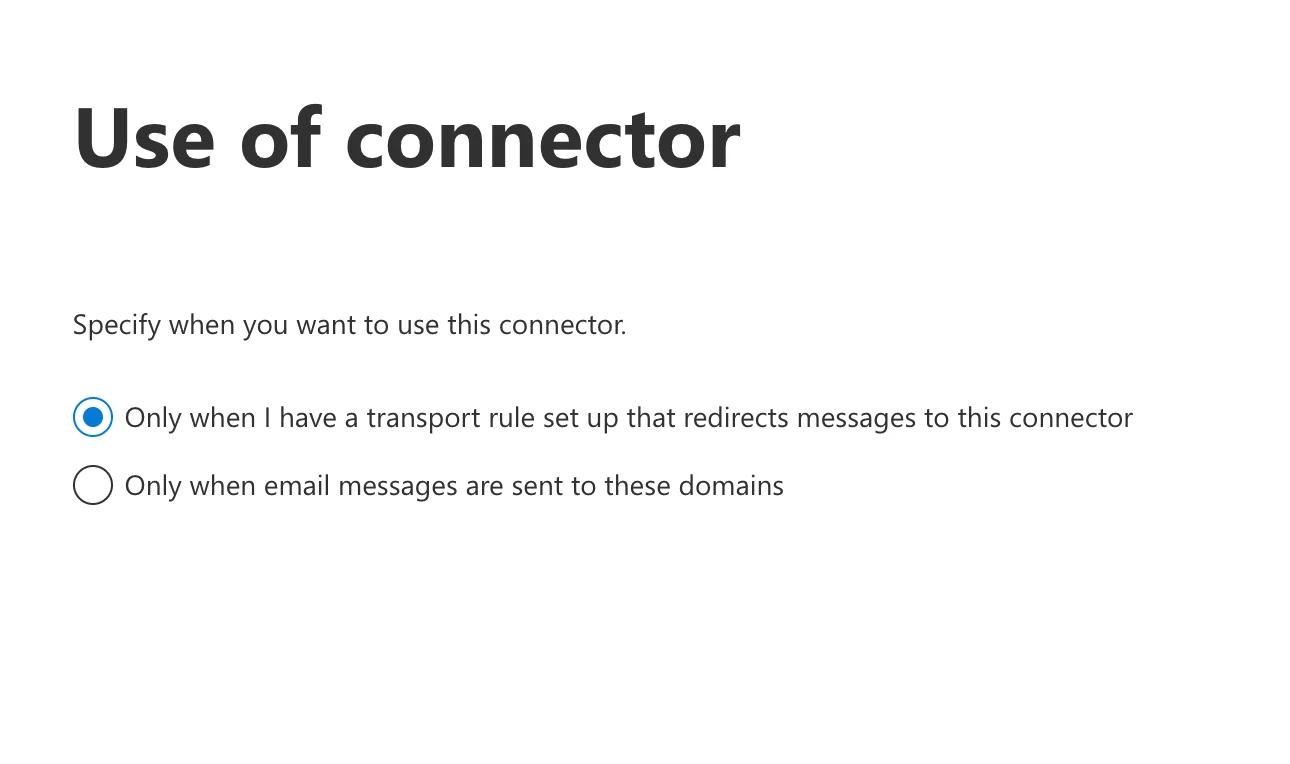
Use of connector selection
Configure routing
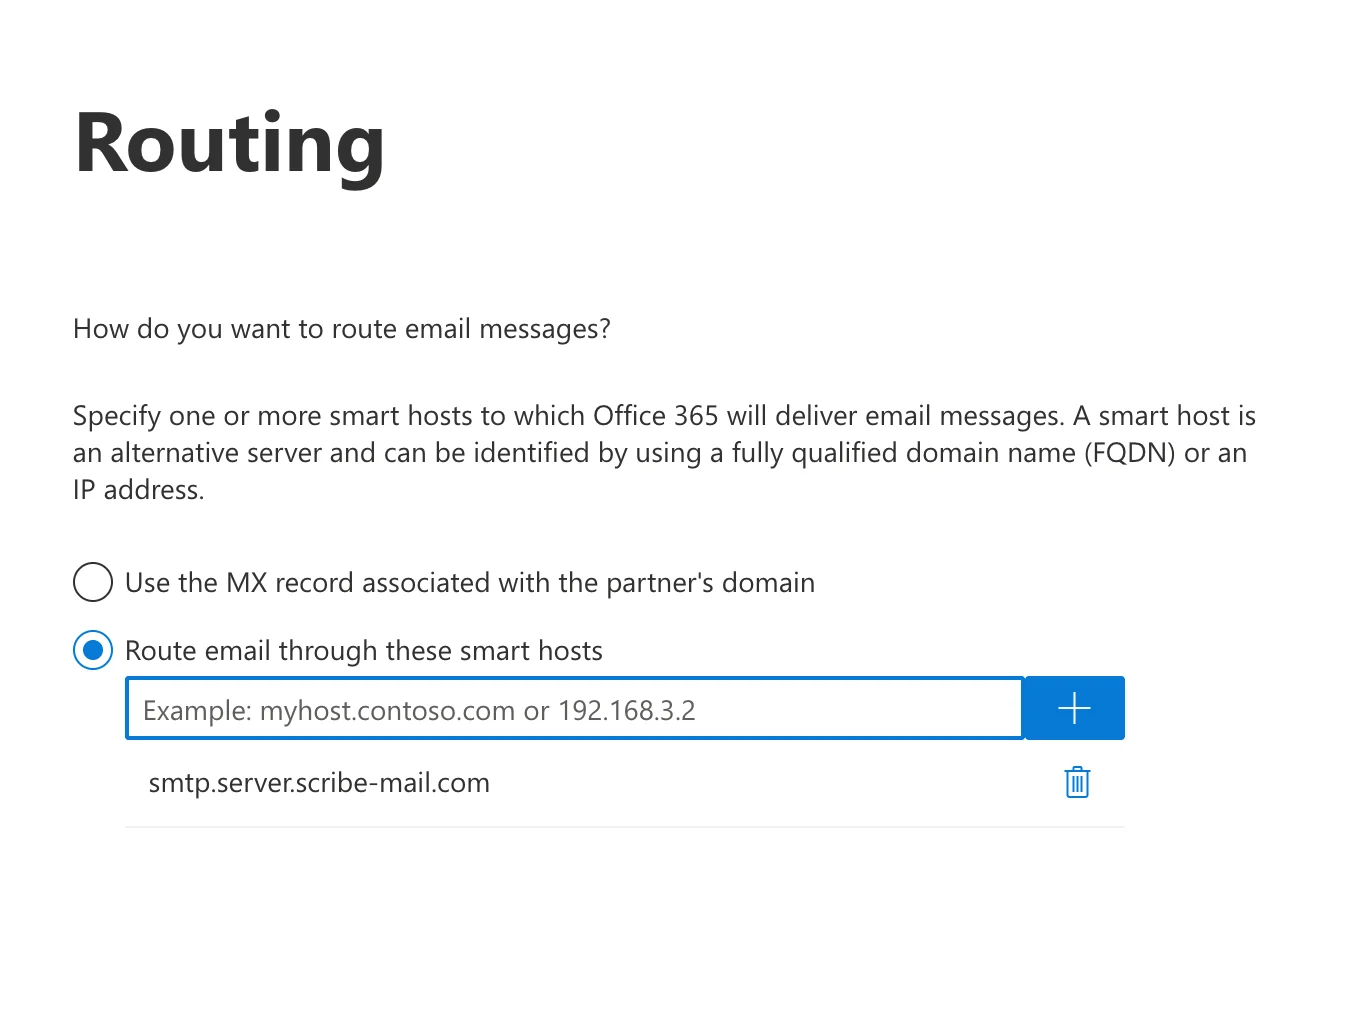
Routing configuration with Scribe smart host
Configure security restrictions
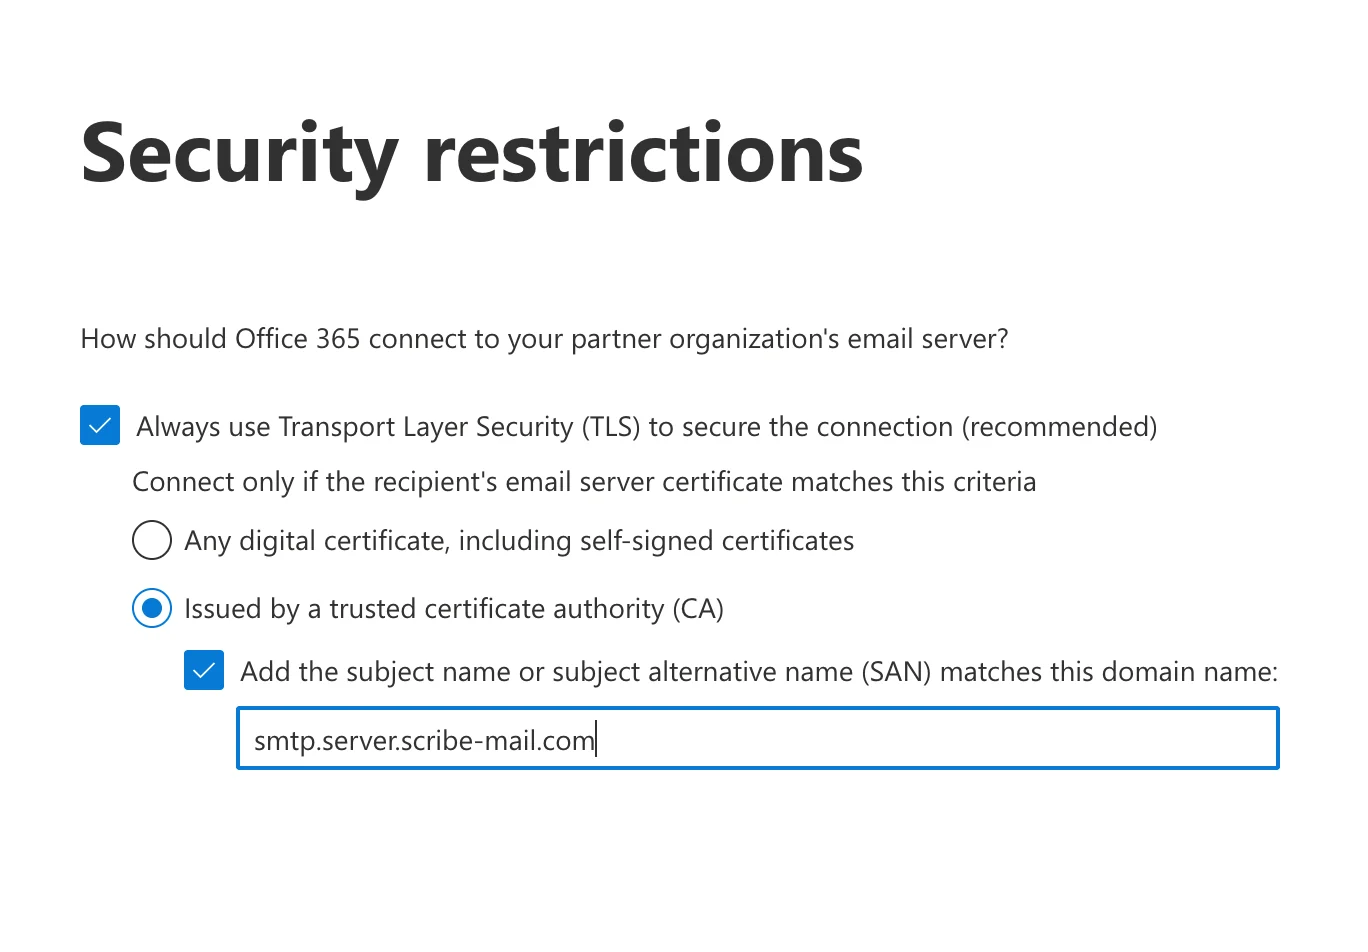
Security restrictions: TLS configuration
Validate the connector
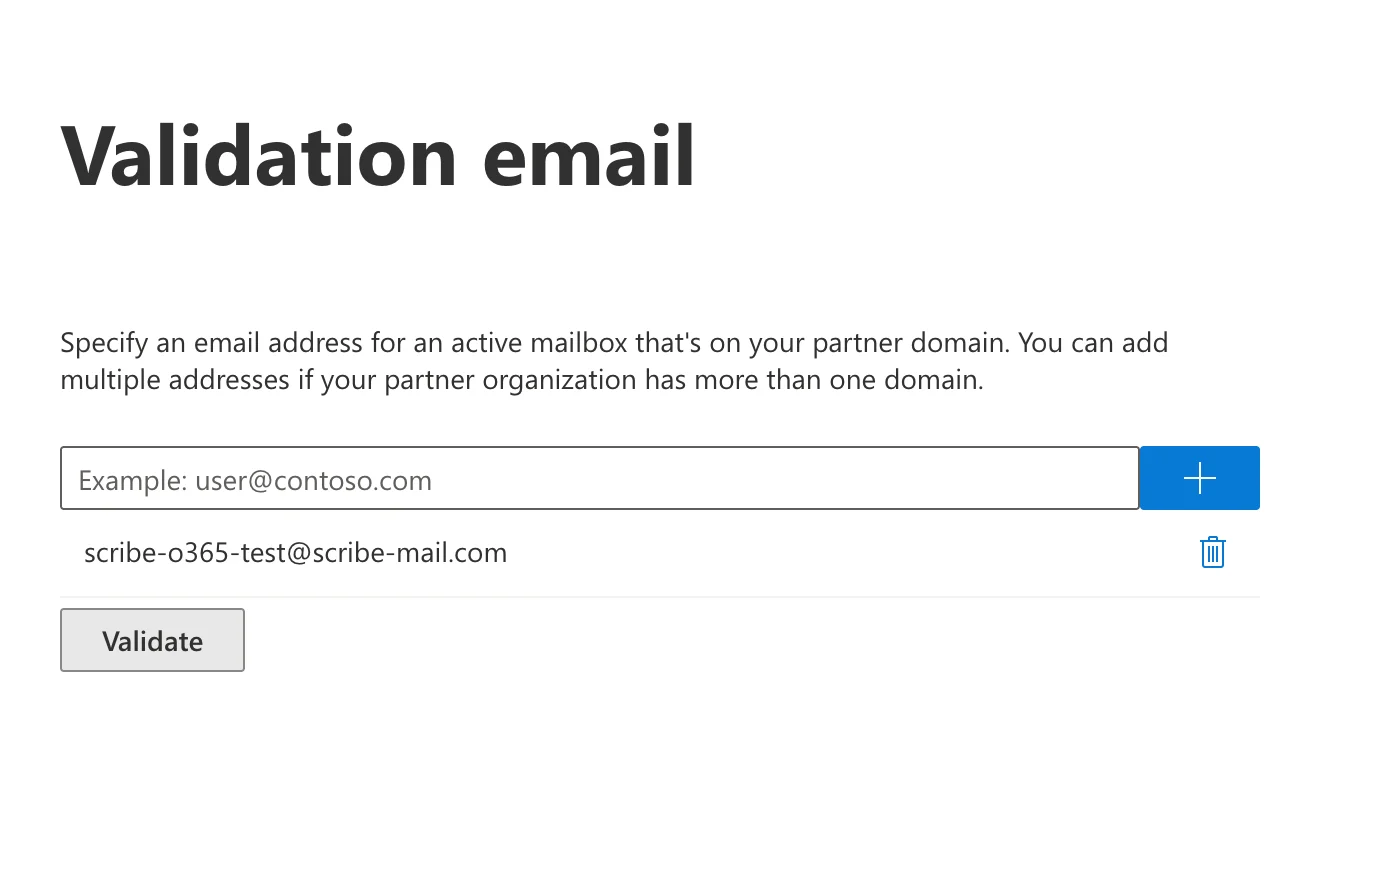
Validation email configuration
Create an inbound connector
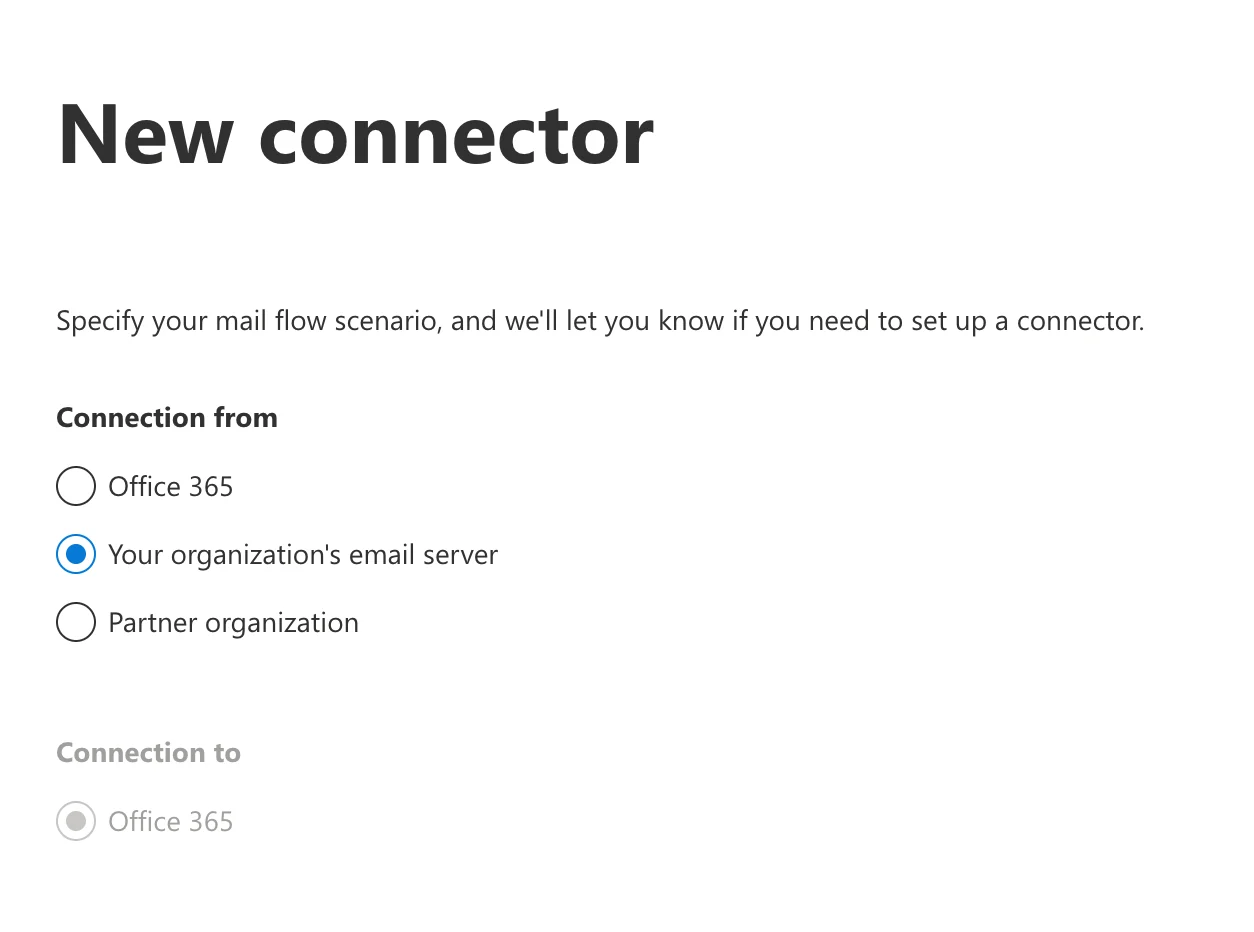
New inbound connector: Connection type selection
Configure inbound connector details
- Name:
Scribe signature inbound - Description:
Scribe signature inbound
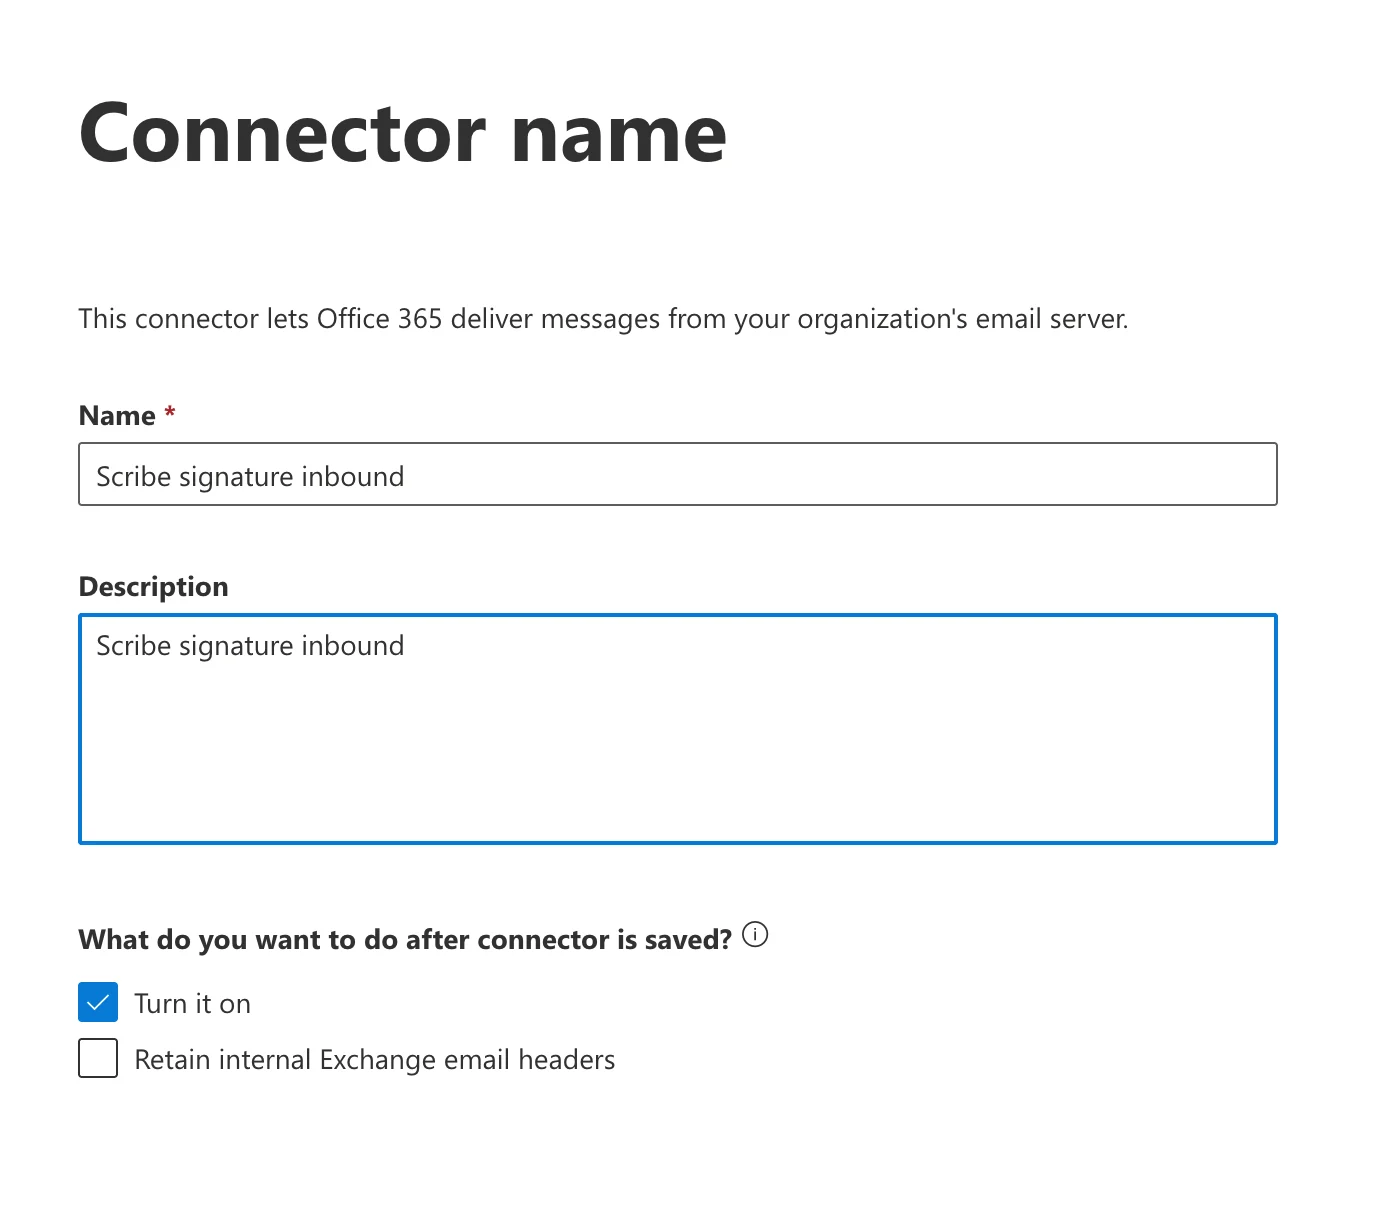
Inbound connector name and description
Authenticate sent email
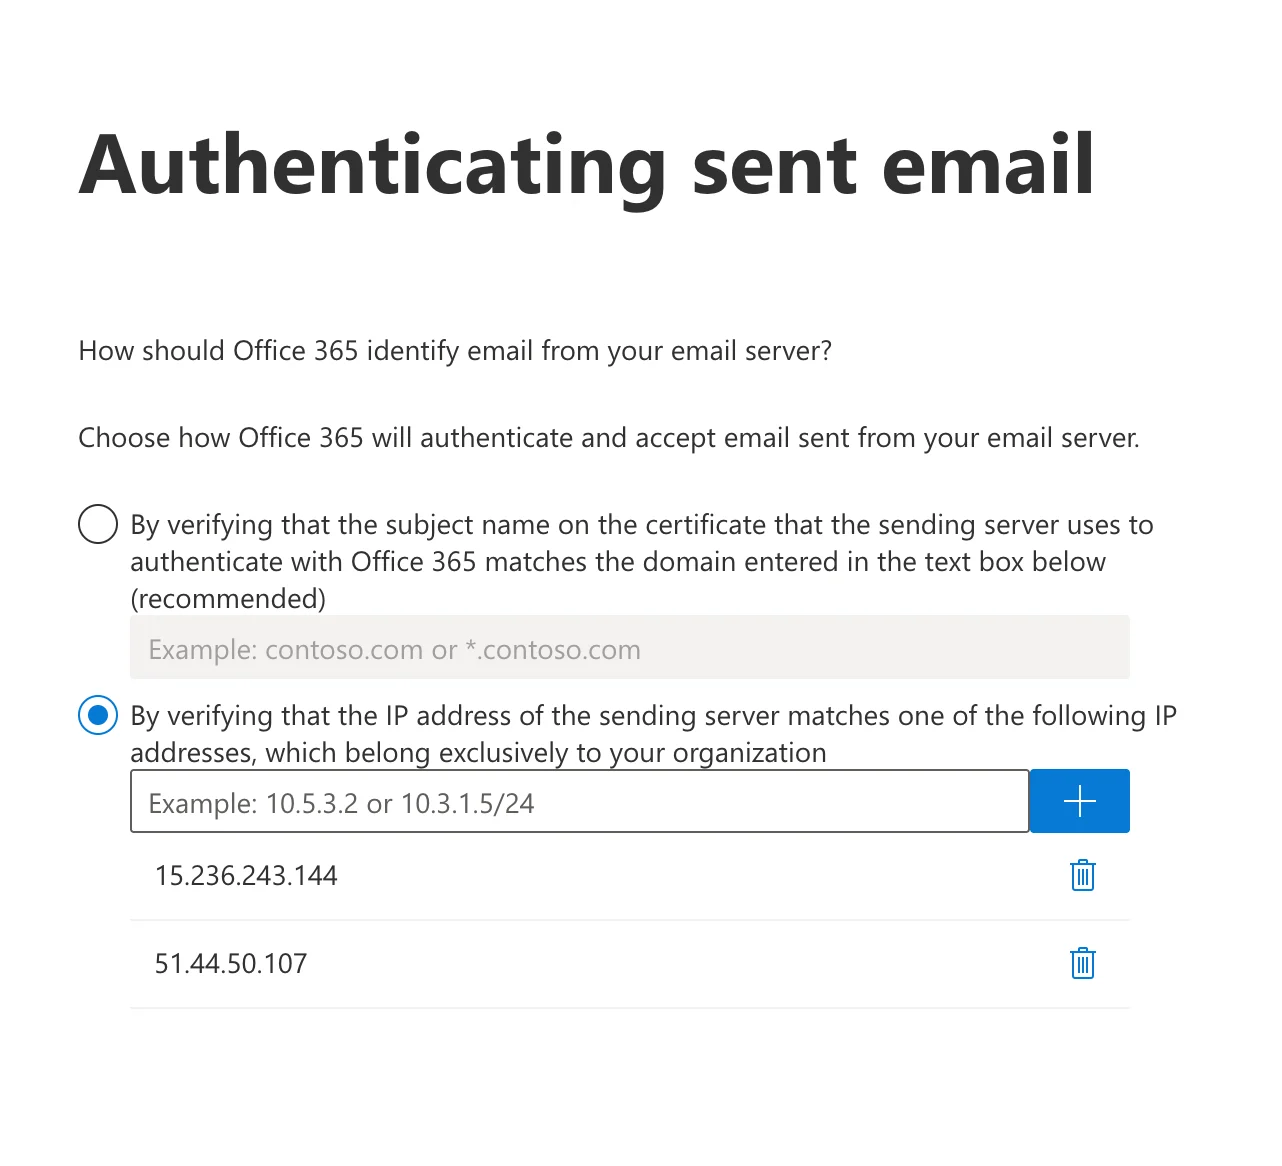
Authenticating sent email: IP verification
Create a mail flow rule
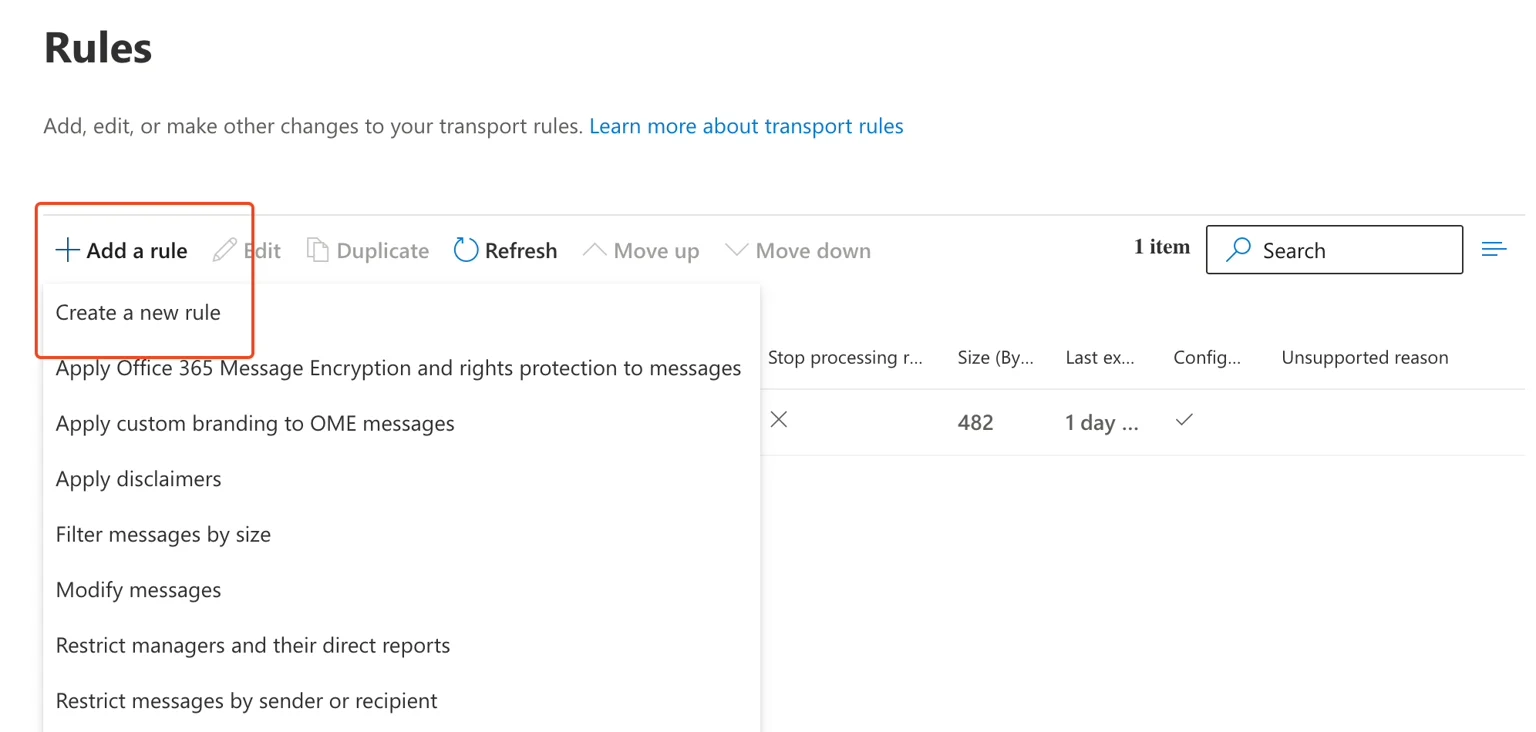
Rules page: Create a new rule
Set rule conditions
- Name:
Route outbound mail via Scribe Signature - Apply this rule if: The sender → is external/internal → The sender is located “InOrganization”
- Do the following: Redirect the message to → the following connector → select “Scribe signature outbound”
- Except if: The message headers → match these text patterns →
X-Scribe-Processedmessage header matchesProcessed
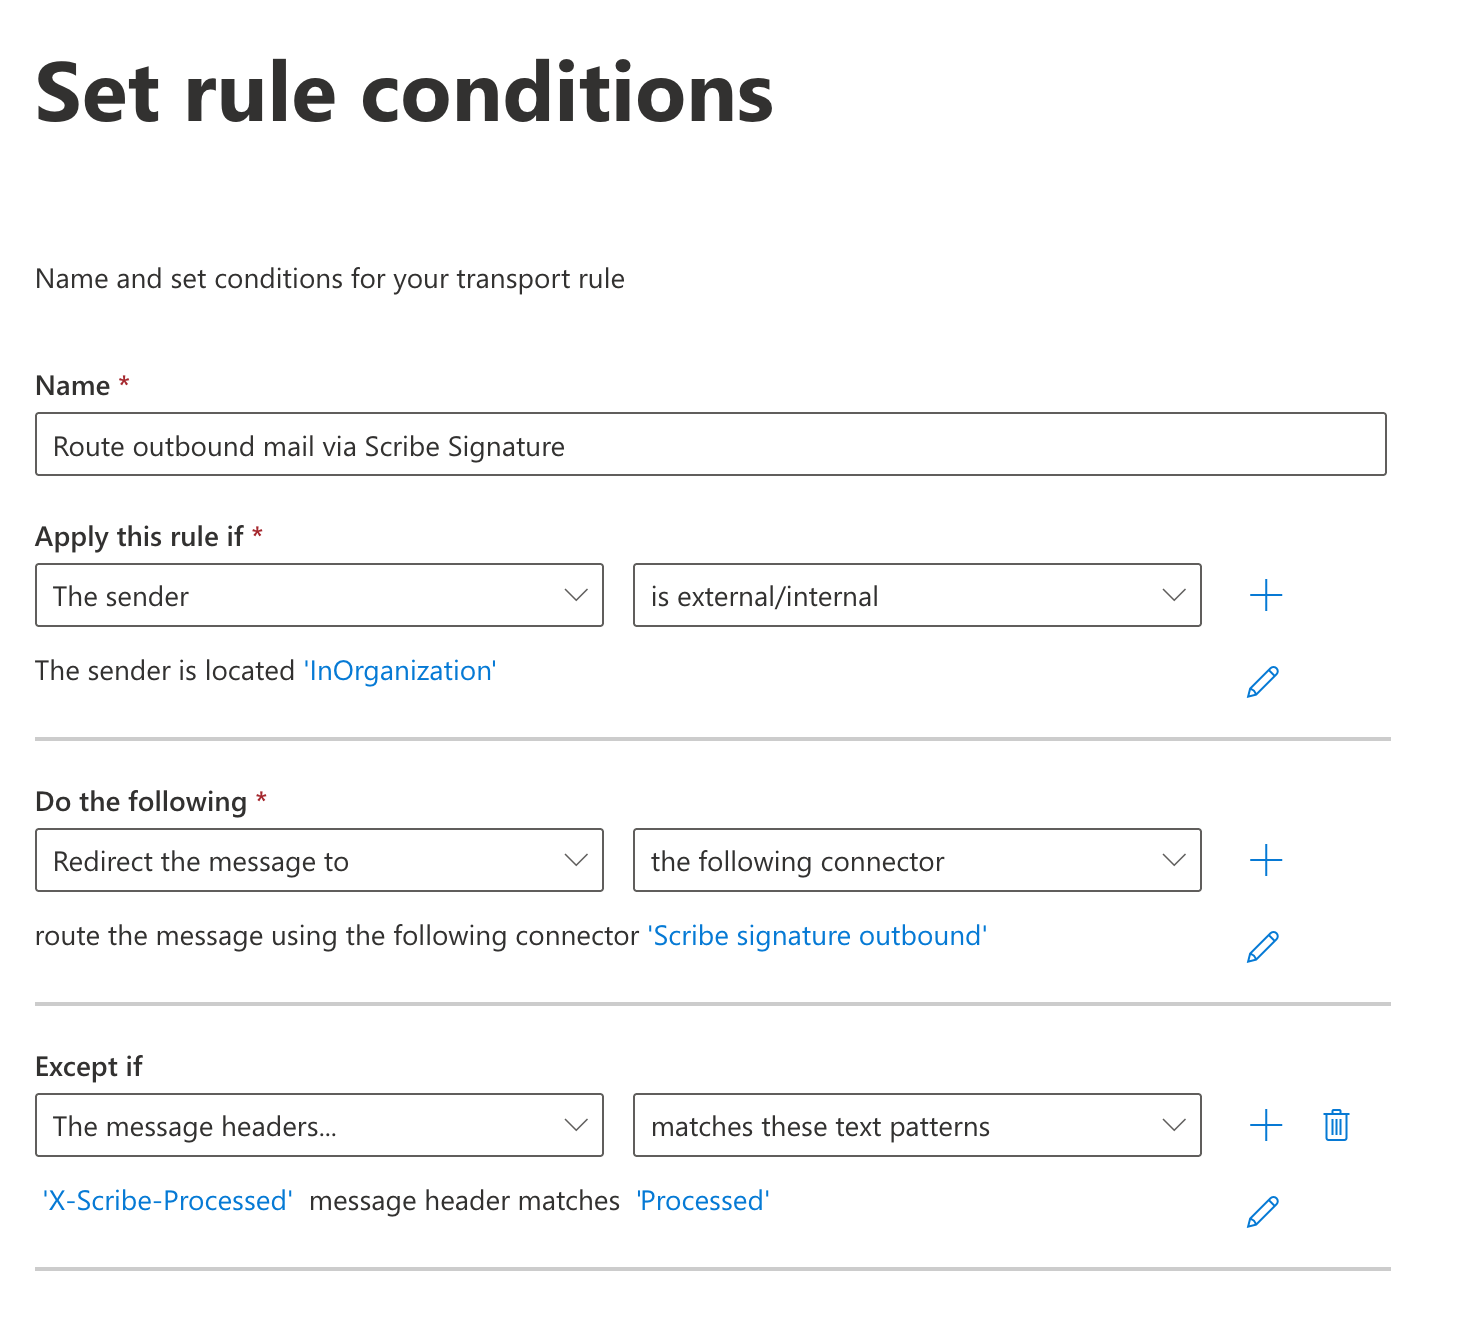
Set rule conditions form
Enable the rule
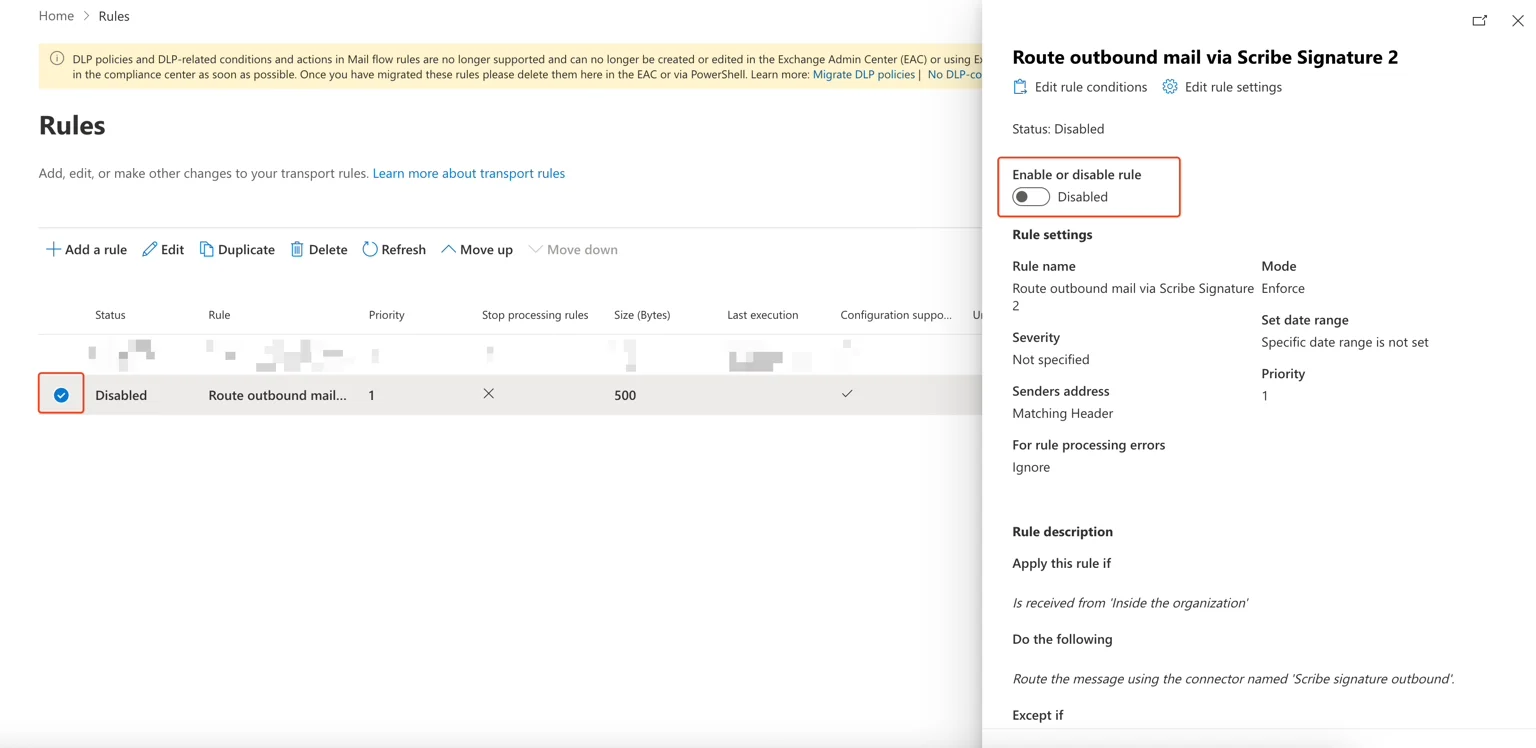
Enable the mail flow rule
Configure DKIM
Configure DKIM button in Scribe
Install team signatures
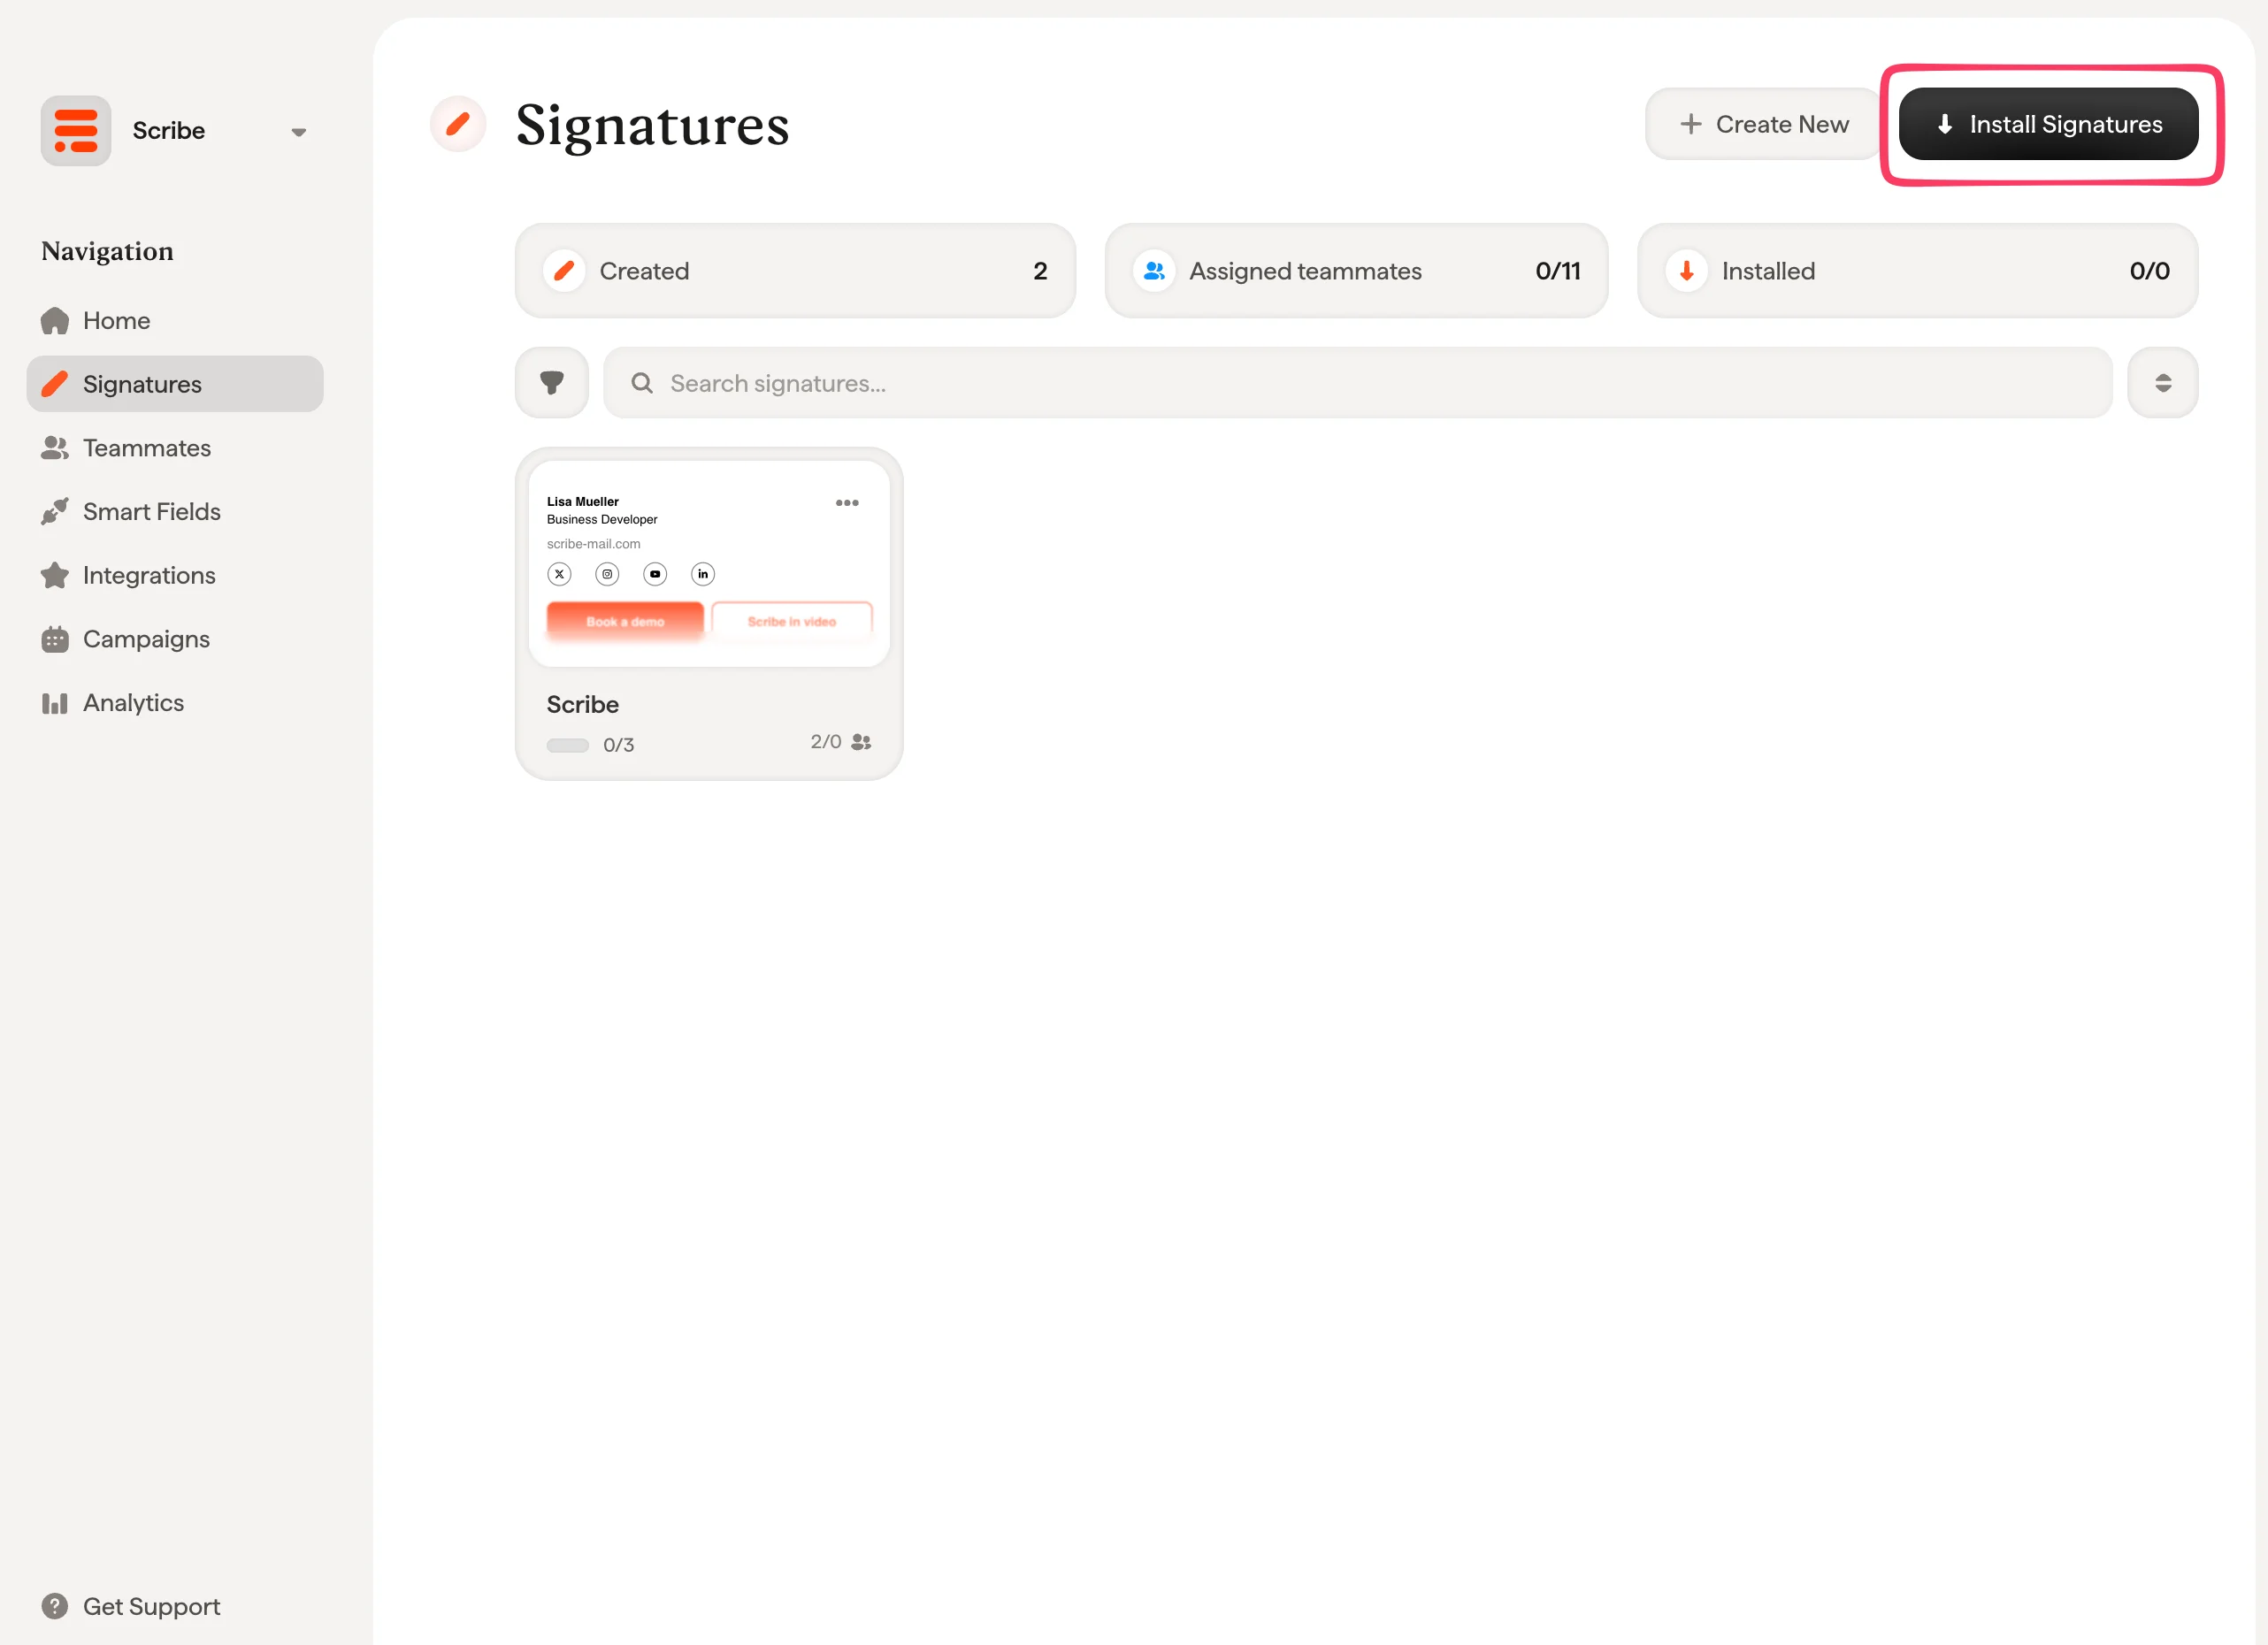
Scribe signatures list with Install Signatures button
IT and security FAQ
Questions that come up most often when an IT team reviews this integration.Which emails are routed through Scribe?
Which emails are routed through Scribe?
InOrganization. Mail arriving from outside your tenant is never redirected to Scribe.The rule also carries one exception, set when you fill in the rule conditions: messages already stamped with the X-Scribe-Processed header are skipped, so nothing is processed twice.Is the connection to Scribe encrypted?
Is the connection to Scribe encrypted?
smtp.server.scribe-mail.com. The inbound connector accepts mail back only from Scribe’s own IP addresses.What do we need to allow through the firewall?
What do we need to allow through the firewall?
Does routing through Scribe affect SPF, DKIM or DMARC?
Does routing through Scribe affect SPF, DKIM or DMARC?
- A fresh
DKIM-Signature, signed with a key Scribe generates for your domain and published as ascribe._domainkeyrecord. It covers theFrom,To,Cc,SubjectandMessage-IDheaders along with the body. - An ARC chain (RFC 8617):
ARC-Authentication-Results,ARC-Message-SignatureandARC-Seal. These record the authentication results the message carried when Scribe received it, so a receiving server can tell that an authorized intermediary modified it rather than reading the change as tampering.
What stops a message being processed twice?
What stops a message being processed twice?
X-Scribe-Processed header, and the mail flow rule carries an exception for messages whose headers match it, so a message coming back from Scribe no longer triggers the redirect.As a second guard, Scribe checks whether the body already carries the signature before inserting one. A message that reaches it twice still goes out with a single signature.The connector validation failed. Is the setup broken?
The connector validation failed. Is the setup broken?
scribe-o365-test@scribe-mail.com and it does not always complete, even when routing is correct. You can save the connector and continue. Confirm the setup instead by sending a real email once the mail flow rule is enabled and checking that the recipient sees the signature.Why can't teammates see the signature while composing?
Why can't teammates see the signature while composing?
Do replies and internal emails get a different signature?
Do replies and internal emails get a different signature?
- On-reply, when the subject starts with a reply or forward prefix such as
Re:,Fw:orFwd:, including the localized equivalents. - Internal, when every recipient is on the same domain as the sender.
- Primary in every other case.
What does Scribe do with our email content?
What does Scribe do with our email content?
How do we roll it back?
How do we roll it back?
Related articles
- Integrations overview: all the ways to deploy Scribe signatures, cloud or server side.
- Google Workspace (server side): route mail through Scribe for all-device coverage.
- Signature variants: on-reply and internal variants for Outlook and server side.