No action needed from your teammates.
Changes in your Okta auto-sync to Scribe.
SOC 2 Type II Certified. Your data is safe.
Installation guide
Prerequisites
- Admin access to the Okta admin console
- A Scribe account with admin access
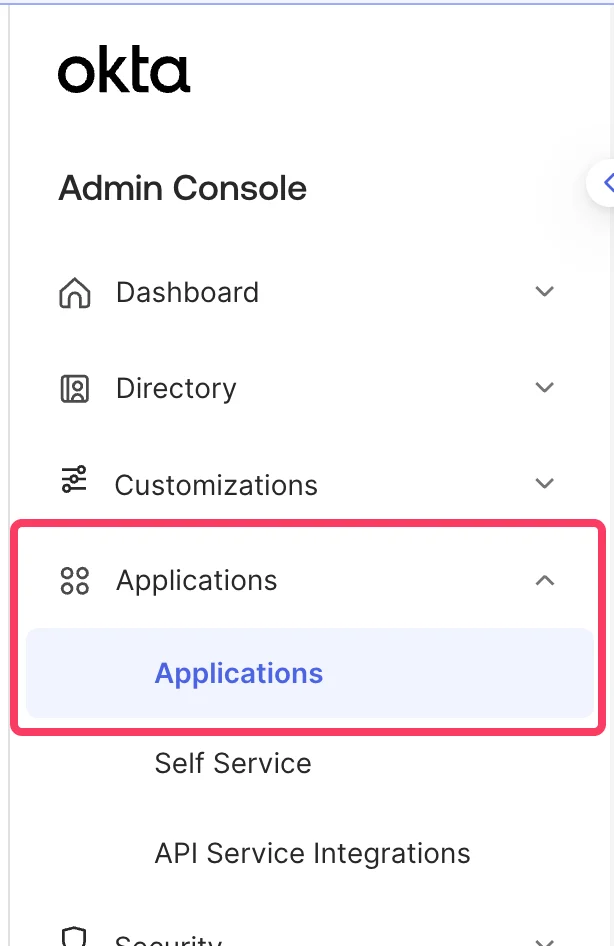
1
Navigate to your Okta admin console and select Menu > Applications > Applications
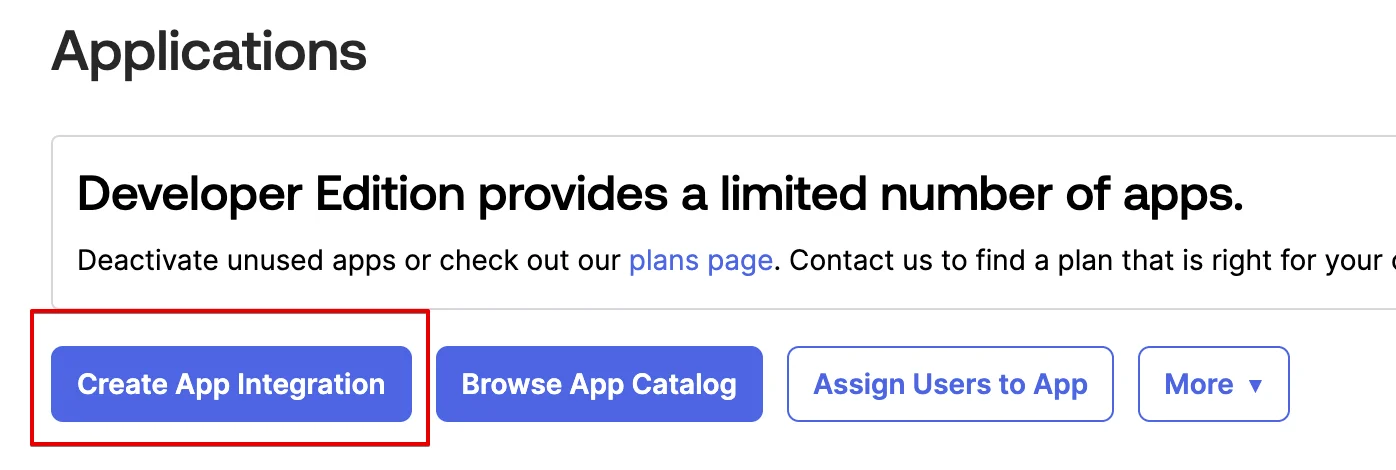
2
Click on Create App Integration
3
Choose 'OIDC - OpenID Connect' and 'Single-Page Application', then click 'Next'
Select OIDC - OpenID Connect as the sign-in method and Single-Page Application as the application type.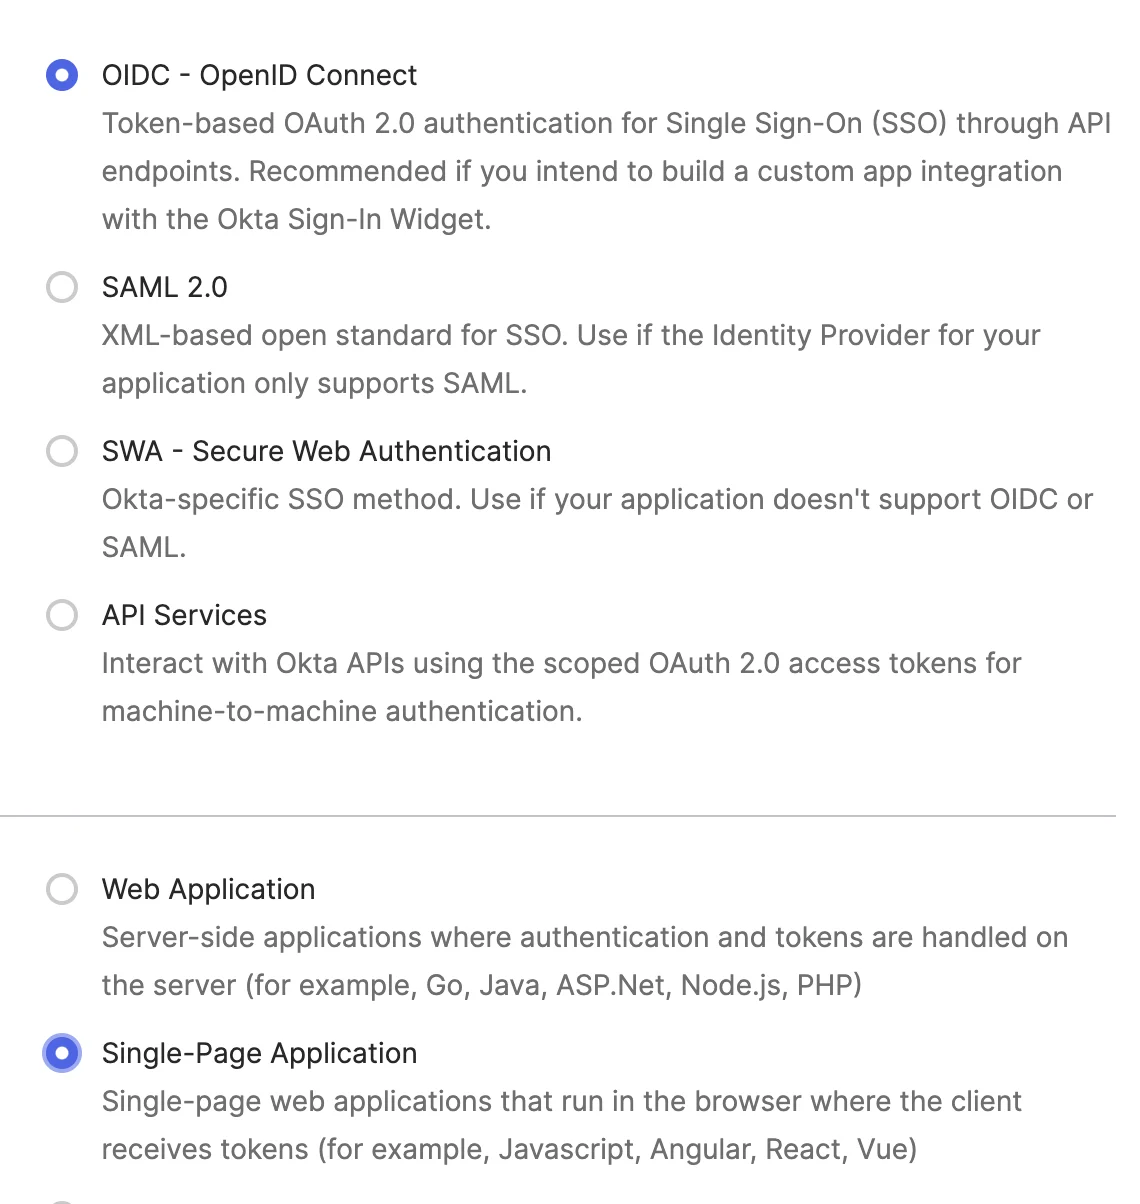
4
In 'General Settings', name your application and turn on the 'Refresh Token' option
Enter a name like 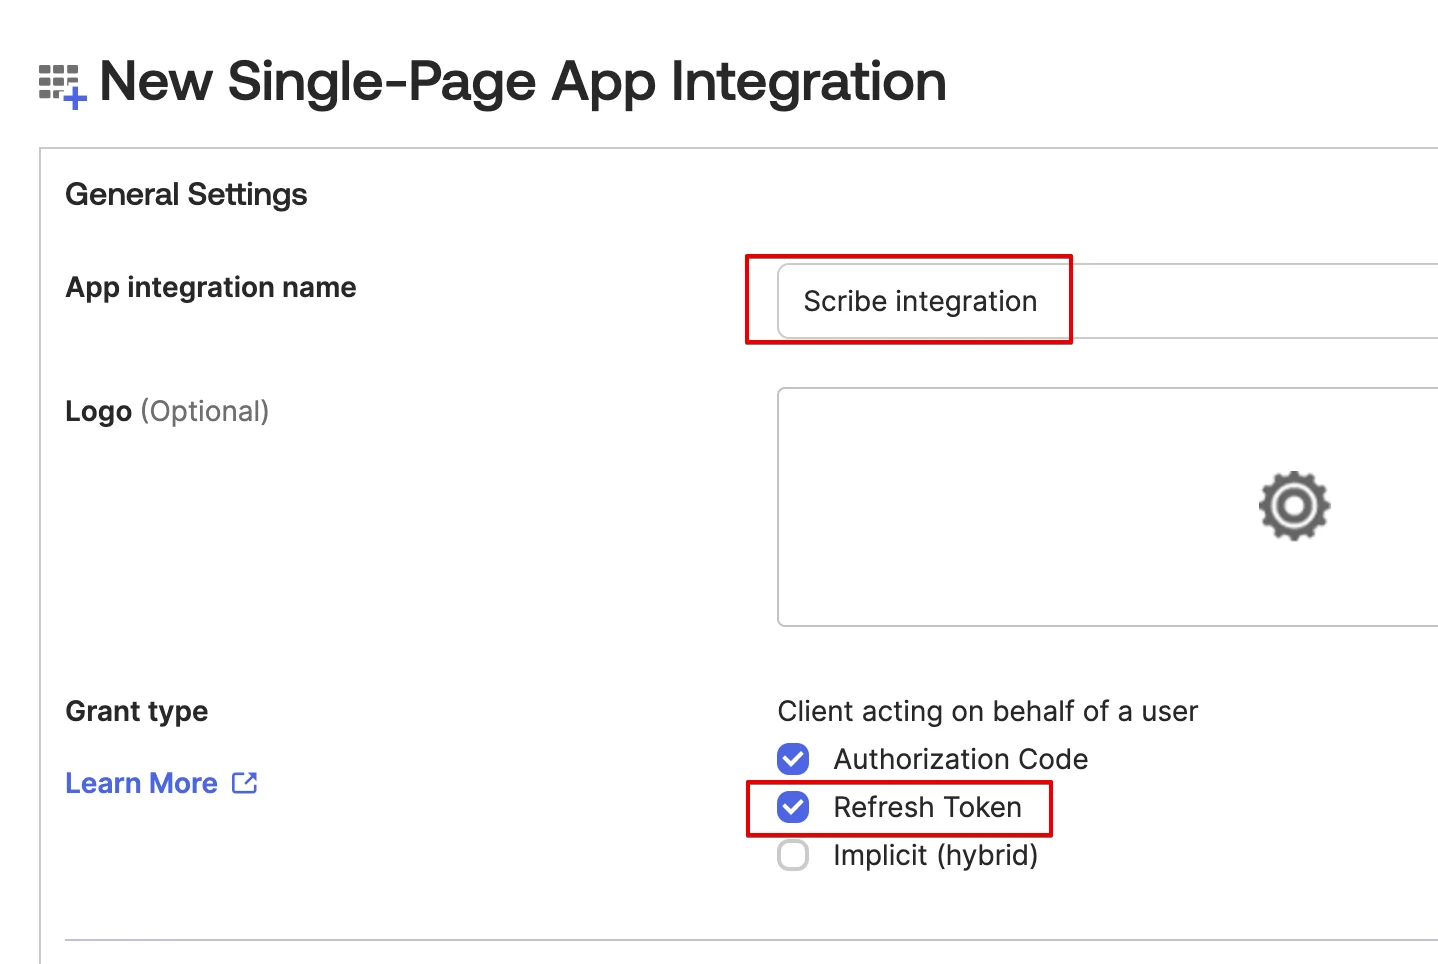
Scribe integration and check the Refresh Token grant type.5
In the 'Sign-in redirect URIs' section, copy the Scribe callback value
Copy the callback URL below and paste it in the Sign-in redirect URIs field in Okta.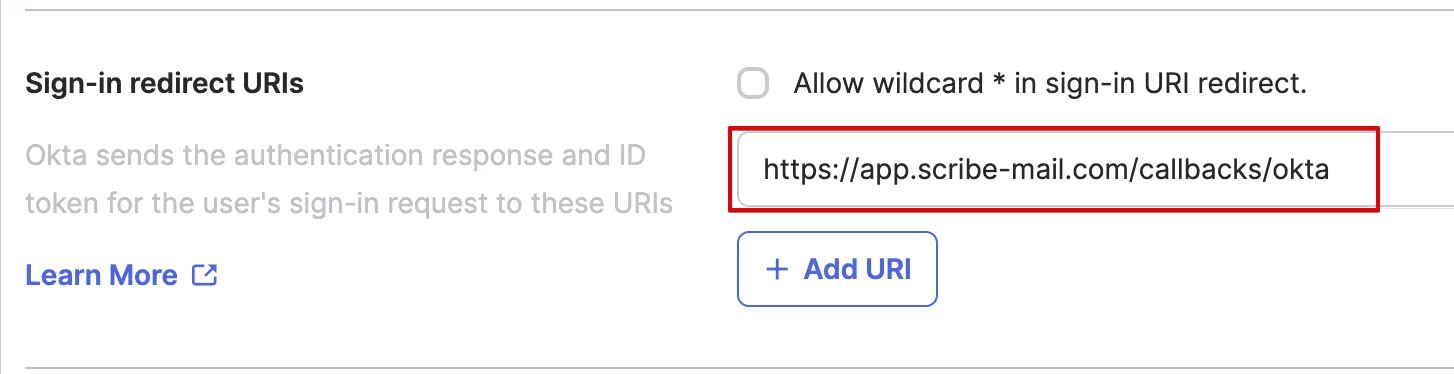
6
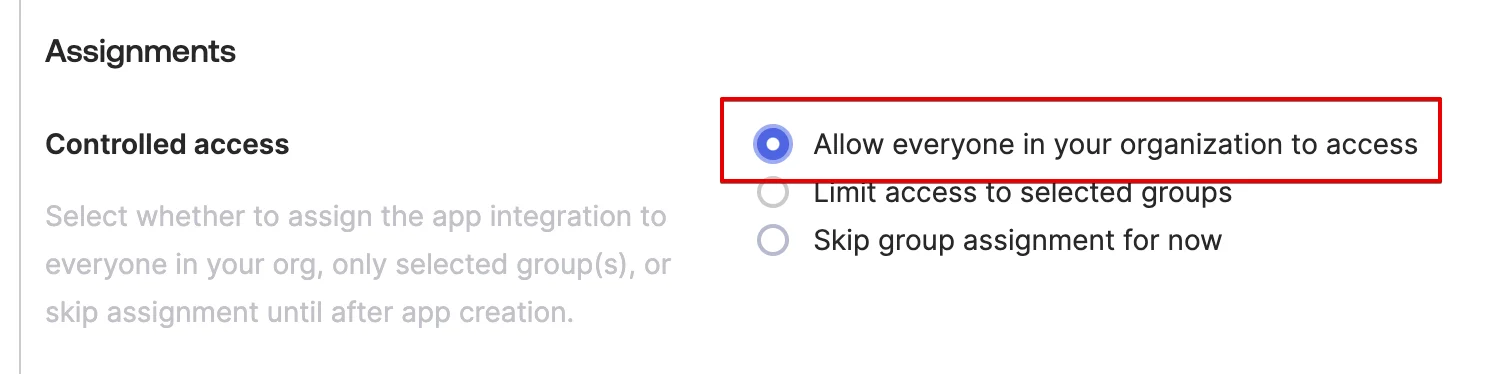
In the 'Assignments' section, choose 'Allow everyone in your organization to access' and then hit 'Save'
7
Copy and paste the Client ID below
In the Client Credentials section, copy the Client ID and paste it in the corresponding field in Scribe.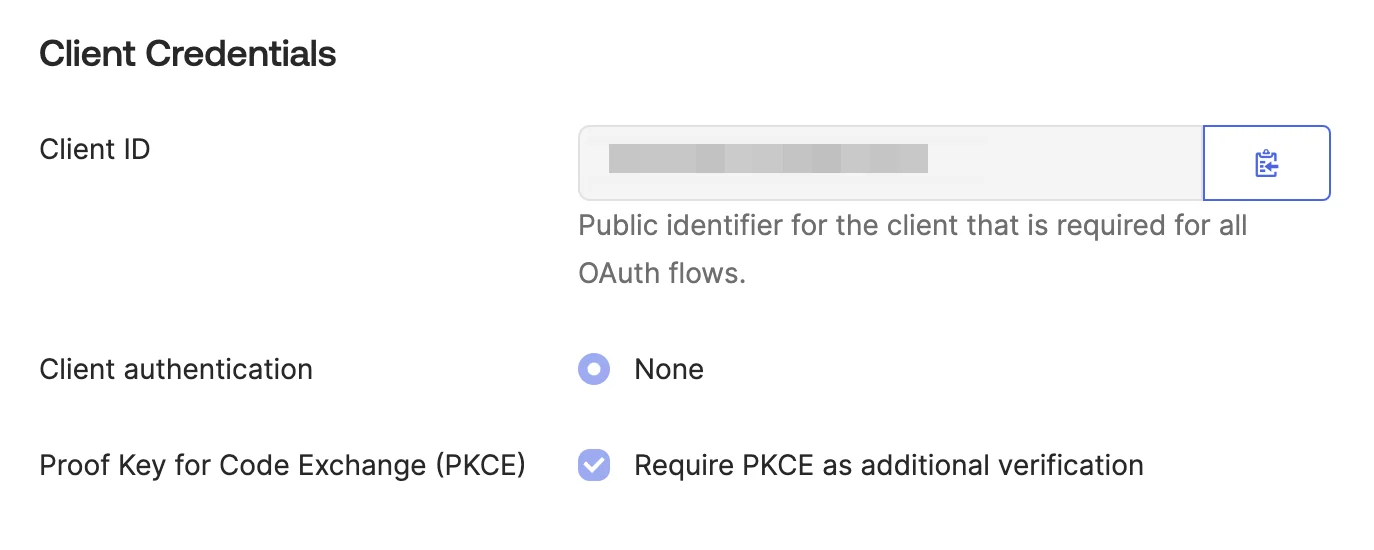
8
Copy and paste your Okta Domain in Scribe
Click on your profile in the top-right corner of the Okta admin console to find your Okta domain (e.g. 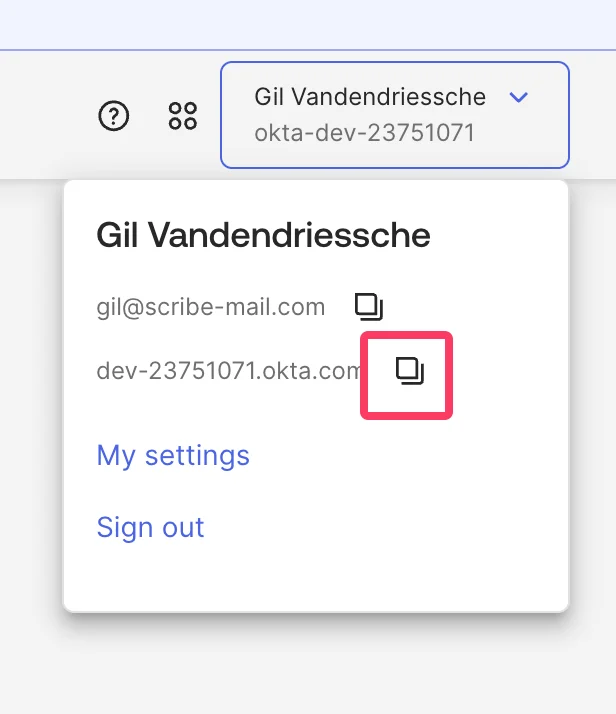
dev-12345678.okta.com). Copy it and paste it in the Domain field in Scribe.9
Grant access to okta.users.read and okta.schemas.read scopes
In your Okta application, go to the Okta API Scopes tab and click Grant next to 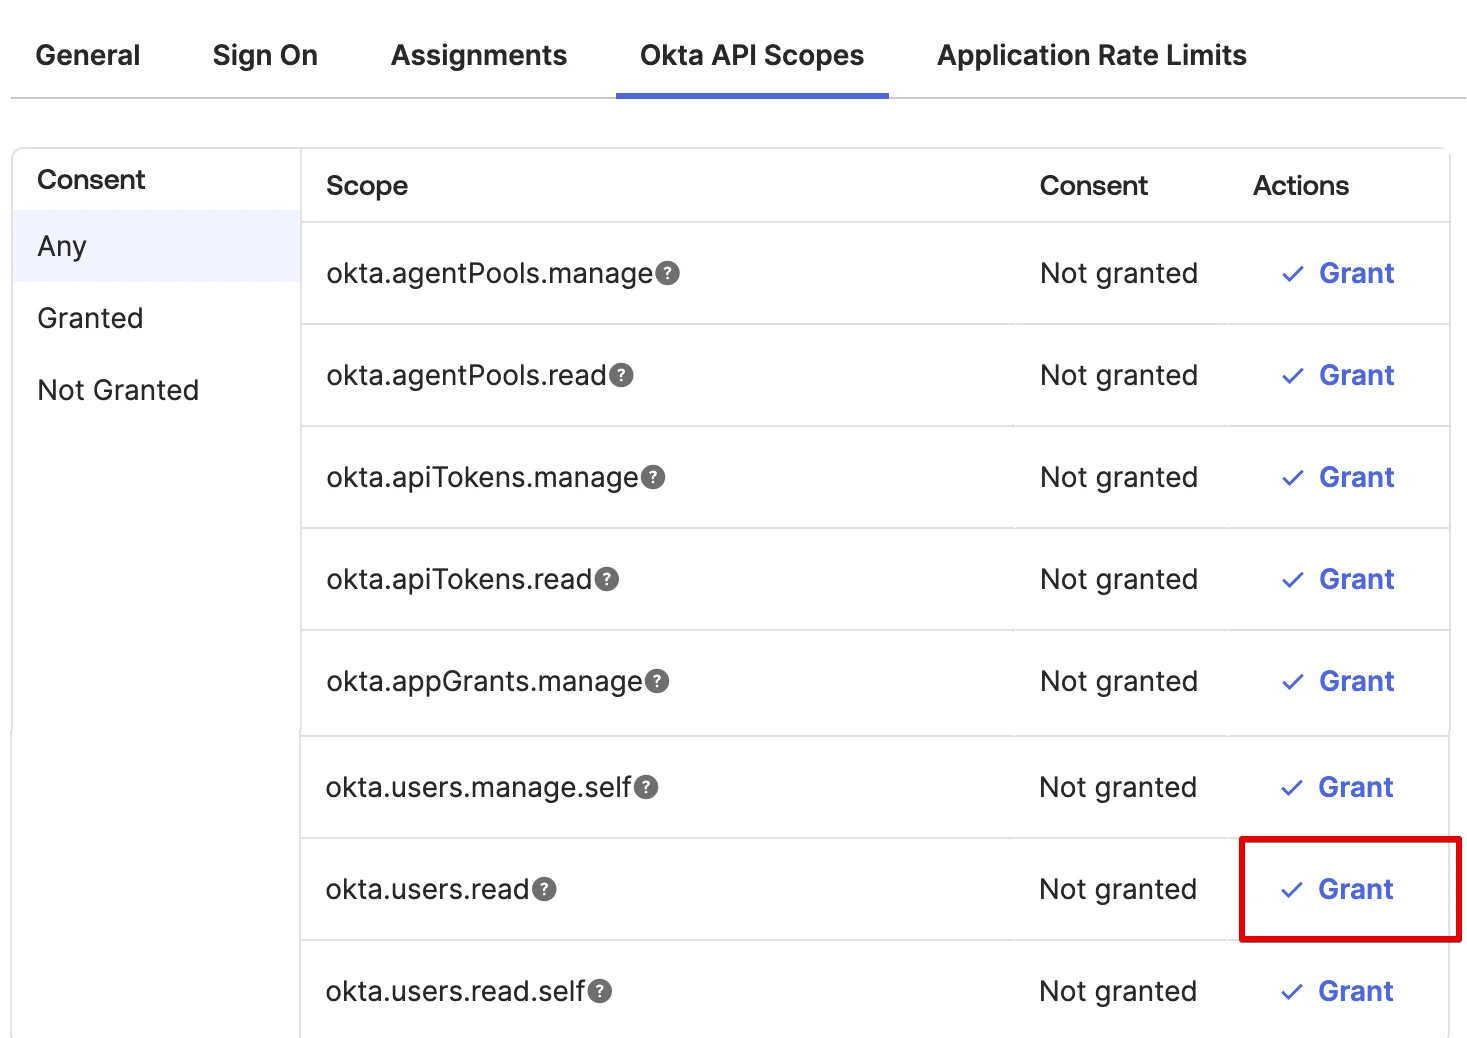
okta.users.read and okta.schemas.read.10
Click 'Connect Okta' below and follow the pop-up instructions

Related articles
- Payfit: sync Payfit data into your signatures.
- Rippling: sync Rippling data into your signatures.
- Assign teammates to a signature: use Smart Field conditions to assign signatures automatically.