Install Scribe email signatures across your team’s Smartlead by connecting the integration with a Smartlead Admin API key, no teammate action needed.
Centralized installation with your Smartlead API key. No teammate action needed. Scribe keeps each teammate’s Smartlead email-account signature in sync. Cloud-based installation: emails don’t go through Scribe servers.
Scribe matches each of your teammates to their Smartlead email account by email address, then keeps that account’s signature in sync. Make sure the email addresses in Smartlead match the ones in Scribe.Smartlead installs one signature per email address. If a teammate is assigned more than one signature, only the highest priority signature is installed. See Signature priority.
You must be an Admin in Smartlead to create the API key, and an admin or owner in Scribe to set up the integration.
1
Open Settings in Smartlead
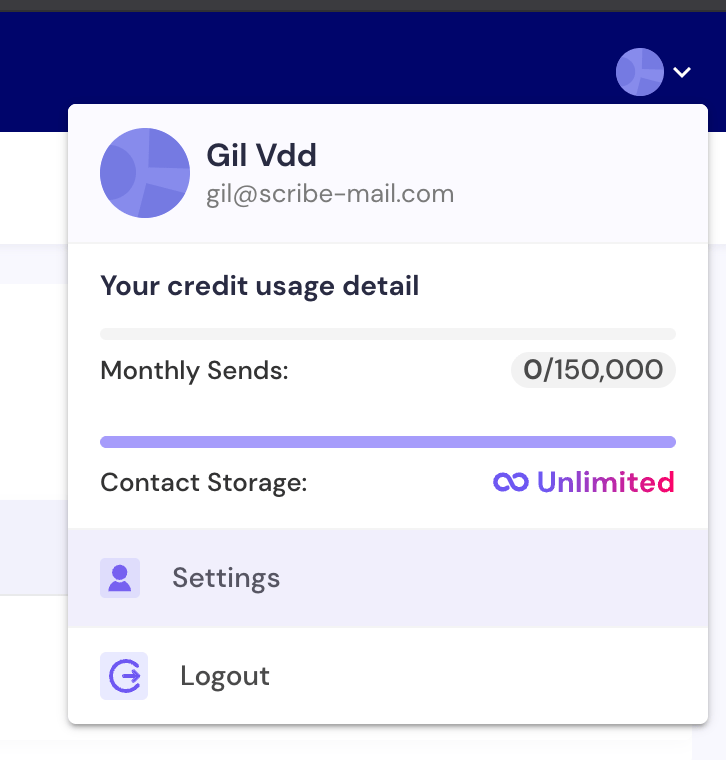
In Smartlead, click Settings in the top-right corner.
Smartlead settings in the top-right corner
2
Open API Keys Management
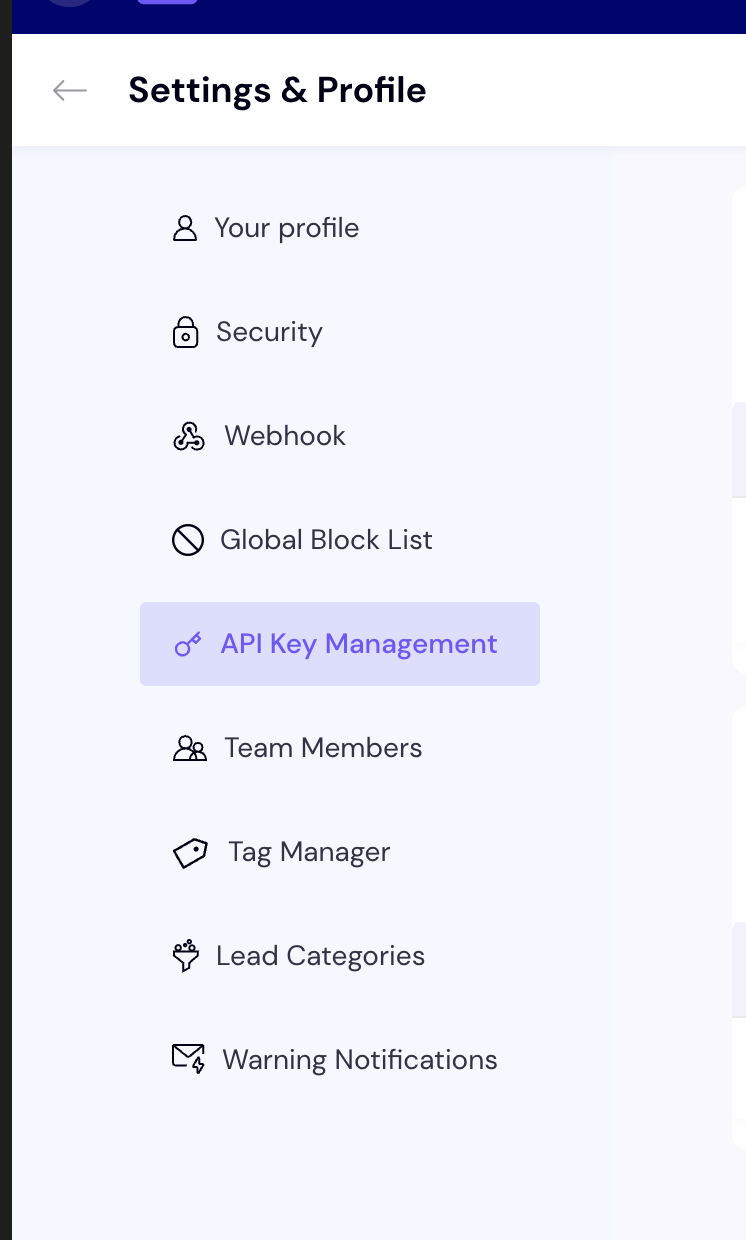
In the left menu, click API Keys Management.
API Keys Management in the Smartlead settings menu
3
Create an Admin Key
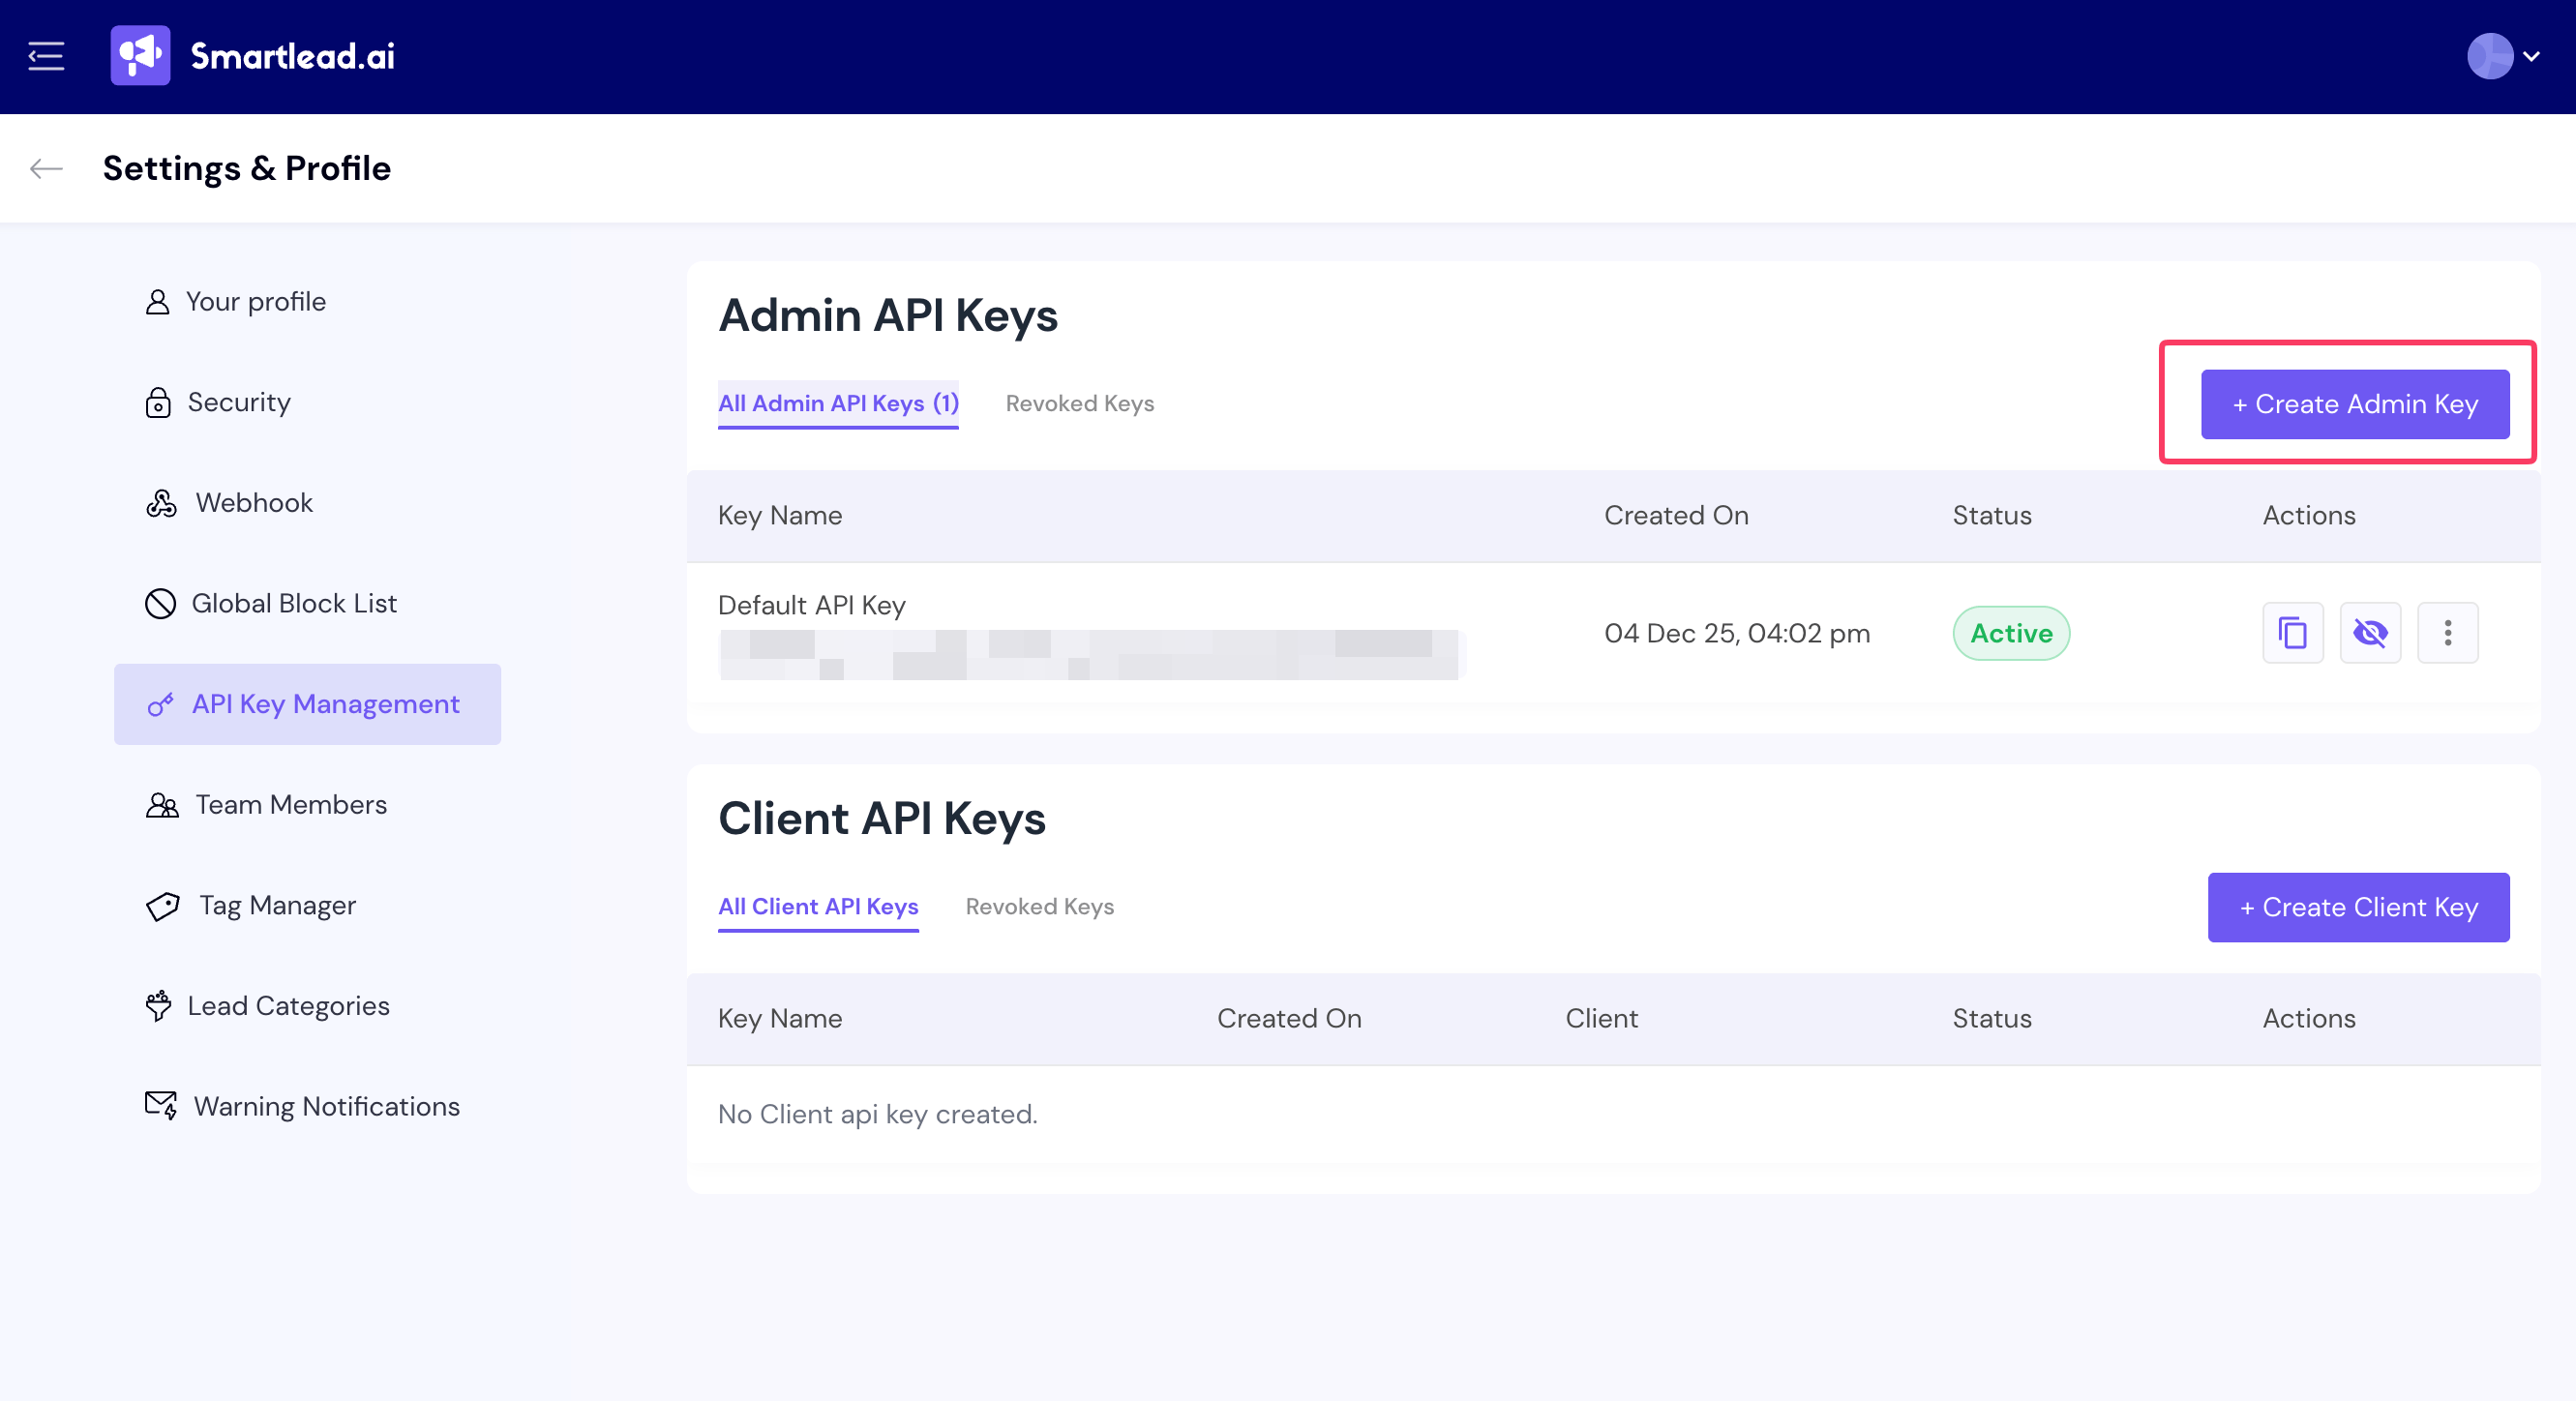
Click Create Admin Key.
Create Admin Key button in Smartlead
4
Name your API key
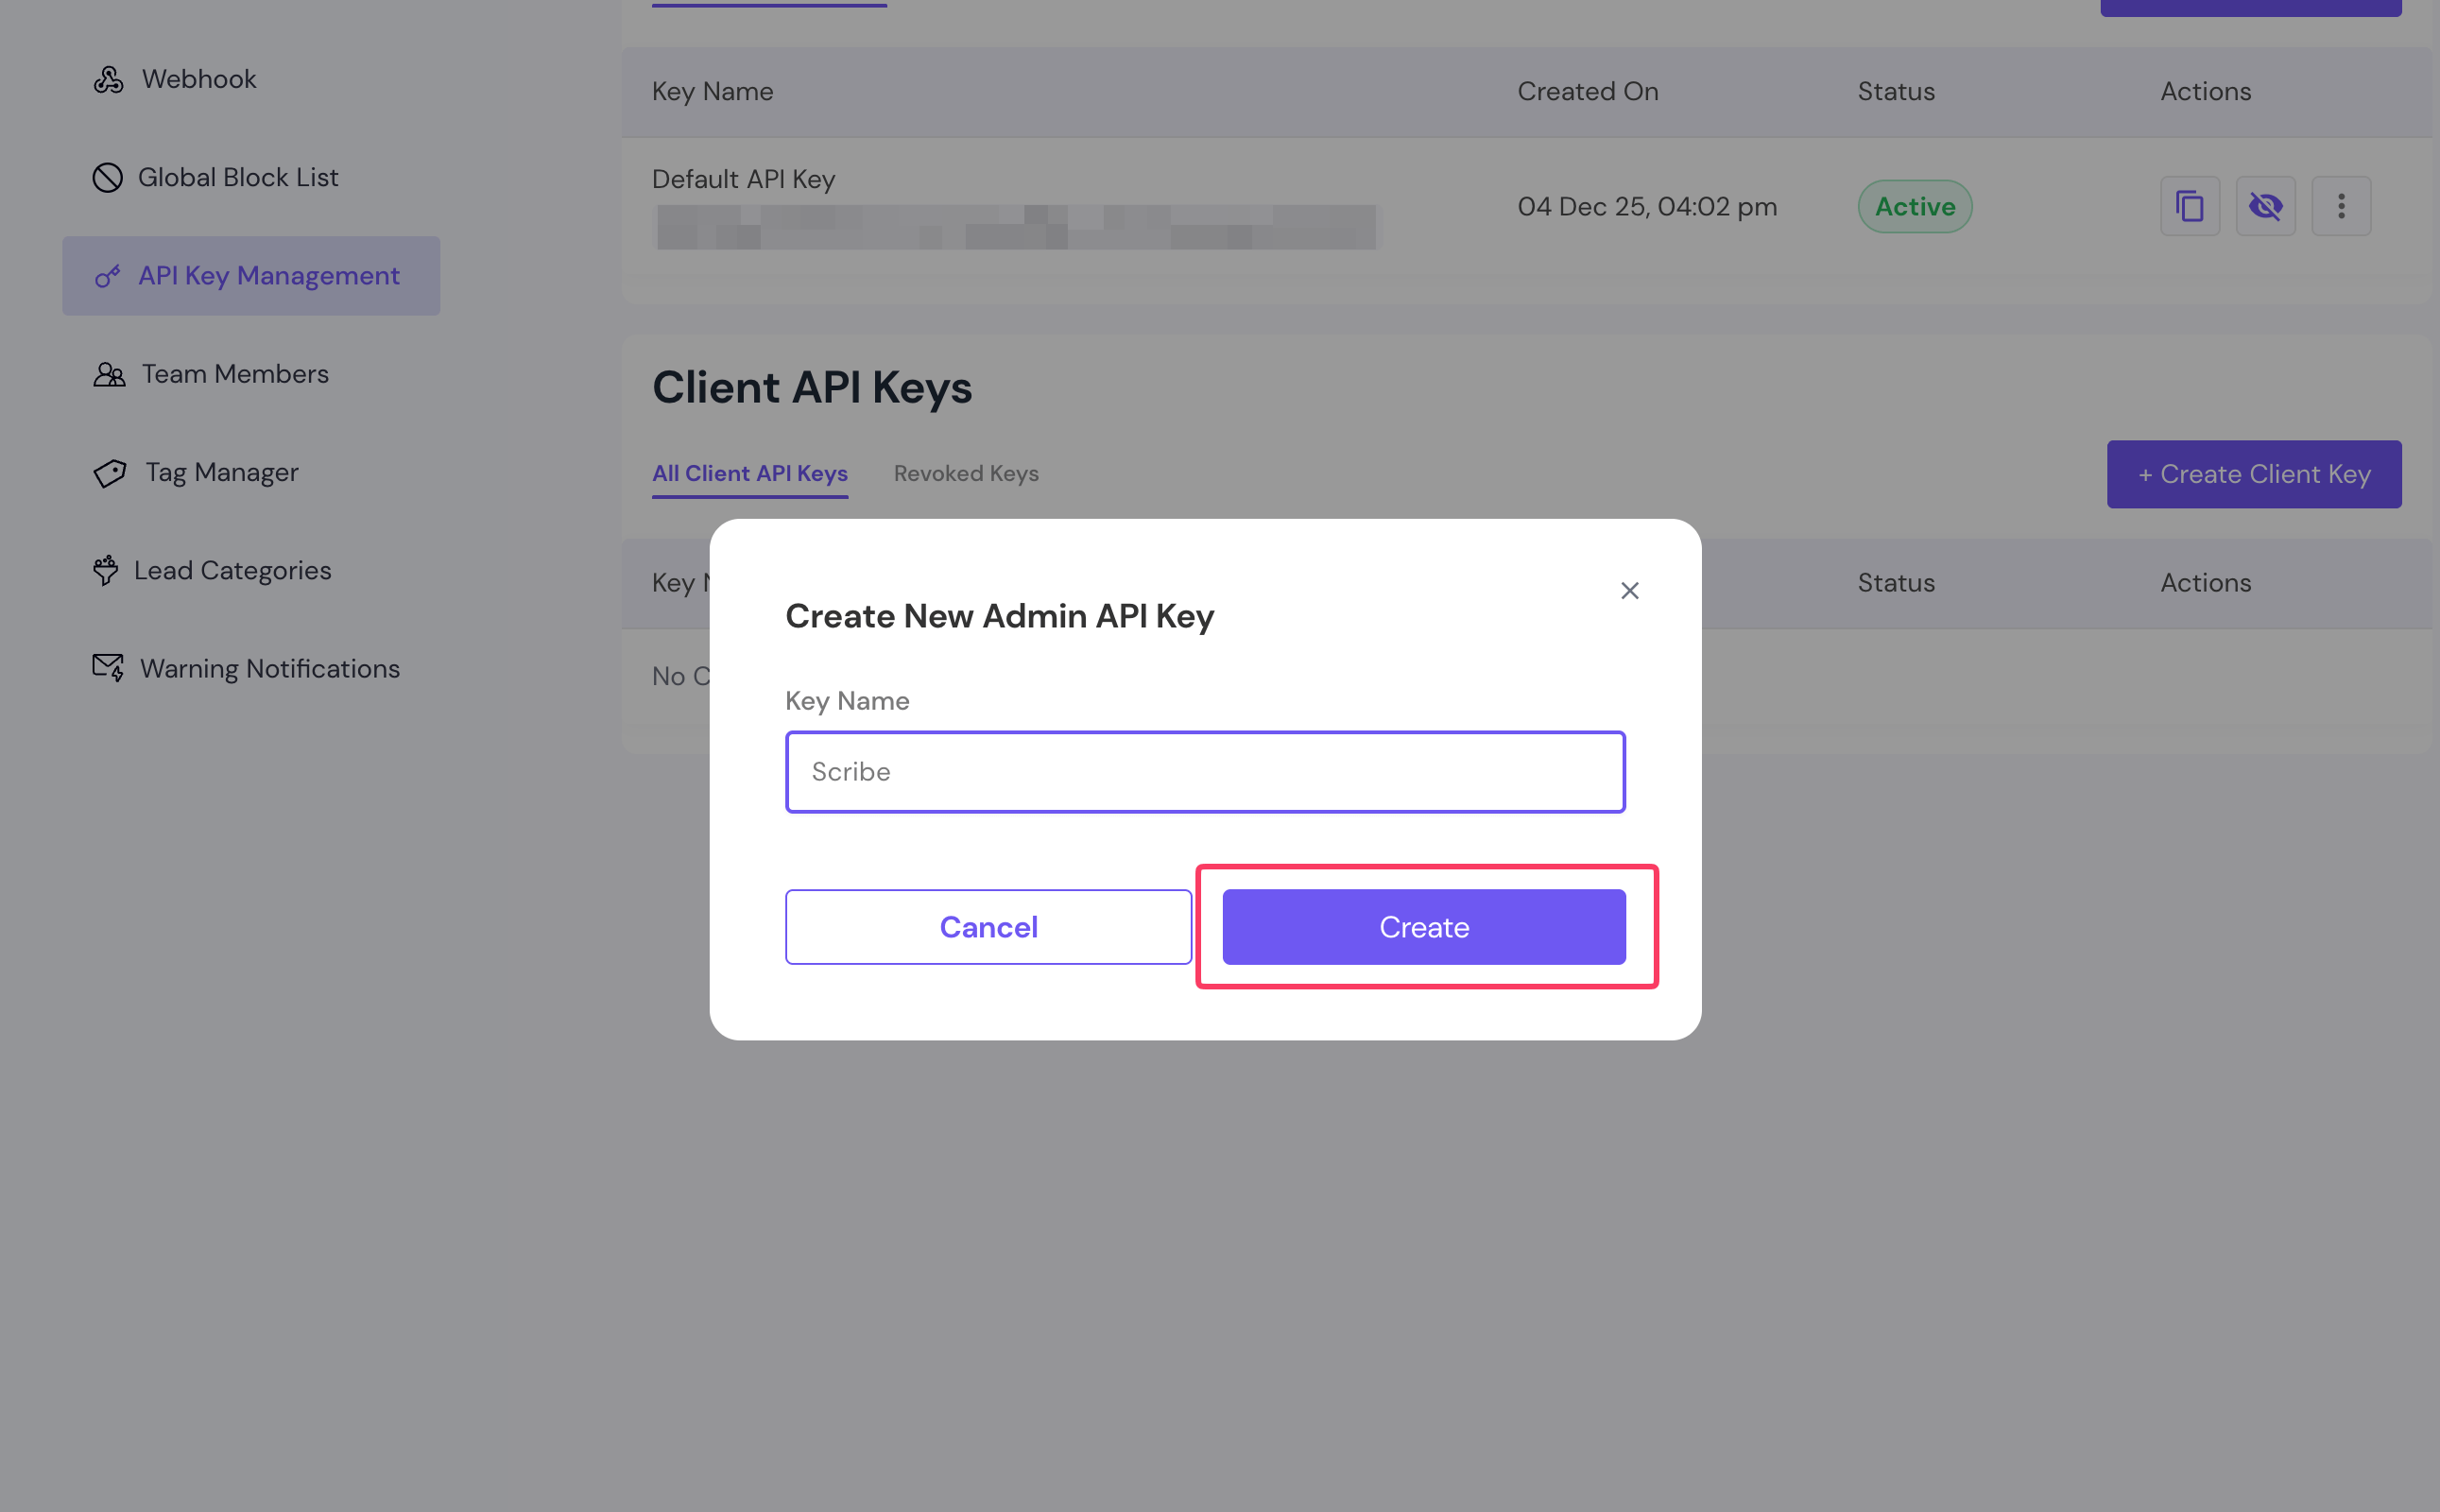
Enter a name for your API key, then click Create.
Naming the new Smartlead API key
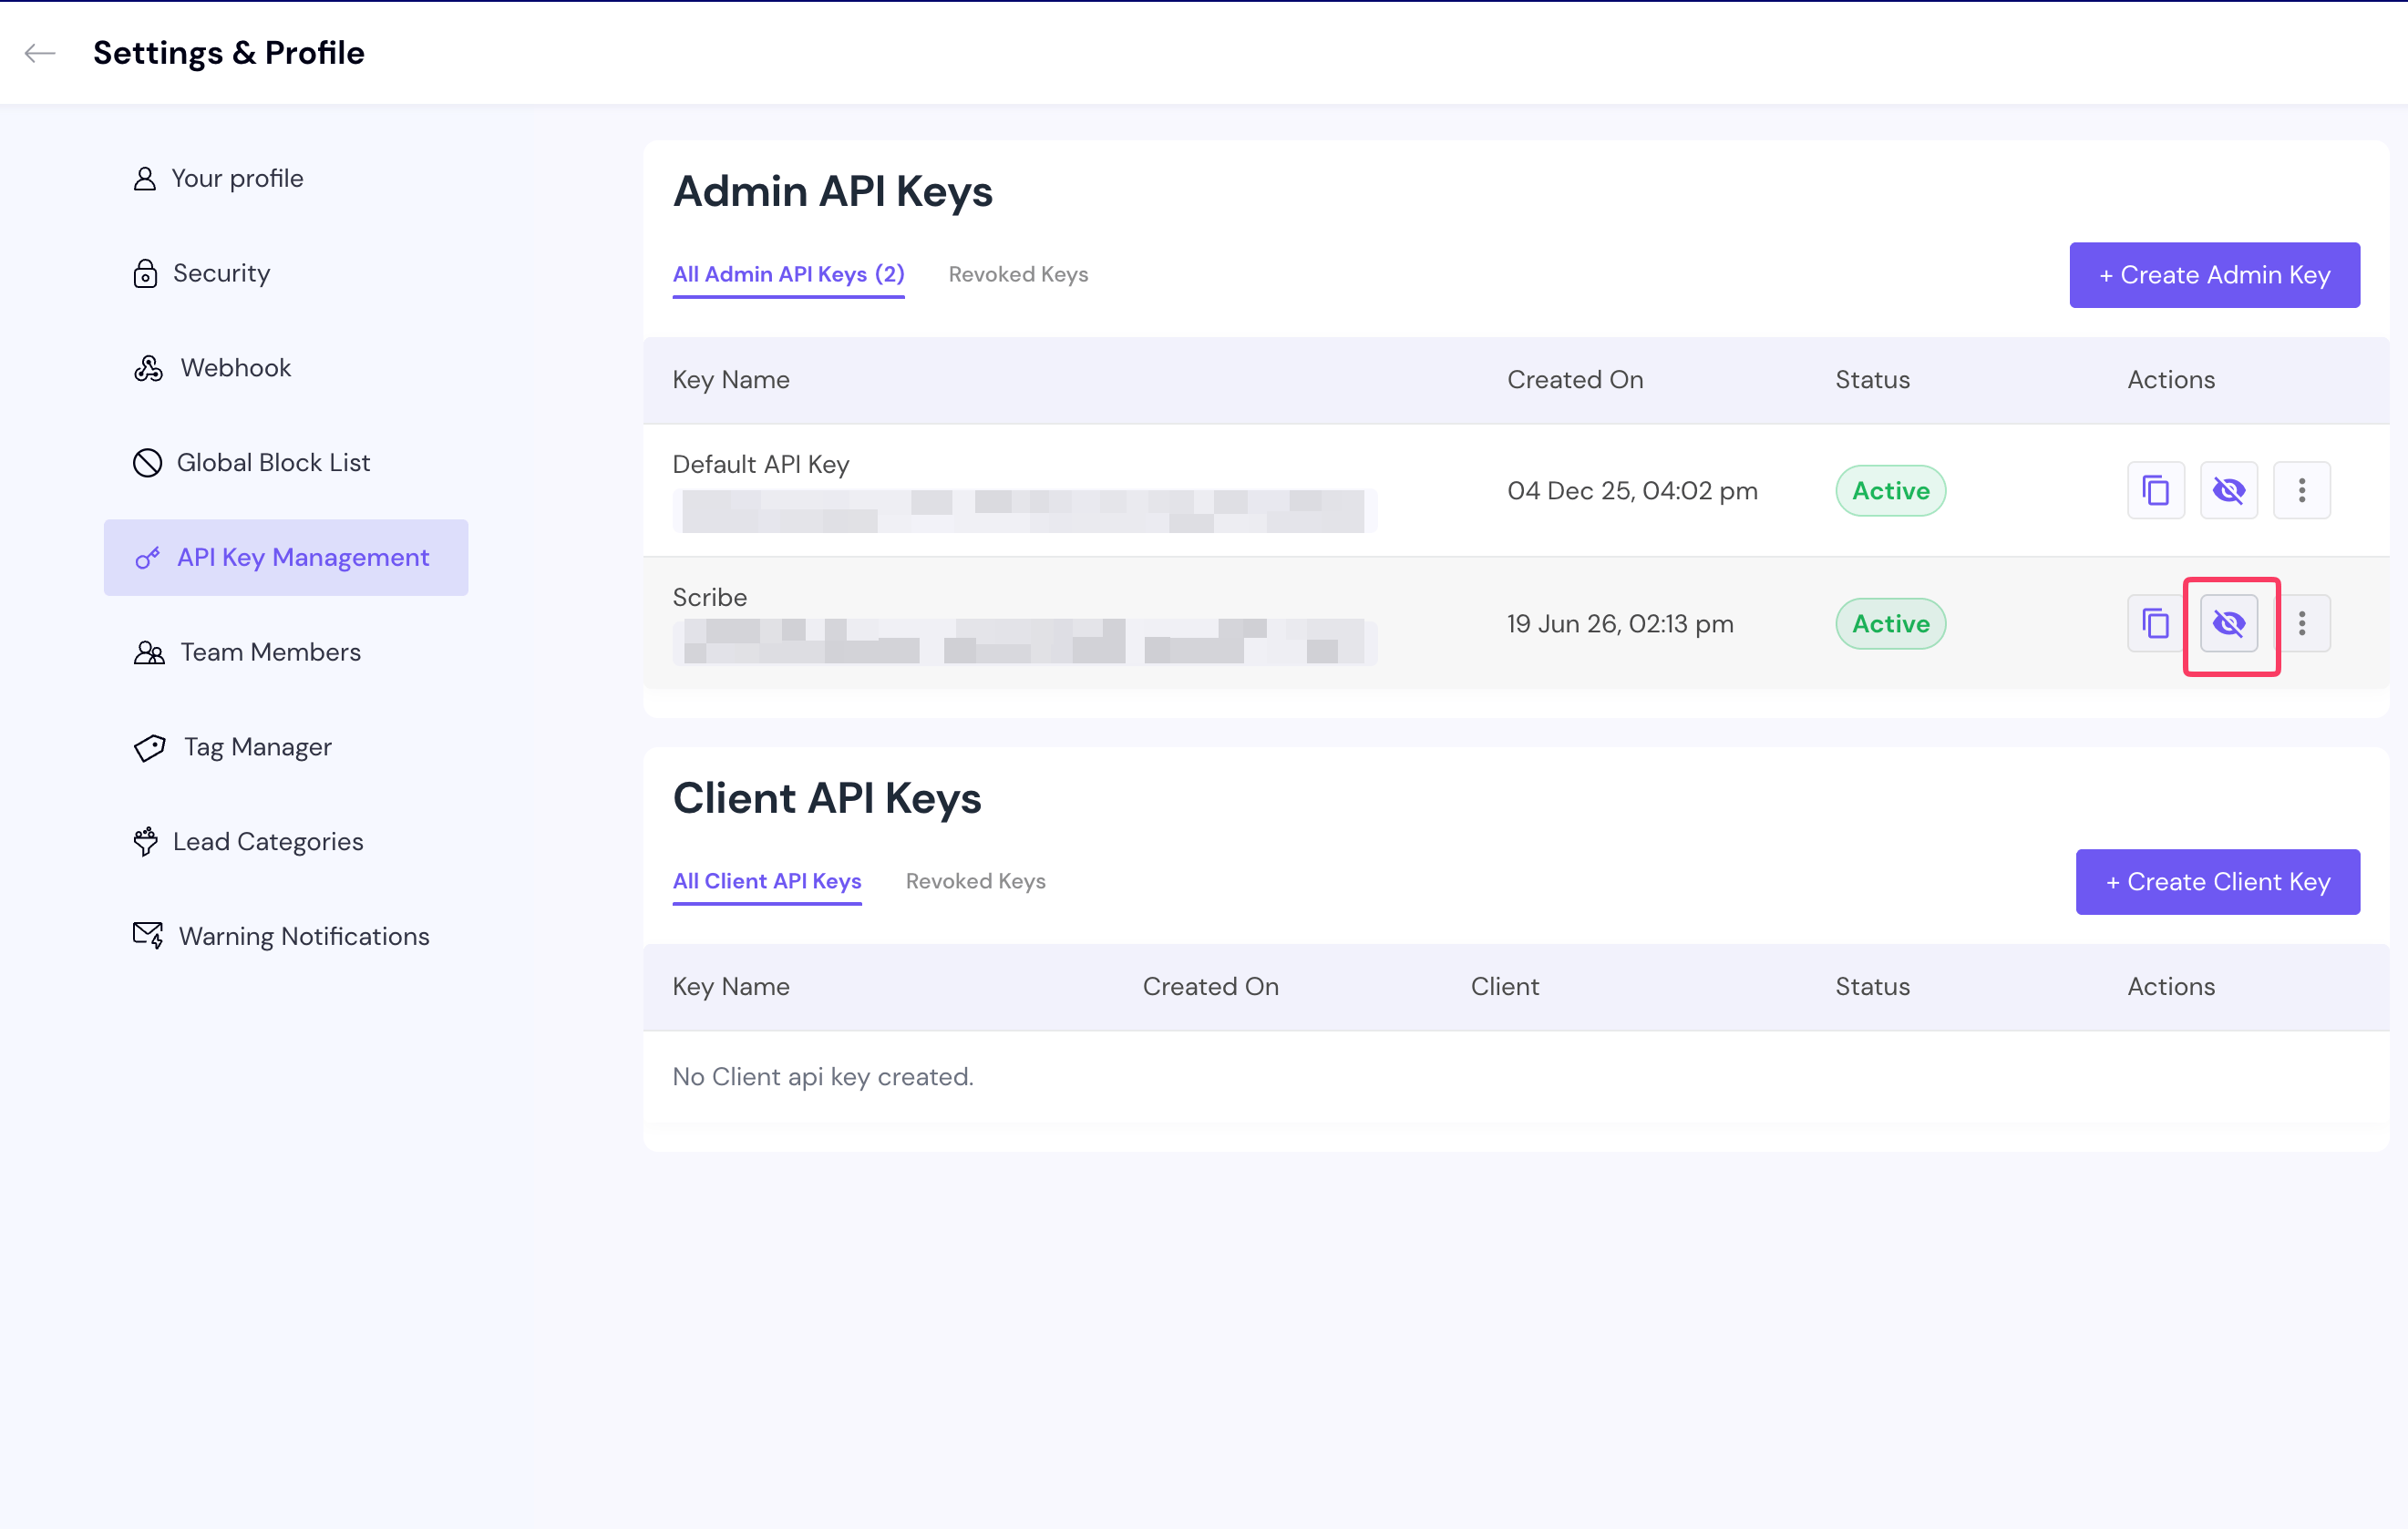
5
Copy the key and connect Smartlead
In the list, reveal the key you just created and copy the API key. Paste it into the field in Scribe, then click Connect Smartlead.
Reveal and copy the Smartlead API key, then paste it into Scribe
Scribe matches each teammate to their Smartlead email account by email address, then keeps that account’s signature in sync. Make sure the email addresses in Smartlead match the ones in Scribe.